

Most people start choosing cabinet hardware by browsing finishes. That’s the last decision in the sequence.
There’s a sequence to this. Five decisions, in order, narrow several hundred options down to a workable shortlist. This piece follows that sequence and keeps the aesthetic decisions and the execution decisions together, because I’ve watched them get separated across more than 220 renovation projects, and the cost is always the same.
One scope note before we start. This piece covers everything you decide before the drill comes out: cabinet style matching, hardware type, sizing, finish, and placement.
Start With What’s Already Fixed in the Kitchen
Identify the metals you cannot change before you look at a single pull.
Your faucet is fixed. So are your light fixtures and appliance handles. Those three elements set the tonal range for every other metal decision in the room. Cabinet hardware has to work within that range.
Hardware doesn’t have to match any of those elements exactly. Some of the best hardware selections I’ve worked on landed on deliberate contrast. All of them started from a fixed metals list.
Write down what’s already in the room before you open a product page.
That list is your filter. Hardware chosen without it tends to look assembled from different rooms rather than designed for one.
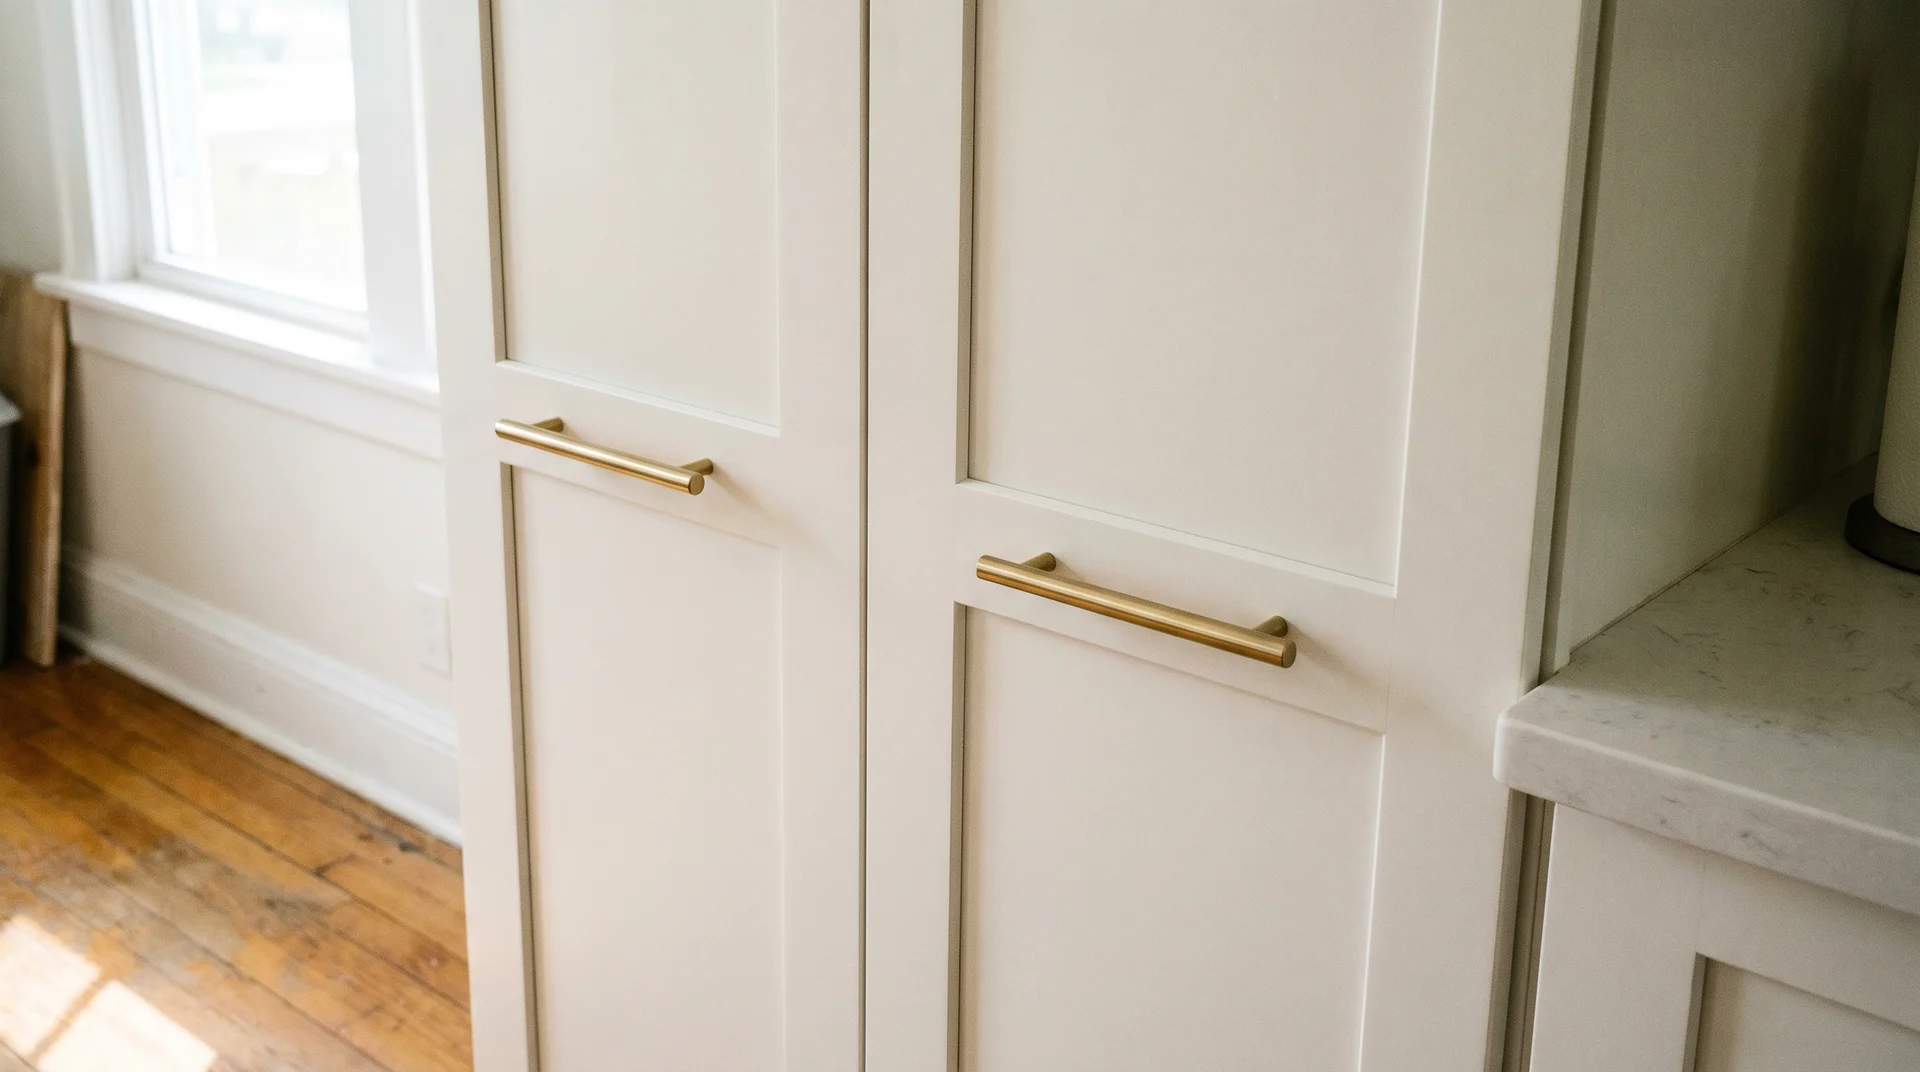
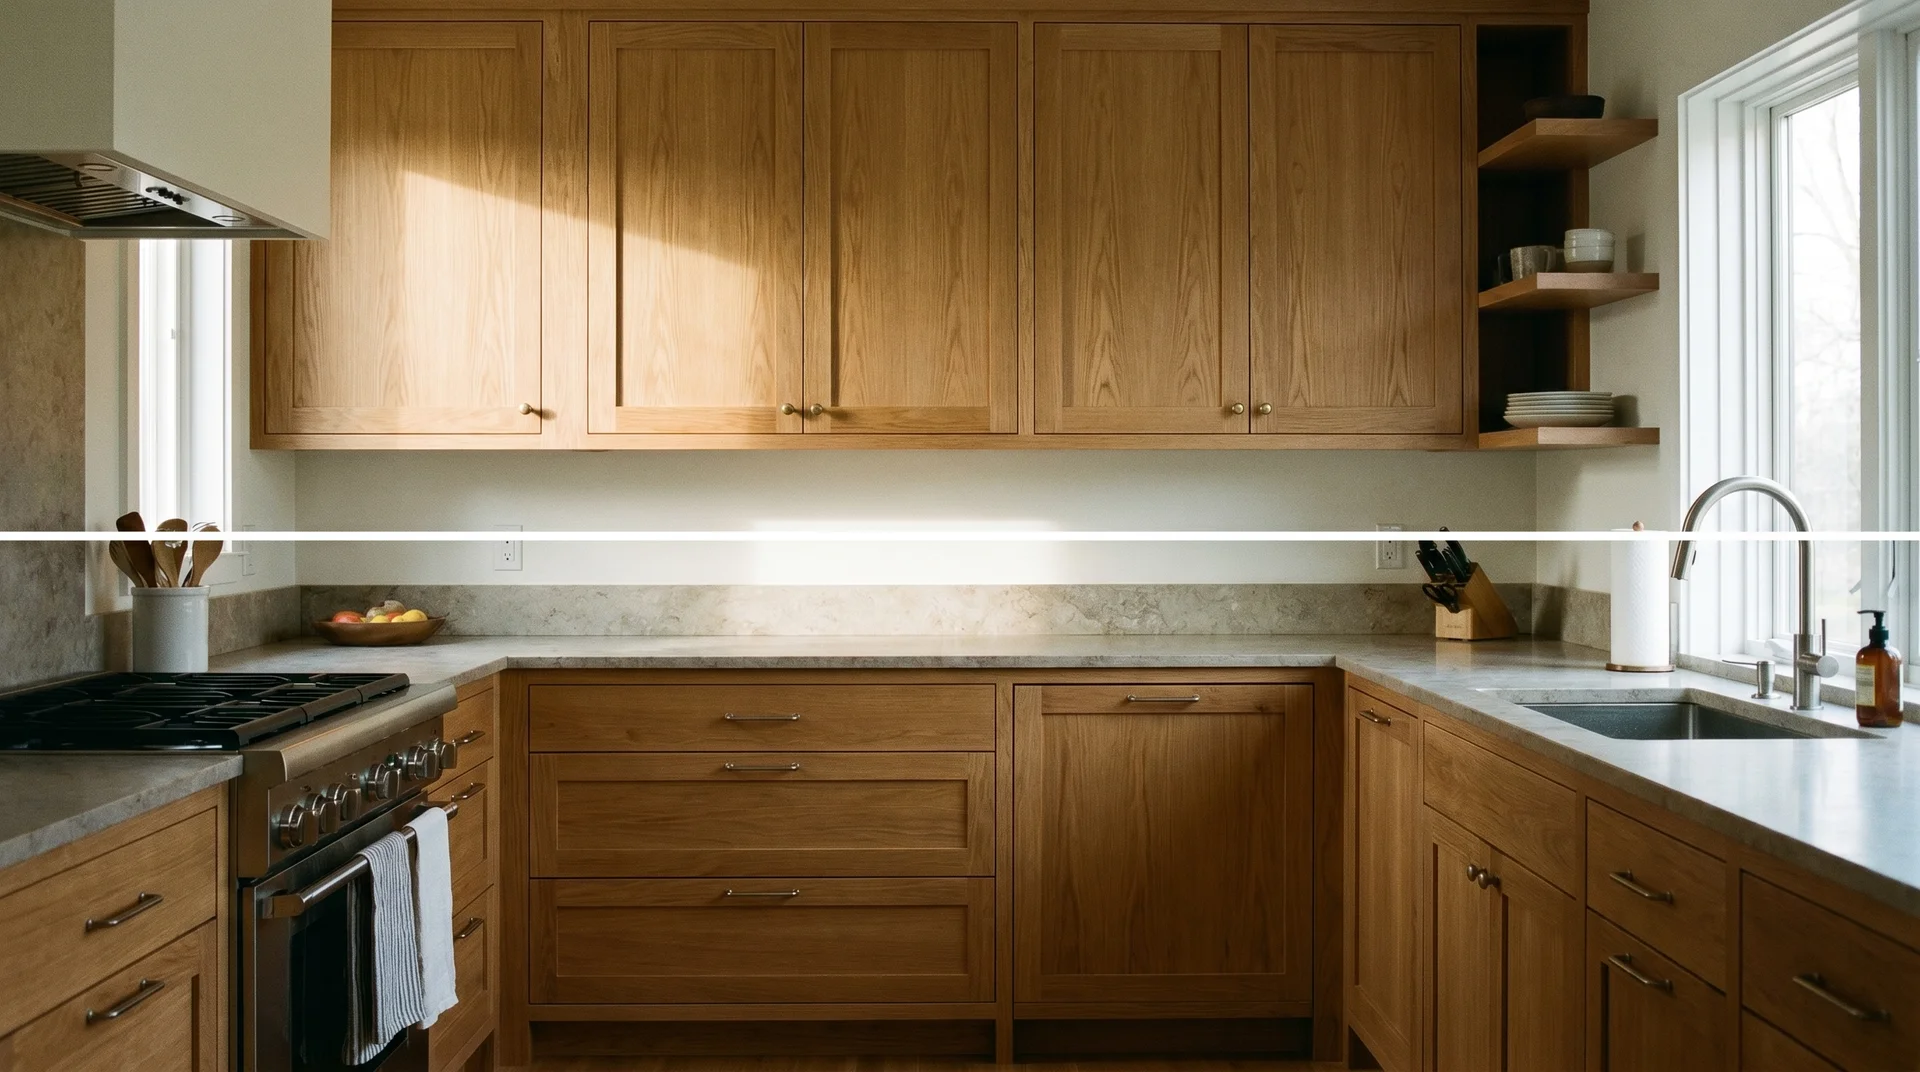
Match the Hardware Style to Your Cabinet Profile
The cabinet’s edge profile tells you what hardware the space is already asking for.
You’re standing in front of those cabinet doors. The profile is already saying something. Hardware that echoes it reads as intentional. Hardware that contradicts it reads as an afterthought.
If you’re still working out your kitchen’s overall design direction before committing to a hardware style, the kitchen decor themes guide covers how different visual directions work in real kitchens.
Read: 25 Kitchen Decor Themes
Shaker Cabinets
Shaker cabinets reward simple hardware in a clean finish.
The recessed panel and flat rail create a language of restraint. Simple bar pulls and T-bar handles extend that language. Ornate hardware fights the profile rather than completing it.
Frame width matters here. If your stiles are narrow, check the bar’s overall length against them before ordering. A bar pull that extends beyond the stile edge looks misaligned. It’s an easy mistake to miss on a product page and hard to unsee in the room.
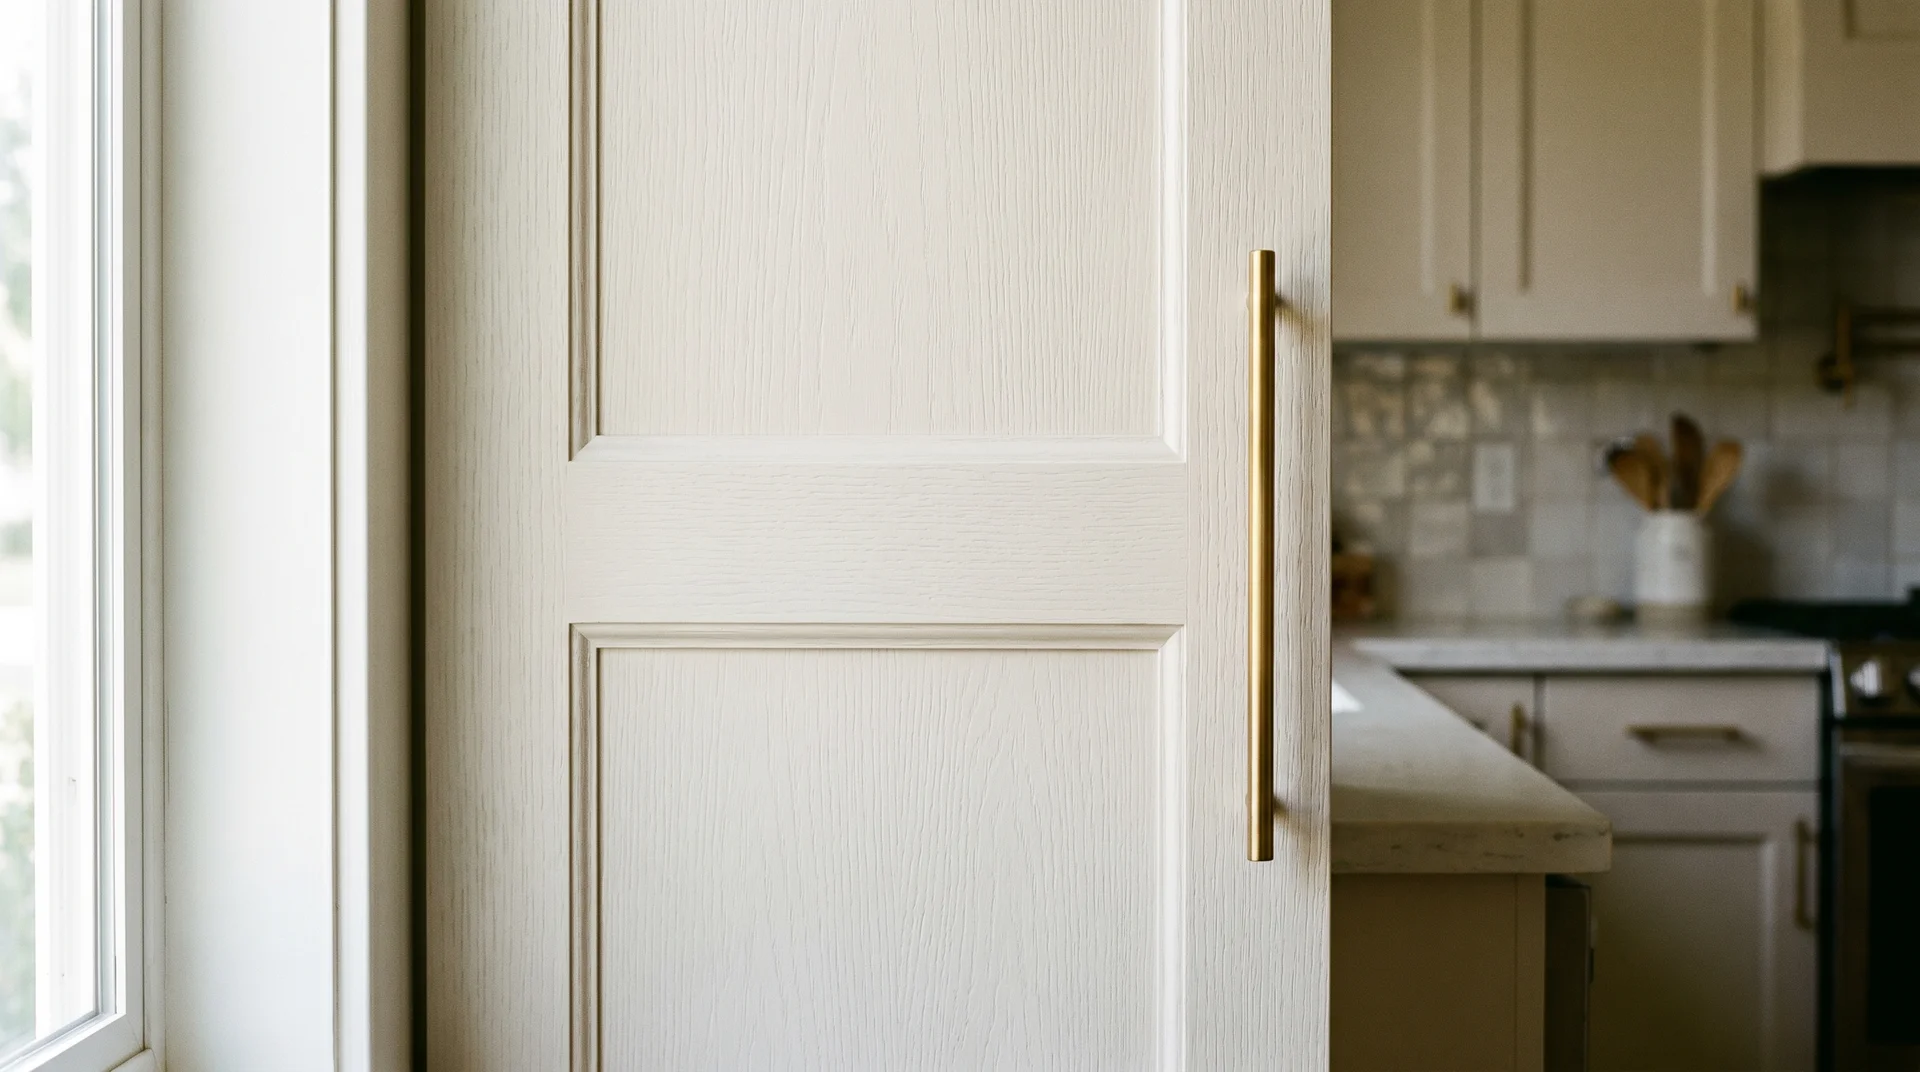
Flat-Panel and Slab Cabinets
Flat-panel cabinets carry no decorative detail, so hardware does more visual work here than on any other door style.
A small knob on a flat slab reads as an accident. A long bar pull or an integrated edge pull reads as a decision. Flat-panel doors tolerate bold hardware choices well; the door’s neutrality gives hardware space to lead.
Edge pulls require a different mounting position than standard bar pulls. Confirm the drilling requirements against your door thickness before you order. The installation detail is different enough that it’s worth checking, not assuming.
Raised-Panel and Traditional Cabinets

Raised-panel cabinets have a decorative structure built in, and hardware can either participate in it or stand in deliberate contrast.
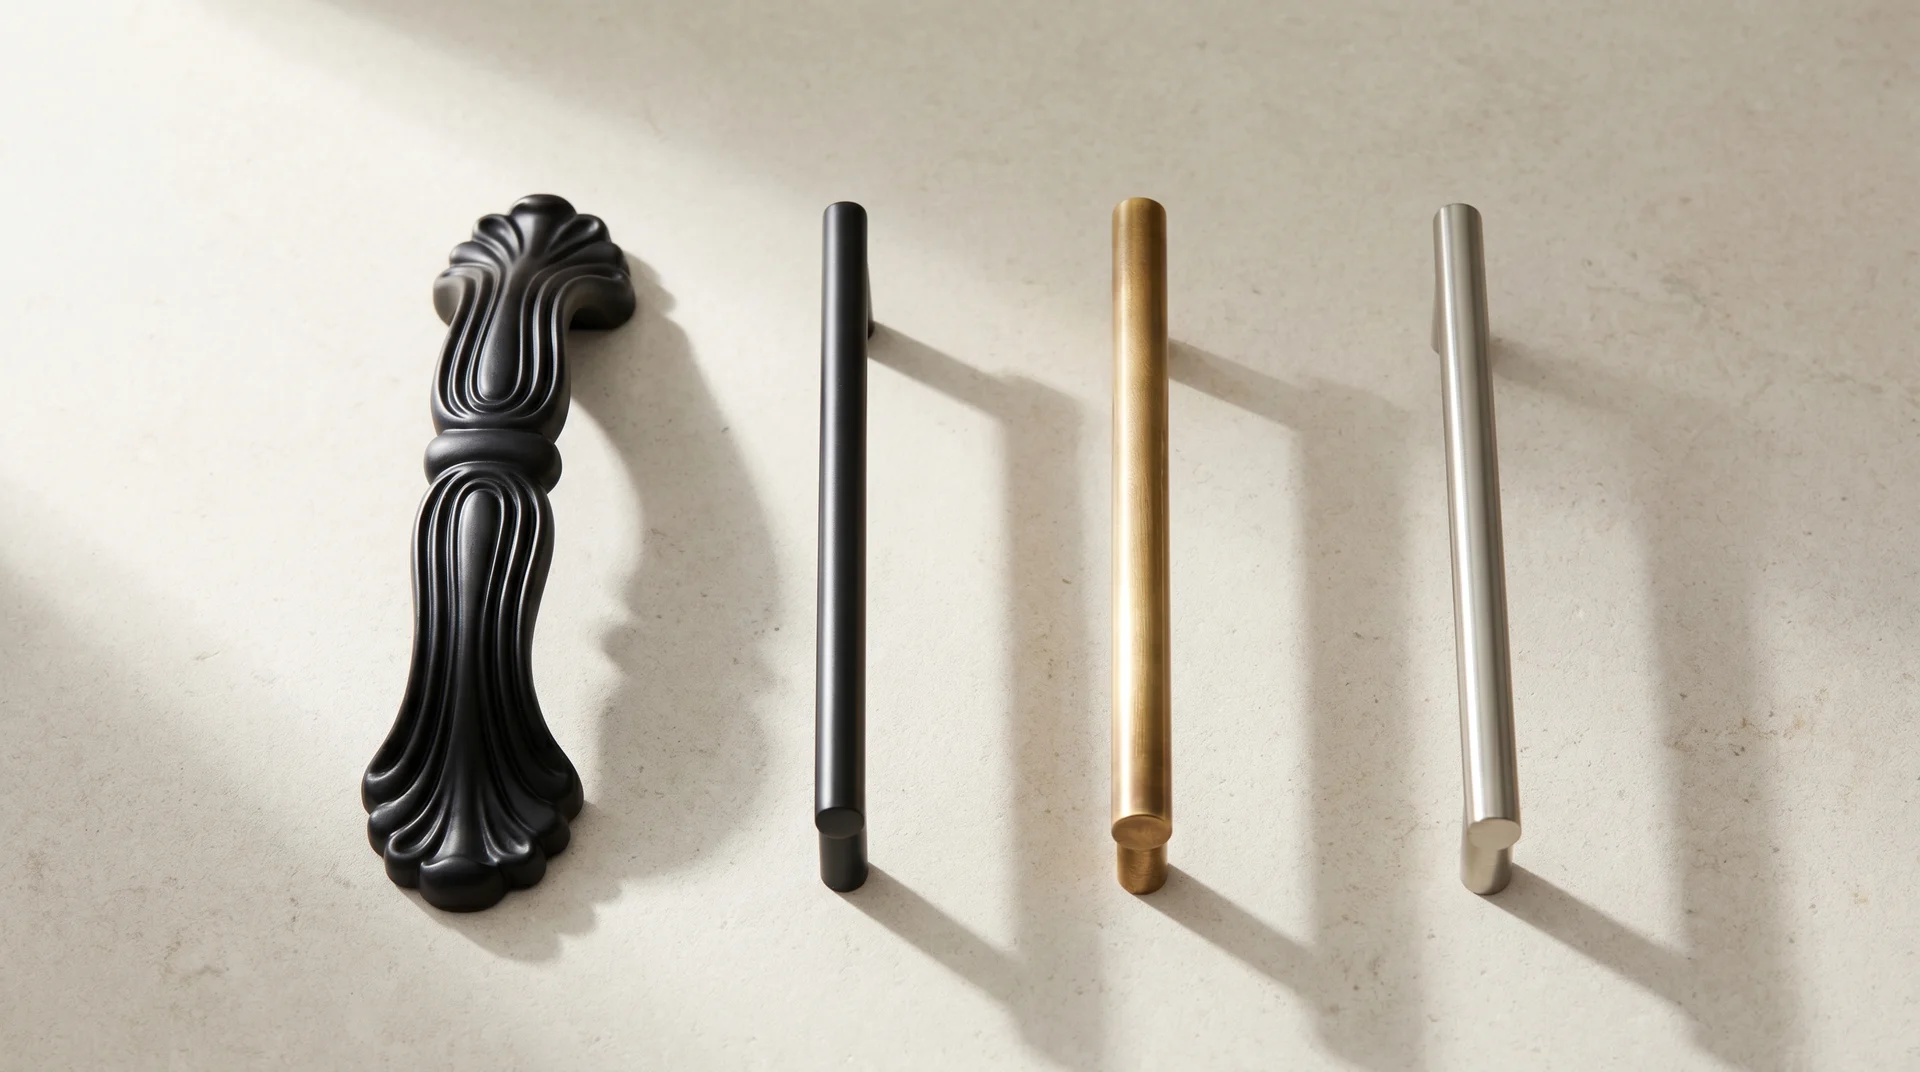
Cup pulls and classic round knobs participate in a traditional profile. Long minimal bar handles create contrast. Both are defensible choices; the decision is which direction the whole kitchen is moving, not which hardware looks best on one door.
The pairing I see fail most often: ornate hardware on a raised-panel door. Both elements are decorative, and they compete. One needs to settle so the room can lead with one clear visual voice.
Once you know what your cabinet profile is calling for, the next question is hardware type.
Knobs vs. Pulls in Your Kitchen Cabinet Hardware
Knobs on doors, pulls on drawers are the starting rule.
The rule exists for a structural reason. Drawers carry weight. Pulls distribute the opening force across two mounting screws. Knobs concentrate it on one. On a heavy drawer box, a single attachment point works loose faster than two.
Knobs
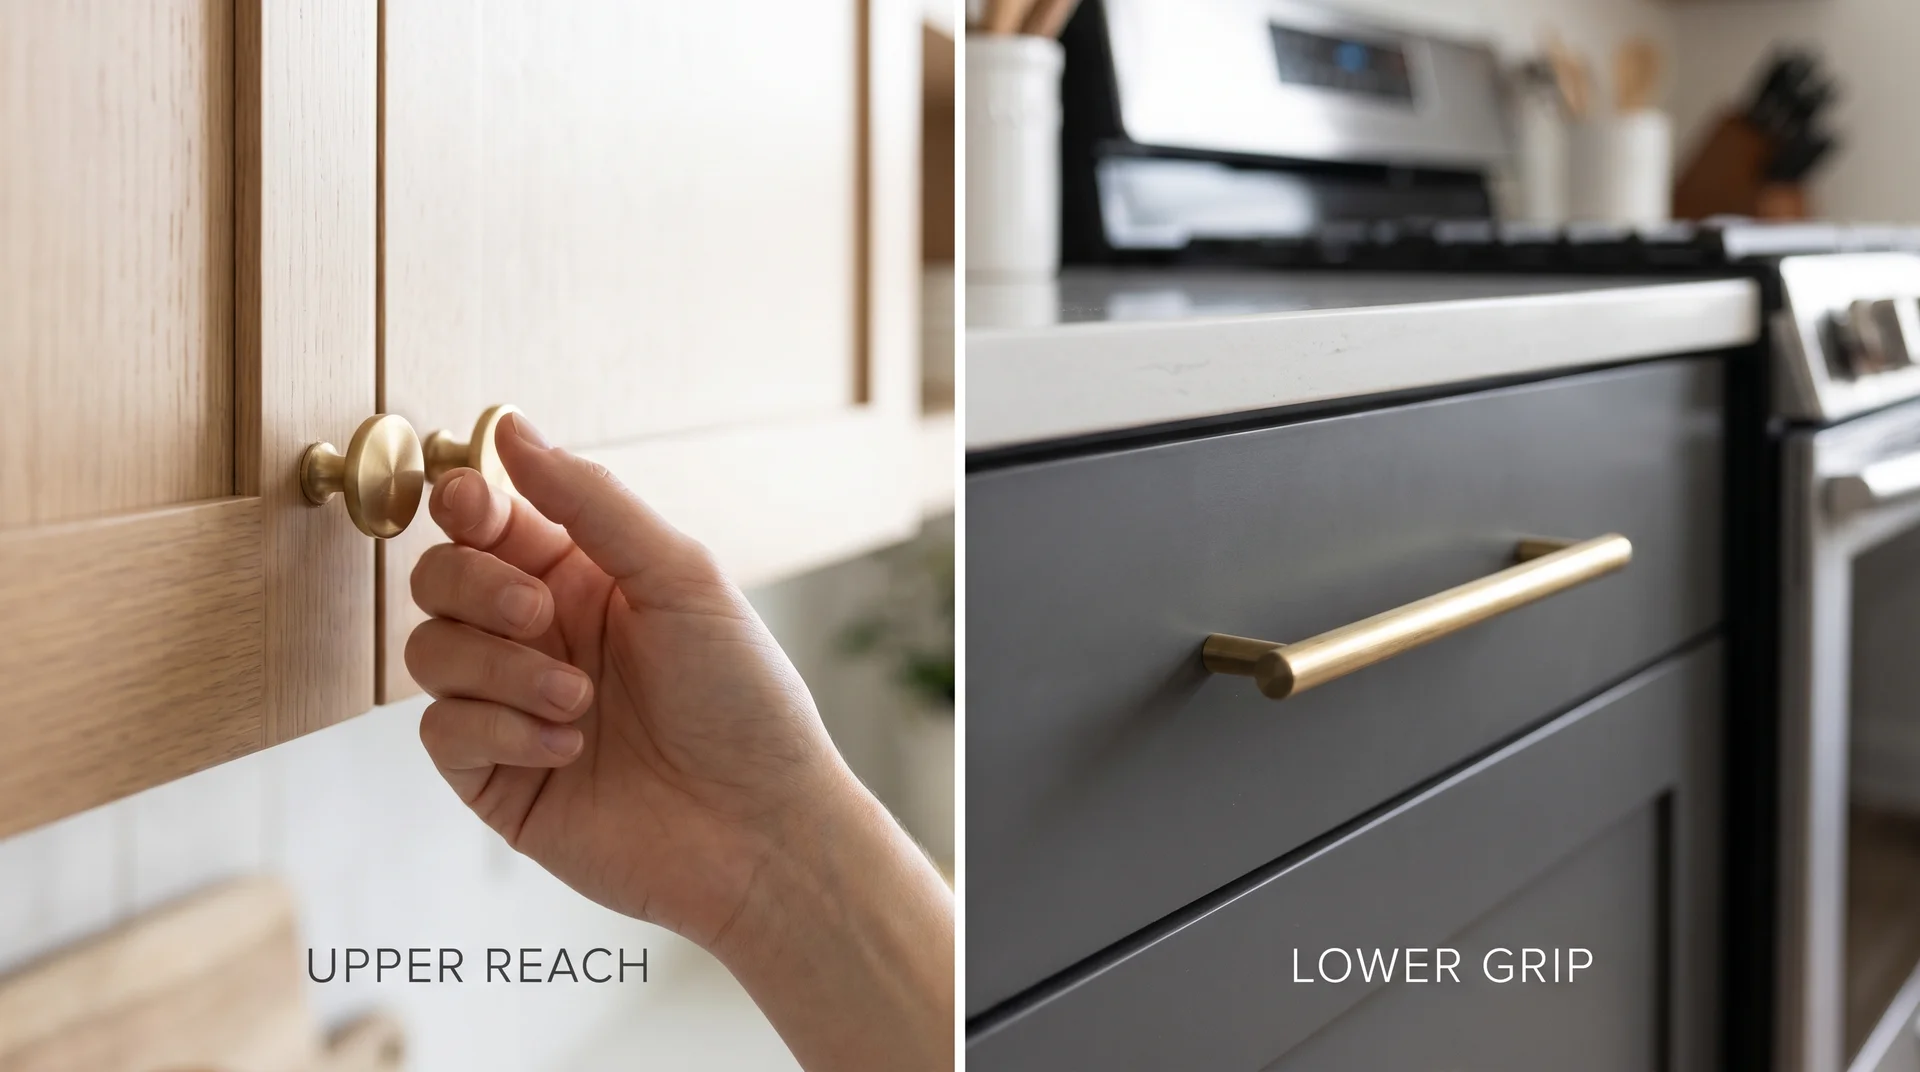
Knobs work well on upper cabinet doors and fall short on heavy drawers and larger lower doors.
Upper cabinet doors are light, usually small, and comfortable to open with a single-point grip. The opening force is low, and the reach is natural. A knob is the right call here.
Knobs struggle in three situations. If your kitchen includes any of these, pulls are the better starting point.
- Heavy drawer boxes, where a single attachment point bears all the pull stress and loosens over time
- Drawers wider than 18 inches, where a single central grip means pulling slightly off-center every single time
- Large lower cabinet doors, where the grip demand is higher than one screw, handles comfortably long-term
Projection adds another consideration at base cabinet height. Projection is the distance between the cabinet face and the back of the knob. A knob with very low projection is harder to grip than it looks in a product listing.
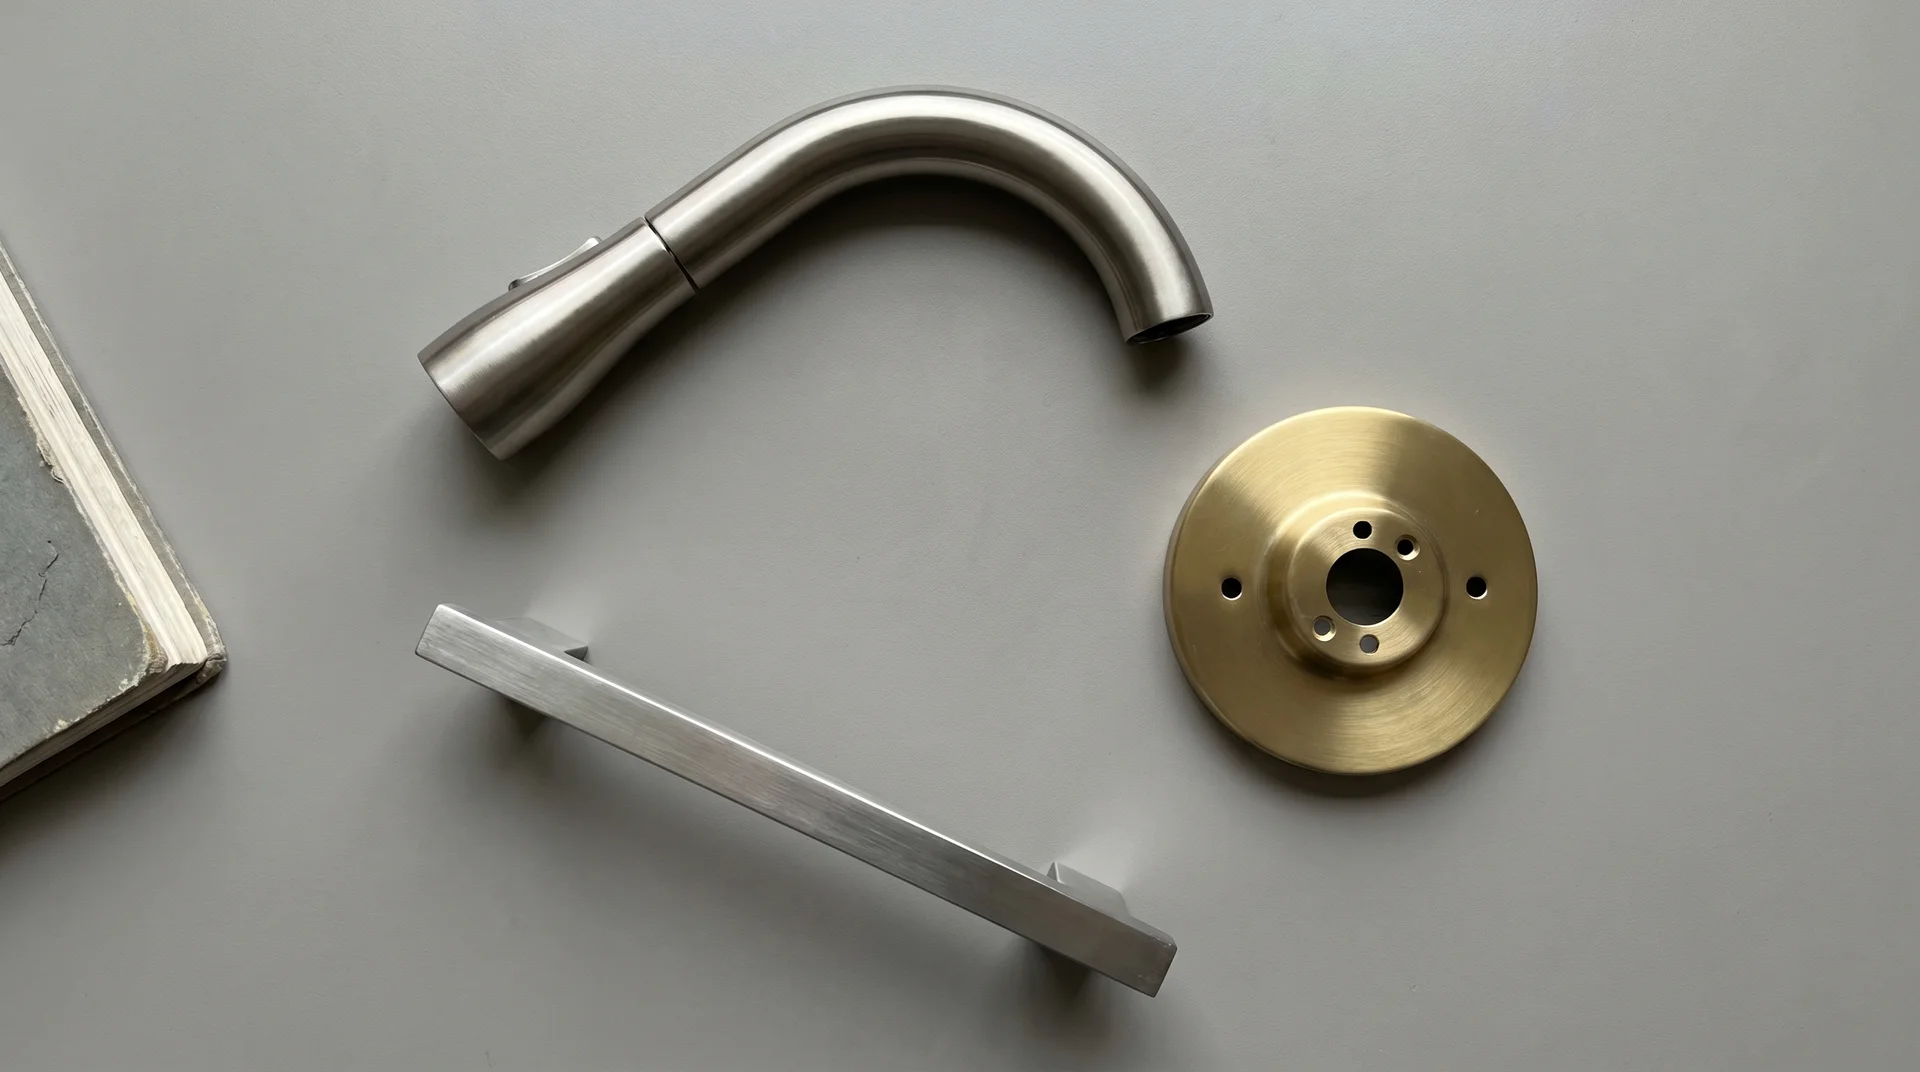
Pulls
Pulls use two mounting screws, which distribute opening force and keep them secure on heavier drawers and larger doors.
The main pull types you’ll encounter are
- bar pulls (straight, minimal, the most versatile),
- cup pulls (curved grip, traditional or farmhouse contexts),
- bin pulls (deep-grip, drawer-specific), and
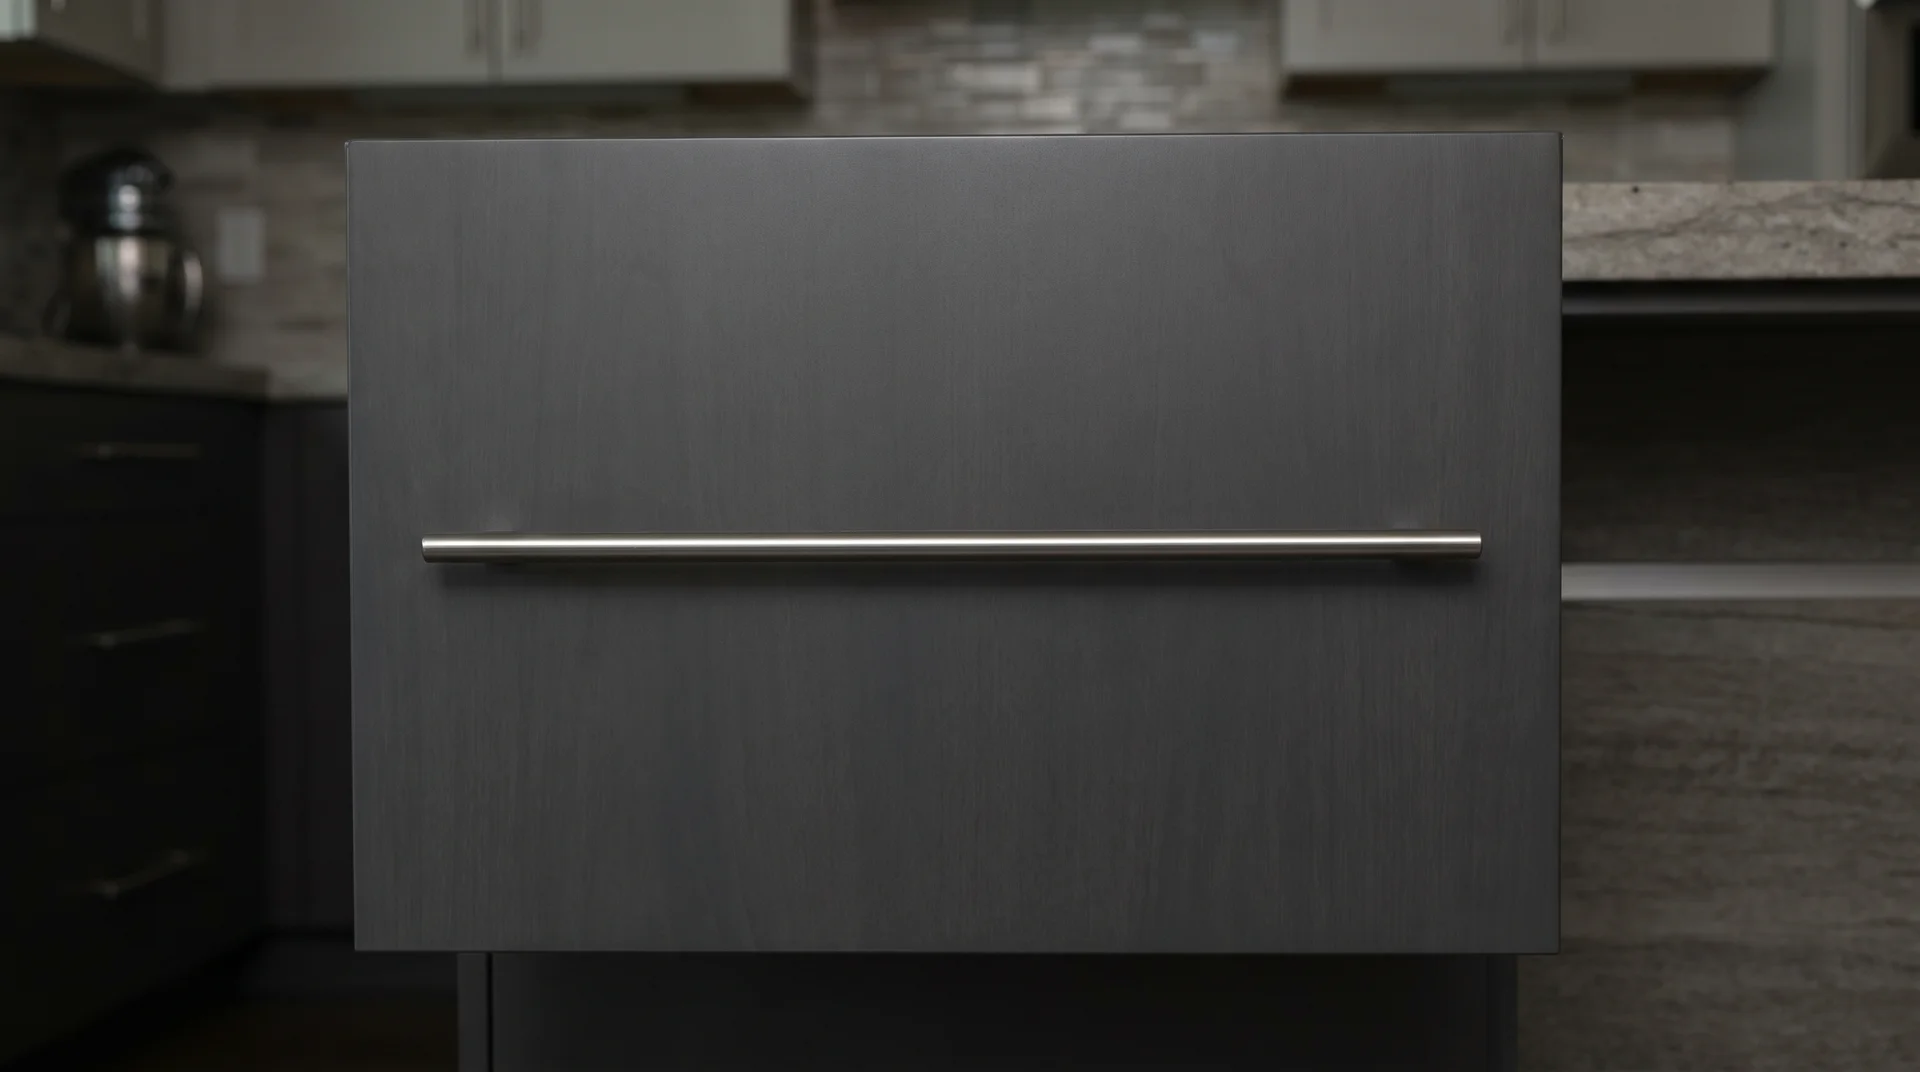
- appliance pulls (heavy-duty, designed for integrated dishwashers and refrigerators where the door weight is significantly higher than a standard cabinet).
Each type has a pull spec that includes both center-to-center measurement and projection.
Projection matters in a way most hardware guides skip. I make my own ceramic drawer pulls, so I understand this on a material level. A bar pull with very low projection on a base cabinet drawer catches on clothing at hip height every time you reach for it.
At base cabinet height, projection is a daily usability consideration, not just an aesthetic one.
The NKBA Universal Design guidelines recommend pulls over knobs for anyone with limited grip strength or reduced hand flexibility. The larger contact area and two-point force distribution are meaningfully easier to use than a single small knob.
Worth knowing if you’re specifying for a household where that applies now or might in the future.
Mixing Knobs and Pulls in the Same Kitchen
Mixing hardware types works when the spatial logic is visible from inside the room.
Knobs on upper doors, pulls on drawers and lower doors: the eye accepts this arrangement because it follows function. There’s a visible reason for the shift, and the room makes it clear.
Mixing becomes noise when types change with no visible pattern, pulls on some drawers, knobs on others, no spatial logic the eye can follow. The issue isn’t that you mixed. It’s that nothing in the room explains why.
Sizing Kitchen Cabinet Hardware
The 1/3 rule says pull length should be roughly one-third of the drawer width.
“Pull length” in that rule means center-to-center, the distance between the two mounting holes. Understanding center-to-center first makes the rule usable. It also prevents the most common hardware return mistake in this category.
What Center-to-Center Actually Means
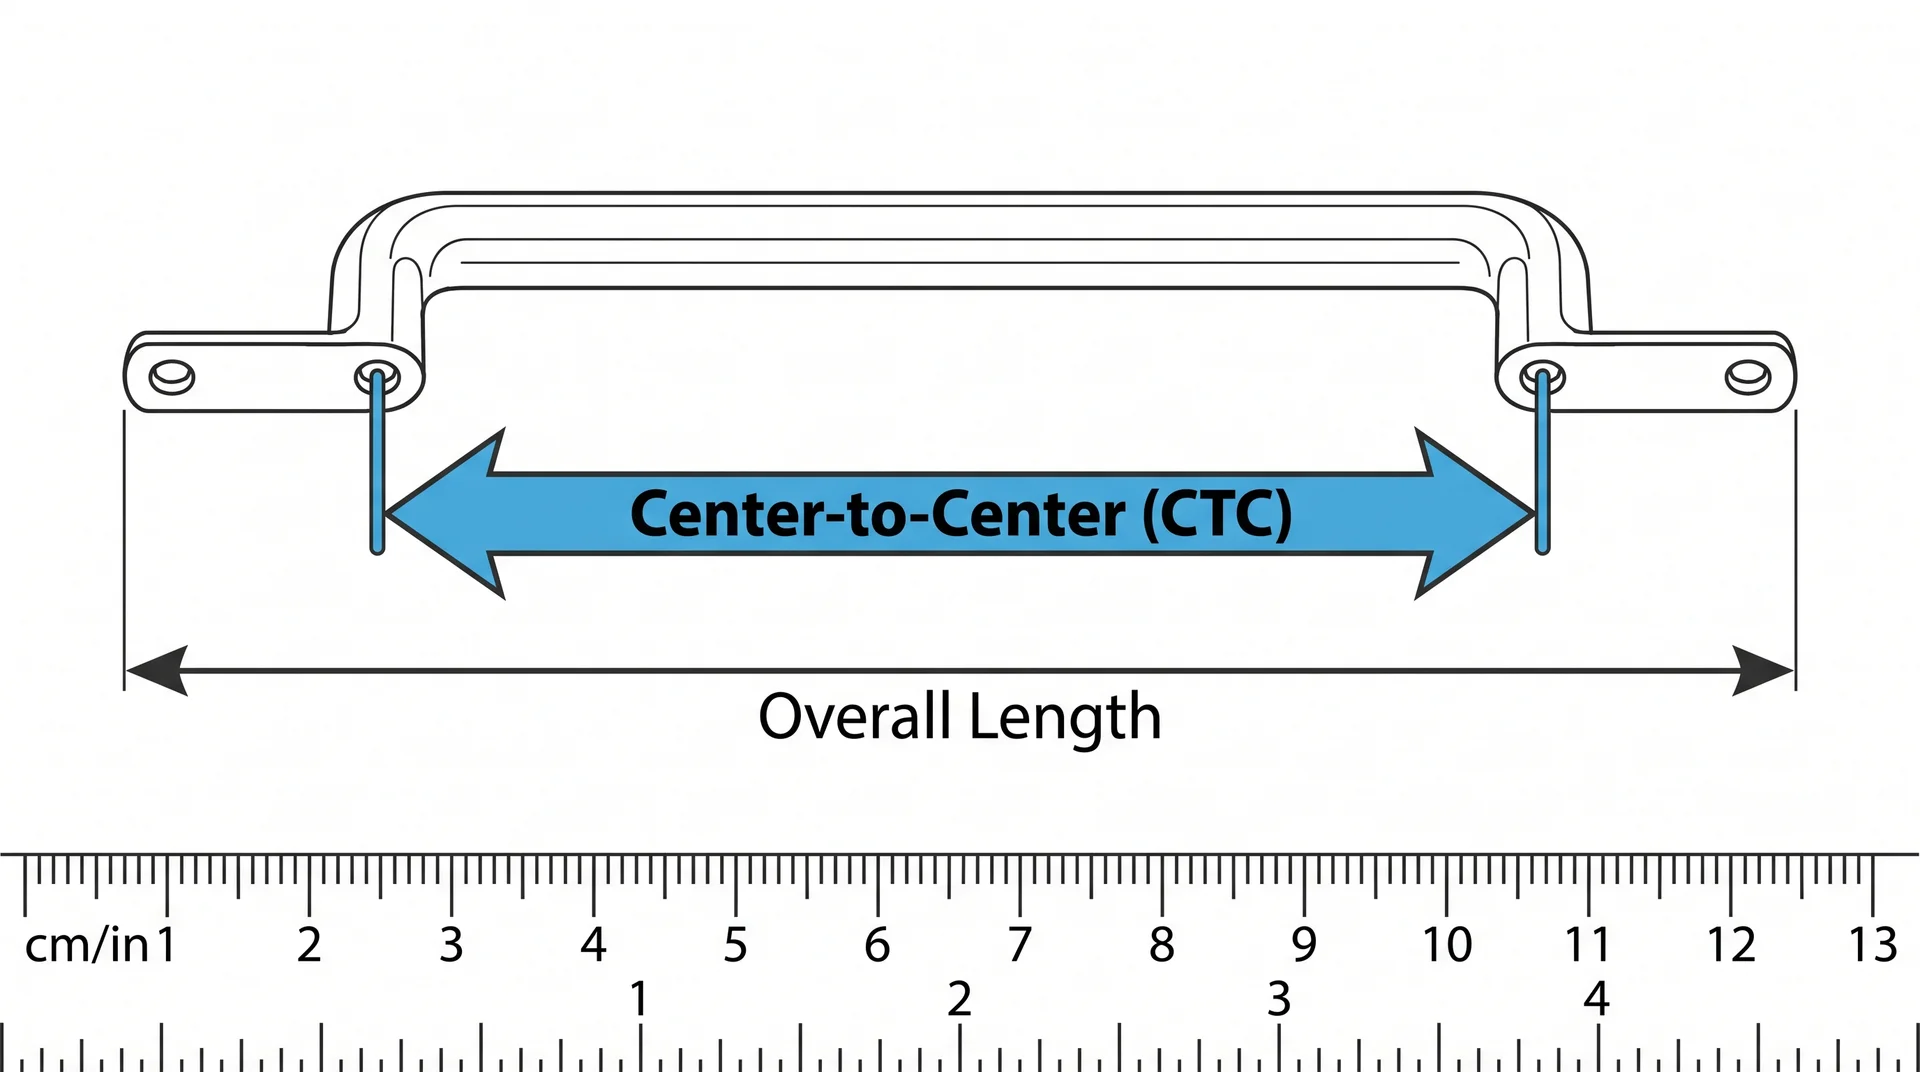
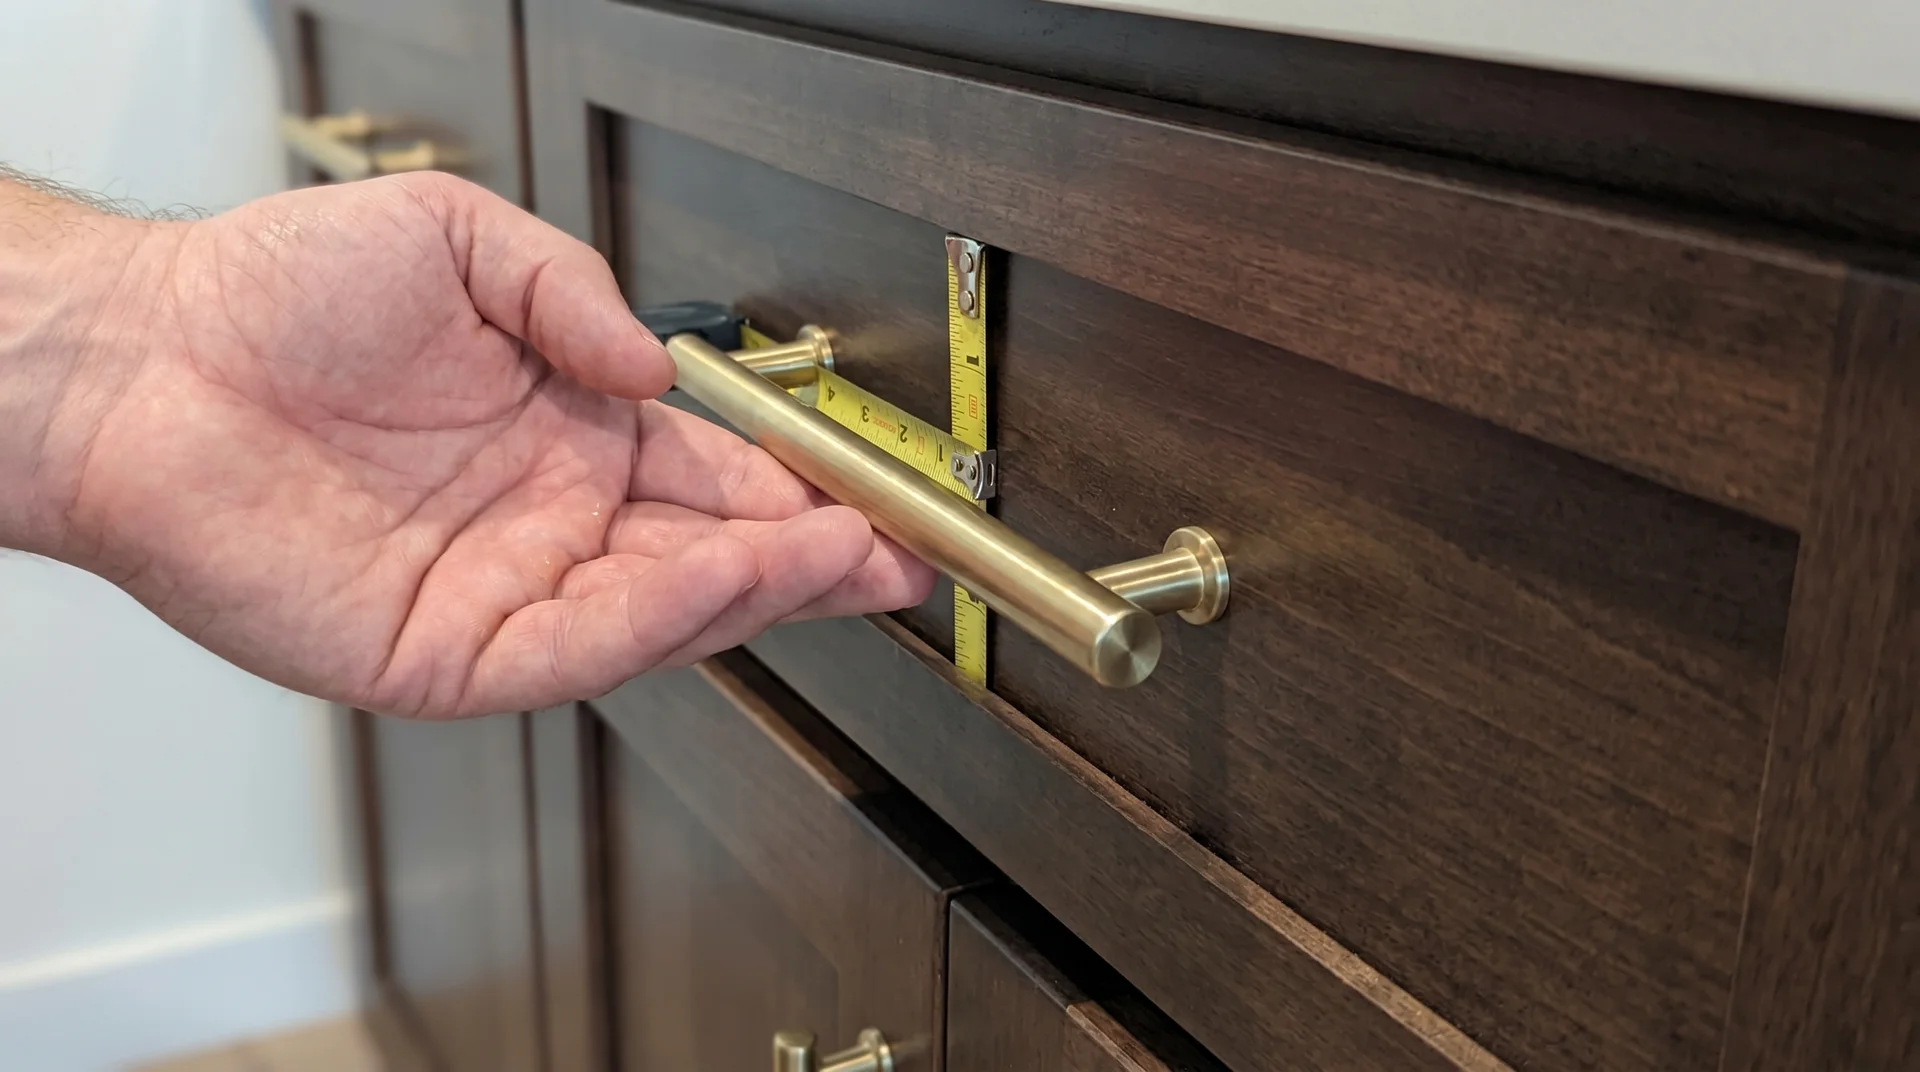
Center-to-center is the distance between the two mounting holes on a pull, not the overall bar length.
When a product listing says “4-inch pull,” that number is hole-to-hole. The bar itself is longer than 4 inches.
If you’re replacing existing hardware and want to keep the same holes, measure from the center of one hole to the center of the other before you shop. That number tells you what hardware drops straight in.
Common industry-standard center-to-center measurements are 3 inches (76mm), 3.75 inches (96mm), 4 inches (102mm), and 5 inches (128mm). These align with standard drill jig templates.
If your existing holes match one of these, your replacement options stay wide open.
The 1/3 Rule Applied to Real Drawers
On a 24-inch drawer, one-third is 8 inches; look for a pull with roughly an 8-inch center-to-center measurement.
The rule produces a balanced result across most kitchen styles. A pull significantly smaller than one-third reads as lost in the drawer. A pull significantly larger reads as overwhelming it.
Quick Sizing Reference
Measure your drawer widths before you use this table.
The CTC target column is your starting range. The right column shows what most hardware brands actually manufacture at those measurements.
| Drawer Width | CTC Target (1/3 Rule) | Common Sizes That Fit |
|---|---|---|
| 12″ and under | 3″–4″ CTC | 3″ (76mm), 3.75″ (96mm) |
| 15″–24″ | 5″–8″ CTC | 5″ (128mm), 6.25″ (160mm) |
| 24″–33″ | 8″–11″ CTC | 8″ (203mm), 10″ (256mm) |
| 33″–48″ | 11″–16″ CTC | 12″ (305mm), or two pulls |
| 48″ and above | Two pulls | Space evenly in thirds |
For cabinet doors, size slightly smaller than the drawer table suggests at the same width. A pull that reads well on a drawer can overpower a door of equal width — the surrounding door face gives hardware more to compete against.
Choosing the Finish for Your Kitchen Cabinet Hardware
One finish leads. Everything else responds to it.
This is the framework that makes mixed-metal kitchens work. If you’re working with two cabinet colors — a painted perimeter and a contrasting island, for example, the finish coordination question gets more involved.
The two-tone cabinet guide covers how specific hardware finishes behave across different cabinet color combinations.
Read: 25 Stunning Two-Tone Kitchen Cabinet and Island Ideas
Finishes That Hold Up vs. Those That Don’t
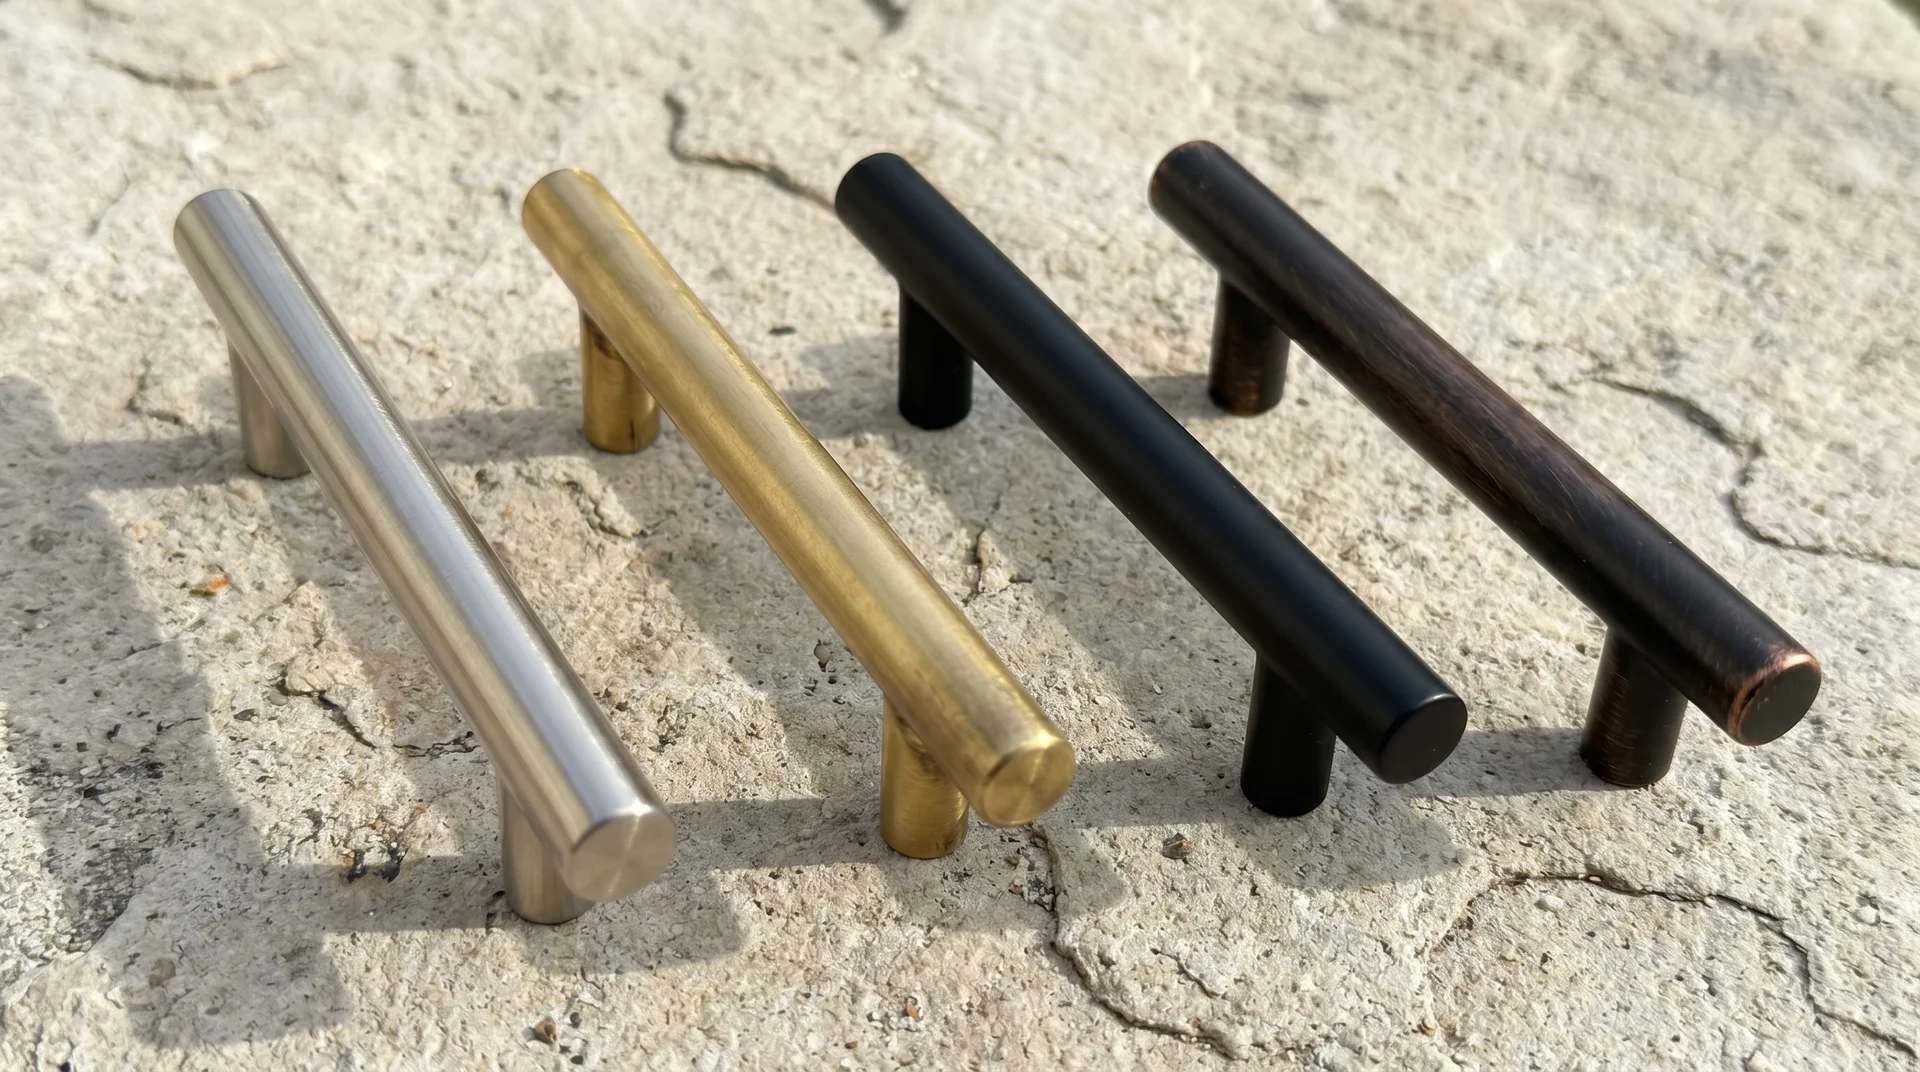
Brushed nickel, satin brass, matte black, and oil-rubbed bronze perform most consistently in a real working kitchen.
Polished chrome looks sharp at install. In a kitchen you actually cook in, every fingerprint and water spot shows. I’ve watched it go from showroom-quality to a visible maintenance problem within a few months on active projects.
Over twelve years of photographing real kitchen choices that fail in real rooms, ornate pulls with deeply routed grooves come up consistently. Grease and grit collect in the channels, and no quick surface wipe removes them fully. That’s a maintenance commitment most buyers don’t see coming from a product photo.
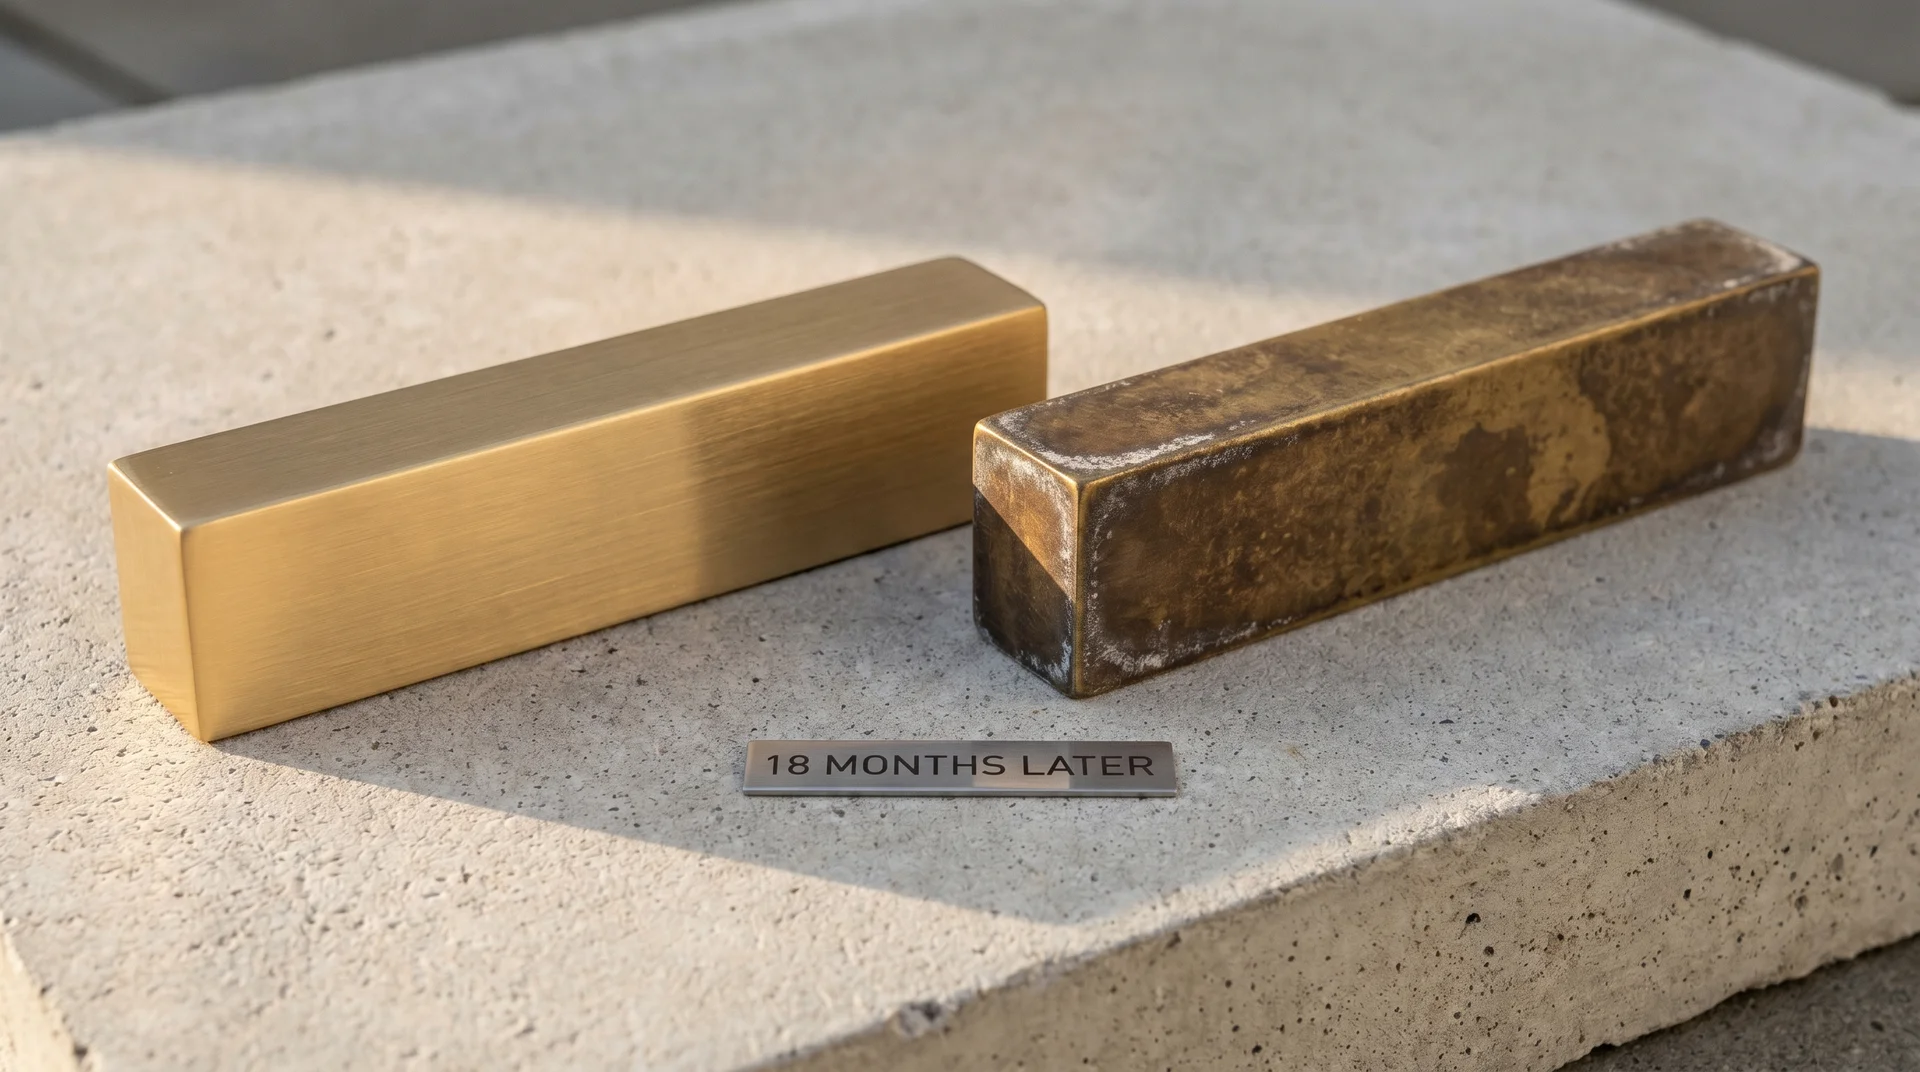
Unlacquered brass and aged bronze develop patina rather than degrade. That is the intended behavior, but the finish you install is not the finish you’ll have in two years, and that needs to be a deliberate choice.
I handle a lot of vintage hardware at flea markets, and genuine aged brass wears differently than a powder-coat version of the same look. The real thing develops depth. The imitation fades unevenly. That difference shows up around 18 months in.
How to Mix Metals Without the Kitchen Looking Fragmented
Identify the anchor finish before you pick anything else.
The anchor finish is the metal with the most visual presence already in the room, usually the faucet, sometimes the light fixtures if they have significant mass.
When I redesigned a client’s kitchen at my own cost, $6,000 out of pocket, the problem wasn’t a lack of hardware. There were too many elements competing at equal visual weight. Nothing led. I call what I built from that project the one-hero rule: one dominant visual statement in the room, and everything else submits to it.
The rule applies to hardware finish as directly as it applies to anything else in the kitchen.
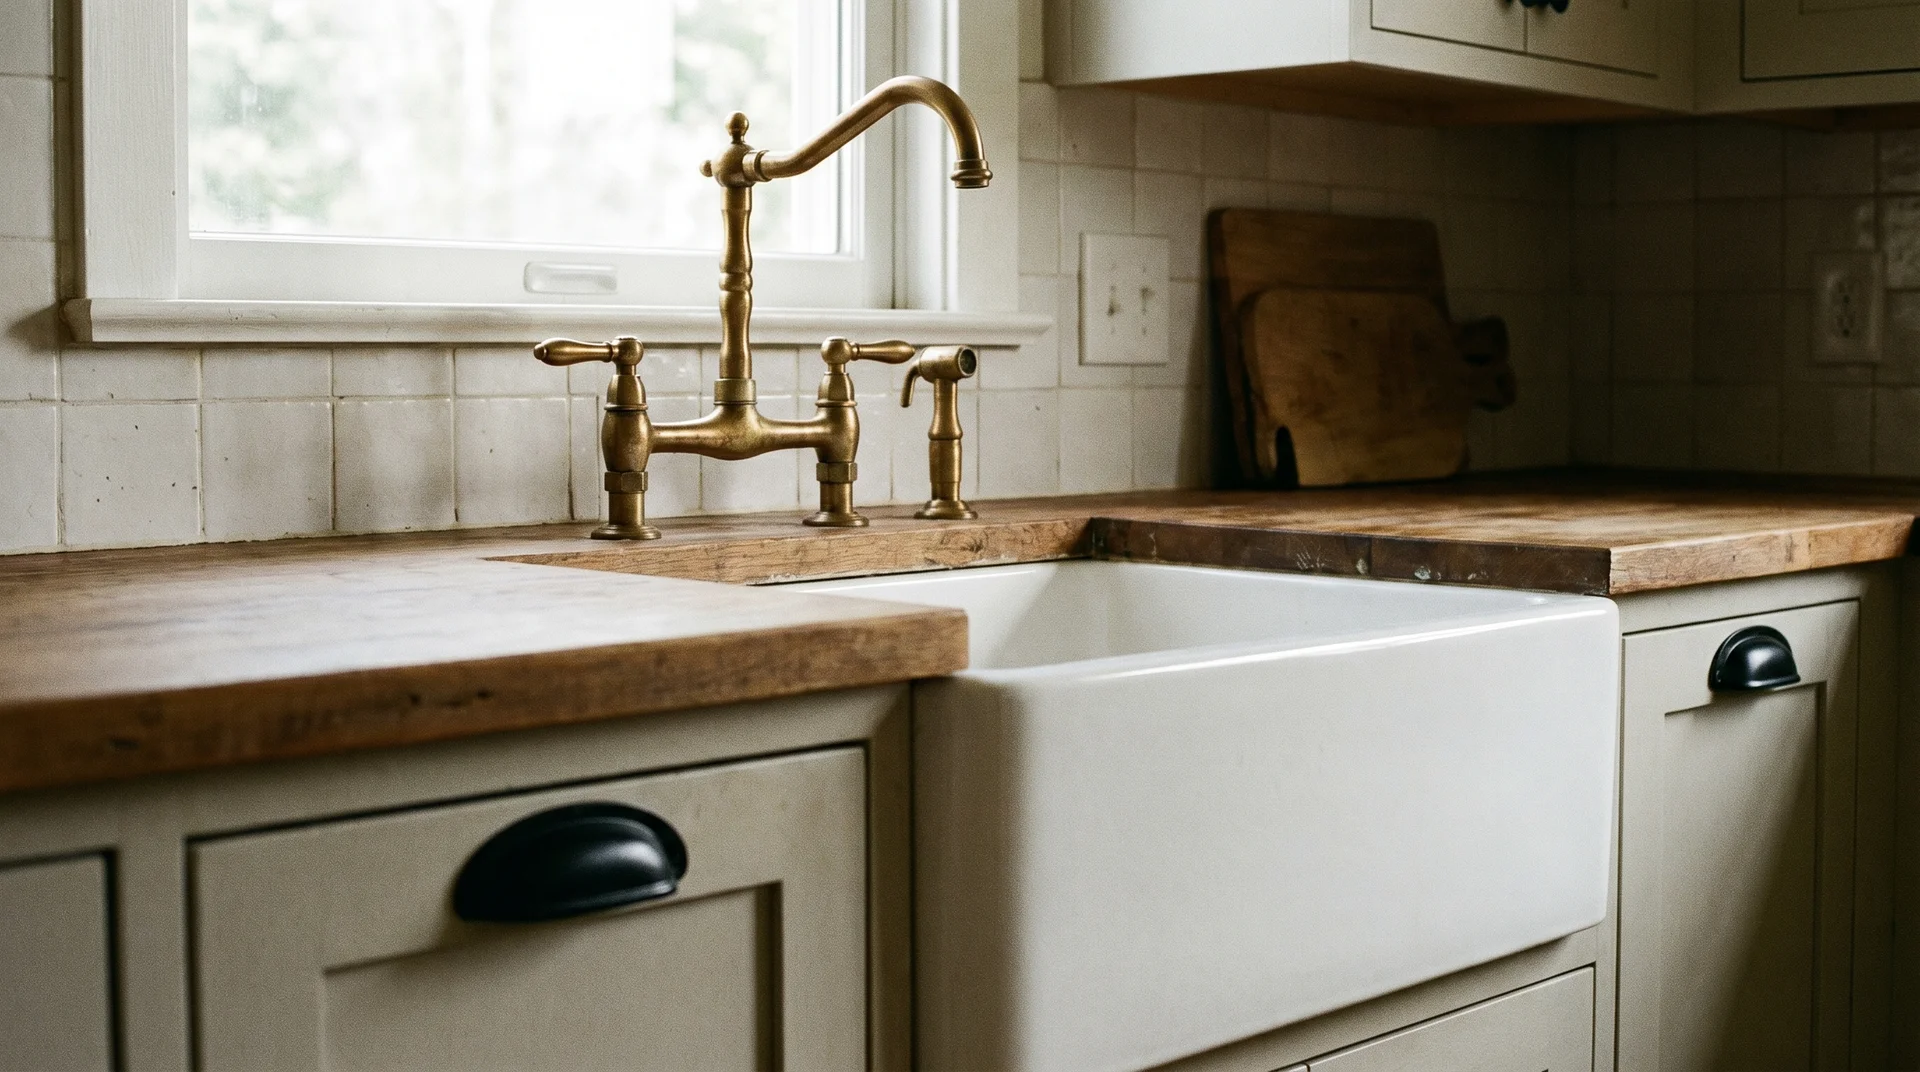
In practice, the anchor finish leads, and cabinet hardware responds to it. A brushed brass faucet pairs with unlacquered brass cabinet hardware, with matte black, or with oil-rubbed bronze finishes that have a tonal relationship with brass.
It does not pair well with polished chrome. Those two pull in opposite directions every time someone looks at the sink.
The accent metal needs to appear at least twice in the room to read as a choice. Once reads as a mistake. Twice reads as intention.
A Note on Kitchen Cabinet Hardware Trends
Trend-driven hardware decisions are the fastest ones to regret.
- Unlacquered brass and warm metals have been building since 2019 and are still holding.
- Matte black has peaked and is oversaturated in the mid-market.
- Brushed nickel and satin brass remain stable because they were never strongly tied to a specific design moment; they don’t date quickly because they never claimed to be a moment.
My honest position: trends belong at the back of this decision. A pull in the right proportion in a durable finish is a trending finish in the wrong size every time.
If a trending finish fits your metal hierarchy and your cabinet profile, use it. If you’re choosing it primarily because it’s trending, that’s the part worth revisiting.
Hardware Placement in Your Cabinets
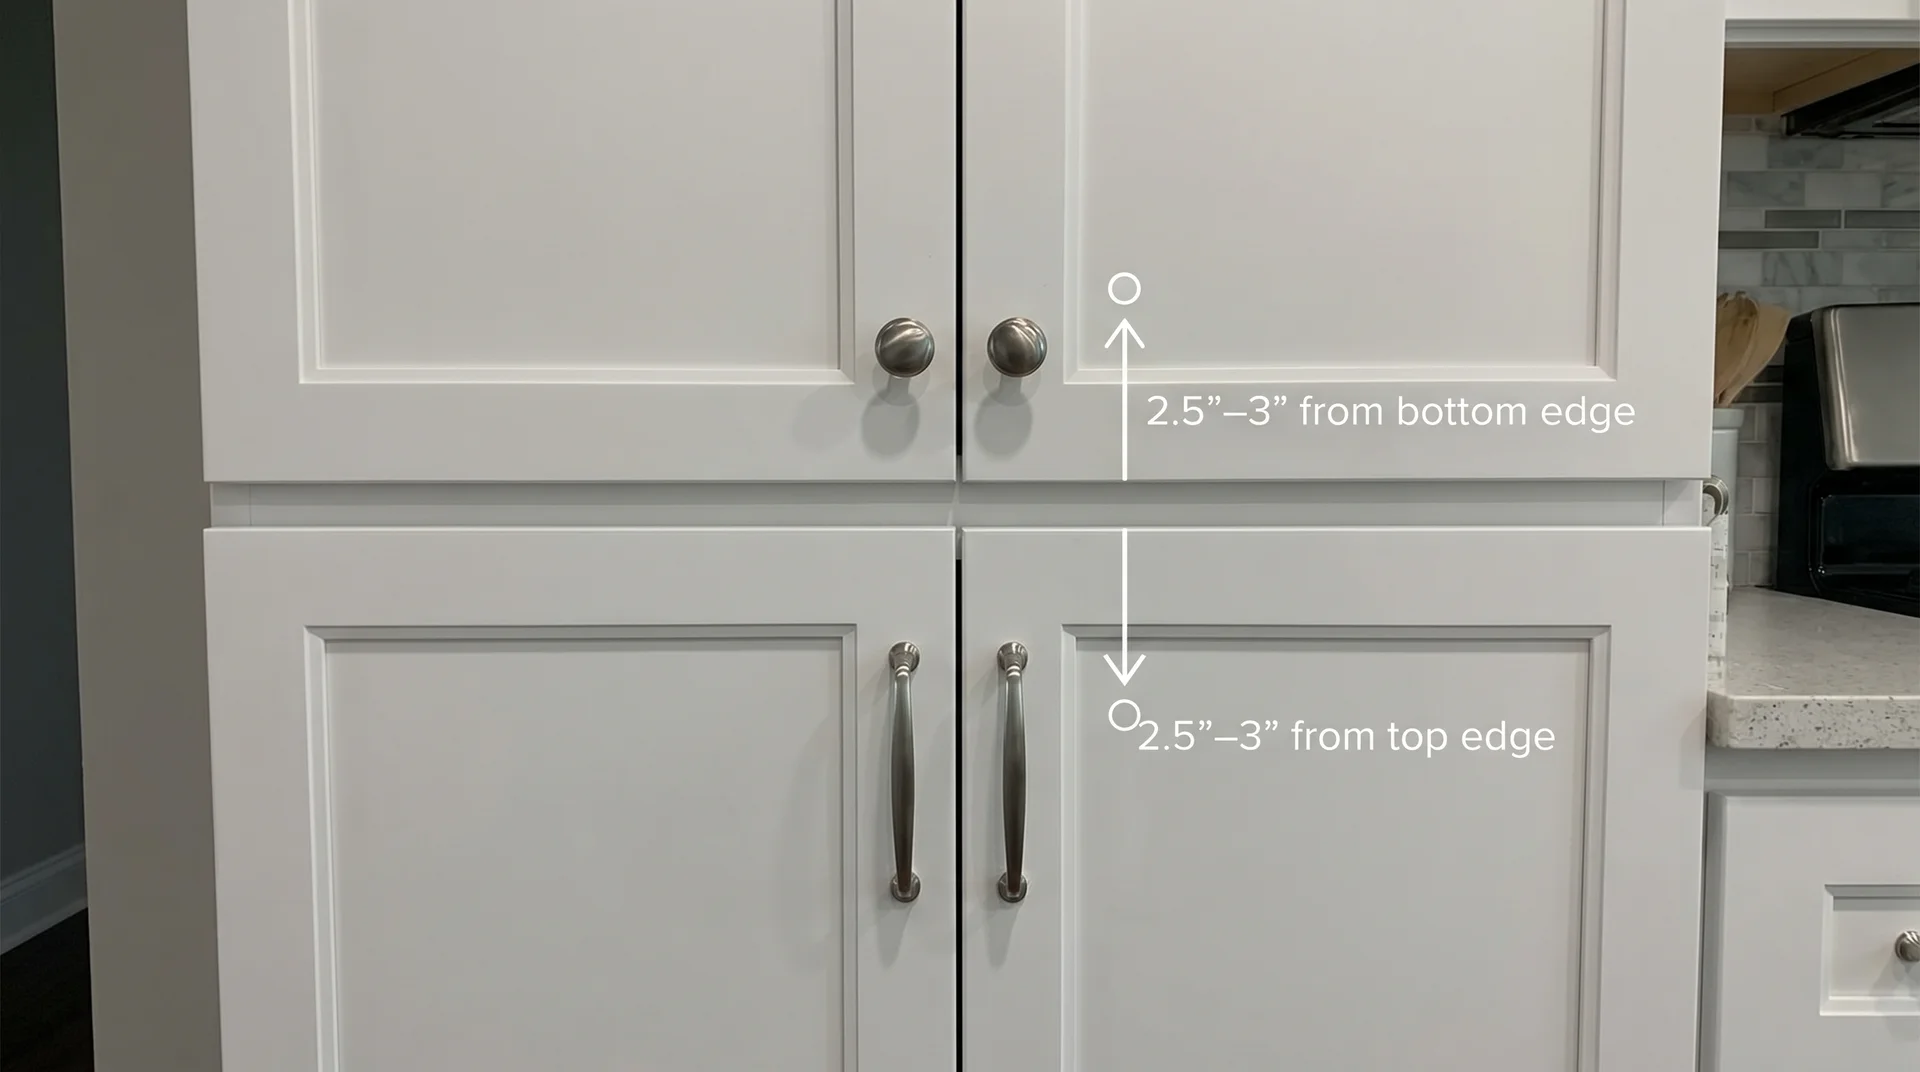
Consistent placement is what makes hardware look like a decision rather than an installation.
Walk into that kitchen and look at a row of upper cabinets with hardware at different heights on each door. The room looks unfinished even when everything else is right. Consistent placement at the same position on every door and every drawer is what prevents that.
NKBA placement guidelines are the professional baseline. They reflect decades of observation about where hardware placement creates friction in daily use and where it doesn’t.
- Upper cabinet doors: hardware 2.5 to 3 inches from the bottom edge of the door
- Lower cabinet doors: hardware 2.5 to 3 inches from the top edge of the door
- Standard drawers: centered horizontally and vertically on the drawer face
- Deep drawers over 6 inches tall: centered horizontally, placed toward the top vertically, where the reach is natural
Before you drill anything, mark your planned position with painter’s tape. Open and close the cabinet as you normally would. Check clearance between adjacent doors. Check clearance between the hardware and anything sitting on the counter below it.
Ten minutes with tape catches most of the placement mistakes that would otherwise require filling and repainting.
For pantry doors and tall cabinet doors: use a long vertical pull, 8 to 12 inches or more. A knob on a 60-inch pantry door is functionally undersized and visually lost. Match the finish and profile of your main hardware selection, then go long on the length.
Replacing the Existing Kitchen Cabinet Hardware
When holes are already drilled in your cabinets, center-to-center becomes a hard constraint, not a preference.
If you haven’t read the sizing section above, the short version: center-to-center is the distance between the two mounting holes on a pull, not the overall bar length. Measure that distance on your existing holes before you shop. That number determines what drops in without new drilling.
Three scenarios come up most often in replacement projects.
- New hardware matches the existing CTC exactly: Straightforward swap. Remove the old hardware, install the new.
- New hardware has a different CTC: New holes are required. Old holes need wood filler and repainting before you redrill. That’s a prep step, not a hardware step — and it belongs in the installation article, not this one.
- New hardware includes a backplate: A backplate is a flat decorative plate that mounts between the pull and the cabinet face. It covers the existing holes. If your new pull’s CTC falls within the backplate’s coverage width, you may be able to move the hardware position without patching and repainting first.
Check the backplate option before anything else. Measure its coverage against your existing holes before you assume it solves the problem. It only works if the new CTC lands within the plate’s width.
Frequently Asked Questions
What is the 1/3 rule for cabinet pulls?
The 1/3 rule says a pull’s center-to-center measurement should be roughly one-third of the drawer width.
Center-to-center is the hole-to-hole distance, not the bar’s total length. On a 24-inch drawer, that means a pull with roughly 8 inches between its mounting holes. The bar itself will extend beyond that measurement on both ends.
What is the rule of thumb for cabinet hardware placement?
NKBA guidelines place hardware 2.5 to 3 inches from the bottom edge on upper doors and 2.5 to 3 inches from the top edge on lower doors.
Drawer hardware centers horizontally and vertically on standard-depth drawers. On deep drawers over 6 inches tall, placing hardware toward the top of the drawer face is more ergonomic than centering it vertically.
What color hardware does not go out of style?
Brushed nickel and satin brass are the most stable hardware finishes across design cycles.
Neither finish was strongly associated with a specific design moment, so neither dates quickly. Unlacquered brass develops patina over time and holds its character. Polished chrome and high-gloss finishes show wear more visibly and tend to date faster than matte or brushed surfaces.
Can I use different hardware on the upper and lower cabinets?
Yes, and a combination of hardware types often works better than the same hardware throughout.
Knobs on upper doors and pulls on lower doors and drawers follow both function and spatial logic. Keep the finish consistent across both types to hold the selection together visually.
