

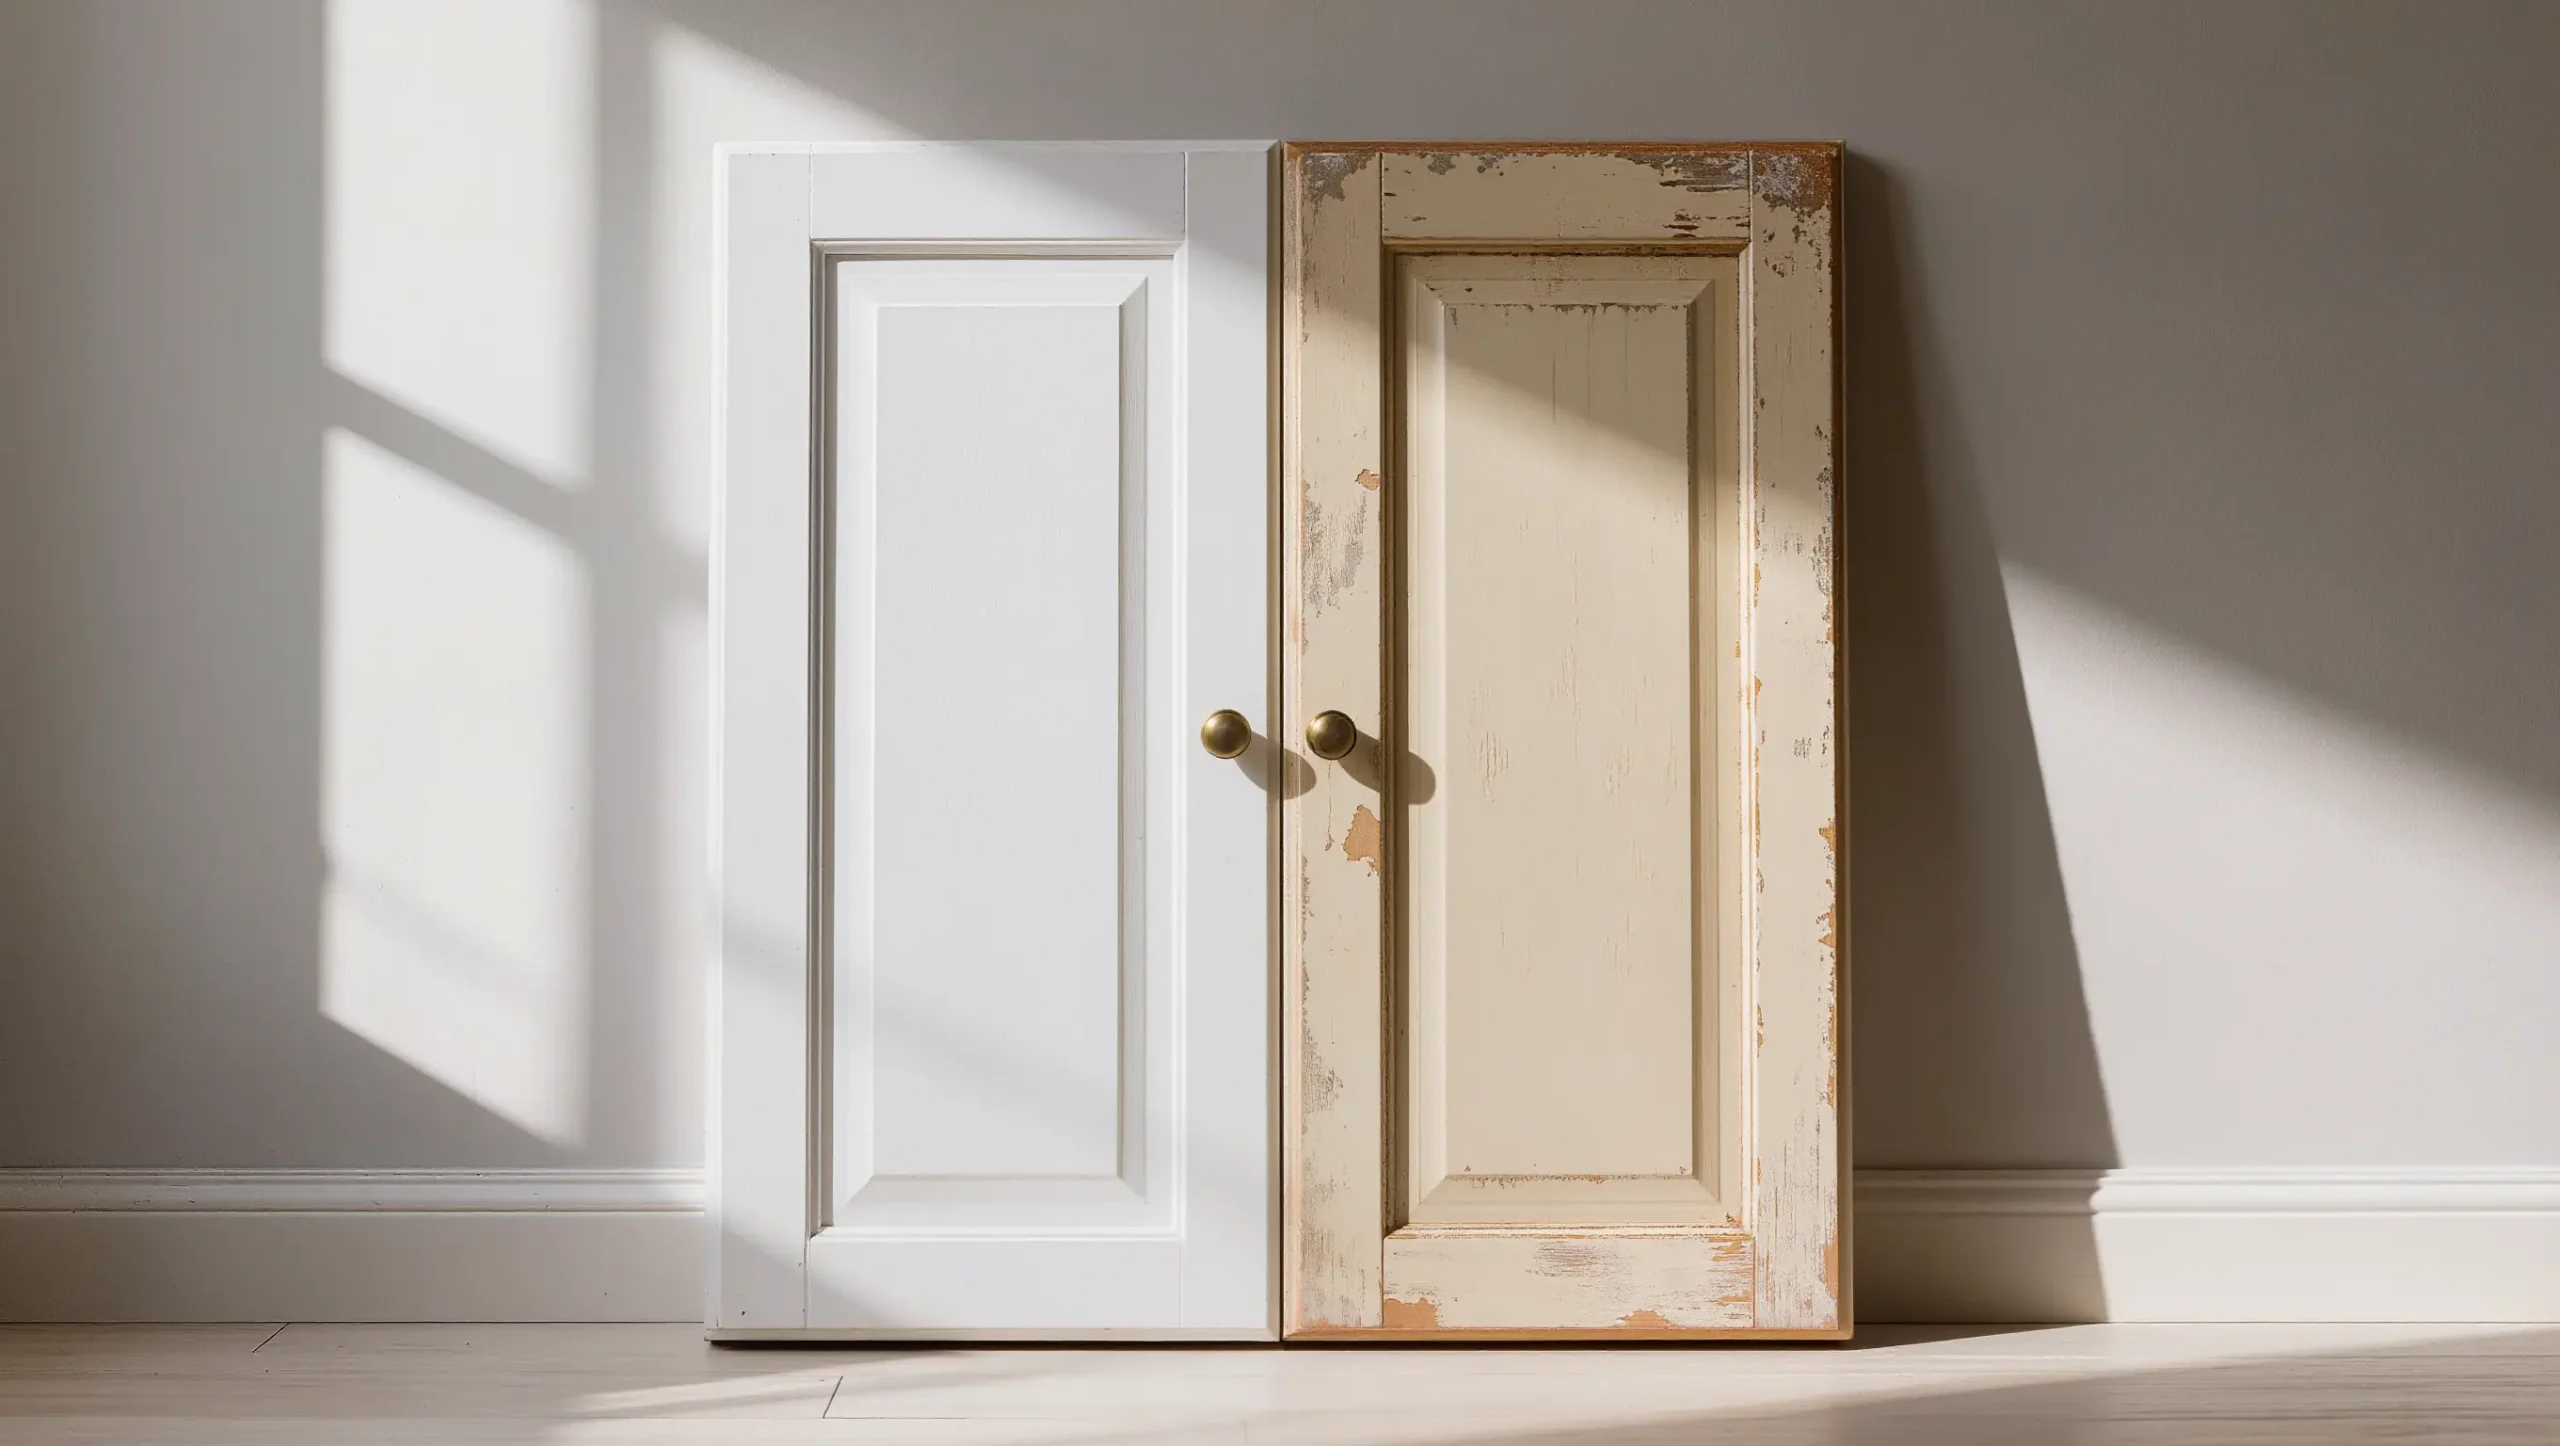
You’re standing in front of your kitchen cabinets. The paint is wrong.
Maybe it’s a color you’ve wanted to change for years. Maybe it’s a previous owner’s job. It’s starting to lift near the handles.
Getting this right starts with knowing what’s already on the surface.
Most cabinet repainting advice splits this into two conversations. Pick your paint in one place, learn the prep steps somewhere else.
That split is where repaint jobs go wrong. What you choose to paint with depends on what’s already on the surface. You need both pieces of that answer before you open anything.
If you’re starting with raw wood or bare MDF, our cabinet painting guide covers that process in full. This article is for cabinets that already have paint on them.
Read: Painting Kitchen Cabinets
Can You Paint Over Your Existing Cabinet Paint?
Yes, in most cases.
The condition of the existing paint determines how much work comes first. Most painted surfaces are repaintable. When they’re not, you’ll know it within a couple of minutes of hands-on assessment.
What a Paintable Surface Actually Looks Like
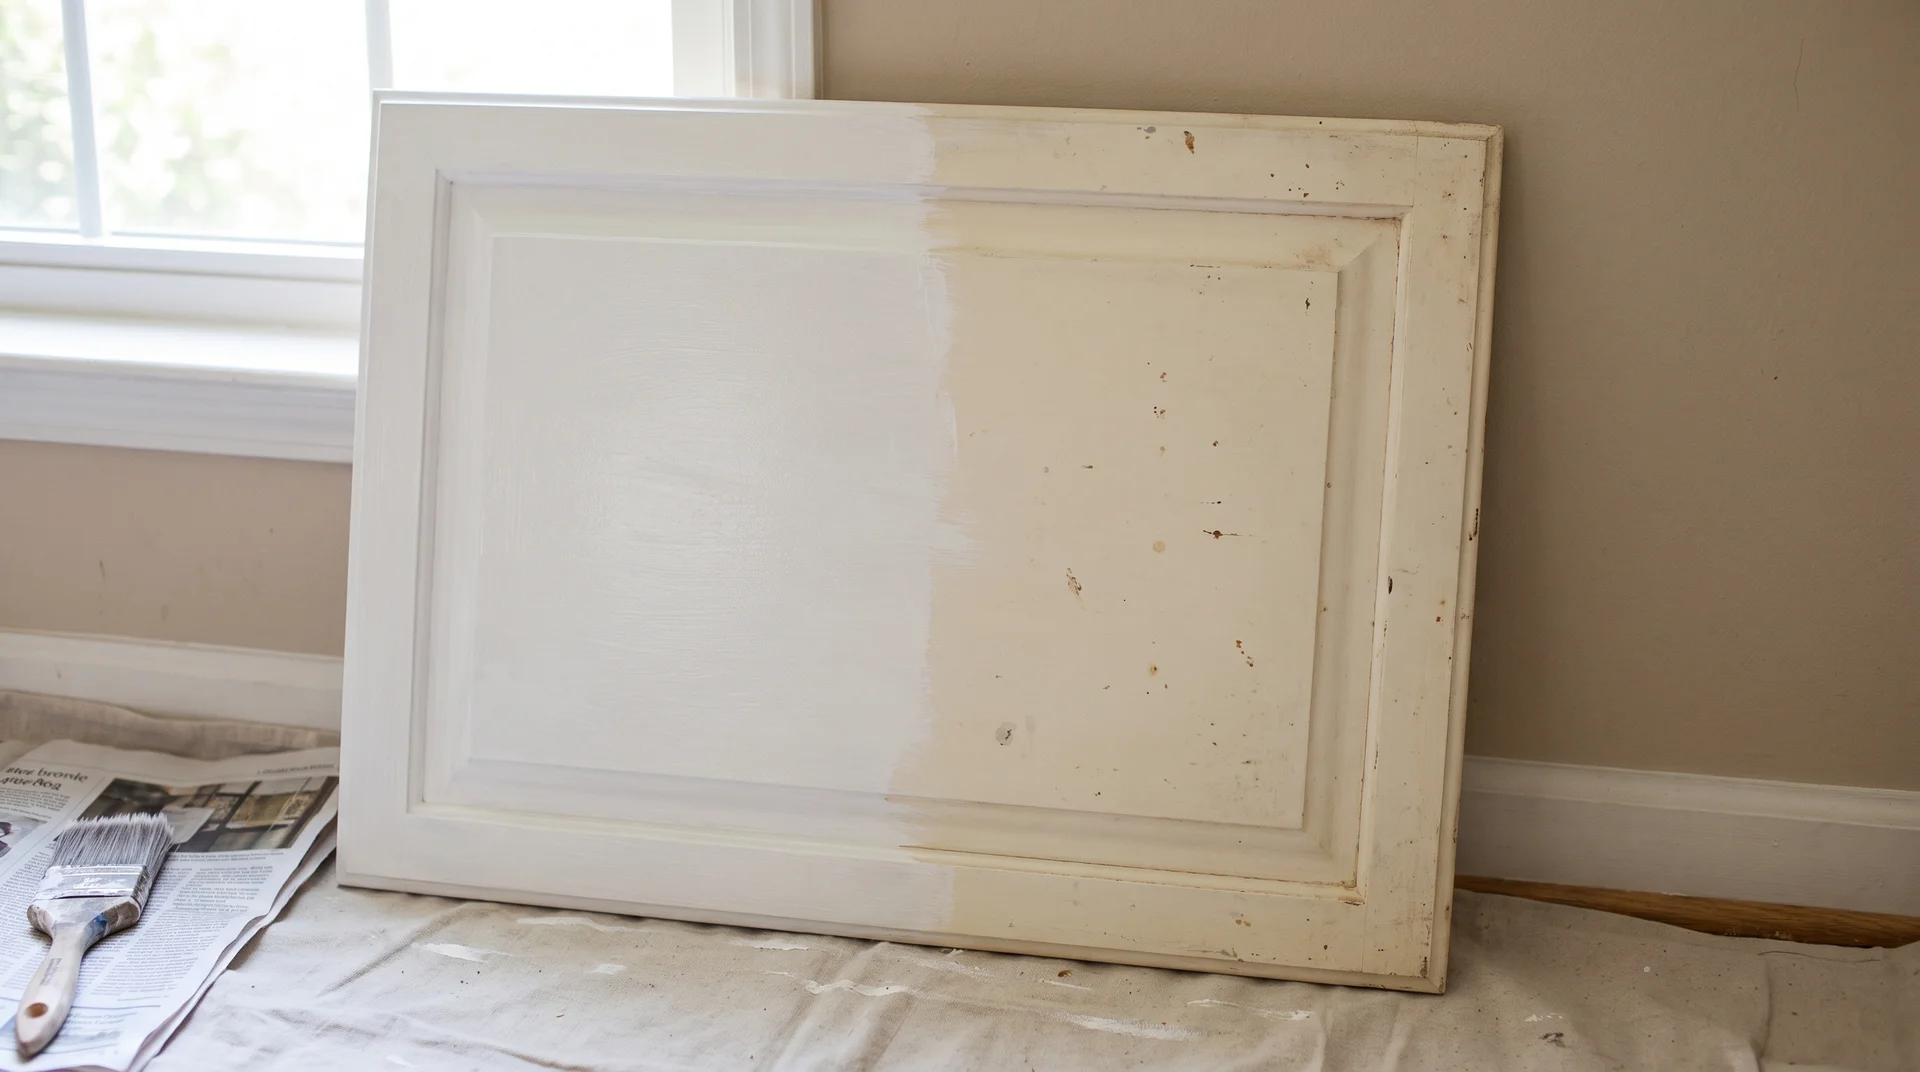
If the existing paint is firmly adhered, dry, and free of active peeling, you can repaint over it.
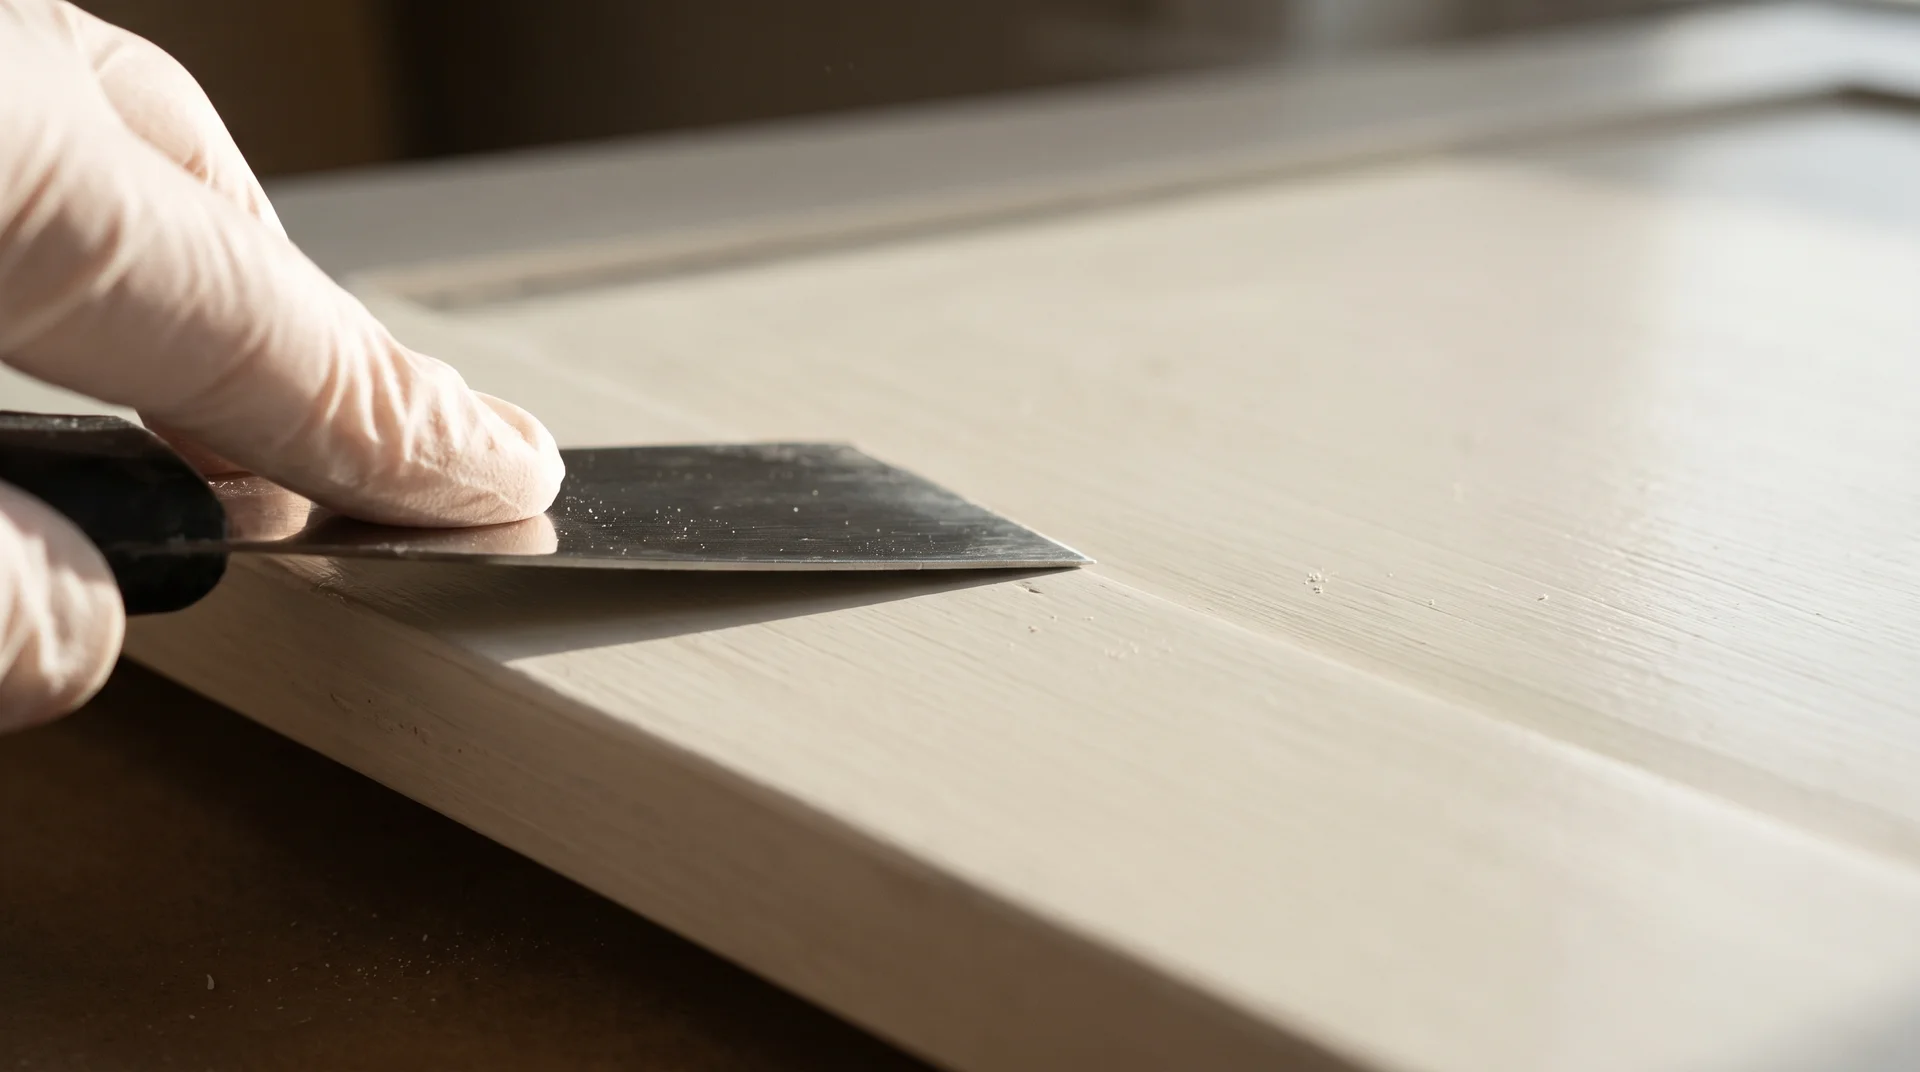
You’re pressing a putty knife gently along a flat panel surface. That single check tells you more about this project than anything else will.
If the paint doesn’t lift at the knife edge, adhesion is intact. Press your fingernail into a corner. If the paint holds its edge, it’s stable. That’s your starting point before any prep begins.
Here’s what you’re checking before you do anything else:
- No active peeling or flaking across large surface areas
- Firm, solid wood beneath the paint, with no soft or spongy spots
- No bubbling or blistering on the paint surface
- Hardware mounting holes that are clean and intact
A surface that passes these checks is ready for prep. The wood and the existing paint layer are both sound.
When You Need to Strip Before You Repaint
Three conditions mean stripping is the right call, not recoating.
If any of these apply, this article isn’t the right guide for your cabinets.
- Active peeling across large sections of the door face. A few lifted edges near the hardware can be repaired. Peeling that covers most of a door means the bond between the existing paint and the wood has broken down broadly. A new coat won’t fix that.
- Multiple old oil-based layers that are failing. If the cabinets have been painted several times over the decades, the layers can start separating from each other. The tell is a crosshatch cracking pattern called alligatoring, which looks like dried mud. That’s a full strip situation.
- Water damage in the wood underneath. Soft wood under the paint means moisture has gotten in. Painting over it covers the damage without addressing it. That’s a structural repair before anything else happens.
None of these are edge cases. They come up in real kitchens often enough that it’s worth a careful look before you buy a single thing.
Why the Base Coat Under Your Paint Changes Your Primer
The type of paint already on your cabinets matters more than most guides account for.
Two base coat types are common on older kitchen cabinets.
- One is oil-based.
- One is latex, also called water-based.
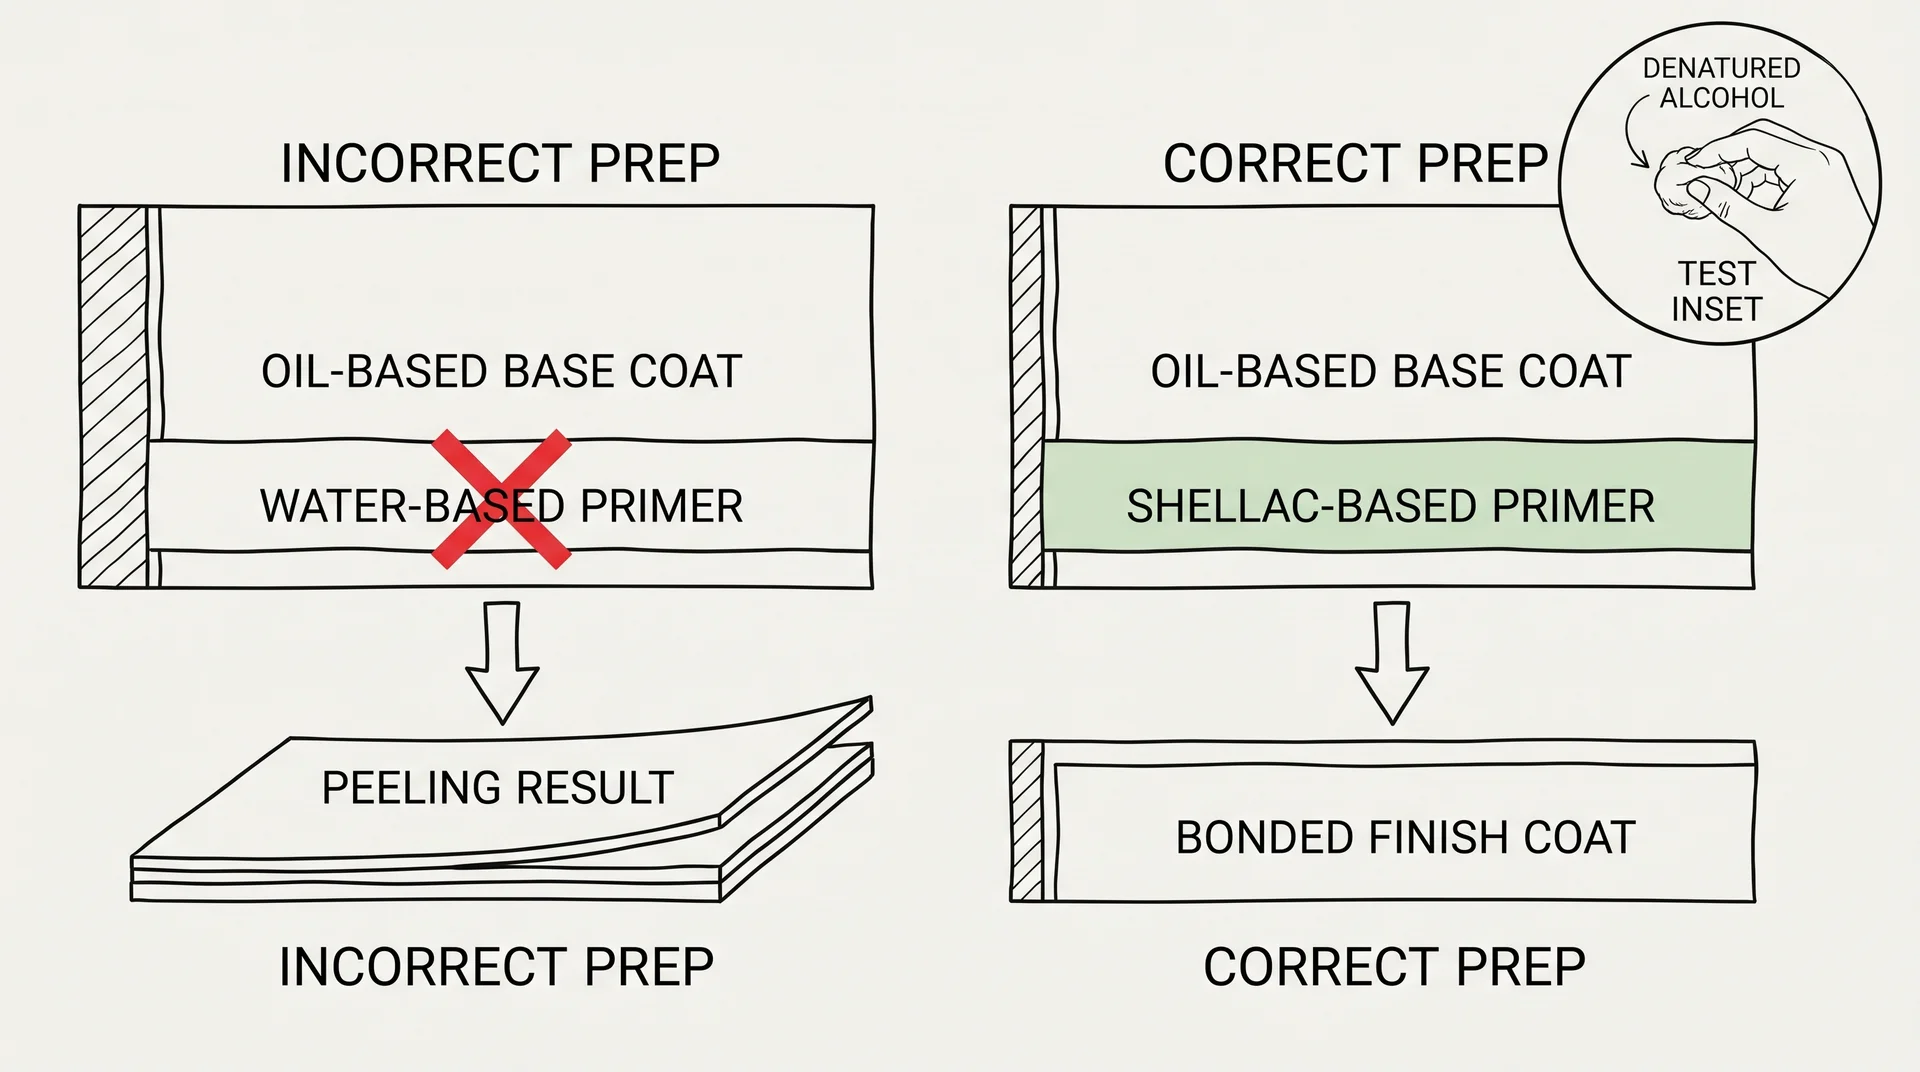
Apply the wrong primer over an oil-based base coat, and the repaint will peel. I’ve watched it happen. The failure shows up around the six-month mark, long after the job felt finished.
Here’s how to identify what you have before you buy primer.
- Dip a cotton ball in denatured alcohol.
- Rub it on a small inconspicuous area, like the inside edge of a door.
If paint transfers onto the cotton ball, the base coat is latex. If nothing comes off, it’s oil-based. The result is reliable in most cases.
| Base Coat Type | Right Primer |
|---|---|
| Oil-based | Shellac-based or oil-based bonding primer |
| Latex (water-based) | Water-based bonding primer |
A water-based primer over an oil-based surface is a gamble that most people lose.
Prepping Before Repainting Kitchen Cabinets
Good prep is what keeps a repaint from peeling before the year is out.
It’s not the paint brand. It’s not the primer color. When a cabinet repaint fails within a year, it almost always traces to one of the three steps below.
Degreasing a Kitchen Cabinet Surface
Degreasing is the step most failed repaints skipped or rushed.
Kitchen cabinet surfaces accumulate polymerized cooking grease over time. This isn’t residue you can feel. It’s a thin, baked-on film that forms from years of cooking heat and splatter.
It’s invisible, and soap and water don’t cut through it reliably. Paint won’t bond to a surface with this film on it. Not even with a bonding primer underneath.
The failure starts at the hardware mounting points and spreads outward from there.
I keep a folder of photographs from real kitchens showing what inadequate degreasing produces. The pattern is consistent. Adhesion breaks down first near the hardware mounting points, then moves outward across the door face.
The paint around a cabinet handle takes more daily contact than any other surface in your kitchen. That’s where grease concentrates most heavily. It’s also the last place most people scrub twice.
Use a dedicated kitchen degreaser. TSP (trisodium phosphate) is effective and widely available. Wear gloves when working with it. TSP is corrosive to skin at working concentrations. TSP-substitute products work equally well and are easier to use in kitchens with limited ventilation.
Follow the dilution and contact time on the product label. Don’t estimate the contact time. After applying and waiting, wipe off and rinse with clean water. TSP residue left on the surface will interfere with adhesion. The rinse step is not optional.
Pay particular attention to these areas before you call the degreasing done:
- The area immediately around every hardware mounting hole
- The top edges of cabinet doors, where cooking heat drives grease upward
- Any cabinet within two feet of the stove or range
A properly degreased surface feels less slick under your hand than it did before. That change in texture is what you’re looking for before sanding begins.
Do You Really Have to Sand the Cabinets?
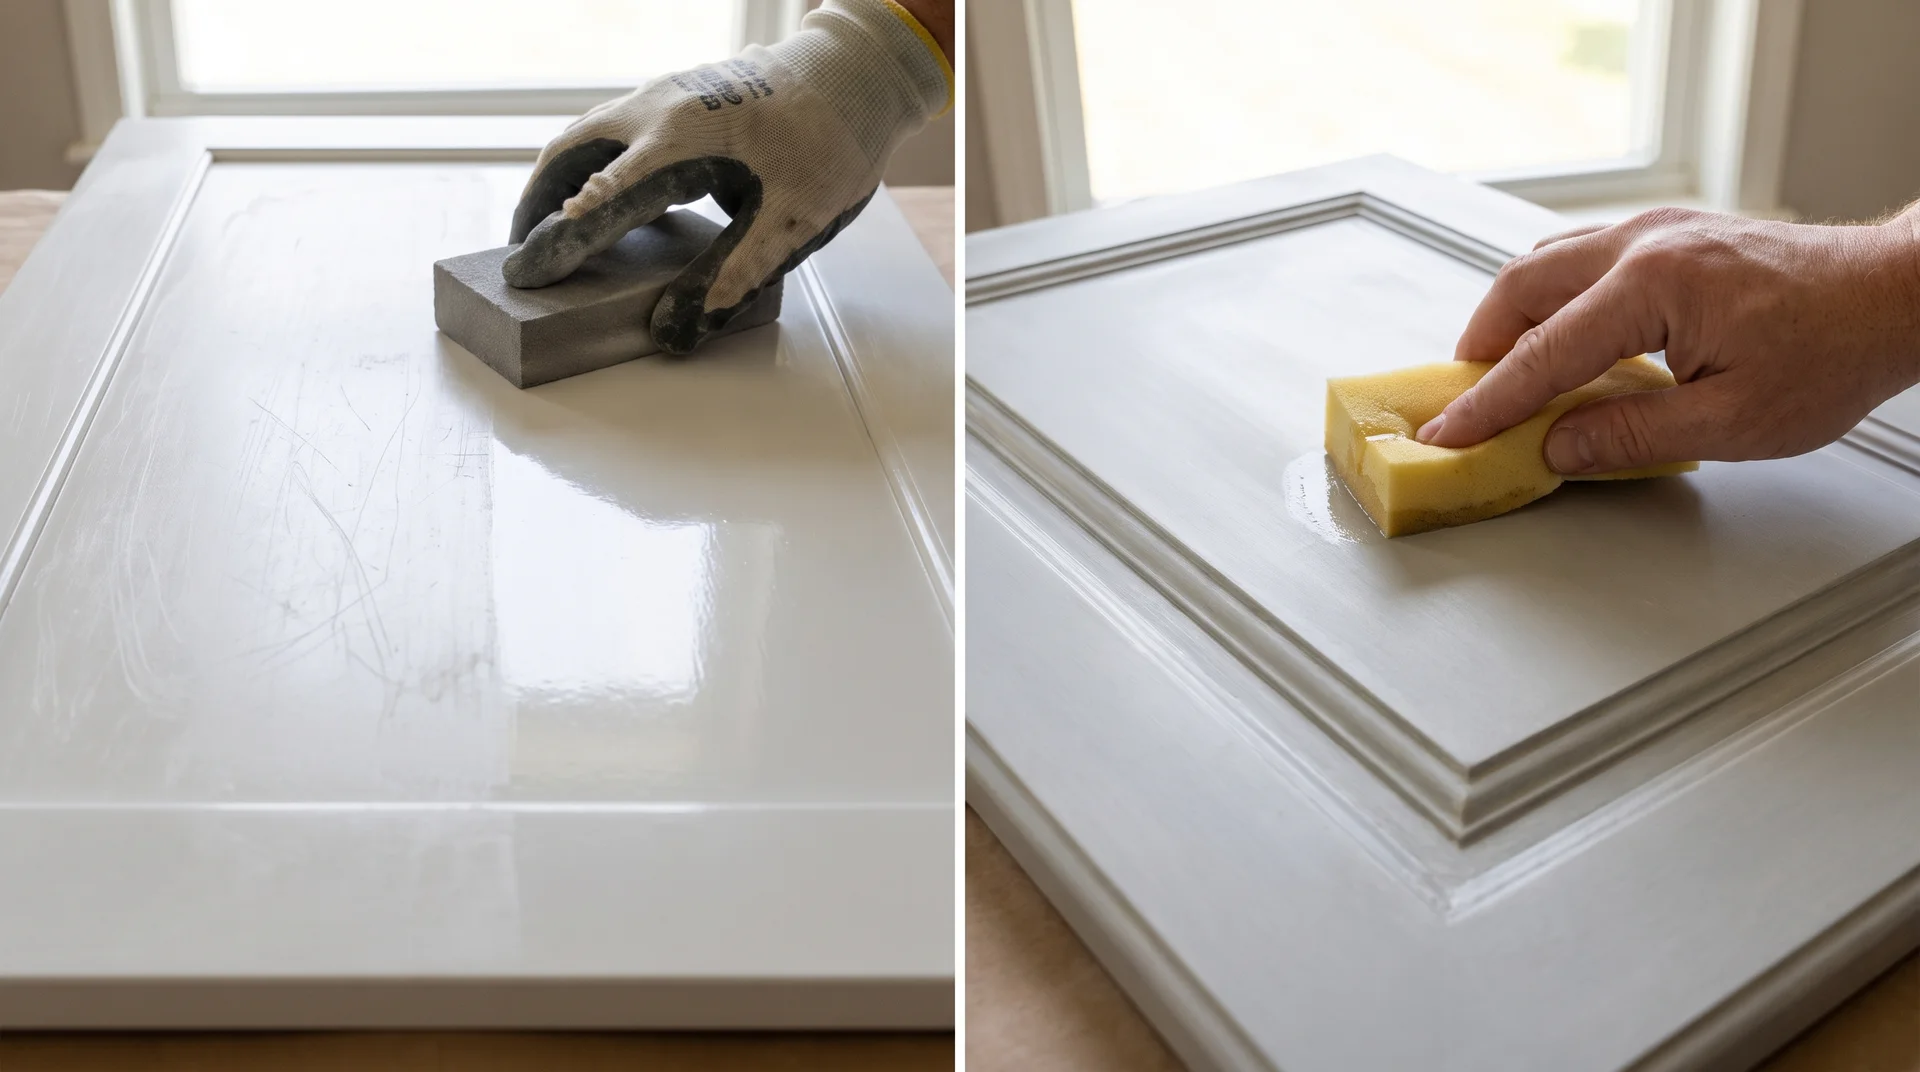
You don’t need to strip the existing paint layer. You do need to break its surface.
Full sanding removes the existing paint. Scuff-sanding roughens it to give the primer something to grip. For a cabinet with stable existing paint in good condition, scuff-sanding is what you need.
Use 120- to 150-grit sandpaper. The goal is a dull, lightly abraded surface with no remaining gloss.
If the existing finish is high-gloss, this step matters more than usual. High-gloss paint resists penetration. That same property makes it resist primer adhesion. Two options:
- Sand until all the gloss is gone. Works well on flat-panel doors where sandpaper moves evenly across the surface.
- Use a liquid de-glosser. A liquid de-glosser dulls the surface chemically rather than mechanically. Most are solvent-based — work in a ventilated room and wear gloves. Liquid de-glosser works better on raised profiles or molded details where sandpaper is awkward to apply evenly.
Run your hand across the surface after scuffing. If it still feels slick in patches, those patches need another pass. Vacuum the dust, then wipe with a tack cloth. Then the surface is ready for primer.
Filling and Repairing Before You Prime
Repairs go before sanding, not after.
Fill deep scratches, dings, and any old hardware holes you’re not reusing. A lightweight spackling compound or wood filler works for both. Let it dry fully, then sand it flush with the surrounding surface.
A repair that sits even slightly proud reads through the finished paint coat. This is a short step. It’s also one where I see people save ten minutes and lose the final result.
Do You Need Primer When Repainting Already-Painted Cabinets?
Yes, and the type matters as much as whether you use one at all.
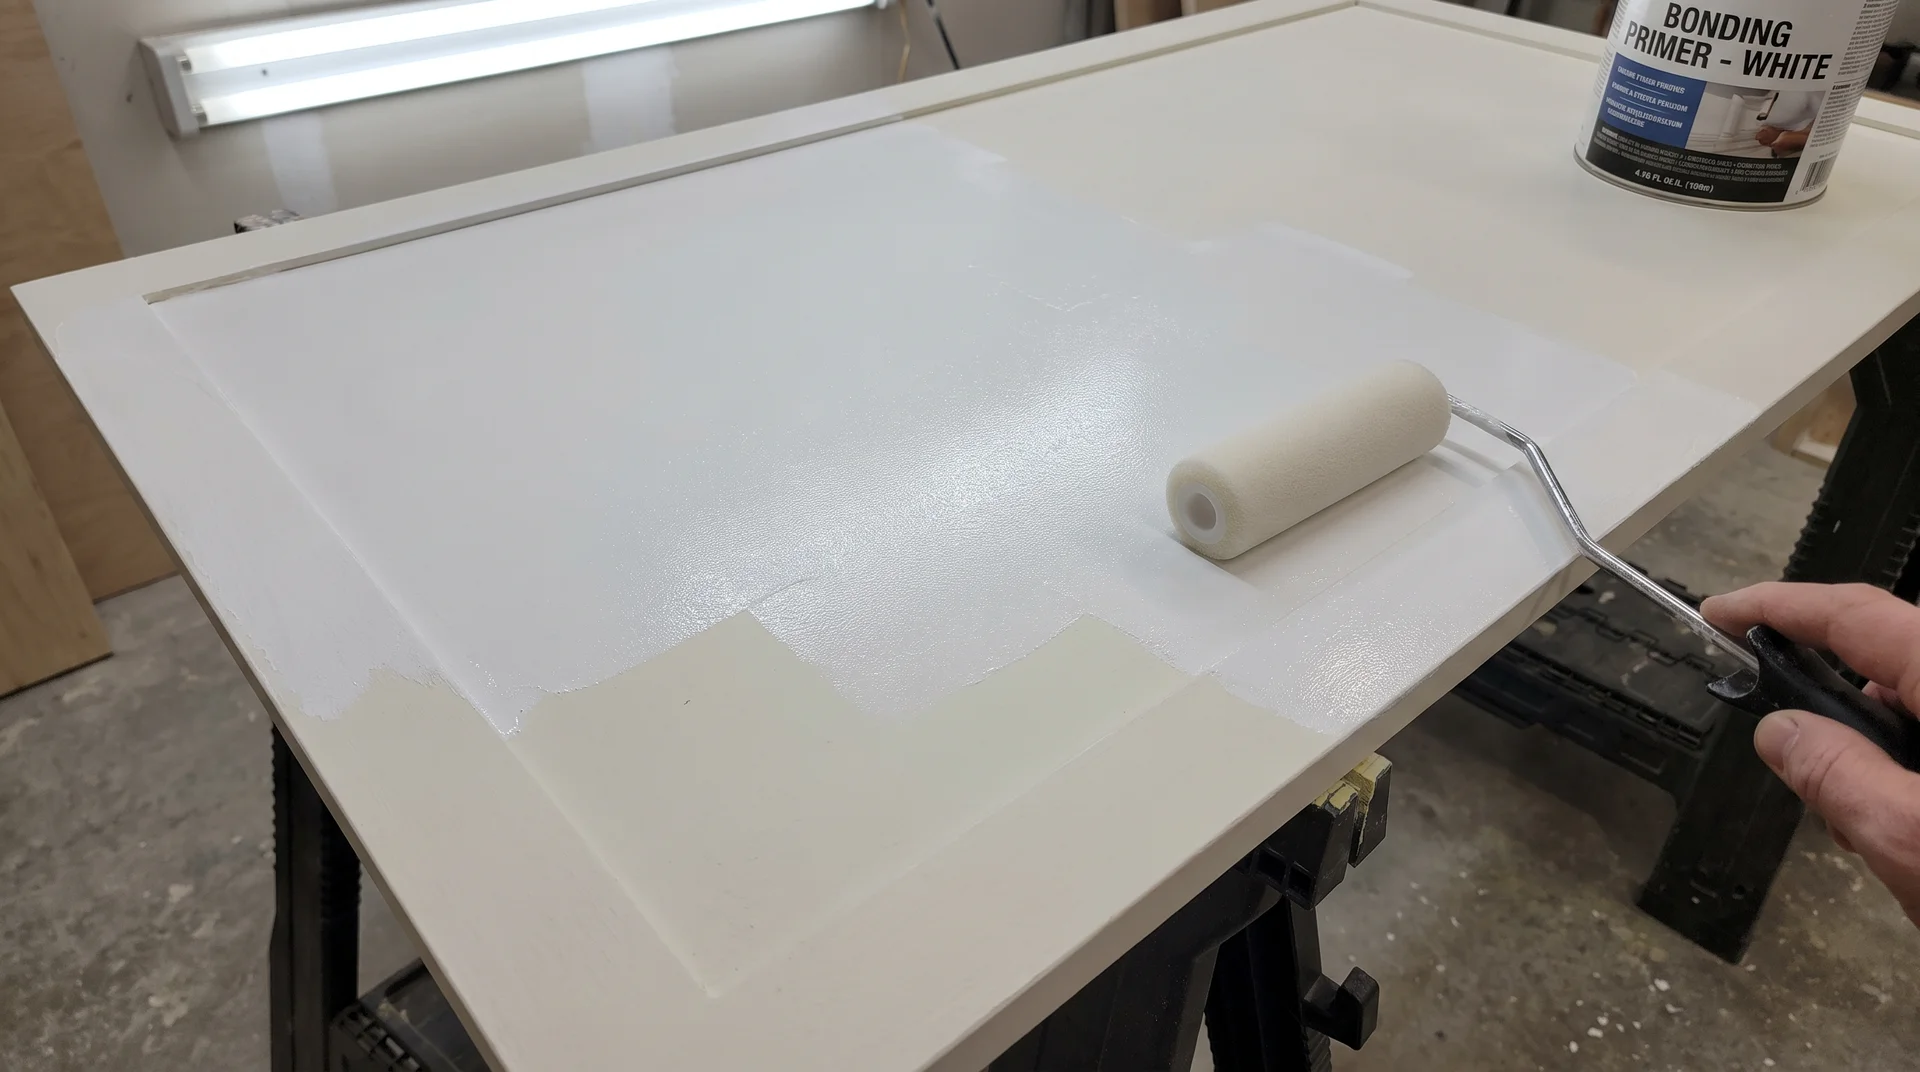
You need a bonding primer that is formulated to adhere to slick, non-porous surfaces. That’s exactly what an existing paint layer is. Standard interior primer is designed for bare drywall and wood. It doesn’t perform the same way over an existing coat.
I’ve seen the difference in long-term hold when the right primer is used. It’s not subtle.
For most already-painted cabinets with a latex base coat, a water-based bonding primer is the right choice. For an oil-based base coat, use a shellac-based or oil-based bonding primer. The base coat test from the earlier section determines which you need.
One additional scenario worth knowing: water stains or old knot marks bleeding through the original finish. For either of those, reach for a stain-blocking primer. A regular bonding primer won’t stop that discoloration from showing through your new coat.
Apply primer in thin, even coats. Let it dry fully before painting. Dry and cured aren’t the same thing. That distinction matters more at the primer stage than most people expect.
Choosing Paint for a Repaint
Cabinet enamel is the right choice, and the finish level deserves a deliberate decision.
Water-based alkyd enamel is my current preference for already-painted kitchen cabinets. It levels well as it dries. Brushstrokes and roller texture flatten out rather than staying visible. Apply it with a foam roller on flat surfaces and an angled brush in corners. Two thin coats, not one thick one.
Traditional oil-based paint is harder wearing but slow to dry and difficult to work with indoors. I don’t think the tradeoff is worth it for most home kitchens.
For finish level, satin or semi-gloss is the practical range for kitchen cabinets. Flat paint on a kitchen surface is a mistake I’ve watched people make more than once. It’s hard to clean and shows wear quickly.
Semi-gloss is slightly more washable. Satin reads a little softer on the eye. Both work for kitchen use, and the choice between them is aesthetic, not functional.
If you’re going from a dark color to a light one, that’s a primer decision before it’s a paint decision. You’ll need a tinted primer close to your final color. Otherwise you’ll need more coats than you planned.
If you’re repainting bathroom cabinets using this same process, choose a cabinet enamel specifically rated for high-humidity environments. Kitchen enamel and bathroom enamel are not always the same product.
The enamel grade your budget allows is where the durability decision actually lives. That’s not a caveat. It’s the decision. Paint brand comparisons with specific testing are a different article, and they need different criteria. What I’d say here: buy the best cabinet enamel your budget allows.
What to Do When the Existing Paint Job Is the Problem
Sometimes the paint job itself is what you’re correcting, not just the color.
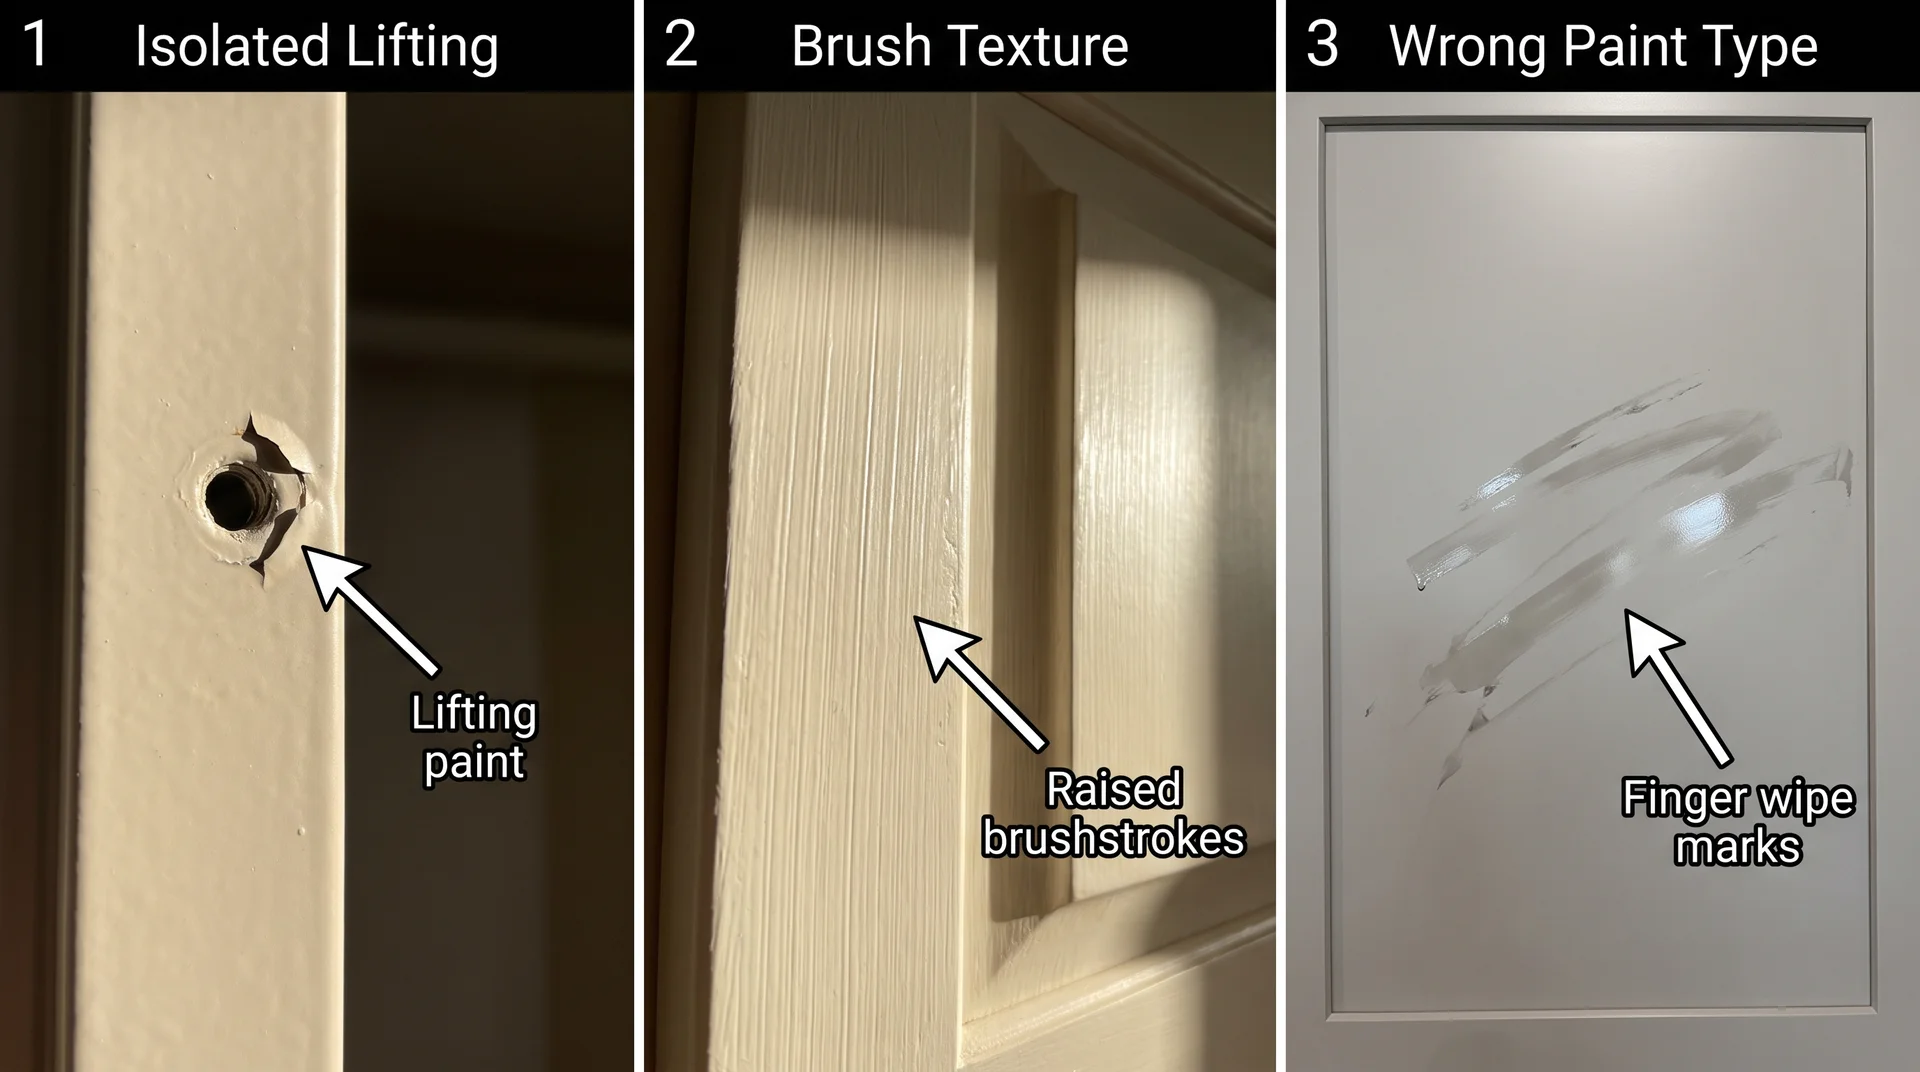
The fix depends on which problem you’re dealing with. Three patterns come up most often.
Isolated Lifting or Peeling in Specific Areas
Remove all loose paint in the affected area before you prime or paint anything.
Use a putty knife to lift every section that’s no longer fully bonded. Then feather the edges with sandpaper — blending the transition from the bare spot into the surrounding paint gradually, so there’s no hard lip where the new coats will start.
Prime the exposed area with bonding primer before priming the rest of the cabinet.
If you paint over a spot where old paint is still loosely attached at the edges, it will keep lifting. It takes the new coat with it when it goes.
Visible Brush Marks and Texture
You can reduce heavy brush marks from the original job, but you won’t eliminate them entirely without stripping the existing coat.
Sand with 120-grit paper, focusing on the ridges. You won’t get back to a perfectly smooth surface without removing the existing paint entirely. That’s probably not the right trade for most projects.
What you can do is knock the texture down so it doesn’t telegraph through the new coat. An honest answer: if the texture is heavy enough, you’ll still see it in the finished result. I’d rather say that now than have you expect a factory finish over a badly brushed original coat.
Wrong Paint Type on the Original Job
Flat or eggshell paint on kitchen cabinets doesn’t need stripping. It needs the right primer.
Apply bonding primer over the flat or eggshell surface. Sand lightly after it dries. Then apply cabinet enamel on top. The bonding primer creates the barrier between the wrong base coat and your new finish.
This is where people reach for the paint stripper when they don’t need to.
Step by Step Guide to Repaint Already-Painted Cabinets
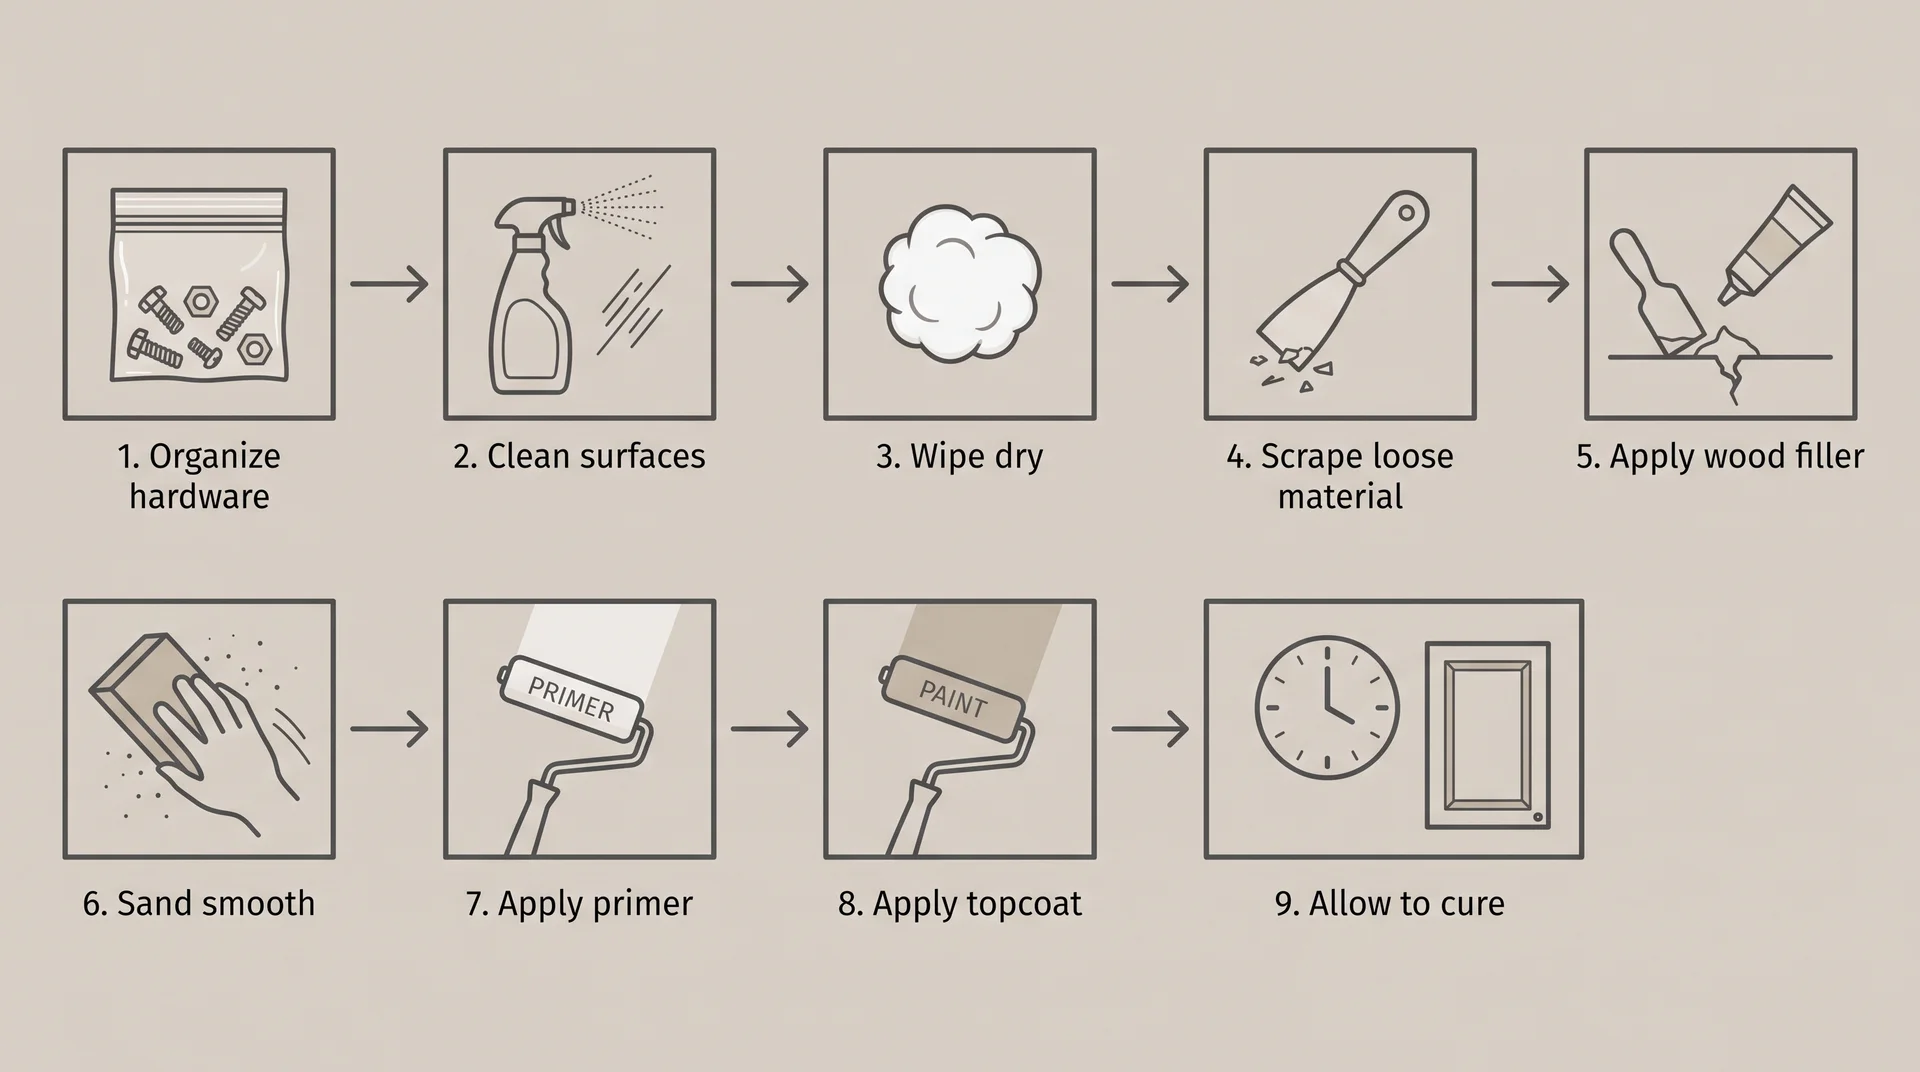
This sequence covers what’s specific to painting over an existing coat.
- Remove all doors, drawer fronts, and hardware. Store each door’s hardware in a labeled zip-lock bag. Mark the back of each door with its cabinet position. This matters more than it seems on reinstall day.
- Degrease all surfaces. TSP or TSP-substitute at the label’s dilution. Apply, hold the contact time, wipe off, rinse with clean water. Pay extra attention to the area around every hardware mounting hole.
- Run the base coat test. Cotton ball and denatured alcohol on an inconspicuous spot. Paint transfers onto the cotton: latex. Nothing transfers: oil-based.
- Assess the existing surface. Putty knife and a fingernail check from the opening section. Look for any of the three strip-first conditions.
- Fill and repair. Spackling compound or wood filler for deep scratches and unused hardware holes. Let it dry fully before sanding.
- Scuff-sand or de-gloss. 120- to 150-grit to remove all gloss from the existing surface. Liquid de-glosser on detailed profiles. Vacuum and wipe with a tack cloth after.
- Apply bonding primer. Type based on the base coat test in step 3. Let it dry fully per the product’s stated dry time. Not approximately. Fully.
- Paint in thin coats. Two to three coats of cabinet enamel. Light 220-grit sand between each coat. Tack cloth wipe before the next. The main guide covers the application technique in full.
- Wait for a full cure before reinstalling doors. Most cabinet enamels are dry to the touch in a few hours and can be recoated within 24. Full cure, where the paint reaches its final hardness, takes longer. Often two to four weeks, depending on the product, humidity, and temperature. Doors rehung before full cure can stick to the frame. When they open, the paint comes with them.
Cure time varies genuinely by product and conditions.
I’ve watched the same enamel behave differently in a humid kitchen in July versus a dry one in January. Check the manufacturer’s technical data sheet, not just the label. Labels give a minimum. The data sheet gives a realistic range for your actual kitchen, in actual conditions.
Frequently Asked Questions
Can I Paint Over Previously Painted Cabinets?
Yes, in most cases. The existing paint needs to be firmly adhered, with no active peeling or blistering across large areas. A quick check with a putty knife and your fingernail tells you whether the surface is ready to prep and repaint.
Can You Repaint Cabinets Without Sanding?
You can’t skip breaking the surface, but you don’t need to strip the existing paint layer. Scuff-sanding with 120- to 150-grit creates the adhesion tooth bonding primer needs. Skipping it is one of the most common reasons repaints fail within a year. A liquid de-glosser can replace mechanical sanding on detailed profiles. The glossy surface still needs to be dulled one way or another.
Do I Need Primer When Painting Over Already-Painted Cabinets?
Yes, and specifically a bonding primer, not a standard interior primer. Standard primer is designed for bare drywall and wood. It doesn’t adhere reliably to an existing paint coat. Bonding primer is formulated for non-porous surfaces. They’re not interchangeable for this application.
How Do I Fix Badly Painted Cabinets Before Repainting?
The fix depends on which problem you’re dealing with.
- Isolated lifting: remove all loose paint, feather the edges, and prime the bare area before priming the whole cabinet.
- Heavy brush texture: sand with 120-grit to reduce it, knowing it won’t disappear completely.
- Wrong paint type: Apply bonding primer over the existing coat and paint with cabinet enamel. Each scenario has its own fix, and they don’t overlap.
