Vinegar steam works on light grease. It does not work on carbonized buildup.
Most guides present one method for both. That’s why the steam method disappoints anyone whose oven hasn’t been cleaned in several months.
Distilled white vinegar is about 5% acetic acid. This piece covers what that acid actually does, when baking soda helps, and the one sequencing mistake that makes the combination less effective.
What Vinegar Actually Does to Oven Grease
Vinegar cleans through chemistry.
The active ingredient is acetic acid, the compound present in distilled white vinegar at about 5% concentration. That acid disrupts the bonds between fresh grease and enamel surfaces.
Light Grease Film vs. Carbonized Buildup
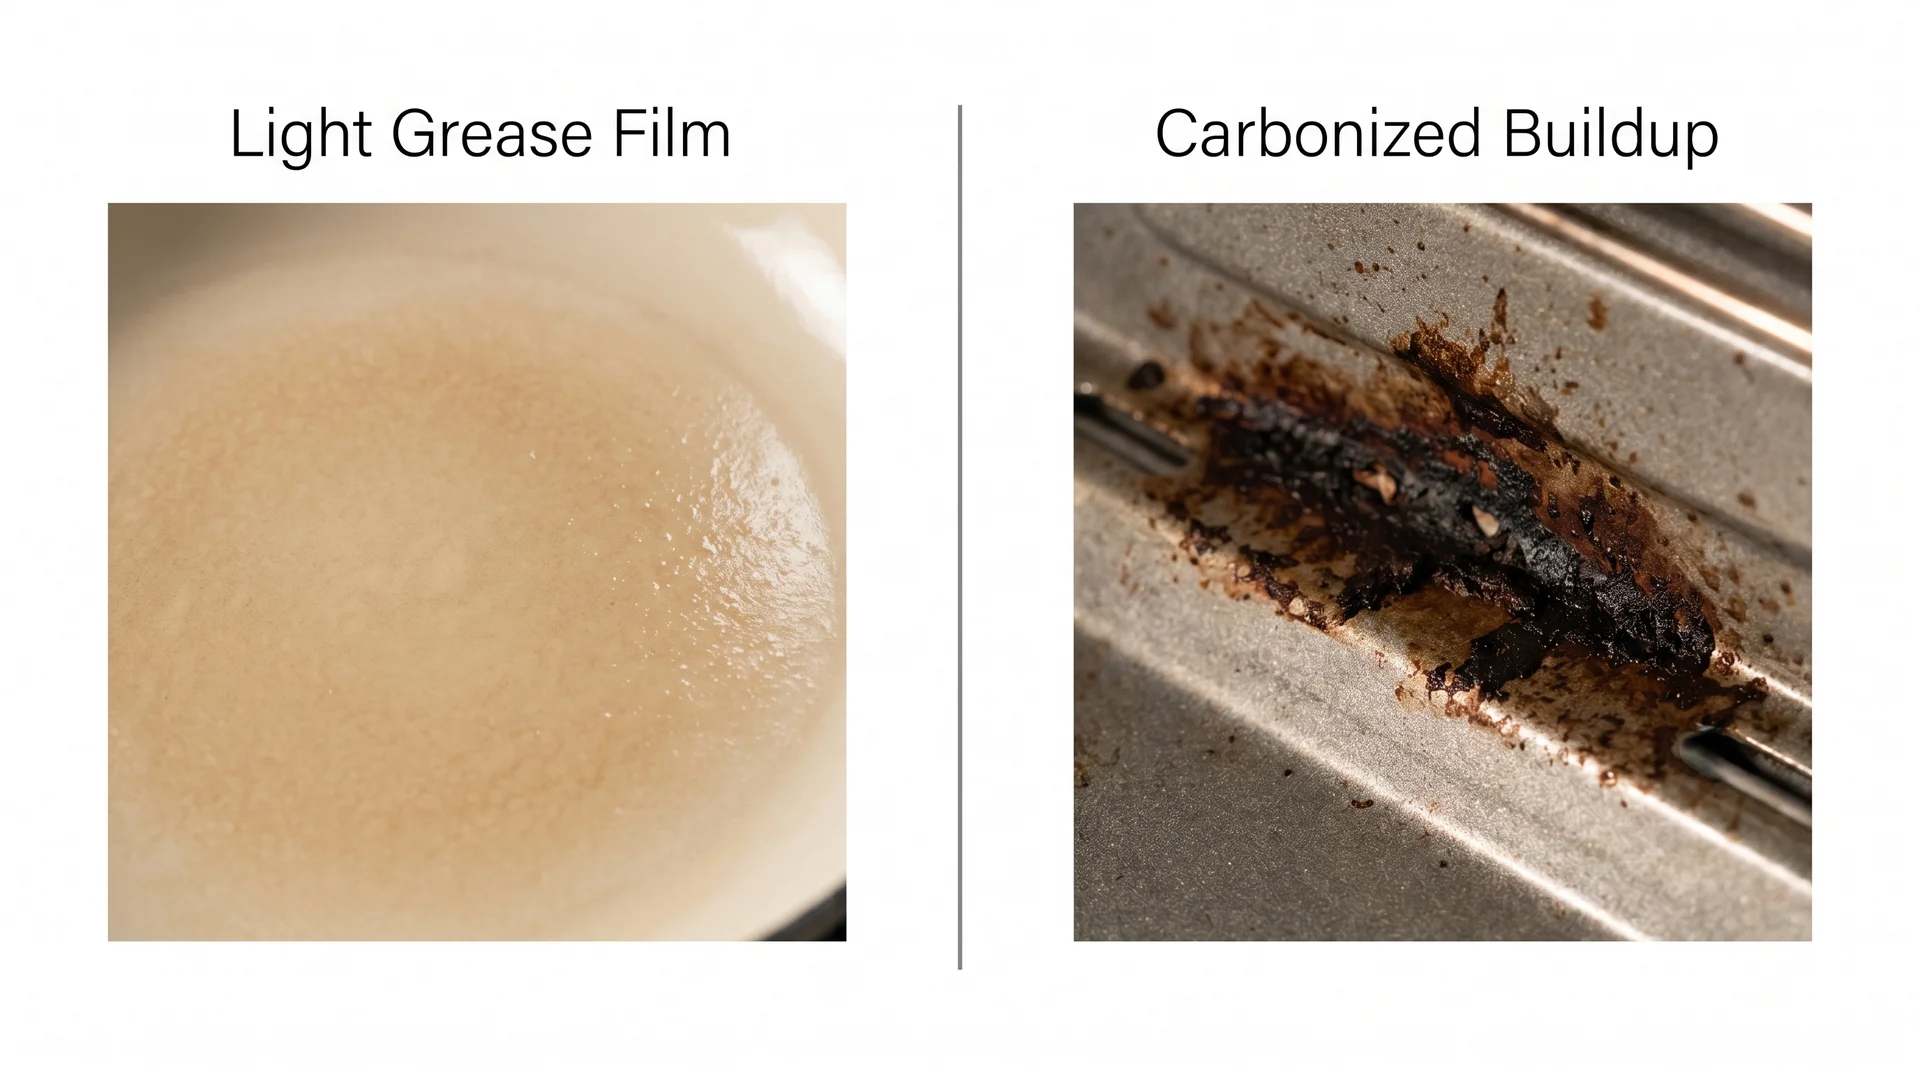
They work on light grease. They do not work on carbonized buildup.
Light grease film is fat deposited before it bonds permanently to the surface. Acetic acid disrupts the adhesive layer beneath it. Steam carries that acid as warm vapor and delivers it to every surface the moisture reaches.
Carbonized buildup is a different compound. When grease bakes at high temperatures repeatedly without cleaning, the fat breaks down into a hard, dark layer. That layer has a different chemistry than the grease it came from.
| Soil Type | What It Looks Like | What Caused It | What Works on It |
|---|---|---|---|
| Light grease film | Tan to brown, slightly sticky, wipes under pressure | Weeks of use without cleaning | Vinegar steam or spray |
| Carbonized buildup | Dark brown to black, hard, resists wiping | Months without cleaning | Baking soda paste, then vinegar rinse |
Most cleaning guides say vinegar is a powerful degreaser. What the chemistry actually shows is that 5% acetic acid disrupts adhesive bonds in fresh or lightly baked-on grease. It cannot break down fully carbonized cooking oil.
If the steam method has let you down before, that table explains why. The method is designed for one of those two problems and not the other.
How to Clean Your Oven With Vinegar Steam
The steam method works best on regularly cleaned ovens.
It generates acidic vapor that condenses on cooler oven surfaces. Use it consistently on light to moderate grease, and it performs reliably.
What You Need
Five items are enough. No special equipment needed.
Gather these before you start. Most are probably already in your kitchen:
- 1 cup distilled white vinegar (standard 5% concentration)
- Water, enough to partially fill the bowl
- An oven-safe bowl or baking dish, 2-quart capacity or larger
- Microfiber cloths or clean sponges
- Rubber gloves
Open a window or run the kitchen exhaust fan before you start. Acetic acid vapors from steam cleaning are pungent and should not be breathed in directly.
Use standard 5% distilled white vinegar for this method. Cleaning vinegar at 6% or higher offers no practical advantage on oven surfaces.
The Steam Method: Step by Step
The sequence matters as much as the ingredients.
The protocol runs in this order: prepare the surface, generate the steam, cool completely, then wipe. Skipping the cool-down step is the most common error.
It’s why people end up smearing loosened grease instead of removing it.
- Remove all oven racks and set them aside for separate cleaning.
- Wipe out any loose crumbs from the oven floor. Dry particles bake on further during the steam phase.
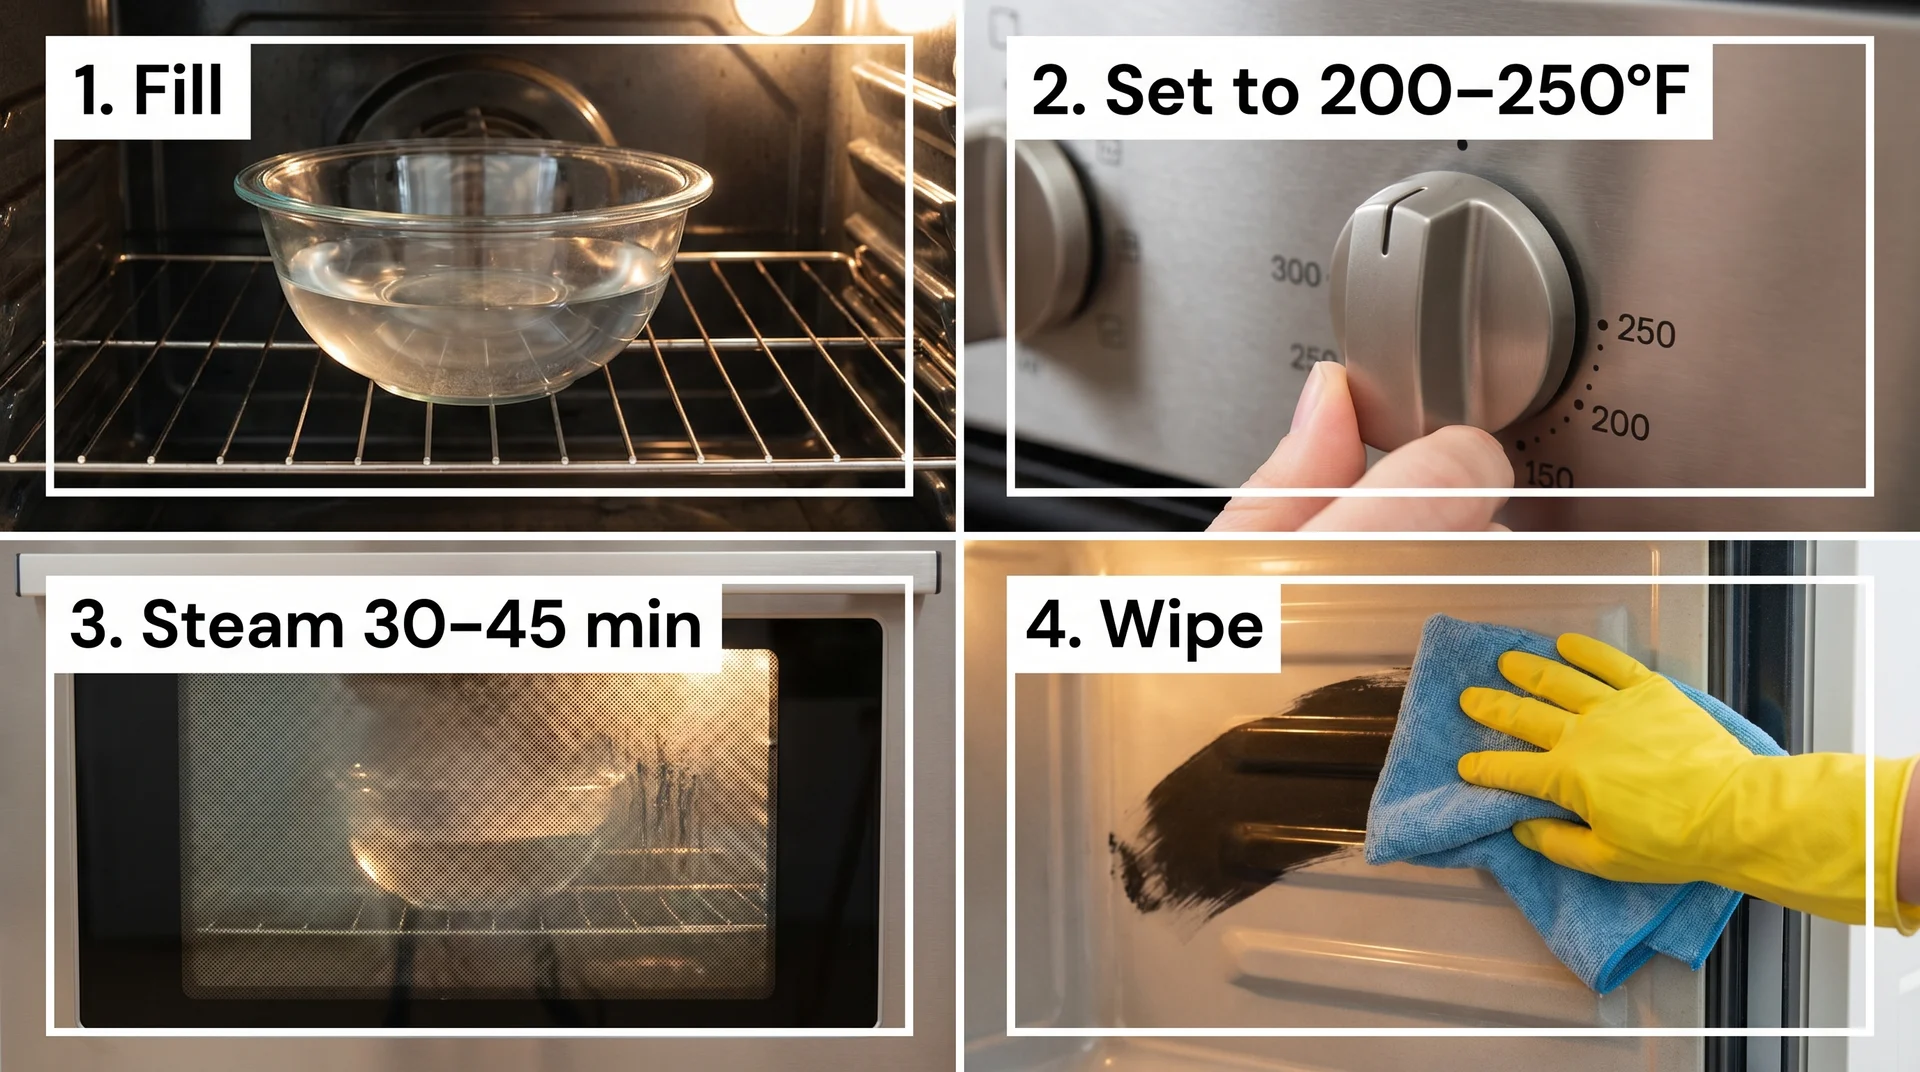
- Partially fill your oven-safe bowl with water and add 1 cup of distilled white vinegar.
- Place the bowl on the center rack. Set the oven to 200°F to 250°F. Heat for 30 to 45 minutes. That’s the contact time. The steam needs this full window to reach every surface.
- Turn off the oven. Keep the door fully closed. Let it cool for at least 30 minutes before opening. Open the door slowly; hot steam can escape quickly and cause burns.
- Wipe all interior surfaces with a microfiber cloth, working top to bottom. Rinse the cloth in clean water frequently.
- For any spots that didn’t release, apply vinegar from a spray bottle directly and wait two minutes before wiping again.
If you open the oven too soon, the loosened grease re-hardens on contact with air. Wipe for 30 minutes, and the surface won’t move. That’s the skip-this failure mode.
The Temperature Window
The most common recommendation is 450°F. At that temperature, the solution evaporates too fast. The steam phase ends before it can do sustained work on the interior surfaces.
The better range is 200°F to 250°F. At that temperature, the mixture generates steady steam for the full 30 to 45 minutes. The vapor stays in contact long enough to loosen the grease film.
Lower, sustained heat produces better condensation.
I’ve tested both ends of this range in my own kitchen, not in controlled conditions, and the results were consistent.
There is some variation by oven model. If yours runs hot, start at 200°F. If you see minimal steam at 25 minutes, nudge it up to 225°F.
How to Clean Oven Racks With Vinegar
Oven racks respond better to soaking than to steam.
The steam method doesn’t reach every rack surface evenly. Rack grease also tends to build up more heavily than the residue on the interior walls. Follow these steps in sequence:
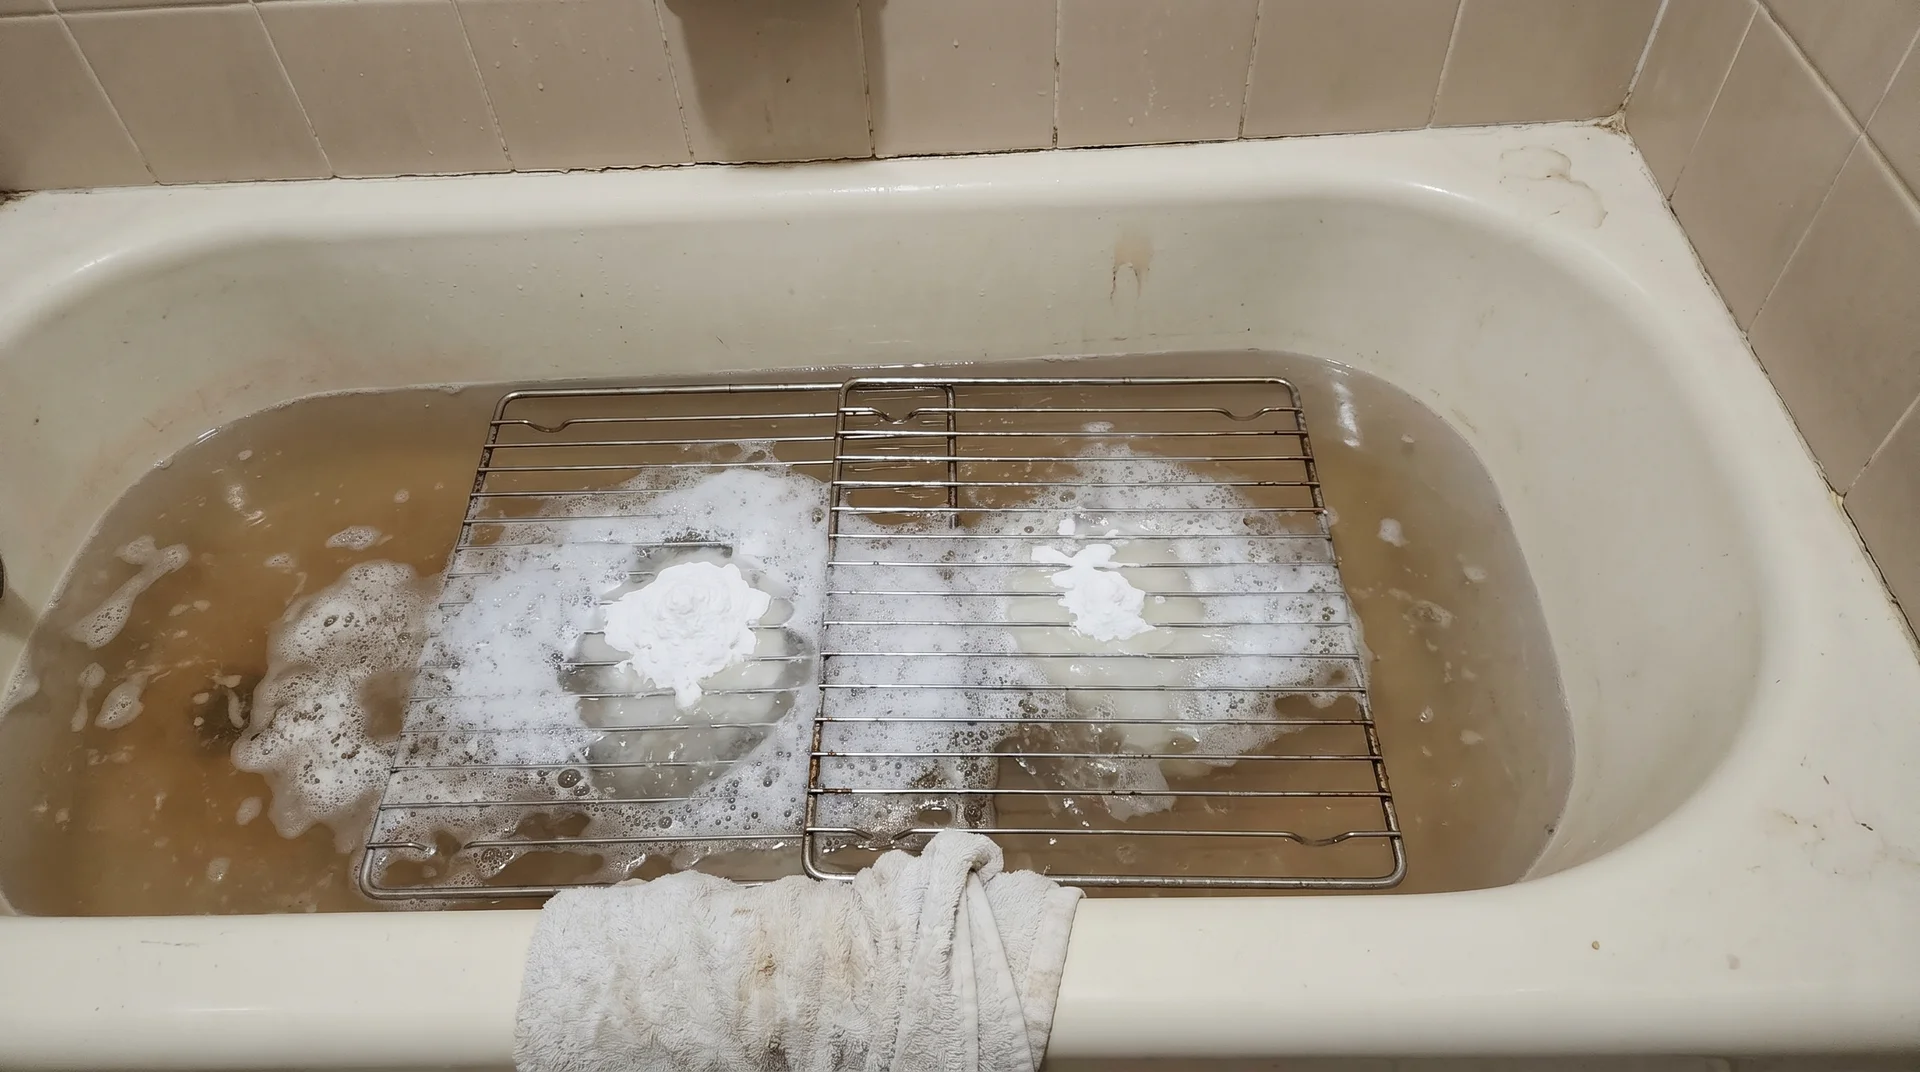
- Place the racks in a bathtub or large sink with a folded towel underneath to protect the surface.
- Spray the racks generously with distilled white vinegar. Let it sit for five minutes. That’s the contact time for loosening surface grease before the soak begins.
- Sprinkle baking soda over the vinegar-wet racks. You’ll get fizzing. At this stage, the CO₂ bubbles help lift already loosened deposits off the rack surface.
- Add enough hot water to fully submerge the racks. Soak for at least one hour. Overnight is genuinely better, not just a cautious suggestion. The difference on heavily soiled racks is visible and significant.
- Scrub with a non-scratch scrub brush or sponge. Rinse thoroughly. Dry before returning the racks to the oven.
Chrome-plated and stainless steel racks handle this method without issue. Uncoated aluminum dulls with prolonged acid exposure. Check your rack material in the oven manual before soaking.
Baking Soda and Vinegar: Why the Sequence Matters
The sequence matters more than the ingredients.
Baking soda and vinegar work well on stubborn grease. They stop working the moment you mix them together before applying.
Why Mixing Them Together Undermines Both
Combine them first, and the reaction happens in the bowl, not in your oven.
My father spent thirty years inspecting commercial kitchens for Baltimore City. He mixes baking soda and vinegar in a spray bottle and swears by the result. He is not entirely wrong.
He is also not entirely right.
Trace acidity and alkalinity survive the reaction. Some cleaning effect remains. But the most useful chemistry is already spent before the mixture touches the surface.
When acetic acid contacts sodium bicarbonate (the compound in baking soda), they react immediately. An acid meeting an alkali cancels both out, producing water, CO₂, and a salt. Both active agents are consumed before the mixture reaches the oven wall.
That is not how a cleaning protocol works.
Most guides describe the foam as a cleaning power. The fizzing is the confirmation that the useful chemistry is over.
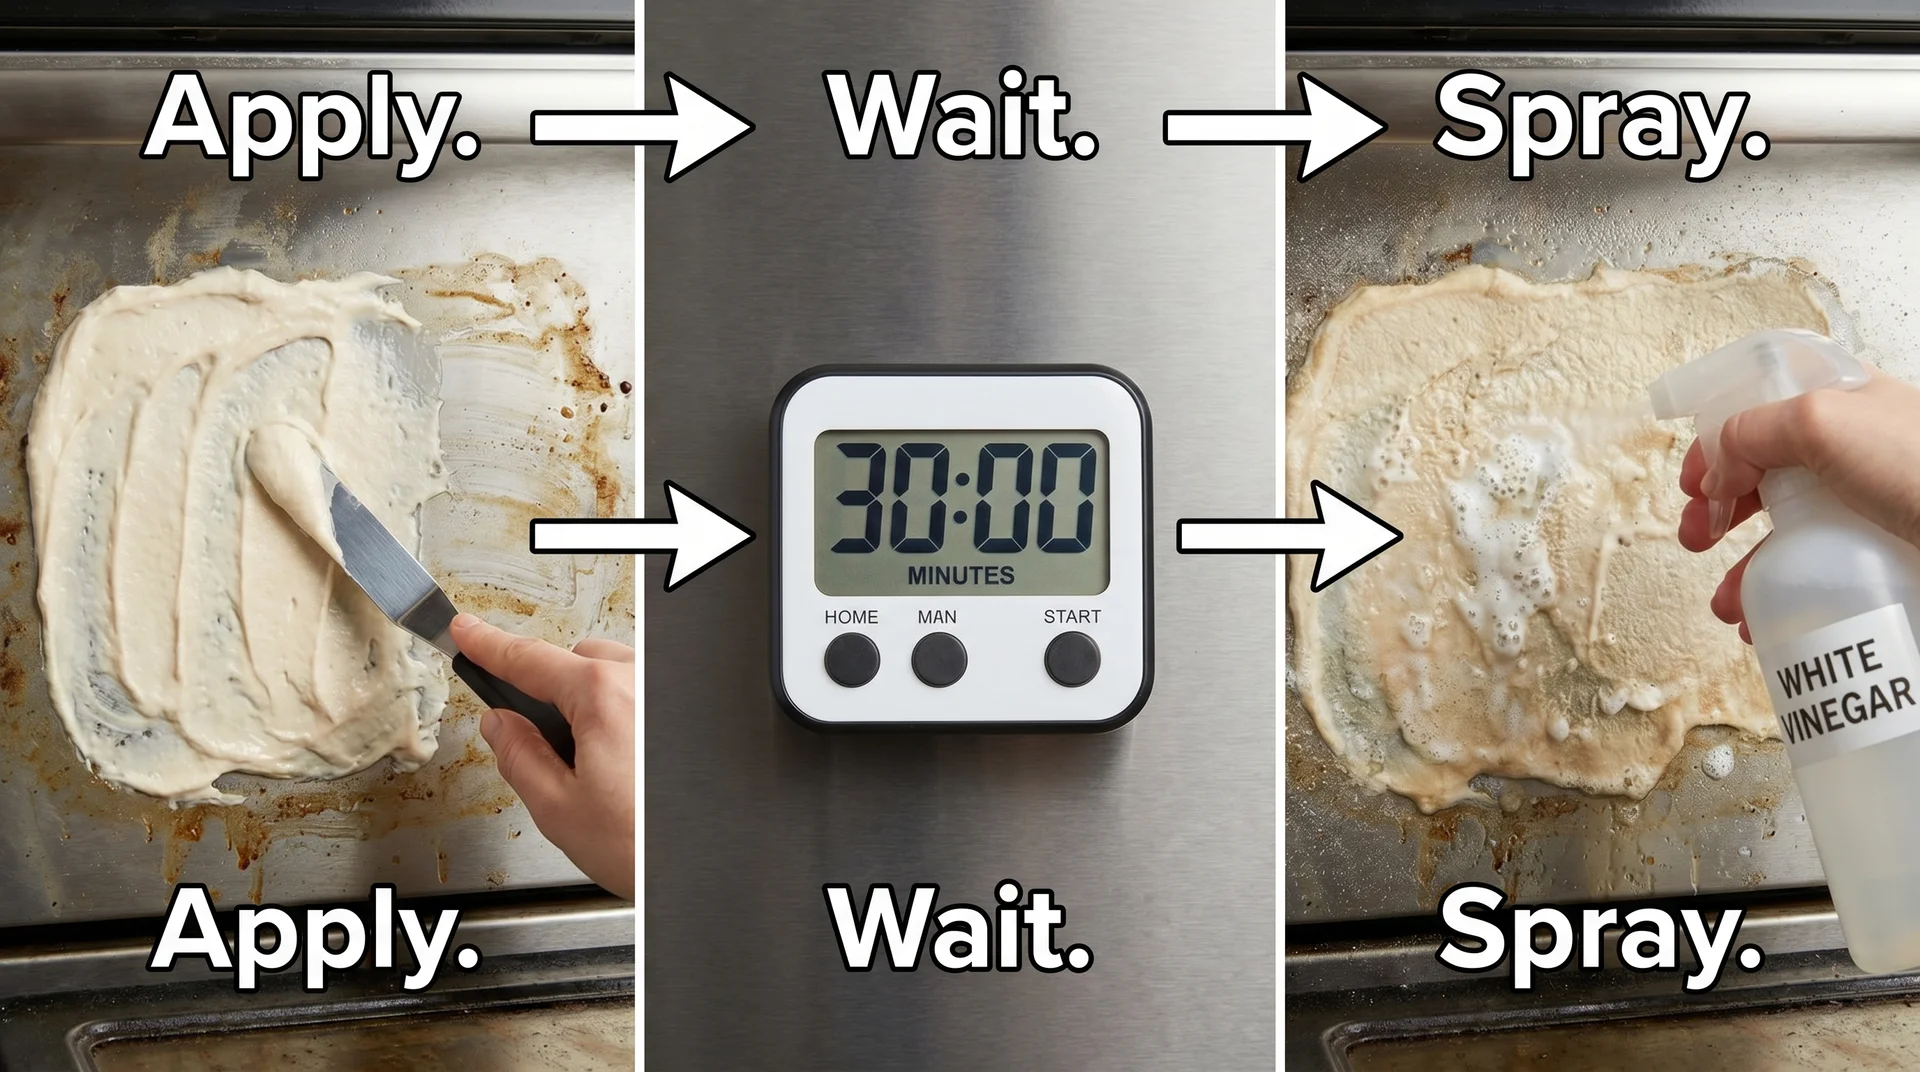
The Correct Sequence for Stubborn Grease
Apply the baking soda paste first and the vinegar second. Keep them separate until they’re both on the surface.
Any other order and the chemistry runs out before it reaches the grease.
- Mix baking soda with just enough water to form a thick, spreadable paste.
- Spread the paste over all soiled oven surfaces. Avoid heating elements and exposed wiring. Cover the floor, walls, and door interior.
- Close the oven and leave the paste for at least 30 minutes. For heavy buildup, leave it overnight. The baking soda is alkaline. It converts the fat into a soap-like substance that releases from the surface.
- Wipe out as much of the dried paste as possible with a damp cloth.
- Spray distilled white vinegar over any remaining paste residue. The fizzing at this stage is doing useful work. It lifts loosened baking soda residue from the surface. This is the rinse step. The baking soda paste handled the primary cleaning.
- Wipe clean with a damp microfiber cloth. Repeat until the surface is clear.
If you skip the baking soda on carbonized buildup, the acetic acid cannot break those bonds. Wipe for 30 minutes, and the surface won’t move. Know that before you start.
Cleaning the Oven Glass With Vinegar
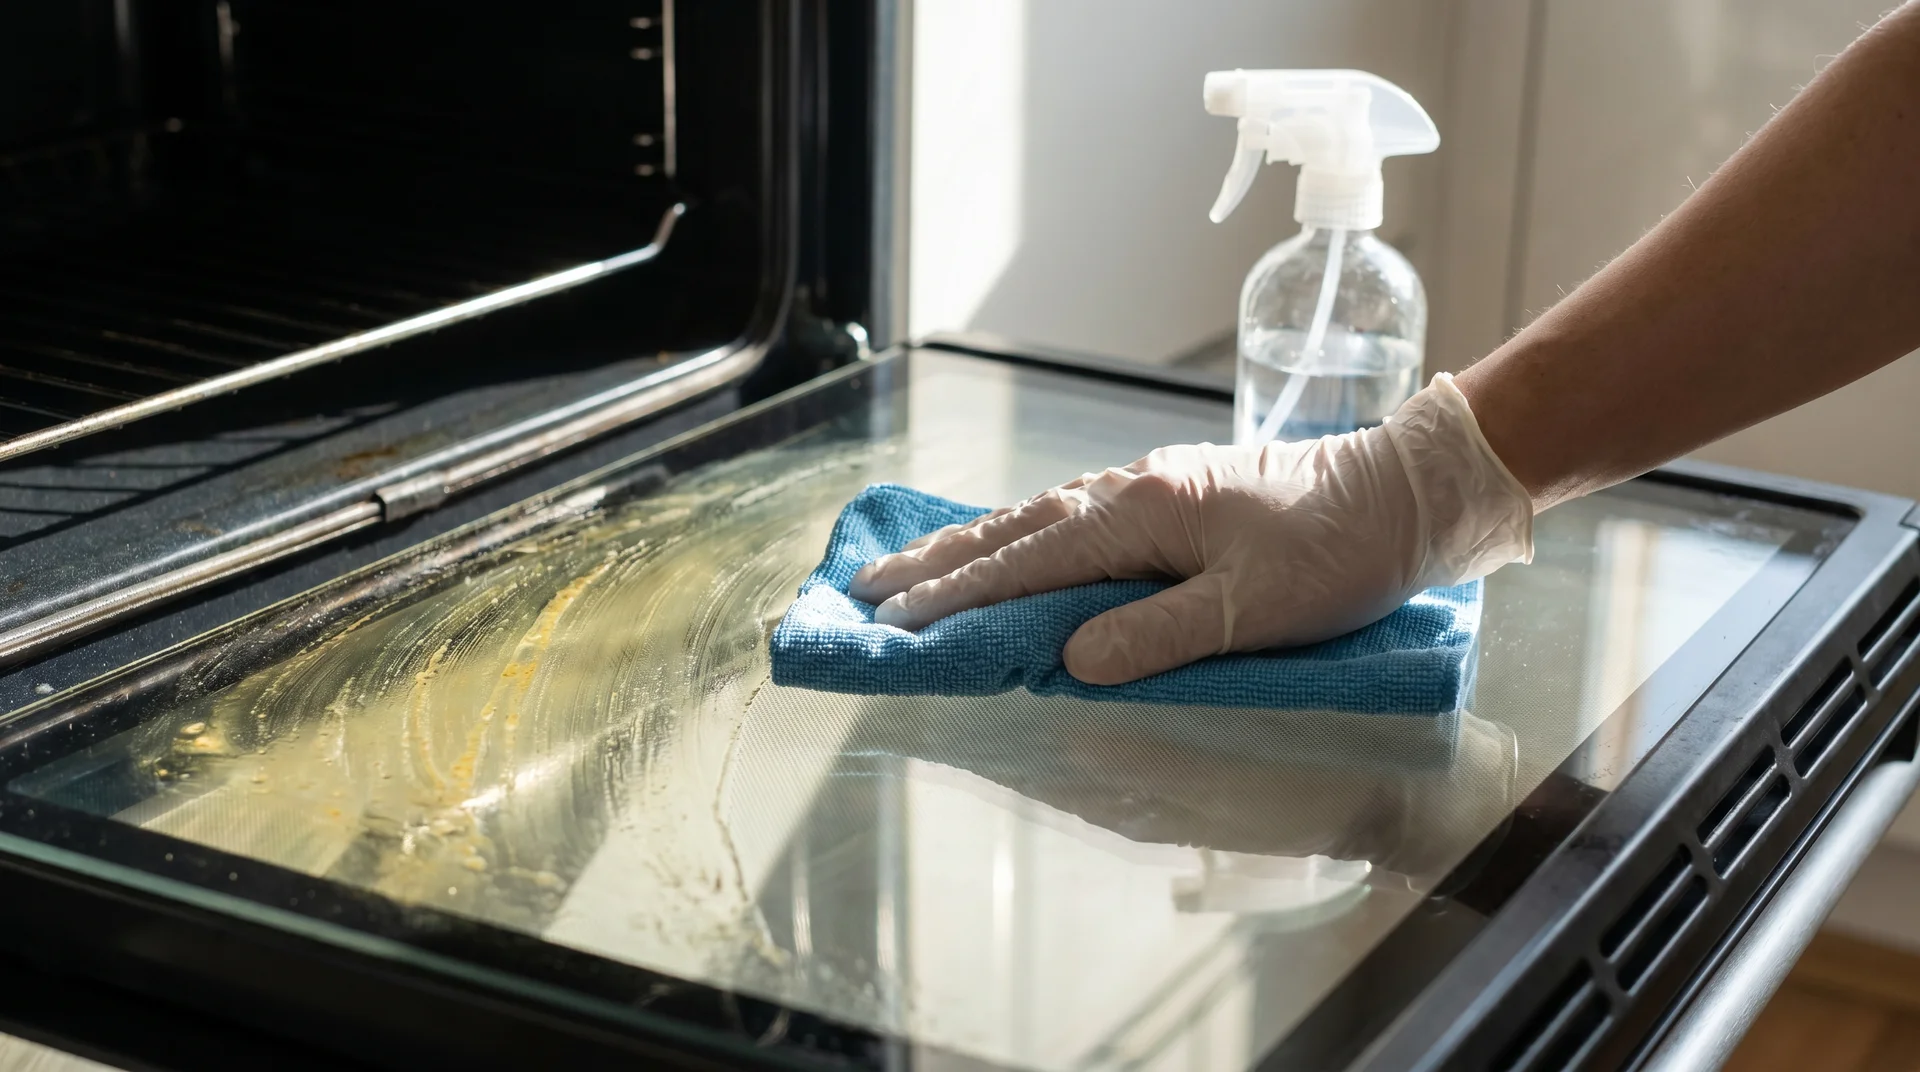
Vinegar is well-suited to oven glass.
The door glass collects vaporized grease and baked-on splatter that bonds to the smooth surface. Acetic acid loosens this film effectively. Glass also doesn’t carry the material sensitivity concerns that worn enamel occasionally does.
- Mix equal parts distilled white vinegar and water in a spray bottle.
- Spray directly onto the cooled glass.
- Let it sit for three to five minutes. Contact time applies here the same way it applies to the interior walls.
- Wipe with a microfiber cloth in straight strokes to reduce streaking.
Oven glass is the one surface where I don’t reach for baking soda. The spray method handles it reliably, even when the interior walls need the full sequence.
For heavier haze, warm the oven to its lowest setting for two minutes before spraying. The warm glass helps the vinegar penetrate baked-on splatter before you wipe.
The gap between the glass panes is a different problem.
If grime has built up there, you’ll need to take the door apart. That job varies by model and belongs in a different article.
Vinegar and Self-Cleaning Ovens
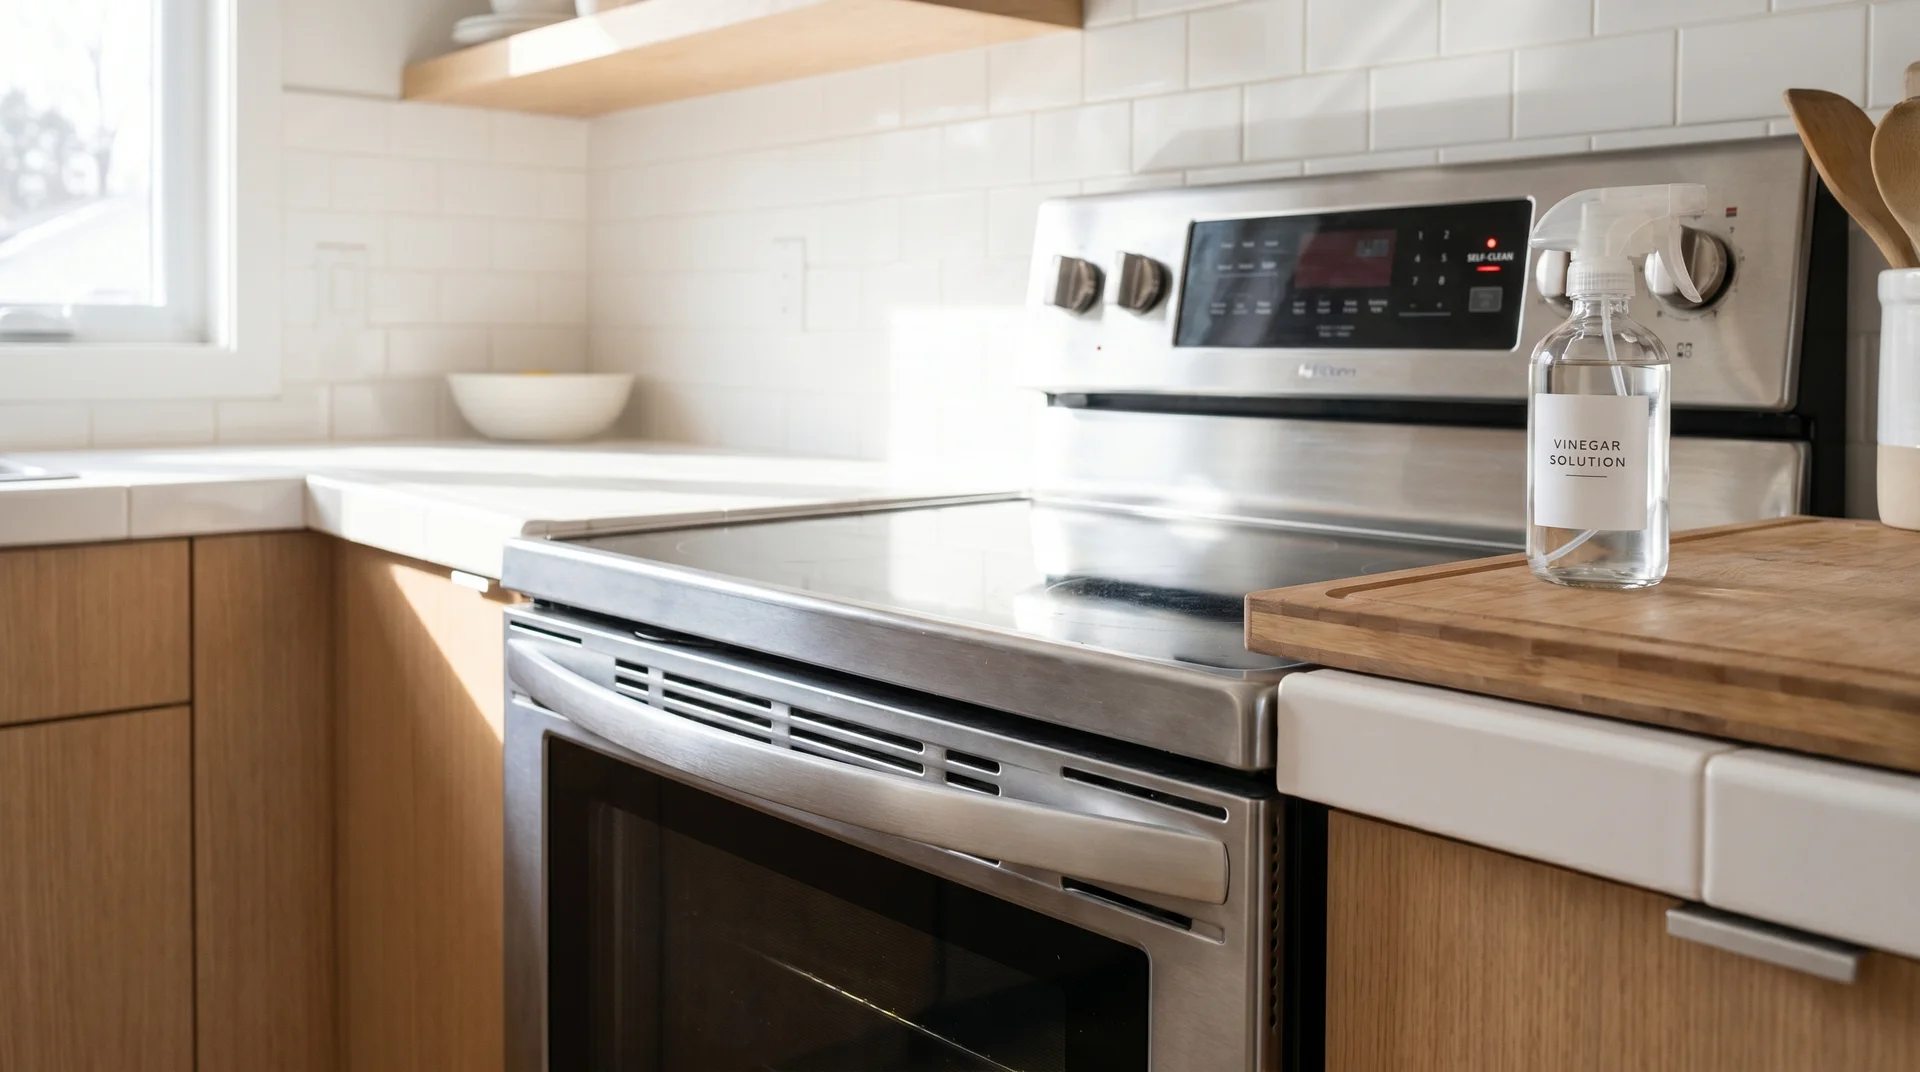
Using vinegar in a self-cleaning oven is generally safe with two conditions.
The self-cleaning label refers to the pyrolytic cycle, the high-heat incineration process that burns food residue to ash above 800°F. It does not describe a special surface coating. Most self-cleaning ovens use standard porcelain enamel interiors.
Most oven manuals don’t mention vinegar at all.
That absence is not an endorsement. What the surface data actually shows is that 5% acetic acid sits within the safe range for standard porcelain enamel. It is well below the concentration that causes etching.
Two conditions apply to all ovens:
- Do not allow liquid to pool near heating elements, wiring, or door gaskets. The steam method keeps the liquid in a bowl at the center of the oven, which handles this automatically.
- Wipe the interior dry after cleaning. Standing moisture near a rubber door gasket degrades the seal over time.
Older ovens with chipped or worn enamel are the one case where I’m genuinely uncertain. Exposed bare metal underneath damaged enamel can react with acetic acid over repeated exposure.
If your oven has visible chipping, do a spot test in an inconspicuous corner before applying the method broadly.
Getting Rid of the Vinegar Smell After Cleaning
The vinegar smell after cleaning is a real problem.
The standard answer is that it dissipates quickly. For the open oven cavity, that’s accurate enough. For acetic acid vapor absorbed by the door gasket or the insulation near the door frame, it isn’t accurate at all.
The same principle from the temperature section applies here.
Low, sustained heat drives off acidic vapors more effectively than passive airing. After wiping, close the oven and set it to 200°F with the door cracked for 10 to 15 minutes.
This drives residual acetic acid from the surfaces near the door frame.
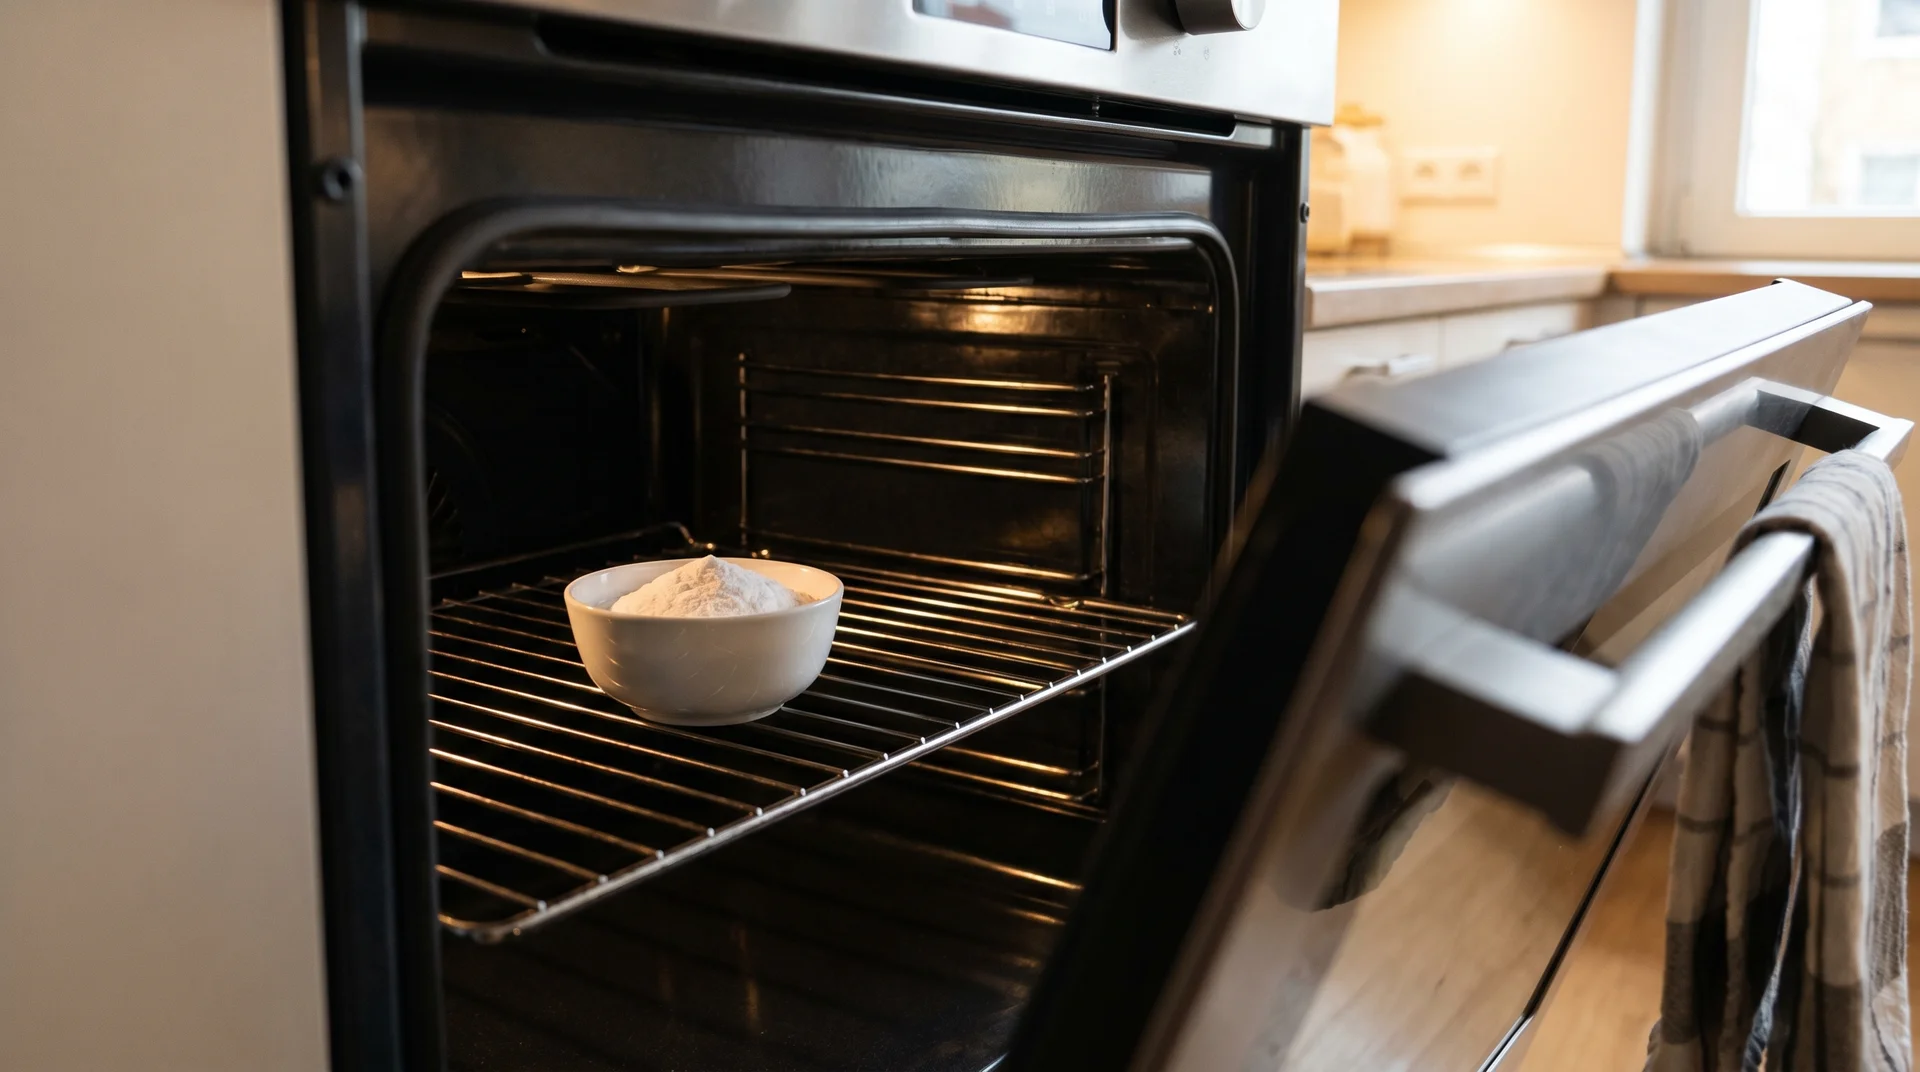
Wipe once more with a damp cloth after the oven cools. If the smell persists, place a small bowl of dry baking soda inside the cooled oven overnight. Remove it before using the oven again.
When Vinegar Won’t Be Enough
Vinegar doesn’t work on heavily carbonized buildup.
If your oven hasn’t been cleaned in six months or more, the buildup may be carbonized. The steam method will loosen surface grime in that case. It will leave the hard crust exactly where it was.
Even overnight baking soda paste has limits against the buildup accumulated over the years. At some point, a different tool is needed.
At that point, a commercial oven cleaner is the right choice.
Which product, what contact time, and which surfaces it’s safe on: that’s a different article with different criteria. Don’t spend three hours on a vinegar method for a job that a commercial cleaner handles in 30 minutes.
How Often to Clean Your Oven With Vinegar
![]()
Clean more often than most guides suggest.
Standard guidance recommends every one to three months. That assumes you’re wiping up spills as they happen.
I keep a whiteboard in my kitchen that tracks what surfaces were cleaned and when. The oven has the longest gap on that board, consistently.
A vinegar steam clean every four to six weeks is the right interval for a regularly used oven.
Below the carbonization threshold, the steam method takes about 45 minutes of mostly passive time. Above it, you’re doing a restoration that takes several hours.
The American Red Cross reports that cooking is the leading cause of home fires in the United States. Accumulated oven grease is a direct contributor to that number.
The sequence is the only part that matters. Steam loosens fresh grease that hasn’t carbonized. Baking soda paste lifts heavier deposits when left in contact long enough.
Apply both in order, and each compound does its full job on the oven surface.
Use the steam method every four to six weeks. You’ll rarely need the baking soda sequence. That frequency is the strategy.