You press the power button. Nothing happens.
No light, no beep, no fan sound. The unit is completely dead.
Before you assume it’s broken beyond saving, here is what’s true. The vast majority of air fryers that won’t turn on have a simple, fixable cause. These appliances are built with safety systems that automatically cut power when a trip occurs, and most of the time, you can reset the trip without any tools.
The short answer: a tripped outlet, an unseated basket, or thermal protection activating after overheating covers most cases. All three are free to fix. This guide works through all eight causes in the order you should try them.
Post-warranty professional repair and brand service centres are outside the scope of this article. That’s a different article, and it needs different criteria.
First: Is Your Air Fryer Completely Dead or Partially On?
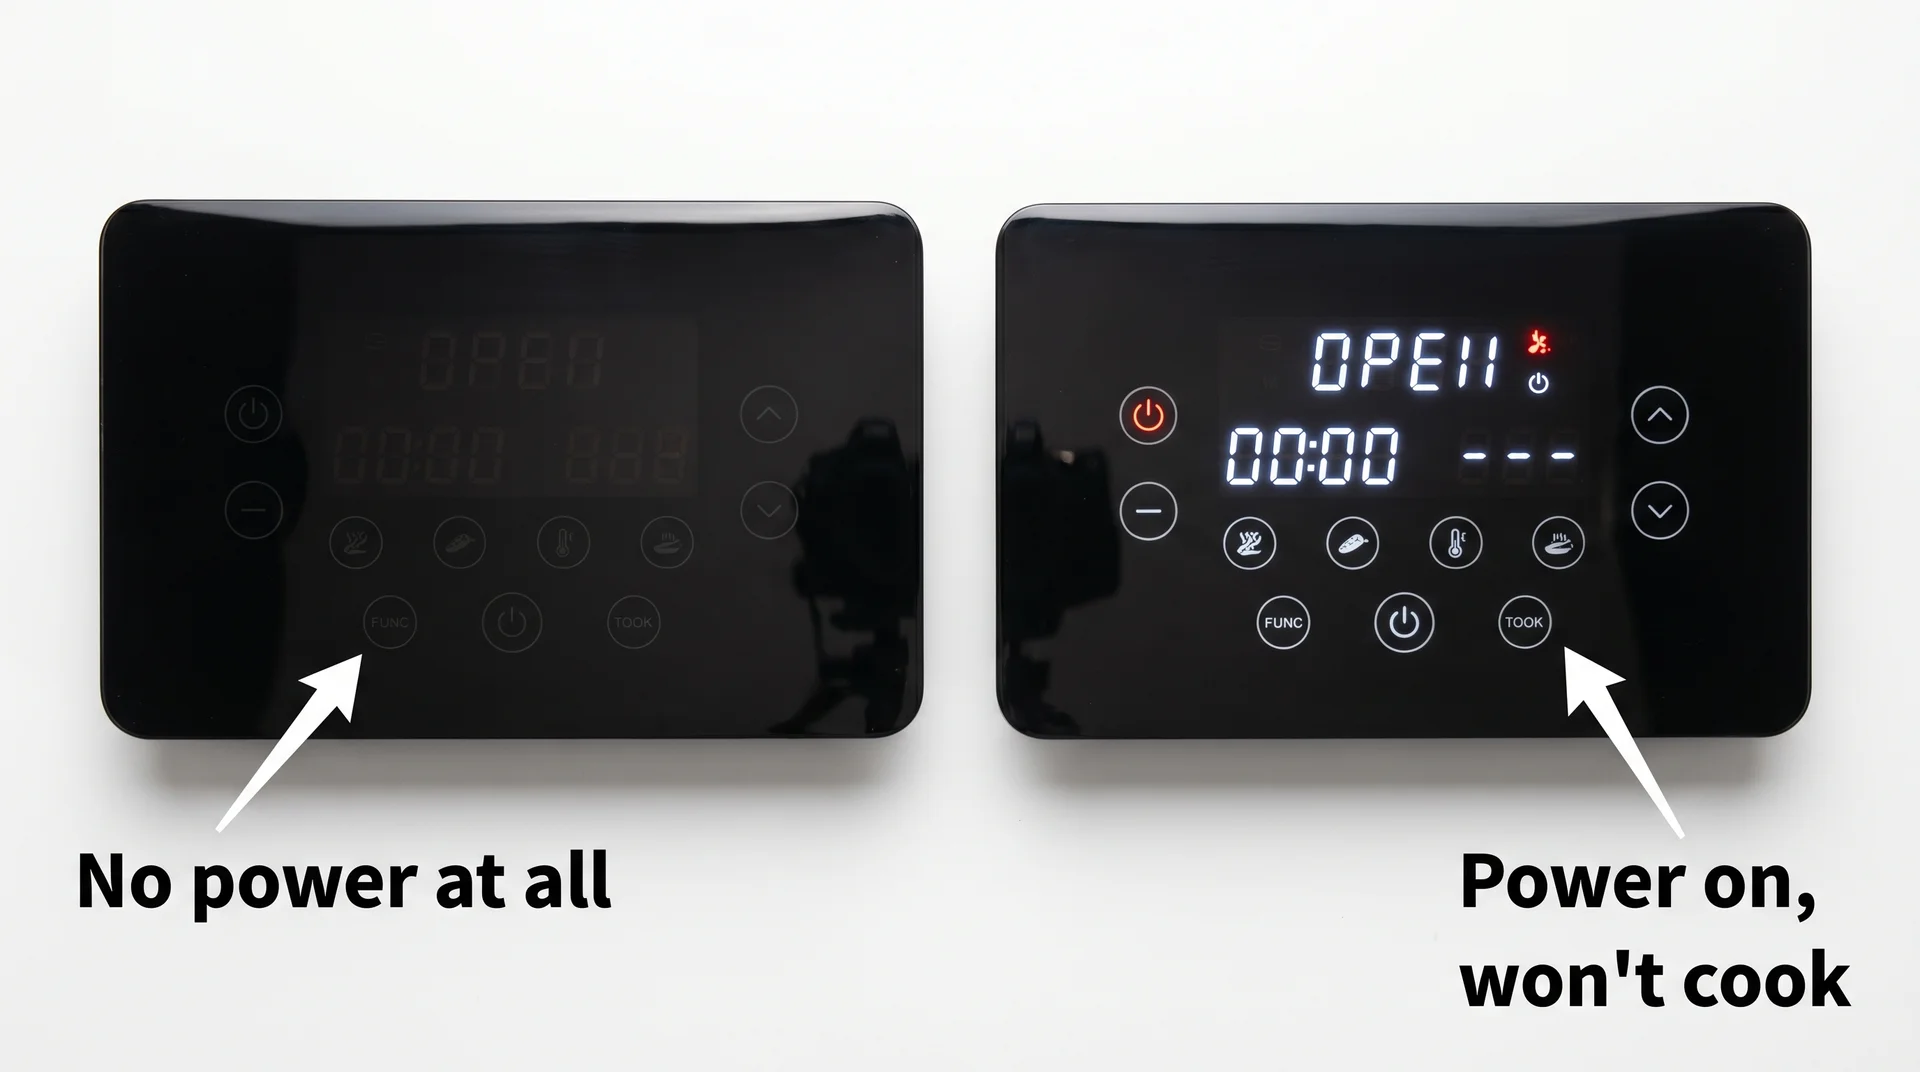
That distinction changes everything about where you start.
A unit with no display, no light, and no fan sound is a different problem from one that shows power but won’t cook. Each point to a different set of causes. Use this table before going any further.
| What You Observe | Most Likely Cause | Start Here |
|---|---|---|
| No display, no light, no fan | Power supply or basket switch | Fix #1, #2, #3 |
| The display lights up, but won’t start cooking | Basket misalignment or settings not set | Fix #3, #8 |
| Worked fine, then died mid-cook | Thermal overload or blown fuse | Fix #4, #5 |
| Died after a long cooking session | Overheating safety lockout | Fix #4 |
| Error code on display | Model-specific fault | Fix #8 |
| Works sometimes, not others | Loose connection or failing control board | Fix #6, #7 |
Reasons Your Air Fryer Won’t Turn On & How to Fix Them?
Fix 1: Check the Power Outlet
Start here before touching anything else on the unit.
Air fryers draw between 1,200 and 1,800 watts. That is a substantial load. Outlets that are partially tripped, weakened, or on an overloaded circuit often can’t deliver it.
Plug a lamp or phone charger into the same outlet. If that device also fails, the outlet is the problem, not the air fryer.
Check your electrical panel for a tripped breaker. A tripped breaker sits halfway between ON and OFF. Flip it fully OFF, then back ON to reset.
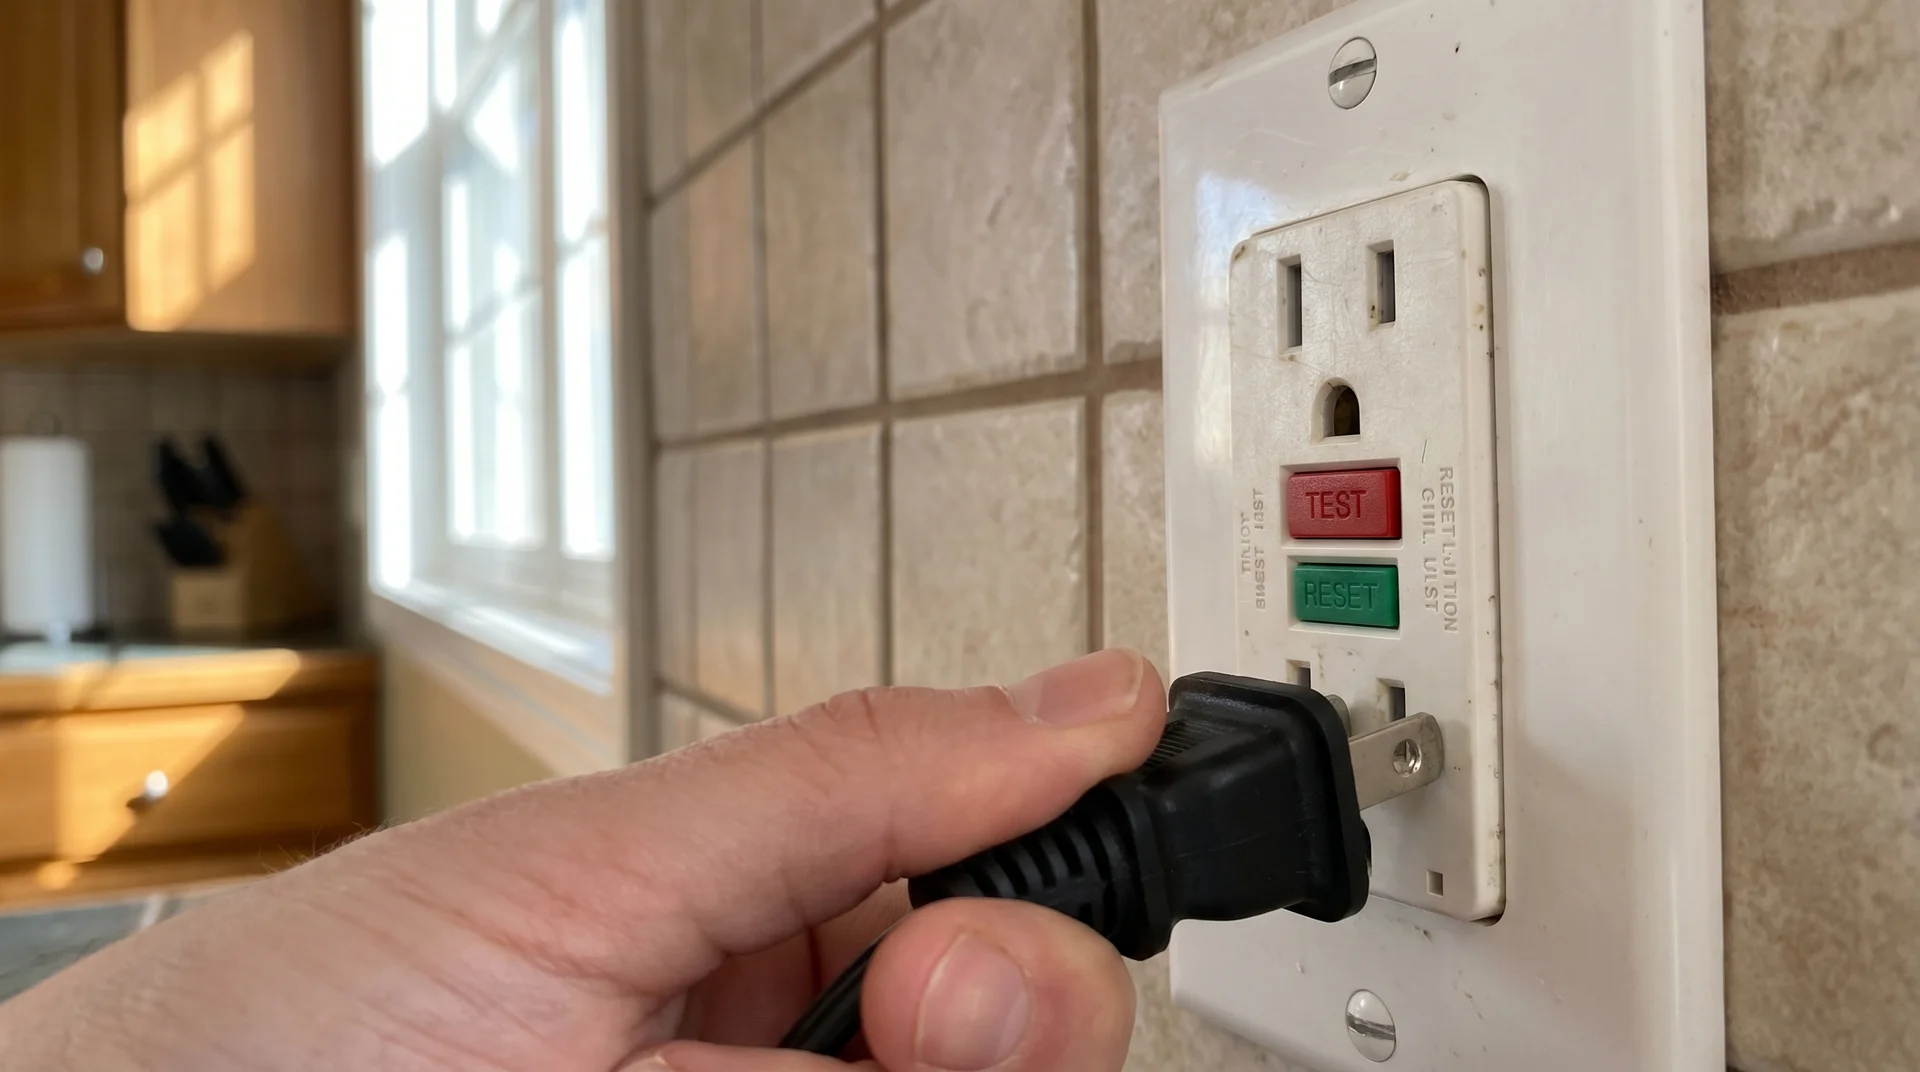
If the outlet has TEST and RESET buttons, it’s a GFCI outlet. These are standard in kitchens. A tripped GFCI cuts all power to the outlet without affecting the main panel. Press RESET and try again.
Never plug an air fryer into an extension cord or power strip. Most extension cords are not rated for this wattage. The result is either a tripped breaker or a fire hazard.
Fix 2: Inspect the Power Cord
Cord damage is underreported as a cause. It isn’t dramatic, and it hides easily behind cabinetry.
Unplug the air fryer before handling the cord. Run your hand along the full length of it. Look and feel for fraying, kinks, or pinch points near the plug and where the cord enters the unit. A cord that feels warm immediately after plugging in is a warning sign, not a coincidence.
If the cord is detachable, you can replace it for around $10 to $15. Some newer models use a removable cord similar to a kettle lead.
If the cord is hardwired and visibly damaged, stop using the air fryer. Contact a qualified technician. Don’t splice or tape a hardwired cord. It’s unsafe and rarely worth the cost on a budget unit.
Fix 3: Reseat the Basket and Close the Drawer Fully
This is the fix most people walk right past.
The default assumption is that a dead air fryer has an electrical problem. That assumption costs people time. Nearly every air fryer on the market has a magnetic or mechanical safety interlock.
That’s a small sensor or switch that cuts all power when the basket isn’t fully inserted. It exists to stop the heating element from running with the basket out.
Even a few millimetres of misalignment is enough to trip it.
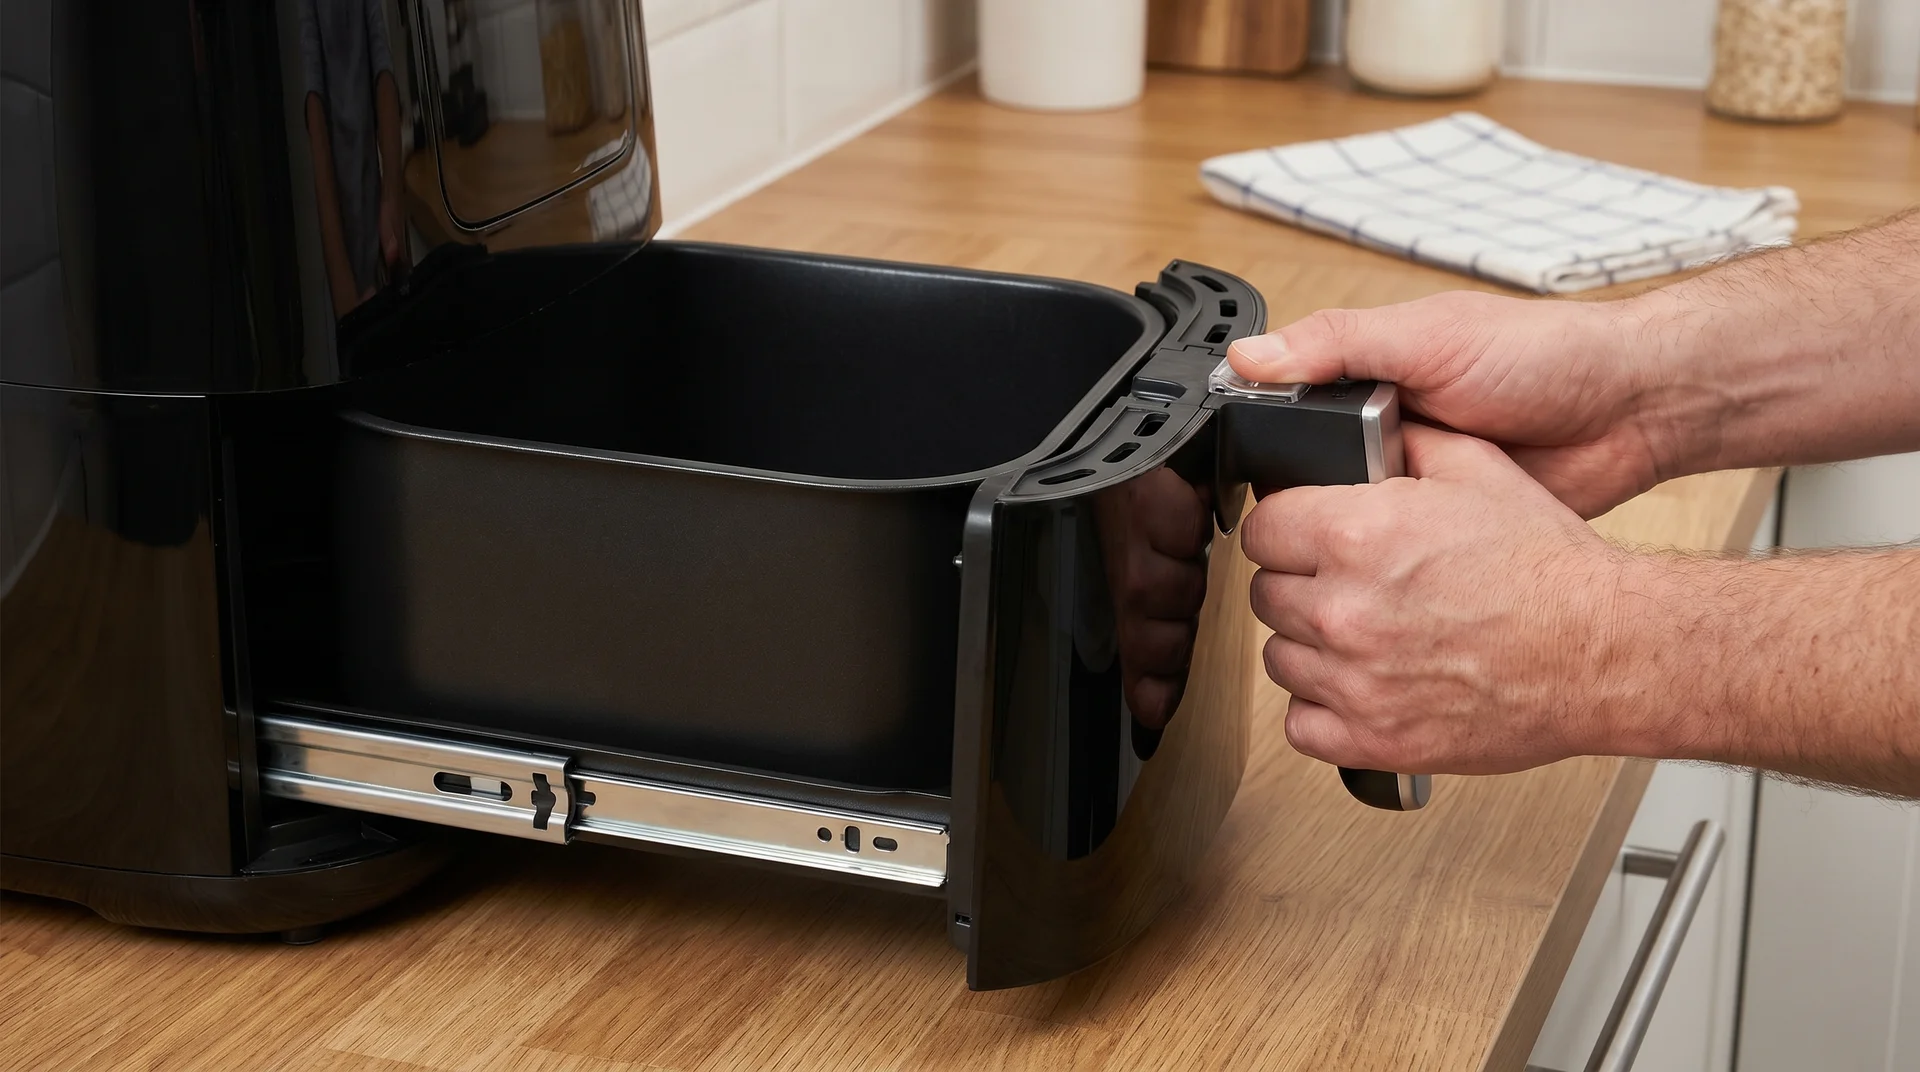
- Pull the basket completely out, not partway
- Inspect the basket tracks and drawer opening for crumbs, grease, or debris
- Wipe the tracks clean with a dry cloth if needed
- Slide the basket firmly back in until you hear or feel it click
- Apply light pressure to confirm it’s fully seated, but don’t force it
On oven-style units with a door instead of a drawer, the same logic applies to the door latch. Open it fully, close it firmly, and try again.
Gummed-up basket tracks are the most common reason this fix fails on the first attempt. Clean them thoroughly and try again before moving to Fix #4.
Fix 4: Let It Cool Down
If the unit died mid-cook, this is almost certainly why.
Air fryers run hard and fast, but the components have strict thermal limits. When the internal temperature climbs too high, the unit shuts down entirely to prevent damage or fire.
The three most common triggers are blocked vents, an overpacked basket, and back-to-back cooking sessions without a rest.
This is designed-in behaviour, not a fault. It is also the cheapest problem on this list.
- Unplug the air fryer completely, not just switch it off
- Move it to a well-ventilated spot, away from walls and cabinets
- Wait 20 to 30 minutes at minimum, or up to 60 minutes after a long session
- Plug back in and try again
To prevent a repeat, keep these three habits in place:
- Leave at least five inches of clearance on all sides of the unit
- Avoid more than two or three consecutive cooking cycles without a ten-minute rest
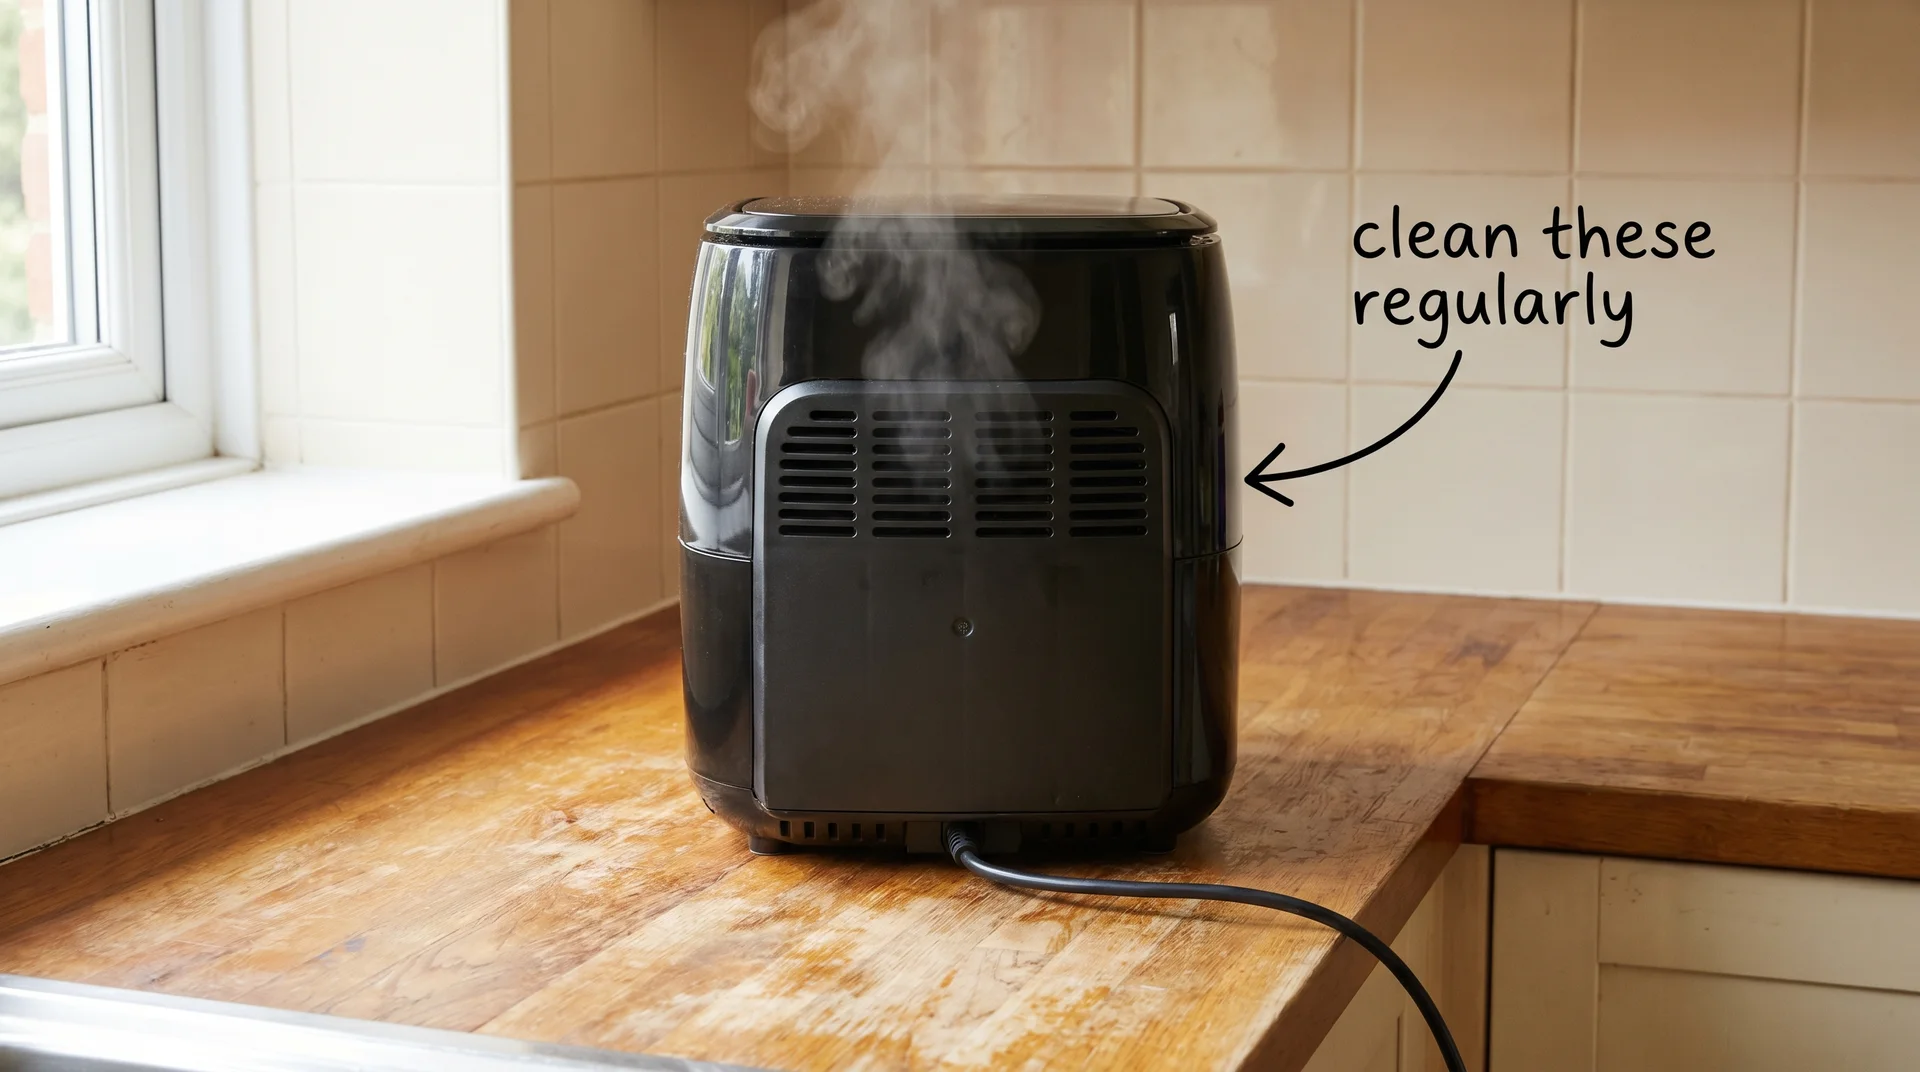
- Clean the air vents regularly – usually on the back or underside of the unit. Blocked vents are the single most common cause of repeat shutdowns.
If the unit shuts down from overheating repeatedly over a short period, the vents may be blocked internally by grease buildup. The internal fan may also be failing. Both are harder to address without opening the unit.
Fix 5: Blown Thermal Fuse
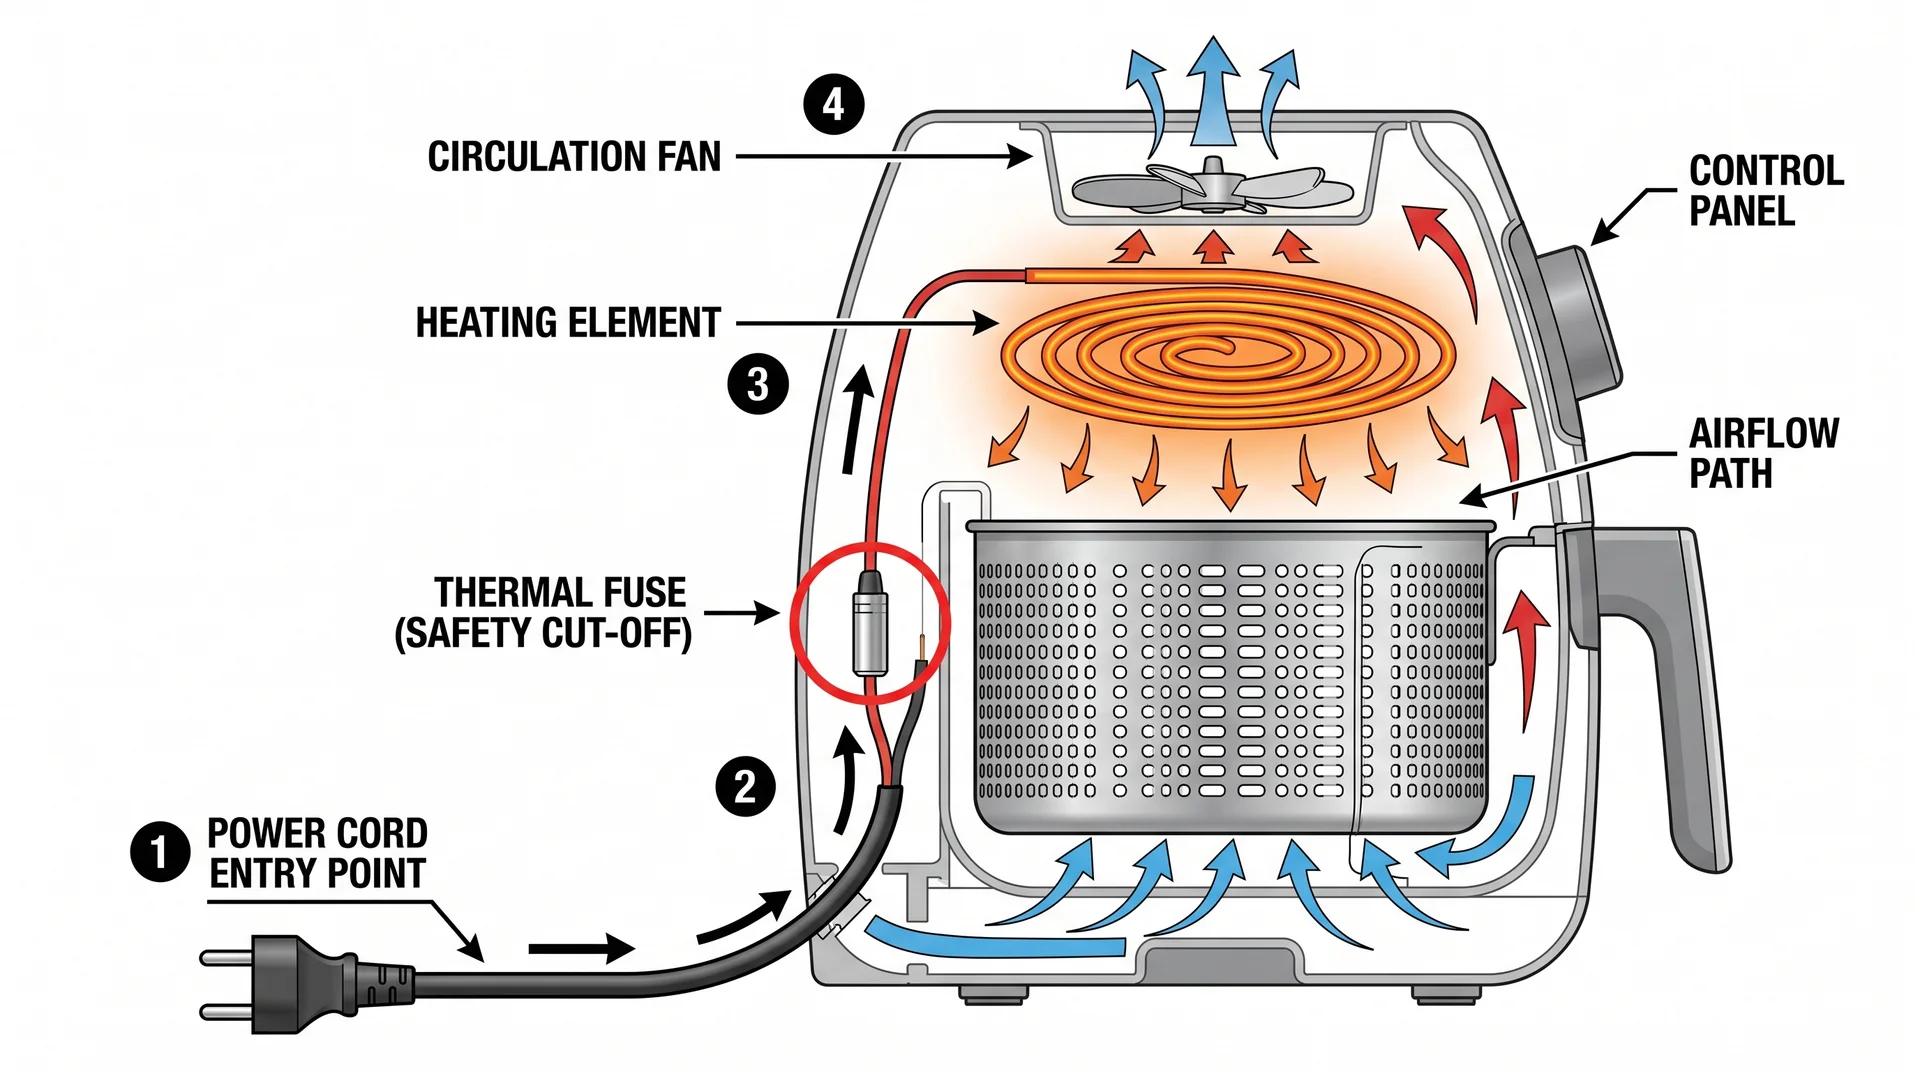
If you’ve been through Fix #4 and the unit is still completely dead, this is the next place to look.
The thermal fuse is a one-time safety component wired directly into the power circuit. When the air fryer exceeds its maximum rated temperature, the fuse element melts and breaks the circuit permanently.
Unlike the thermal overload protection in Fix #4, a blown fuse doesn’t reset. The unit shows no signs of power until the fuse is physically replaced.
Signs the fuse is blown:
- Completely unresponsive – no light, no display, no fan
- The unit ran recently at very high heat or with an empty basket
- A power surge or voltage spike happened just before it died
Replacing the fuse is a medium-difficulty repair. It means disassembling the unit, locating the fuse near the heating element or cord entry point, testing it with a multimeter for continuity, and swapping in an exact match.
One honest limit here: fuse placement varies significantly across brands and models. On some units, it’s accessible after removing the bottom plate. On others, I’ve seen it buried in a way that requires near-complete disassembly. A model-specific teardown video is the most useful preparation before you start.
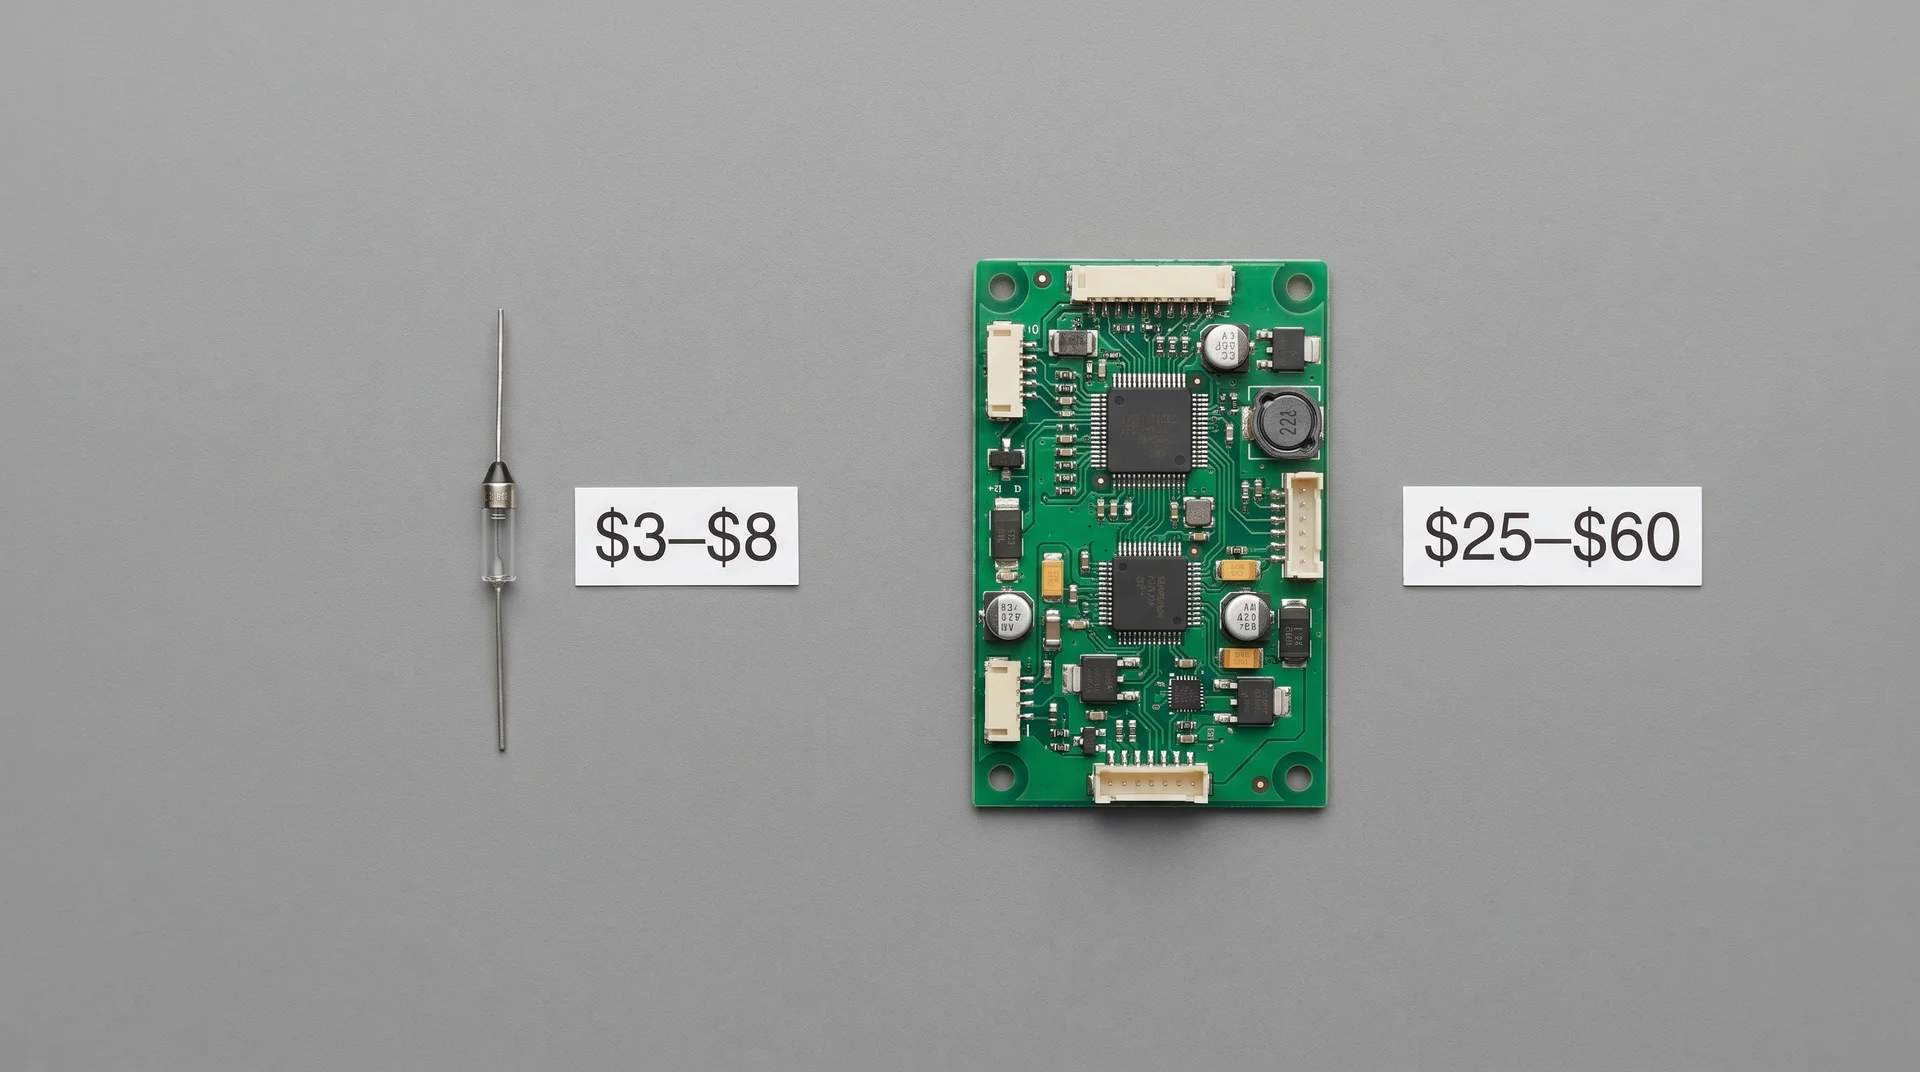
Fuses cost $3 to $8. That’s a sensible repair on a unit worth $100 or more. But replacing the fuse without addressing why it blew means the replacement will blow again.
The root cause, like usually blocked vents or a failing fan, comes first.
A blown fuse on a unit under two years old usually points to a ventilation problem, not a defective part. That distinction matters before you spend anything.
If the unit is still under warranty, contact the manufacturer before opening anything. Disassembly voids most warranties.
Fix 6: Faulty or Stuck Power Button
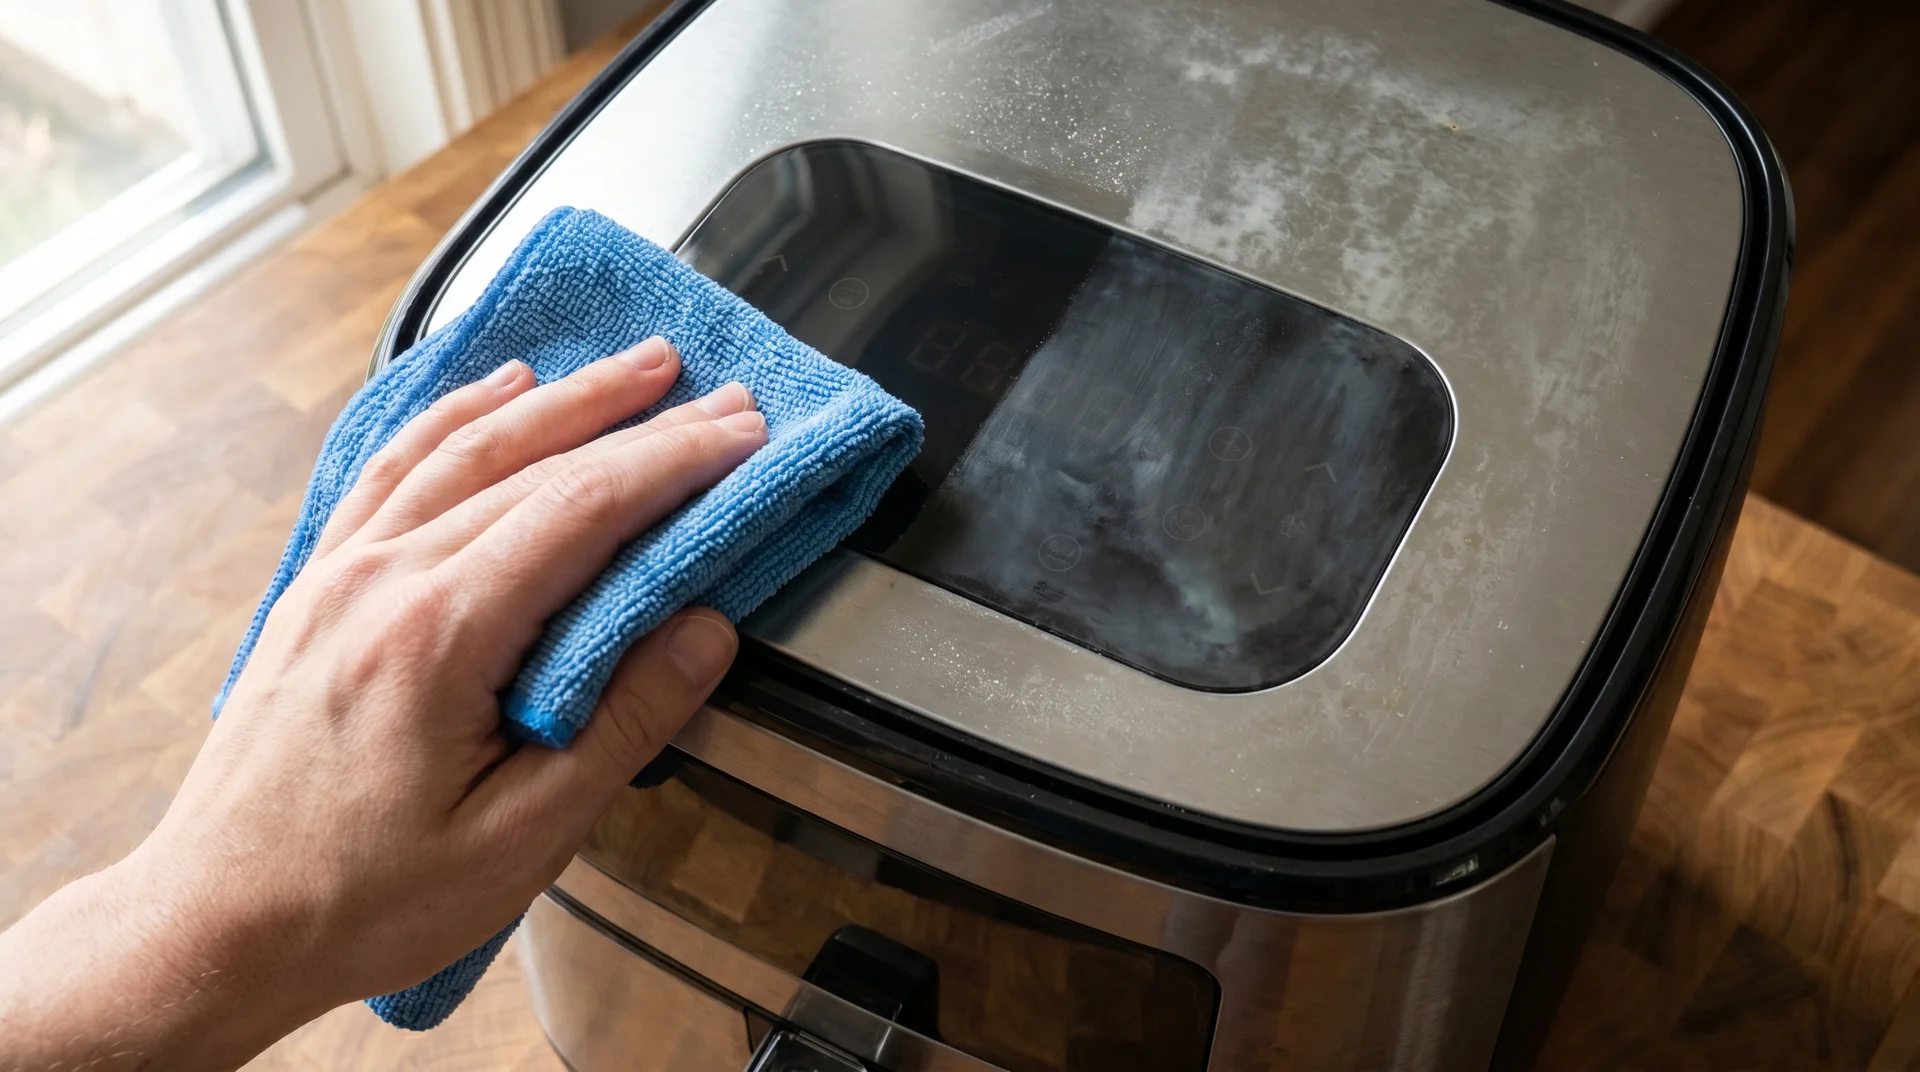
The power button is more vulnerable than it looks.
Moisture from steam, grease films, and daily wear can stop touchscreen buttons from registering presses. Mechanical buttons can get physically stuck in a depressed position.
- Unplug the unit before cleaning
- Dampen a microfibre cloth with a 50/50 mix of water and white vinegar
- Wipe the control panel gently and don’t spray liquid directly onto it
- Let it dry completely, at least 30 minutes
- Plug back in and test
On mechanical push-button models, press the button firmly several times in quick succession. A stuck button can sometimes free itself that way.
If the button still doesn’t register, the issue is internal. At that point, compare the repair cost to the unit’s age and value before spending anything. The repair cost table below has the numbers you need.
Fix 7: Faulty Control Board
The control board is the most expensive diagnosis on this list.
By the time you reach Fix #7, you have already ruled out the fuse in Fix #5. That matters because a failed control board looks identical to a blown fuse from the outside, completely unresponsive to every input, no display, nothing. The only way to separate them is to confirm the fuse is intact first.
I walked through this sequence with a client last year on a Cosori unit. Ruling out the fuse before ordering a board saved her $45 in parts she didn’t need.
Common causes of control board failure:
- A power surge or voltage spike
- Moisture intrusion from steam or over-wet cleaning
- Component wear in units over three to four years old
Boards for common models, including the Ninja, Cosori, and Instant Vortex, typically cost $25 to $60 in parts.
Professional labour adds $50 to $100 on top of that.
On a unit that costs $50 to $80, this repair rarely makes financial sense. On a premium unit at $150 or more, it usually does. The table below breaks it out clearly.
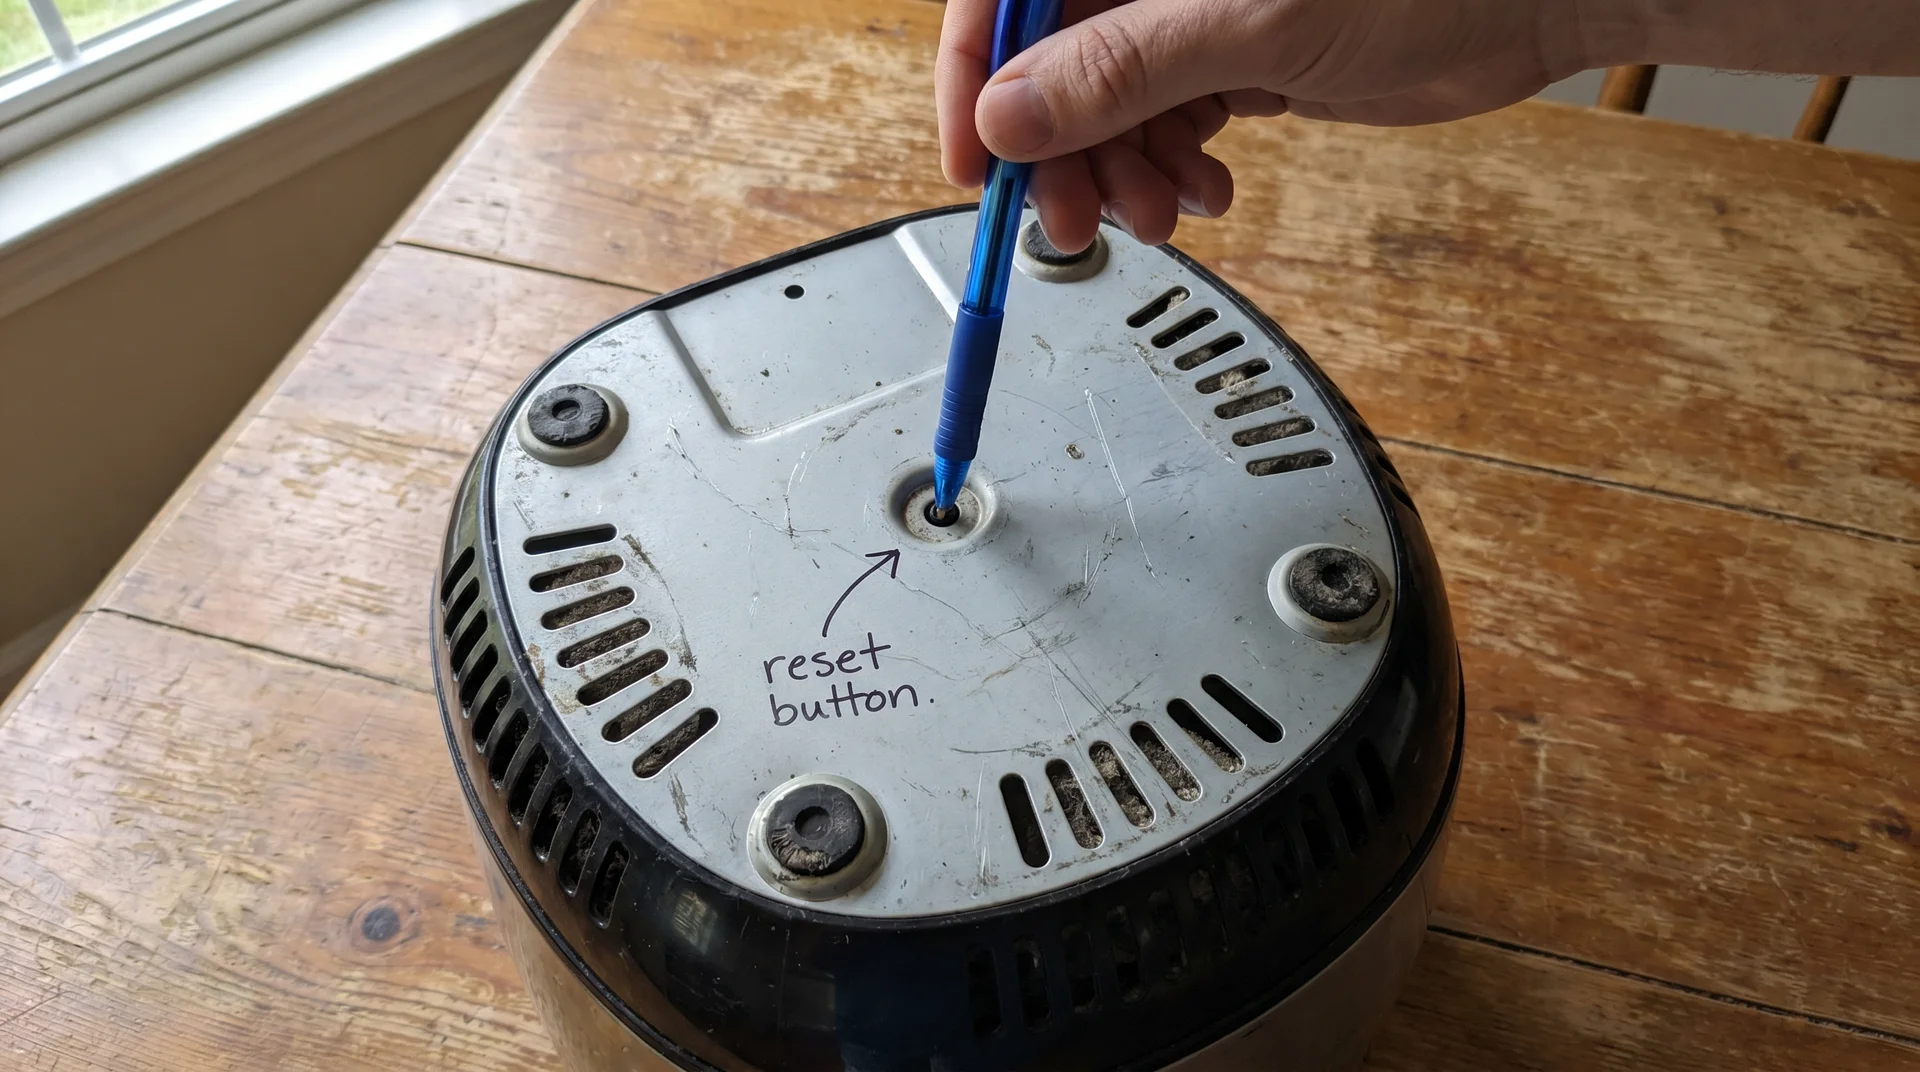
Fix 8: Setting Error, Error Code, or Hidden Reset Button

Rule these out before assuming any hardware has failed.
Several no-start situations have nothing to do with the hardware at all. Check each of these before moving on:
- Temperature or time not set: Many digital models won’t start until both a temperature and a time are set. If either reads zero, the unit won’t respond. Set both and press Start.
- Physical reset button: Some models, including certain Cosori and Gourmia variants, have a small recessed reset button on the base or back of the unit, separate from the power button. Press it with a pen tip or toothpick. Check your user manual for its location.
- Error code on display: Codes like E1, E2, E3, and E006 point to a specific internal fault. Look up the exact code in your user manual or on the manufacturer’s website. The fix varies by brand and code.
- Child lock active: Several models, including the Ninja, Cosori, and Instant Vortex Plus, have a child lock that disables all controls. It’s usually activated by holding a button combination for three to five seconds. Check the manual for the unlock sequence.
- Hard reset needed: Unplug for at least 60 seconds, then plug back in. This clears temporary errors from the control board’s memory and resolves more unexplained no-start issues than you’d expect.
If you’re still stuck after working through all five items above, the fault is likely internal. That’s when the diagnostic table at the top of this guide and the repair cost table below become the most useful things on this page.
New vs. Old Air Fryer: What to Check First
Your starting point depends on the unit’s history.
| Scenario | Most Likely Cause | First Fix |
|---|---|---|
| Brand new, never worked | DOA unit, wrong voltage, or outlet issue | Fix #1, then check return eligibility |
| Worked fine, died suddenly | Thermal overload or basket switch | Fix #3, then Fix #4 |
| Worked, died after a power outage | Blown fuse from a surge | Fix #5 |
| Worked, died slowly over time | Control board or power button | Fix #6, then Fix #7 |
| Died mid-cook, hot to the touch | Thermal overload or blown fuse | Fix #4, then Fix #5 |
| Display on, won’t cook | Basket not seated or settings not entered | Fix #3, then Fix #8 |
When to Replace Instead of Repair
Not every dead air fryer is worth bringing back.
I worked through this calculation with a client who had a three-year-old Cosori with a failed control board. The board cost $45.
A comparable replacement unit costs $79. The answer was clear once you wrote it down. Here is the framework that the decision came from.
Replace if:
- The unit is over three years old and needs a control board replacement
- The repair cost exceeds 50% of what the unit would cost to replace today
- The power cord is hardwired and visibly damaged
- The unit has overheated and blown a fuse more than once in the same year
Repair if:
- The fix is Fix #1 through Fix #4, which costs nothing
- You have a premium unit over $130, and the fault is a fuse or button
- The unit is under warranty. Always contact the manufacturer before opening anything
The 50% threshold is a working rule, not a formula. A $6 fuse on a $130 unit is obvious. A $90 board on a $75 unit is also obvious, just in the other direction.
Repair Costs at a Glance
Here is what each fix actually costs before you commit to anything.
| Fix | DIY Parts Cost | Pro Repair Cost |
|---|---|---|
| Outlet or breaker reset | Free | Free |
| GFCI reset | Free | Free |
| Detachable power cord replacement | $10 to $15 | N/A |
| Thermal fuse replacement | $3 to $8 | $50 to $90 labour |
| Power button or membrane switch | $8 to $20 | $50 to $80 |
| Control board replacement | $25 to $60 | $80 to $160 |
DIY cost estimates sourced from current listings for common models (Ninja, Cosori, Instant Vortex). Professional repair costs are estimates based on typical appliance technician rates and may vary by region.
Final Checklist Before Giving Up

Work through these in order. The promise at the top of this article was that most dead air fryers have a free fix and take under five minutes. For the majority of people, that holds somewhere in the first four steps.
- Test the outlet with a lamp or phone charger plugged into the same socket
- Check and reset the circuit breaker, or press RESET on the GFCI outlet
- Pull the basket fully out, clean the tracks, and reseat it until it clicks
- Unplug for 30 to 60 minutes if the unit has run recently, and let it cool completely
- Inspect the power cord for visible damage near the plug and cord entry point
- Check for a physical reset button on the base or back of the unit
- Clean the control panel gently with a lightly dampened cloth
- Perform a hard reset: unplug for 60 seconds, then plug back in
- Check the display for an error code and look it up in the user manual
- Check whether the child lock is active, and use the unlock combination if so
- If none of the above worked, the fault is internal. Compare the repair cost to the replacement cost before spending anything
Frequently Asked Questions
These are the questions that come up most often for this problem, with direct answers.
Why Won’t My Air Fryer Turn On Even When Plugged In?
A tripped GFCI outlet, a basket that isn’t fully seated, or thermal overload protection from a recent session covers most cases. Start with those three before assuming any internal failure. Between them, they account for the majority of completely dead air fryers.
Can Overheating Permanently Break an Air Fryer?
Not on the first occurrence. The thermal overload protection resets after the unit cools. Repeated or severe overheating can blow the thermal fuse, which doesn’t reset on its own, but the fuse costs $3 to $8 and is a replaceable part.
Why Did My Air Fryer Stop Working After a Power Outage?
Power restoration often includes a voltage spike that can blow the thermal fuse. If the unit is completely unresponsive after an outage, Fix #5 is the likely answer. Plugging into a surge-protected outlet going forward prevents this.
My Air Fryer Turns On but Won’t Start Cooking. What’s Wrong?
Check the basket first, then the settings. The basket may not be fully seated, triggering the safety interlock. The unit may also be waiting for both a temperature and a time to be set before it starts. A child lock on some models is a third possibility.
Is It Worth Repairing an Air Fryer That Won’t Turn On?
It depends on the cause and the unit’s replacement cost. Free fixes are always worth trying. A $6 thermal fuse on a $130 unit makes clear sense. A $90 control board on a $65 unit does not. The 50% rule: if repair cost exceeds half the replacement cost, replace.
What Does It Mean If My Air Fryer Shows No Lights at All?
Complete unresponsiveness points to one of four causes: a power supply failure, a tripped safety interlock from the basket, a blown thermal fuse, or a dead control board. Work through them in that order. The first three are free to check.