You can clean stainless steel appliances naturally using dish soap, white vinegar, baking soda, and mineral oil.
There is one condition you need to resolve before you start. The method that is safe on one finish type will permanently damage another, and that distinction changes every cleaning decision you make.
This guide covers appliance exteriors. Stainless steel sinks are a different surface with different cleaning requirements, and belong in a different article.
Know Your Finish Before You Start

Finish type determines every cleaning decision you will make with this guide.
The method that is safe on bare stainless steel will degrade a coated one. Identifying which finish you have takes about thirty seconds, and it changes every choice that follows.
Bare Stainless Steel
Bare stainless steel has no surface coating and responds safely to diluted vinegar, baking soda, and dish soap.
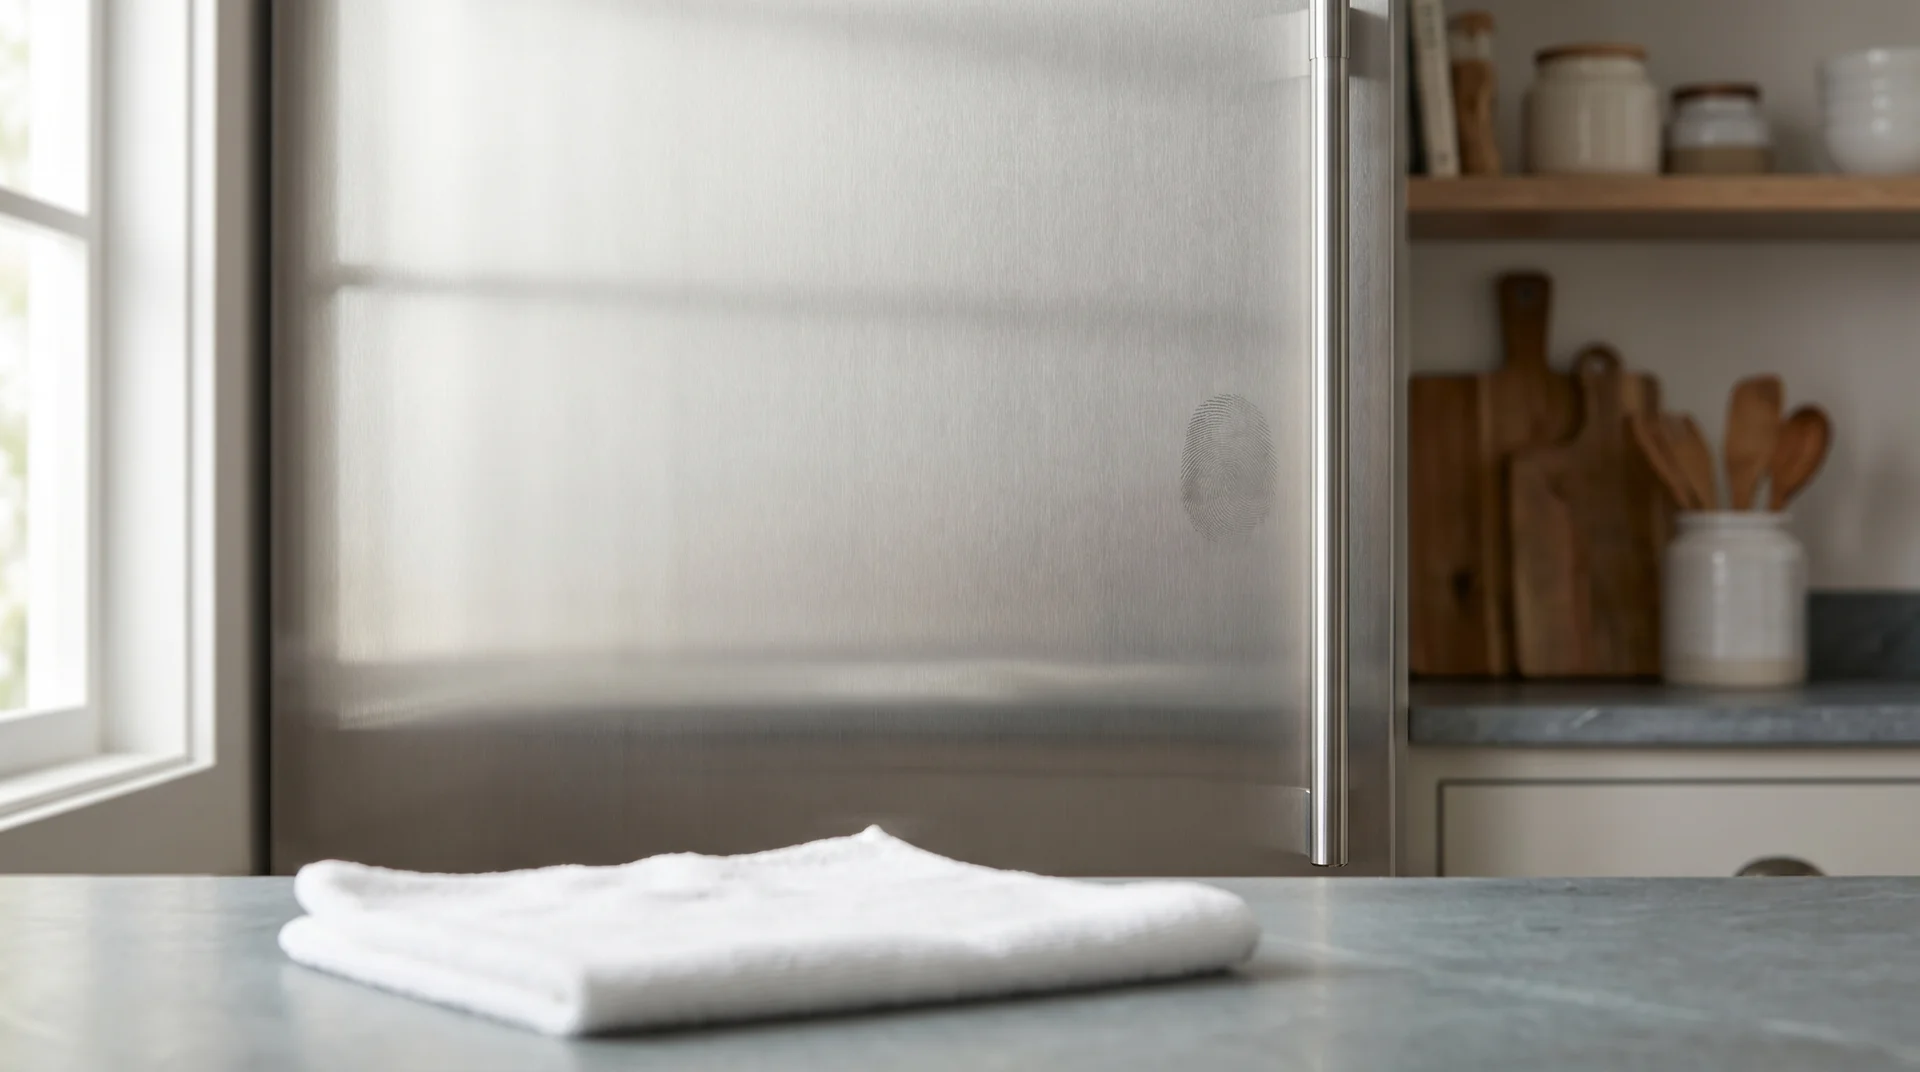
This describes most traditional appliances. Brushed, satin, and mirror finishes are all bare stainless. The grain, those fine parallel lines running across the panel, is etched directly into the steel surface during manufacturing.
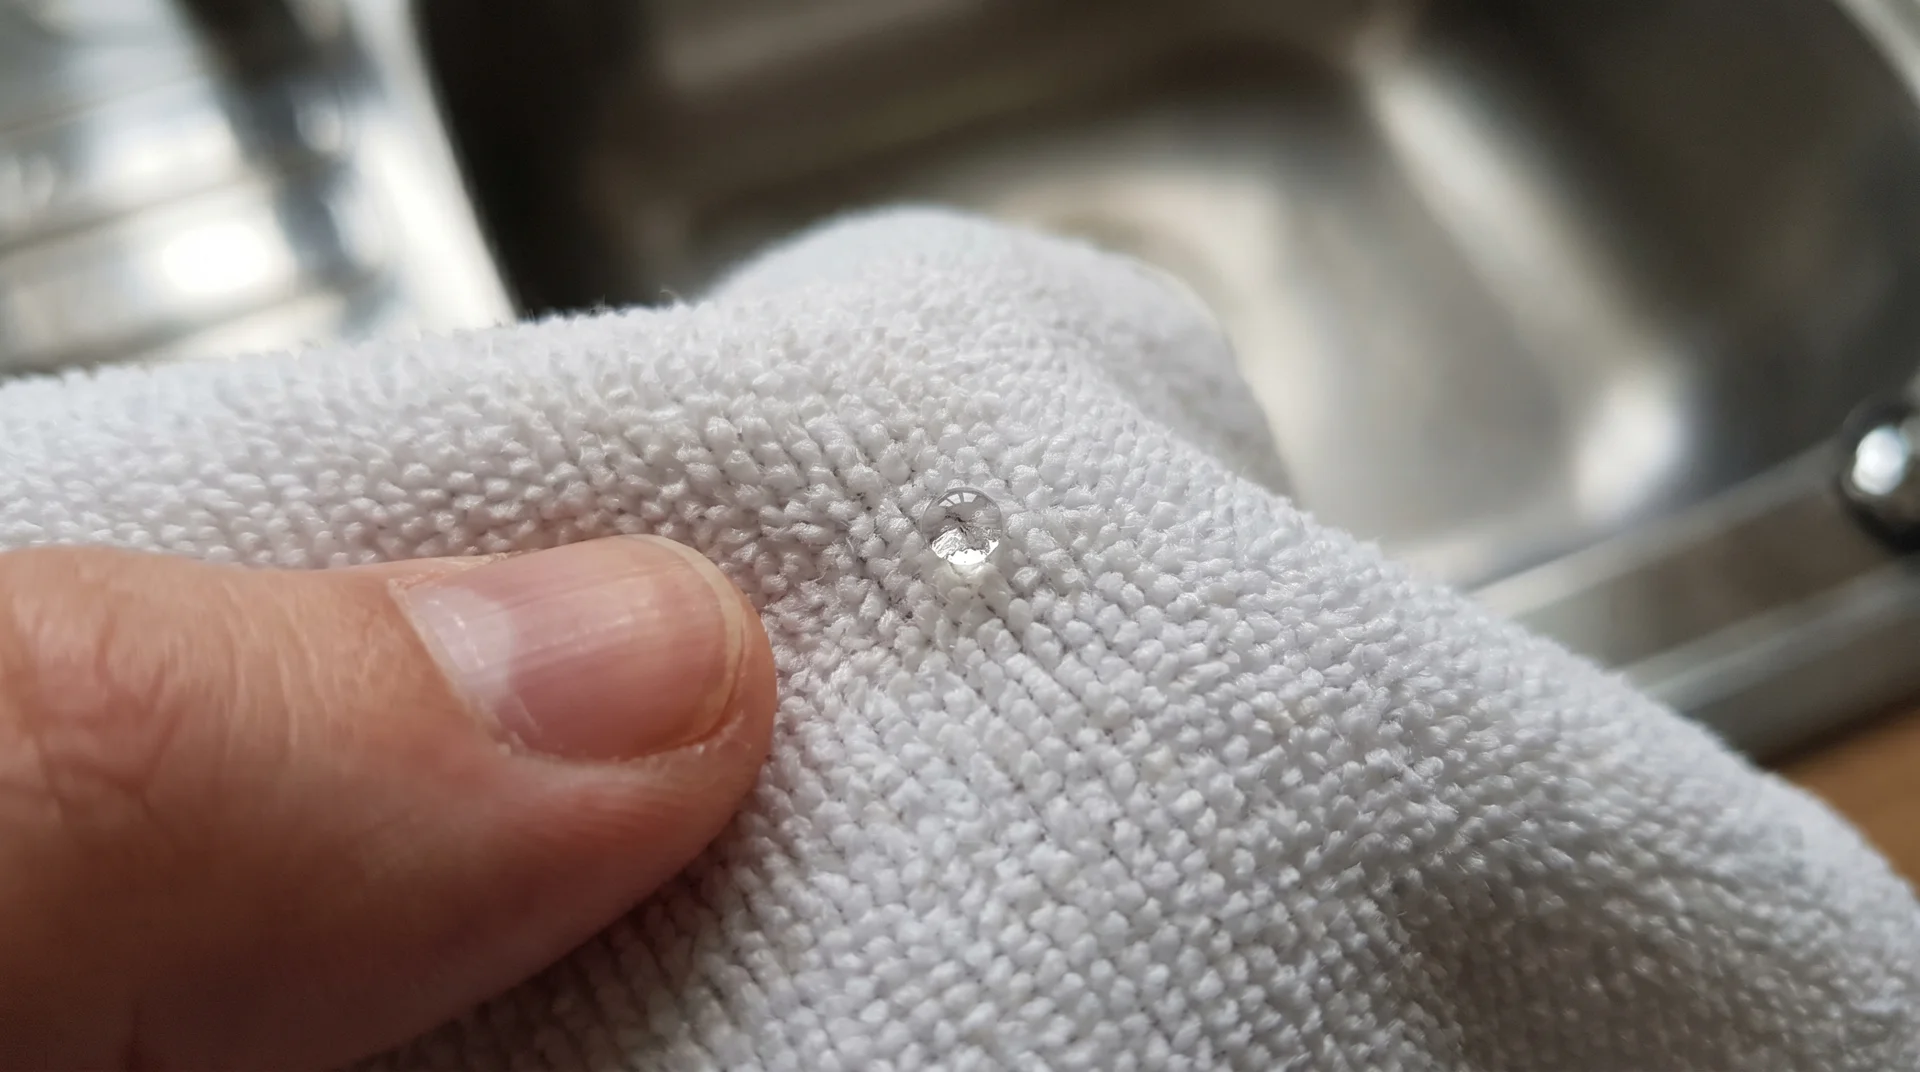
Stainless steel resists corrosion because of a passive chromium oxide layer, a few molecules thick, that sits on the metal surface. This layer reforms after minor disruption. Acid-based cleaners work on bare stainless because that recovery happens, provided the acid is rinsed off promptly.
Coated Stainless Steel
Coated stainless, sold under names like fingerprint resistant, smudge proof, or KitchenAid’s PrintShield, has a thin polymer clear coat that acid and abrasives will permanently damage.
KitchenAid, Samsung, Frigidaire, and GE all offer appliances with this finish. Many manufacturers include it without using consistent terminology. Your appliance may say “fingerprint resistant” near the model number, or the finish may not be labeled at all.
The label on most natural stainless steel cleaners claims safe for all finishes. The manufacturer’s documentation for coated appliances specifically excludes acidic cleaners, abrasive ingredients, and many stainless steel polishes. Those two claims cannot both be correct for the same surface.
I have seen a coated finish turn permanently dull after a single wipe with undiluted vinegar.
The damage appeared within minutes and did not respond to any subsequent cleaning. Dull patches near the handle zone, areas that reflect light differently from the surrounding surface, are the typical result.
How to Clean Bare Stainless Steel Naturally
These three methods are ordered from lightest to strongest.
- Start with dish soap and water.
- Move to vinegar only if soap does not handle the problem.
- Reach for baking soda paste last, when the first two fall short.
Everyday Cleaning with Dish Soap and Water
Dish soap and warm water are the correct protocol for daily and weekly cleaning of bare stainless steel. Apply with a microfiber cloth in the direction of the grain and dry immediately.
Contact time is not part of this method. Soap and water work physically, not chemically.
I use it every week on my own appliances without escalating to anything stronger, and it handles routine fingerprints and grease reliably.
The full sequence:
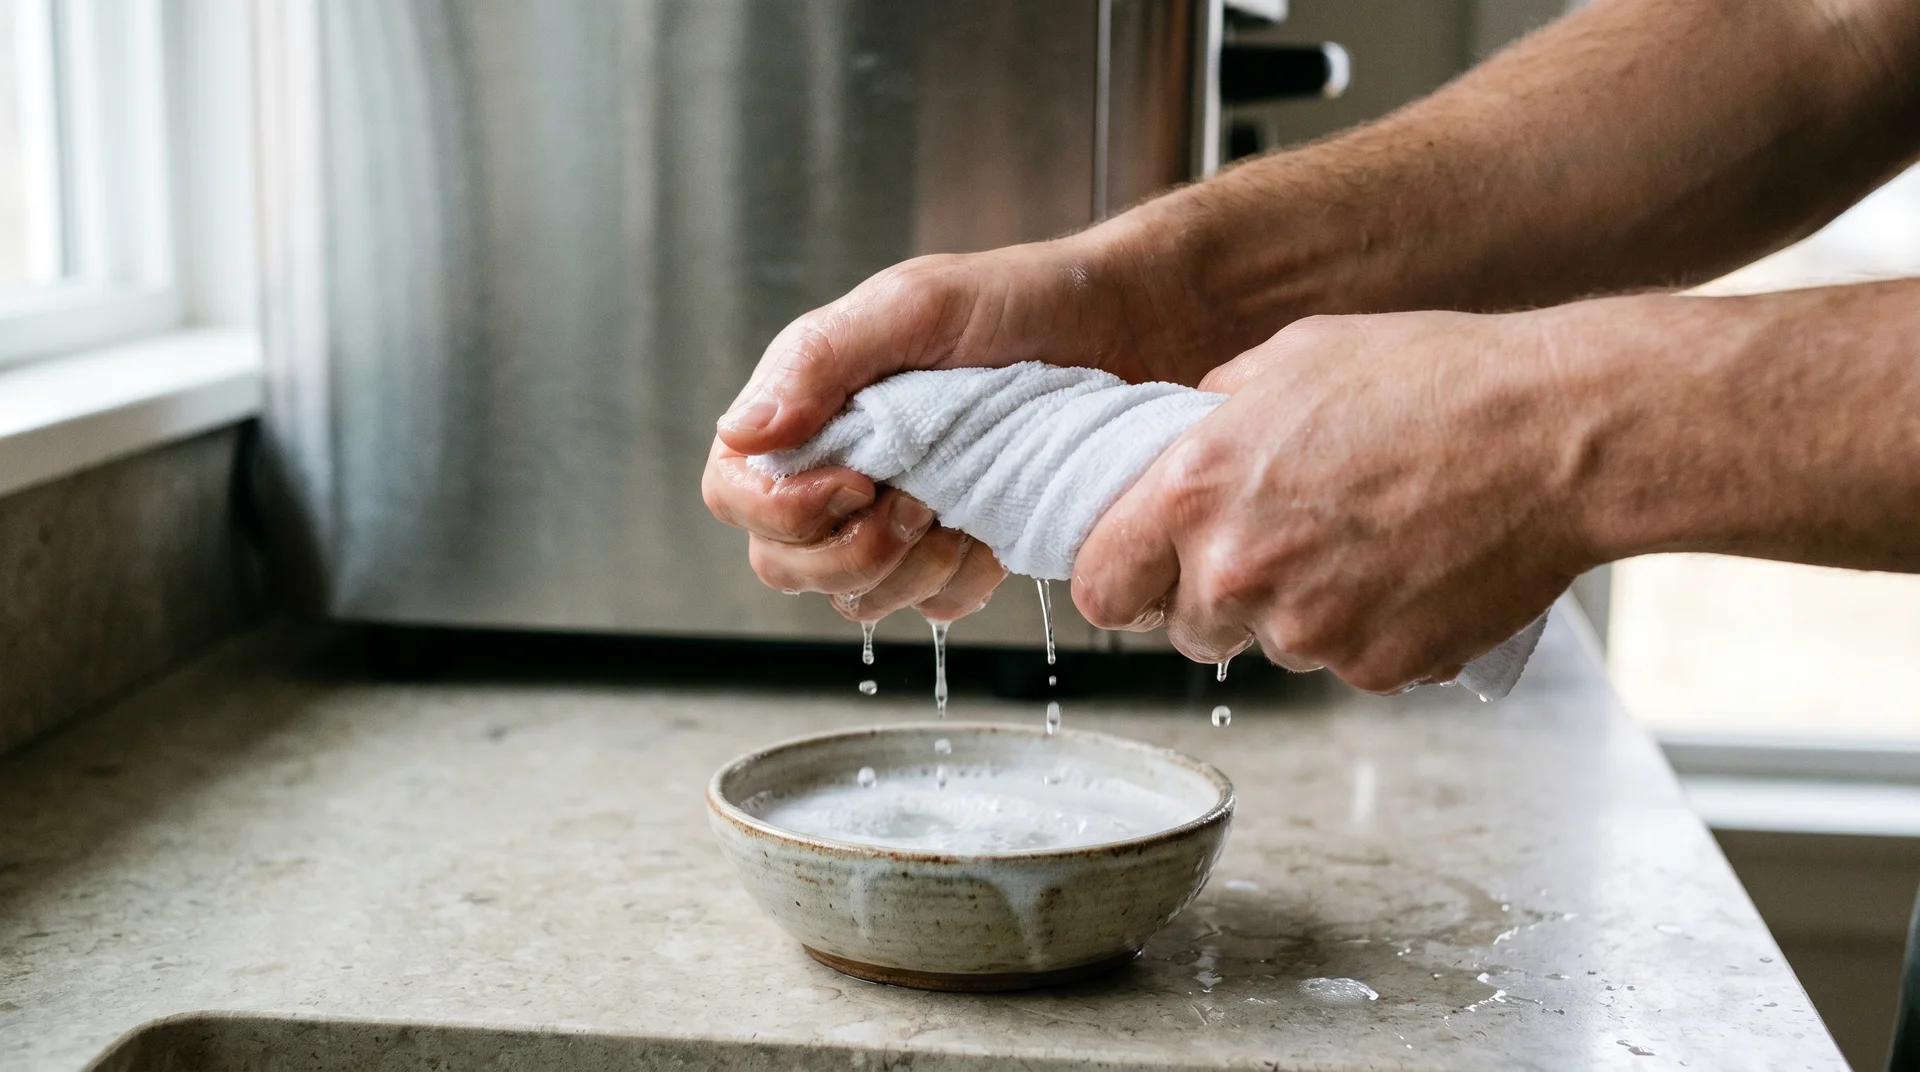
- Add two or three drops of dish soap to a bowl of warm water.
- Dampen a microfiber cloth in the solution and wring it out until damp but not dripping.
- Wipe in the direction of the grain with even pressure.
- Rinse the cloth in clean water and wipe the surface a second time to remove soap residue.
- Dry immediately with a separate, dry microfiber cloth, following the grain direction.
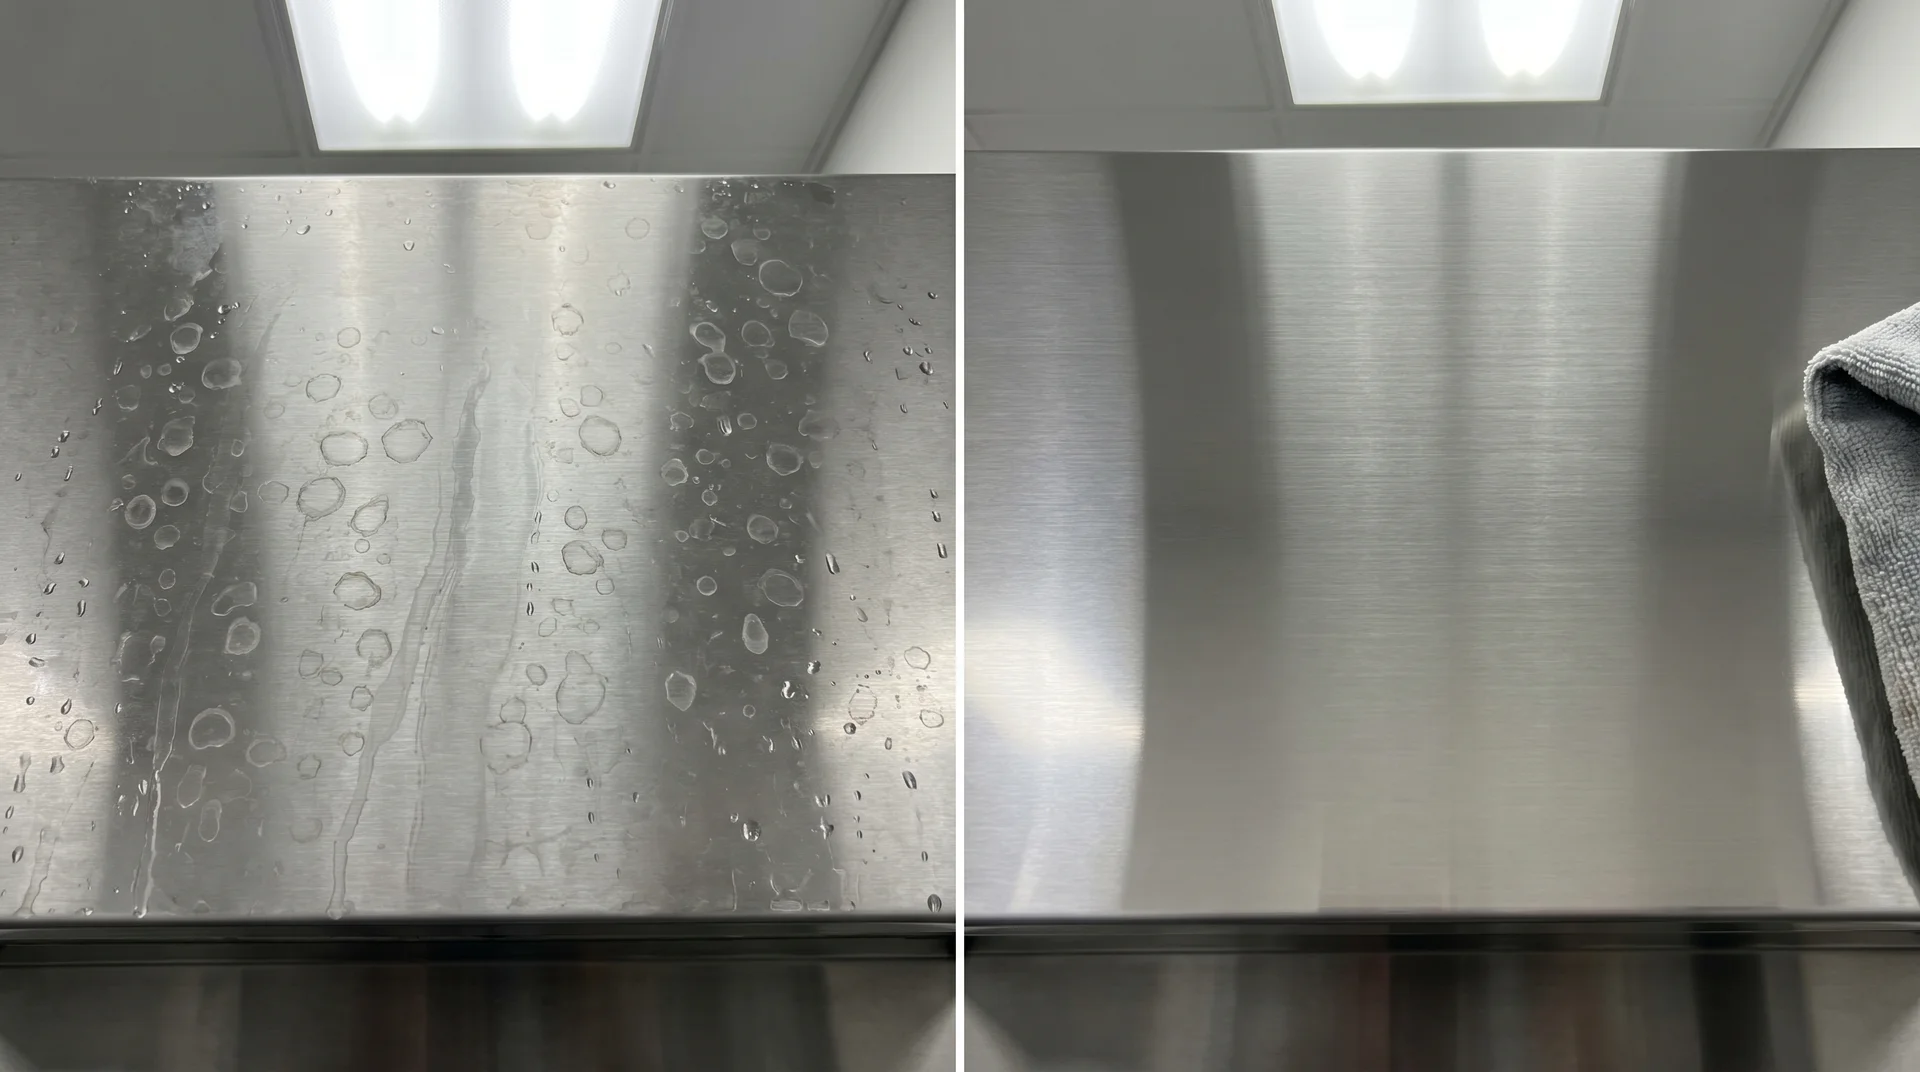
The rinse pass and the dry pass are not optional steps. They are part of the protocol. Skip the dry step, and water evaporates unevenly, leaving the calcium deposits most people call water spots.
Dish soap labels sometimes say rinse-free. Residue left on stainless attracts grease within hours.
For daily-use appliances, a once-a-week wipe is enough, though handles and touch points may need a mid-week pass.
Use Vinegar for Fingerprints and Grease
Equal parts white vinegar and water remove fingerprints and light grease from bare stainless steel. Contact time must not exceed two minutes, and a water rinse before the solution dries is mandatory.
That two-minute limit matters because the passive chromium oxide layer on bare stainless is stable but not impervious. Diluted acetic acid disrupts it at short contact times. At longer contact times, that disruption becomes cumulative.
According to research by Strehblow and colleagues on passive metal layer behavior, repeated acid exposure without thorough rinsing degrades the passive layer gradually.
The visual result is surface dulling, usually most noticeable in areas where cleaning frequency is highest.
The full sequence:
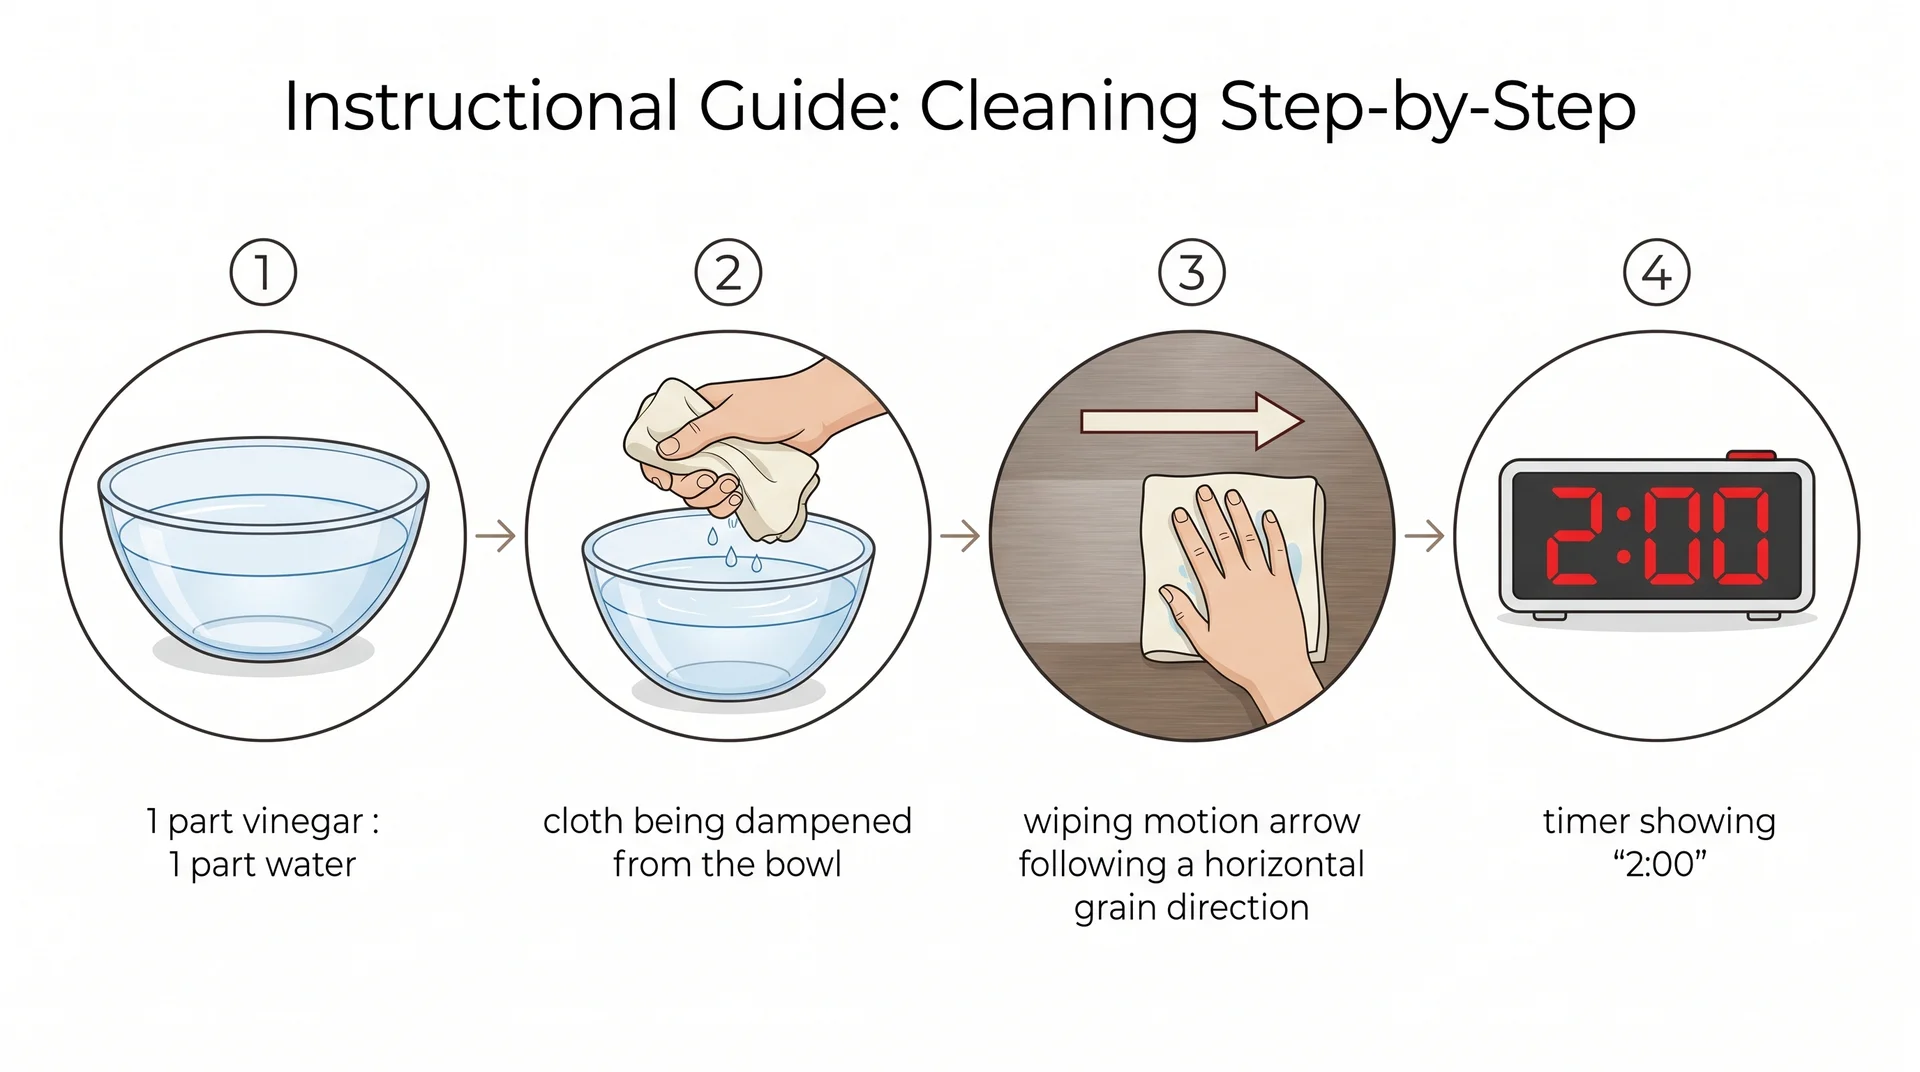
- Mix equal parts white vinegar and water in a spray bottle or small bowl.
- Apply the solution to a microfiber cloth. Do not spray directly onto the appliance surface, which concentrates the solution in one spot longer than intended.
- Wipe in the direction of the grain.
- Set a timer. Two minutes is the maximum contact time.
- Before the timer reaches two minutes, wipe the surface with a separate cloth rinsed in clean water.
- Dry immediately with a dry microfiber cloth.
If you skip the water rinse, the acetic acid continues working on the passive layer after you walk away. The result is surface dulling that develops gradually, usually over multiple cleaning sessions without a clear single cause.
I have watched people spray a vinegar solution on a stainless fridge and leave the room. The grease comes off, and some of the surface quality comes off with it. Those are not the same outcome.
Use Baking Soda Paste on Stubborn Buildup
Baking soda paste removes baked-on grease and discoloration from bare stainless steel without scratching. The conditions are light pressure, grain direction, and a 2-3 minutes of contact time before rinsing completely.
Baking soda is a mild abrasive. It works physically, not chemically, with slightly more mechanical action than dish soap. The particle size is small enough to lift baked deposits without scratching the steel surface, provided you do not press hard.
Make the paste by mixing one tablespoon of baking soda with just enough water to form a thick, spreadable consistency. If it flows easily off the spoon, it is too liquid. A liquid paste spreads further than you intend and dries into a crust that is harder to remove than the original stain.
The full sequence:
- Apply the paste to the stained area with a microfiber cloth or a clean fingertip.
- Work in the direction of the grain only. Do not use a circular motion.
- Use light fingertip pressure. Scrubbing pressure creates micro-scratches that trap grease.
- Set a timer for two to three minutes.
- Rinse completely with a damp cloth and clean water. Remove all powder residue before it dries, including any paste that has reached vents or control panel seams.
- Dry immediately with a dry microfiber cloth.
Contact time varies in practice. Two minutes handles most of the buildup in my kitchen. Some stains need three or four minutes, but I will not leave the paste on while I go start something else.
Too much pressure creates micro-scratches running in the grain direction. Those scratches trap grease and make the appliance harder to clean than it was before. Frequency without method is not a protocol.
The Only Safe Natural Method for Coated Stainless
For coated stainless steel, dish soap and warm water are the complete cleaning protocol.
In practice, every cleaning situation I have encountered on a coated finish has been a soap-and-water problem. Dish soap and a microfiber cloth handle fingerprints, grease, and routine grime without risk to the clear coat.
If you identified your finish using the steps in the first section of this article, the sequence is the same as the soap-and-water protocol above. Soap, damp cloth, grain direction, clean water rinse, immediate dry.
If you notice dull patches or an uneven sheen after cleaning, the clear coat may already be compromised. Soap and water will still clean those areas. It will not restore the coating, and that is a different problem from cleaning.
The Vinegar Debate: Why Contradictory Advice Exists
Vinegar is safe on bare stainless steel and damaging to coated finishes, and confusing the two surfaces is why contradictory advice exists.
White vinegar diluted with water is safe for bare stainless steel when rinsed off within two minutes. It will degrade coated and fingerprint-resistant finishes.
Sources that say “vinegar is safe” are written about bare stainless steel. Sources that say “never use vinegar” are writing about coated surfaces. That is the entire source of the contradiction, and neither group specifies which surface they mean.
My father cleaned every stainless surface he encountered with straight vinegar for thirty years. He is not entirely wrong. He is also not entirely right, and the difference between those two positions is finish type and contact time.
Stainless steel resists corrosion because of its passive chromium oxide layer. Acetic acid, the active compound in white vinegar, disrupts that layer. At low concentrations and short contact times, the disruption is transient and the layer reforms.
At longer contact times or without a rinse, the disruption becomes cumulative. The surface develops a dull appearance, usually most visible under directional light at a low angle. Dulling concentrates in areas of the highest cleaning frequency first, typically the handle zones.
Reversibility depends on how far the damage has progressed. Surface-level dulling from light acid exposure on bare stainless steel sometimes responds to mineral oil polishing. Etching, a visible texture change in the steel surface itself, does not.
The label on white vinegar positions it as a natural, safe household cleaner. The peer-reviewed literature on passive metal layer chemistry describes conditions under which that same compound degrades a metal surface.
Oil Polishing on Bare Stainless Steel: What Works and What Goes Rancid
Oil polishing is a finish step on bare stainless, not a cleaning step.
After cleaning, a small amount of oil creates a barrier that slows fingerprint transfer and reduces static buildup. Which oil you use matters more than how you apply it.
Which Oil to Use
- Mineral oil is the correct choice for polishing stainless steel appliances.
- Olive oil and other cooking oils will oxidize in a kitchen environment and leave a rancid, tacky residue.
Mineral oil is non-drying, food-safe, and stable at kitchen temperatures. It does not contain fatty acid chains that oxidize over time. According to NSF International guidance on food-contact surfaces, mineral oil is an accepted food-safe surface protectant that does not degrade under normal storage conditions.
Olive oil contains fatty acids that begin oxidizing at room temperature. Near a heat source, that process accelerates noticeably. The result is a thin, tacky film that smells slightly off and attracts grease at an accelerated rate.
The olive oil recommendation shows up in a significant amount of cleaning content. It comes from cooking writers, and cooking writers understand food chemistry well. They are not always thinking about what a thin oil film does next to a stovetop for a week at ambient kitchen temperatures.
How to Apply Without Making It Sticky
The correct amount of mineral oil for a full appliance door is roughly one drop applied to a clean, dry microfiber cloth.
- Buff in the direction of the grain with moderate pressure until the cloth feels dry against the surface. If it feels oily when you finish, you used too much.
- Wipe the excess off immediately with a clean, dry cloth before it creates a film that catches airborne grease.
Apply oil to bare stainless steel only. Coated stainless steel does not need it. A polymer clear coat has its own surface properties that added oil will disrupt rather than protect.
How to Get Streak-Free Results Every Time
Streaks on stainless steel have three causes, and none of them is the fault of the cleaning agent.
The most common complaint I hear about stainless cleaning results is streaking. In almost every case, the problem is technique, not ingredient. Identifying which cause applies takes one wipe to confirm.
These are the three most common causes and their fixes:
- Air drying instead of hand drying. Water evaporates unevenly on a metal surface and leaves mineral deposits in ring and streak patterns. Dry by hand with a clean microfiber cloth immediately after every rinse step. This single habit eliminates most streaking complaints.
- Cleaner residue on the surface. Any leftover soap, vinegar, or oil dries unevenly and leaves streaks. The solution is a second wipe with a clean water-dampened cloth, followed immediately by a dry cloth. Two wipes, not one.
- Grain direction. The grain lines in stainless steel are micro-channels. Cleaning against them pushes residue into the channels rather than out. Wipe only with the grain, on every pass, with every cloth.
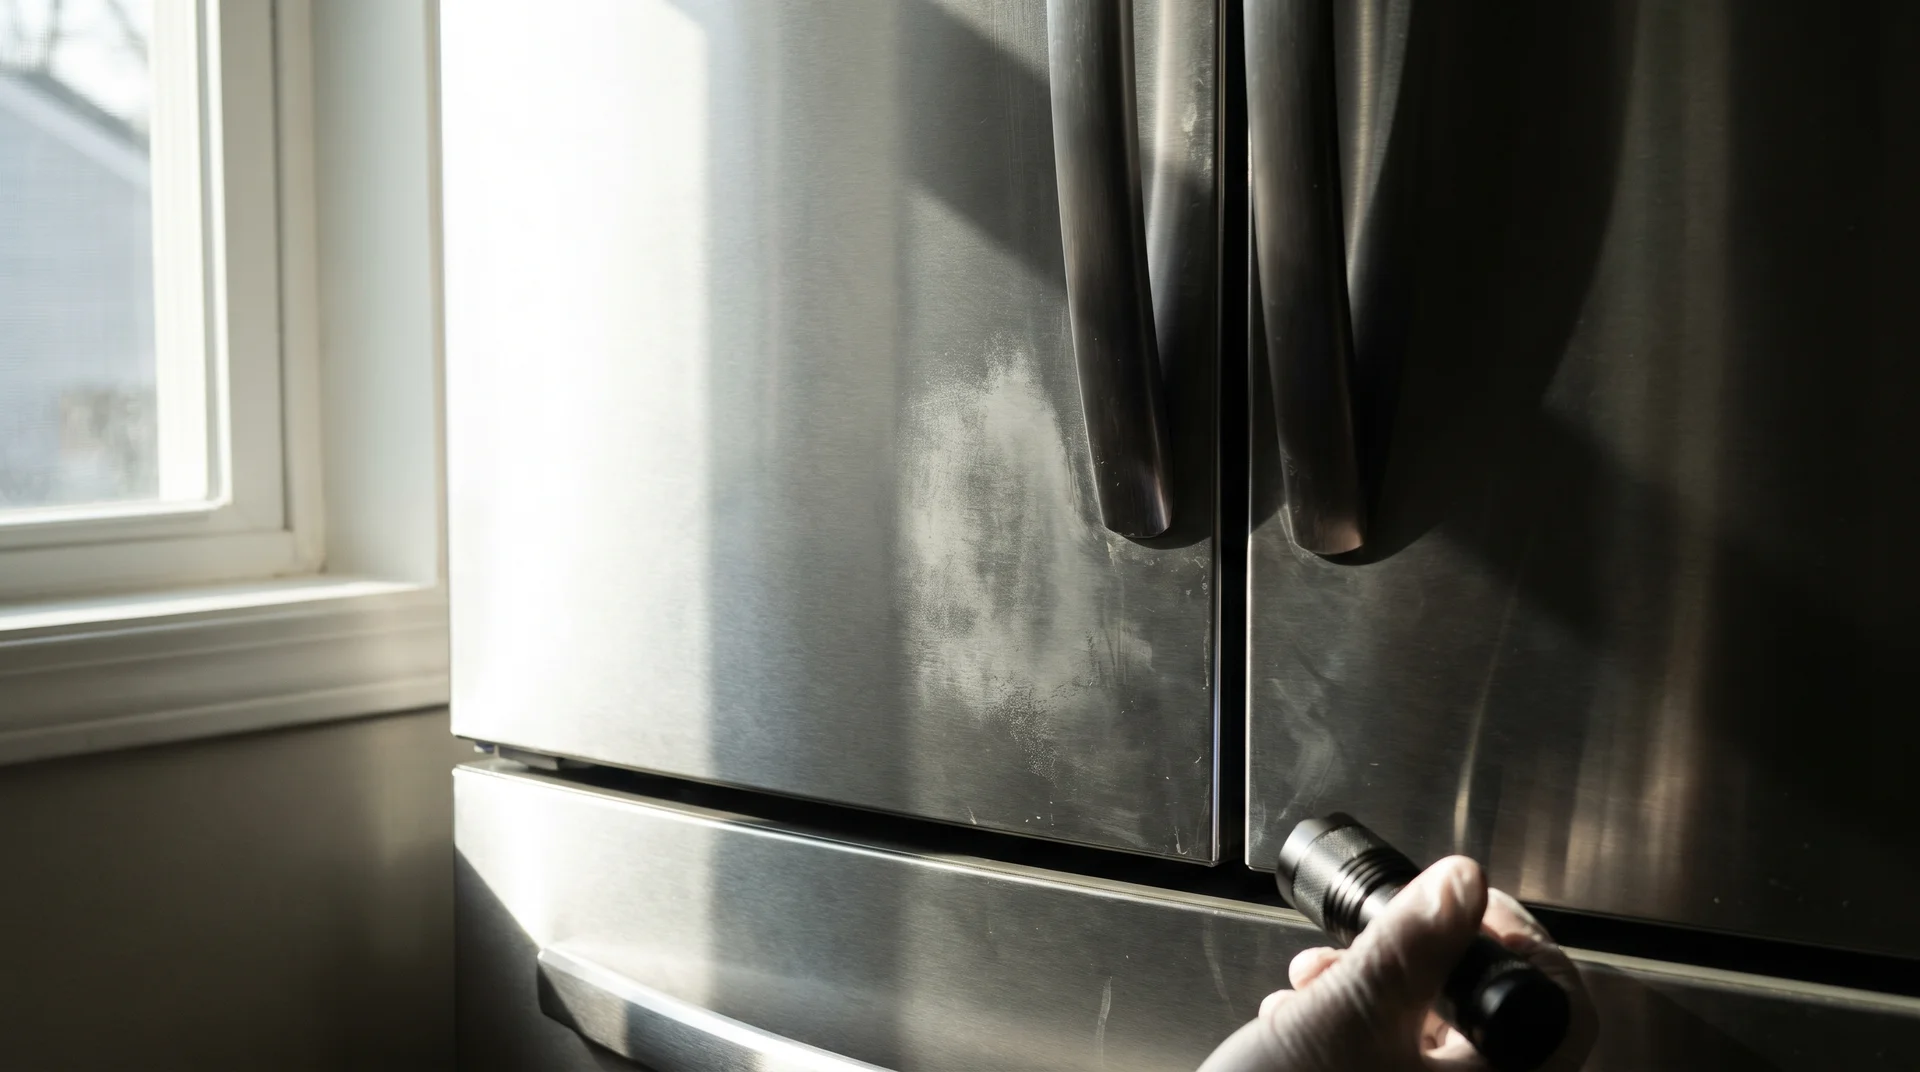
Finding the grain direction is simpler than it sounds. Hold a flashlight or your phone’s torch at a low angle to the surface. The grain lines appear as the light rakes across the metal.
They run either horizontally or vertically, depending on the appliance panel.
You can also locate the grain by touch. Run a dry fingertip slowly across the surface in both directions. Resistance increases when you move against the grain. That directional difference is subtle but consistent, and it takes about five seconds to identify once you know what you are feeling for.
Most streaks that get blamed on vinegar are actually caused by air drying. The vinegar removed the grease, and nobody followed it with a dry cloth.
Hard Water and Heavy Grease: When Standard Methods Fall Short
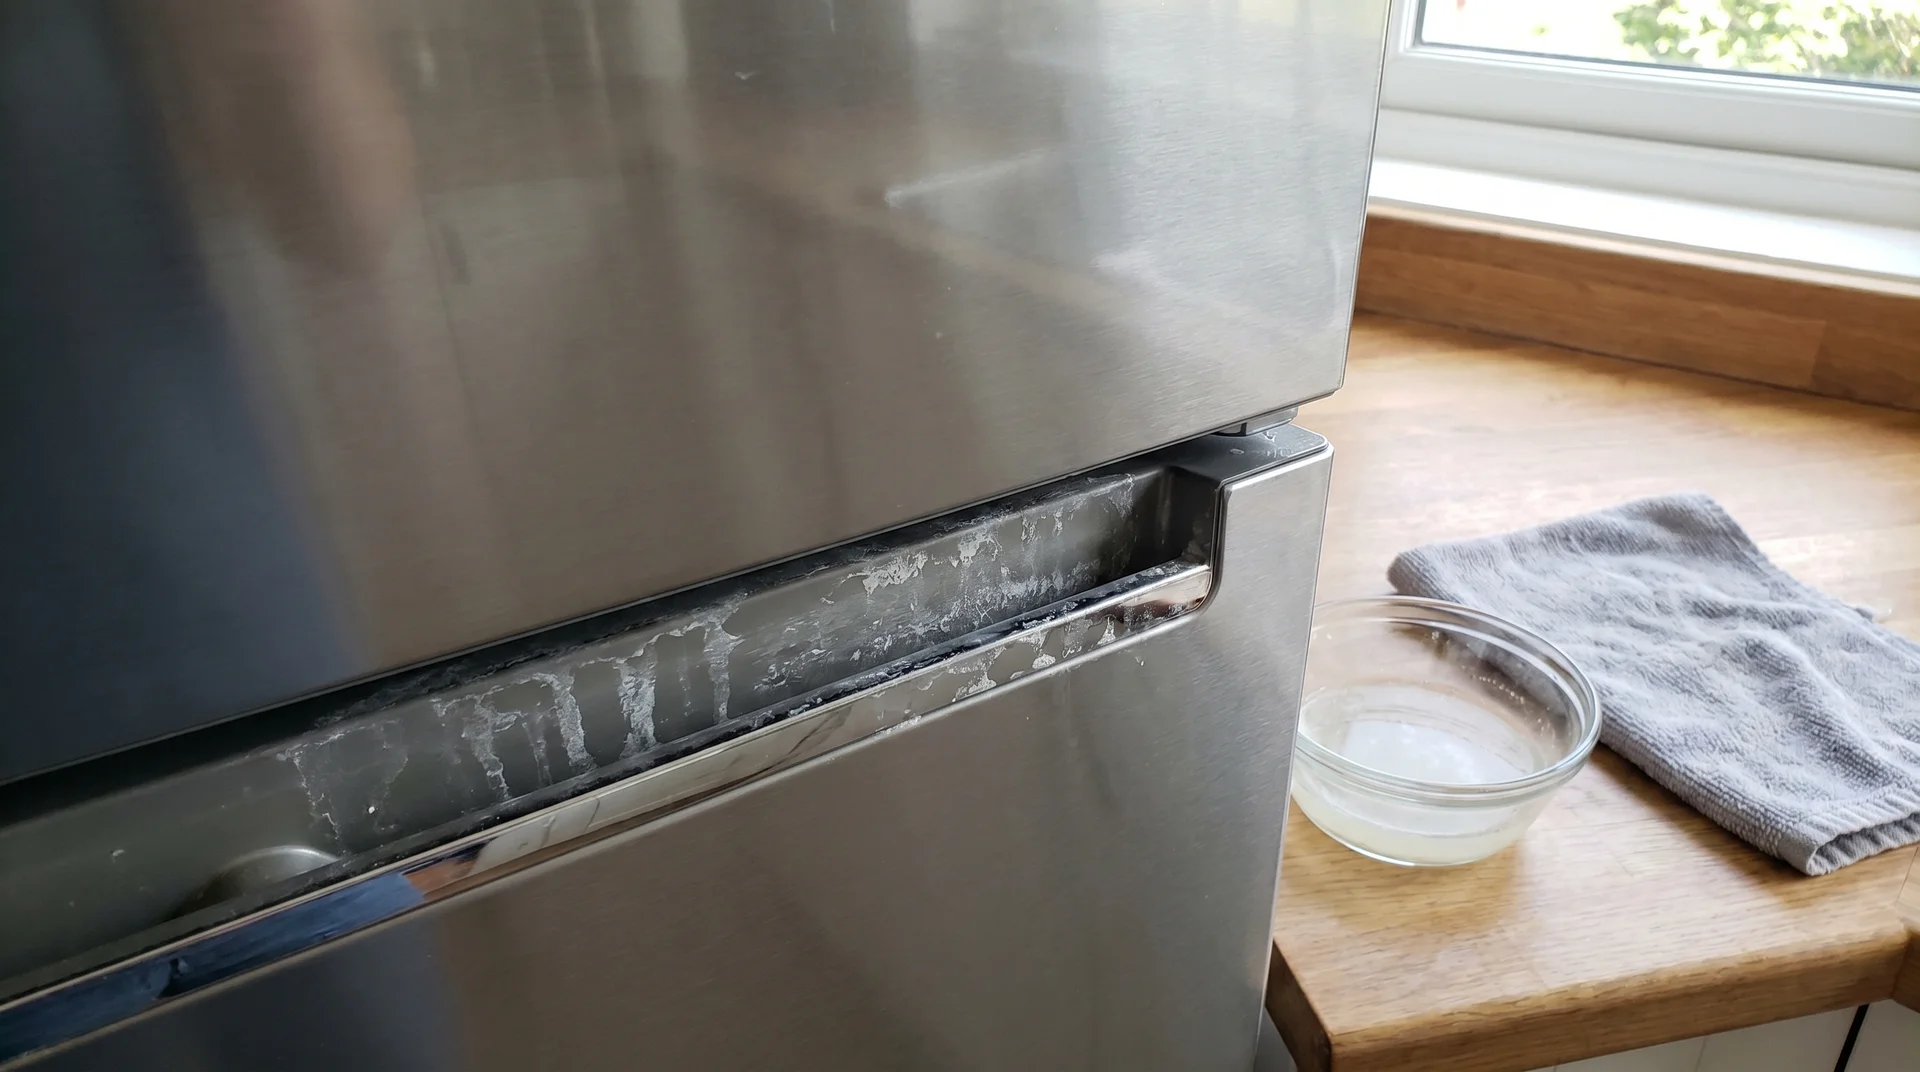
Hard water and accumulated grease both require adjustments to the sequences above. The methods are still natural. Contact time becomes a variable rather than a constant, and sequence matters more than it does in routine cleaning.
Hard water spots are calcium and magnesium deposits left by evaporating tap water.
- Dish soap will not dissolve them because they are alkaline mineral deposits, and soap does not carry enough acidity to break them down.
- Diluted vinegar is the correct tool for this specific problem.
Do not apply vinegar directly on top of a greasy surface. The grease layer blocks the vinegar from reaching the mineral deposit underneath it. Clean with soap and water first, dry the surface, then apply the diluted vinegar solution to the deposit location.
The contact time for hard water spots is the same two-minute maximum that applies to the standard vinegar wipe. Rinse before that time is up. Stubborn deposits may need a second pass, but always rinse completely between passes before reassessing.
Heavy grease buildup on an appliance neglected for several months needs an extended soap contact time.
- Apply the soapy solution to heavy areas and let it sit for three to five minutes before wiping. That penetrates a thicker buildup layer before you start moving the cloth.
- After the soap passes, dry the surface completely. Follow with the diluted vinegar, wiping only if fingerprints or mineral deposits remain.
- Dry again after the vinegar step, then apply a small amount of mineral oil if you want the protective polish finish.
Hard water hardness varies by region. My calibration is for Baltimore’s water, which runs in the moderately hard range. In a city with significantly higher mineral content, you may need a second vinegar pass to clear deposits fully.
There is no universal contact time for hard water deposits. That number depends on your local water chemistry. Start with two minutes and assess before extending.
Etching, rust spots, and physical scratches on stainless steel are not cleaning problems. Cleaning those areas correctly will not resolve them.