

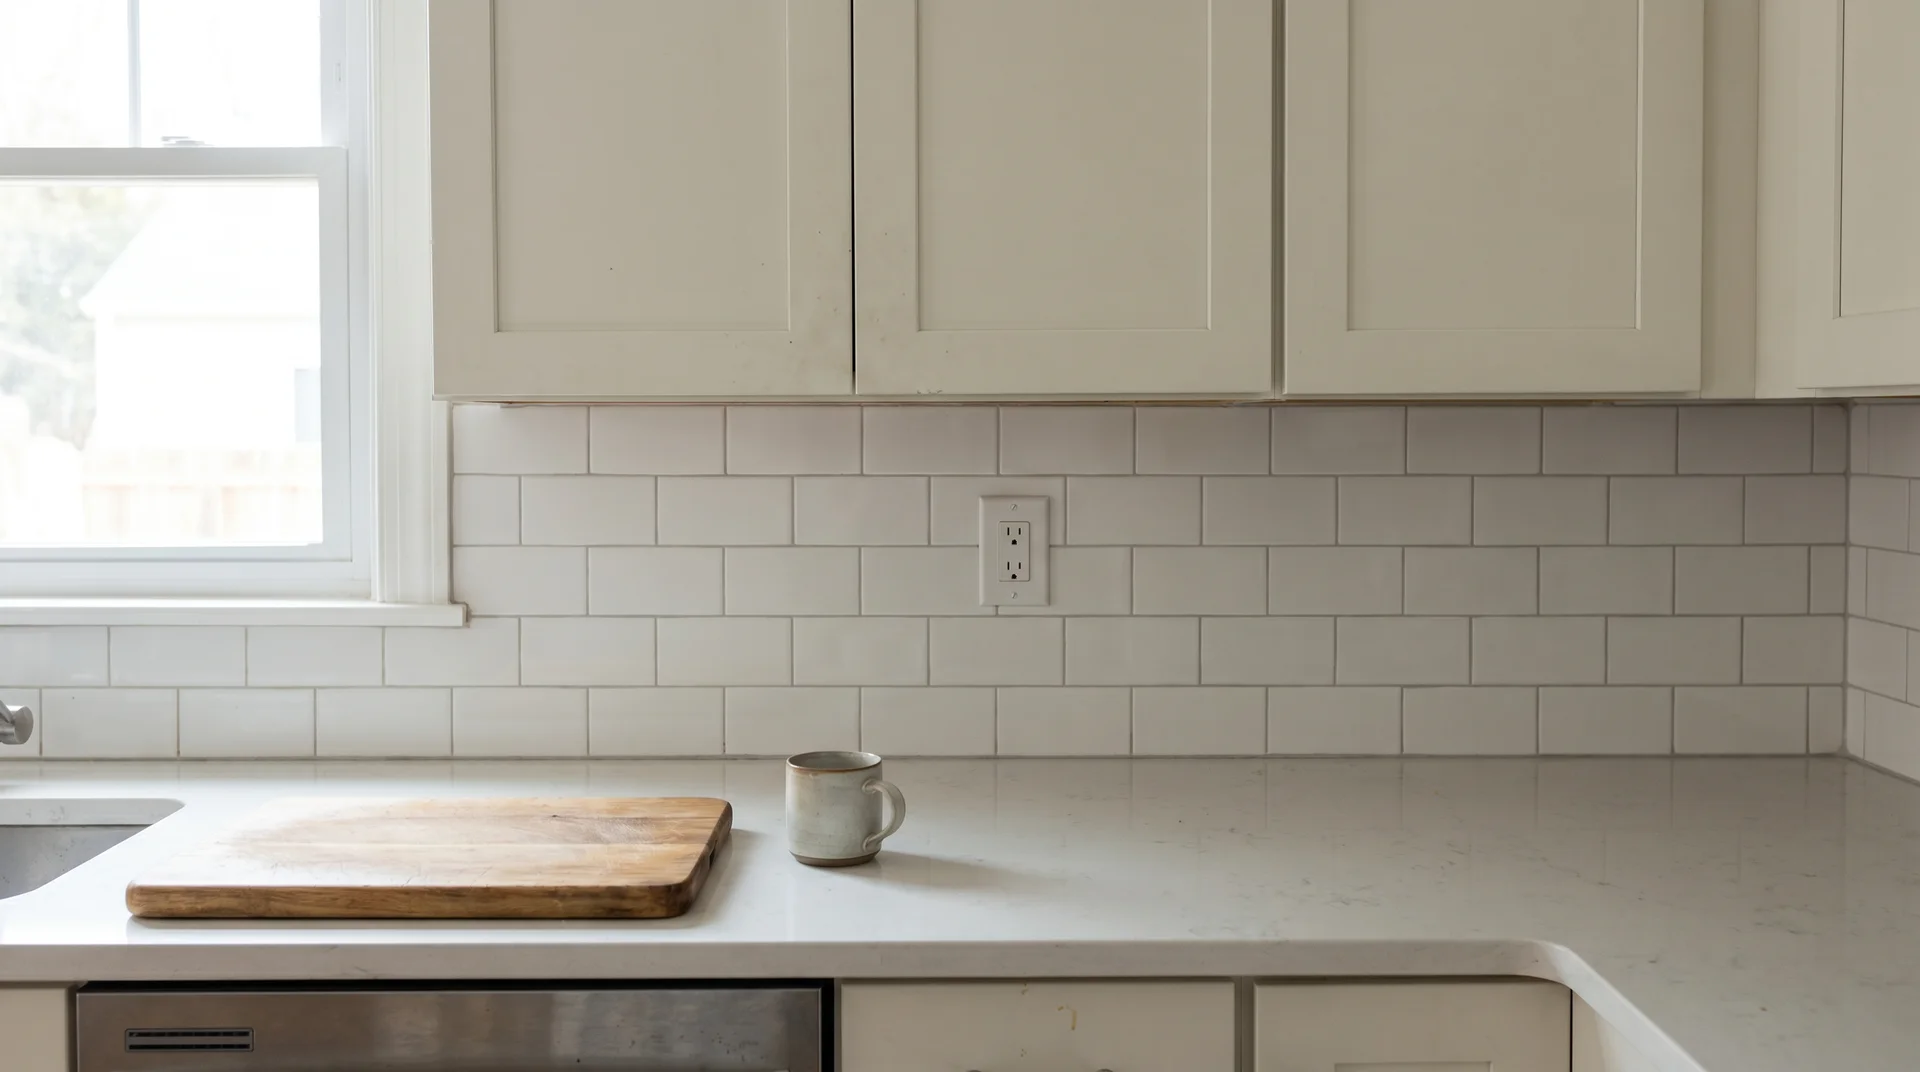
The standard distance between countertop and upper cabinets is 18 inches.
Whether that number is right for your kitchen depends on three decisions that most renovation guides never ask you to make first. This piece walks through all three, and it does not cover full wall-to-ceiling cabinet installation from rough-in or accessible kitchen design heights.
Those are different planning conversations with different starting assumptions.
The 18-Inch Rule
The standard distance between countertop and upper cabinets is 18 inches, measured from the finished countertop surface to the bottom of the upper cabinet box.
The National Kitchen and Bath Association, the professional body that sets residential kitchen design guidelines, places the minimum clearance at 15 inches.
Most cabinet installers use 18 inches as the working baseline. The accepted range across most residential kitchen designs runs from 15 to 20 inches.
Over the past decade, many installers have quietly moved to 20 inches as the working baseline. Whether it should be 20 in yours depends on what’s going on the counter.
What 54 Inches From the Floor Actually Means
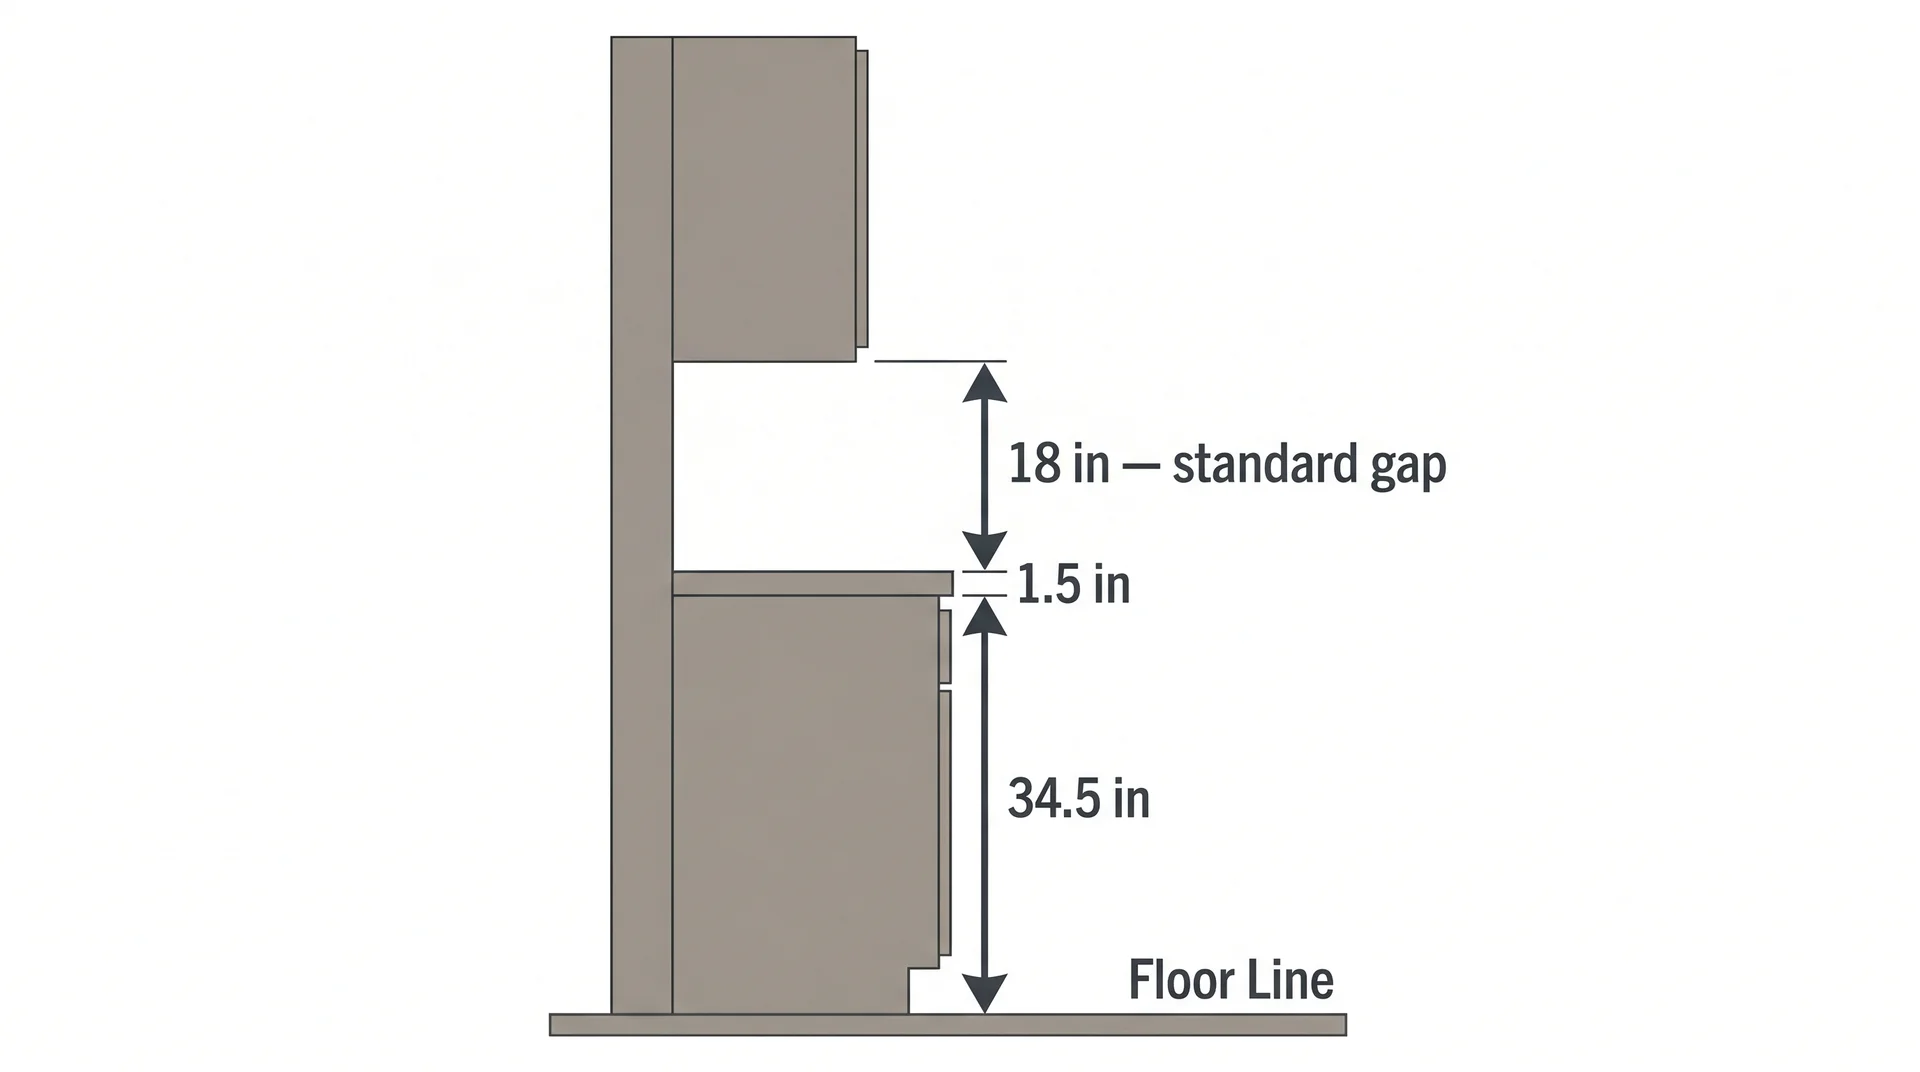
54 inches from the finished floor is where the bottom of your upper cabinet lands in a standard kitchen.
The math: a standard base cabinet stands 34.5 inches tall. A standard countertop adds 1.5 inches. The 18-inch gap brings the total to 54 inches from the floor to the bottom of the upper cabinet.
Contractors and installers use the 54-inch mark as their reference line when hanging wall cabinets. If you hear it on a job site, that is what it refers to.
Where the 18-Inch Standard Came From
The 18-inch rule is a practical baseline, calibrated around average reach height and the size of common countertop appliances.
Kitchen designers settled on this number for a cook standing between 5 feet 4 inches and 5 feet 9 inches. Blenders, toasters, and early-model coffeemakers fit comfortably under it.
Appliances have grown. The standard has not changed as such. That gap matters more than most renovation articles let on.
Measure Your Appliances Before You Measure Your Wall
The 18-inch standard was not sized around your specific appliances.
Stand at your counter and look at what lives there. That is the clearance you are actually planning around, and it may already be asking for more than 18 inches.
The Appliances That Don’t Fit Under 18 Inches
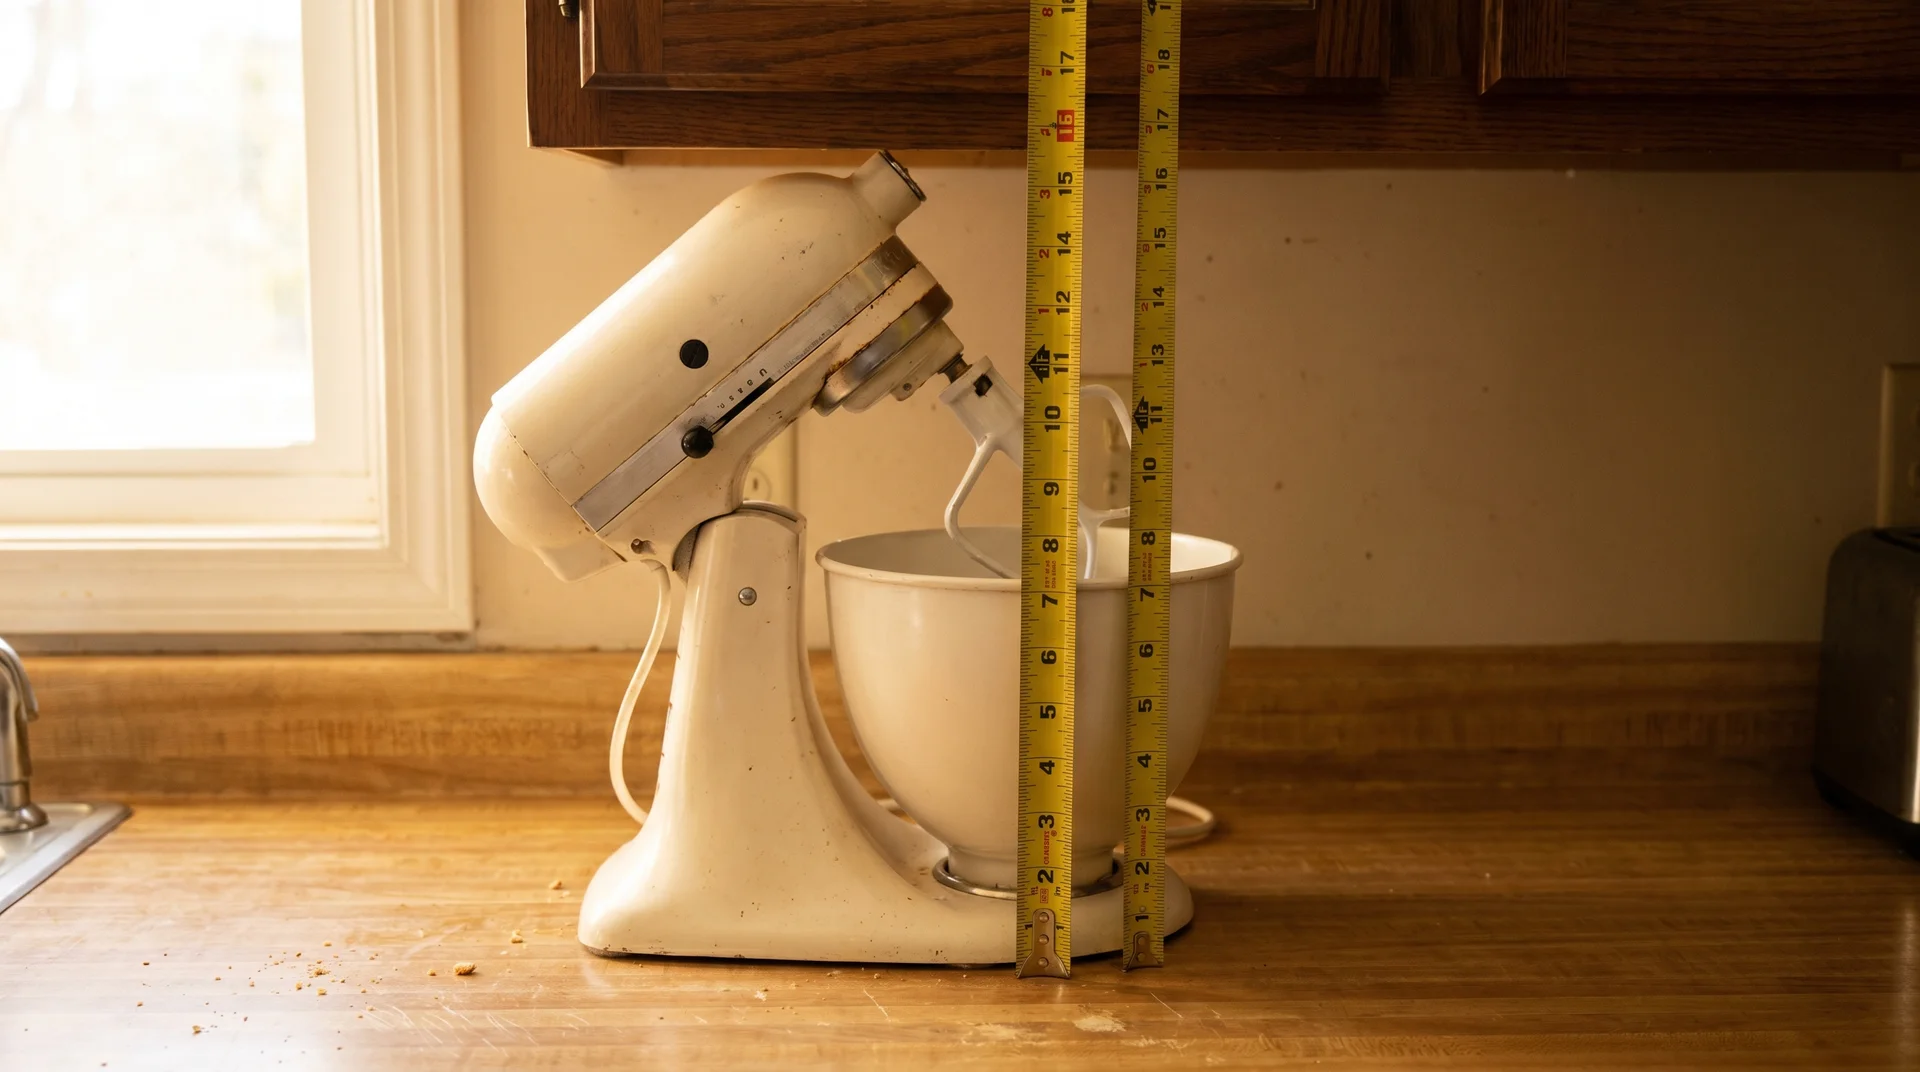
- Full-size stand mixers and tall-carafe coffeemakers regularly push past 14 inches in height before you factor in operating position.
- A full-size stand mixer runs approximately 14 inches in storage position. With the head raised to add ingredients, it can reach 16 inches or more.
- A tall drip coffeemaker with the lid open for filling can push past 15 inches.
Measure your appliances in their operating position. Lid open, head raised, carafe in place.
That is the number that matters, not the storage height, not the box dimensions.
I have walked into kitchens where the stand mixer lives permanently on the kitchen table. It doesn’t fit where the owner intended to keep it. That is a failure because it shows that the appliance height got checked after the cabinets went up, not before.
The Light Rail Problem
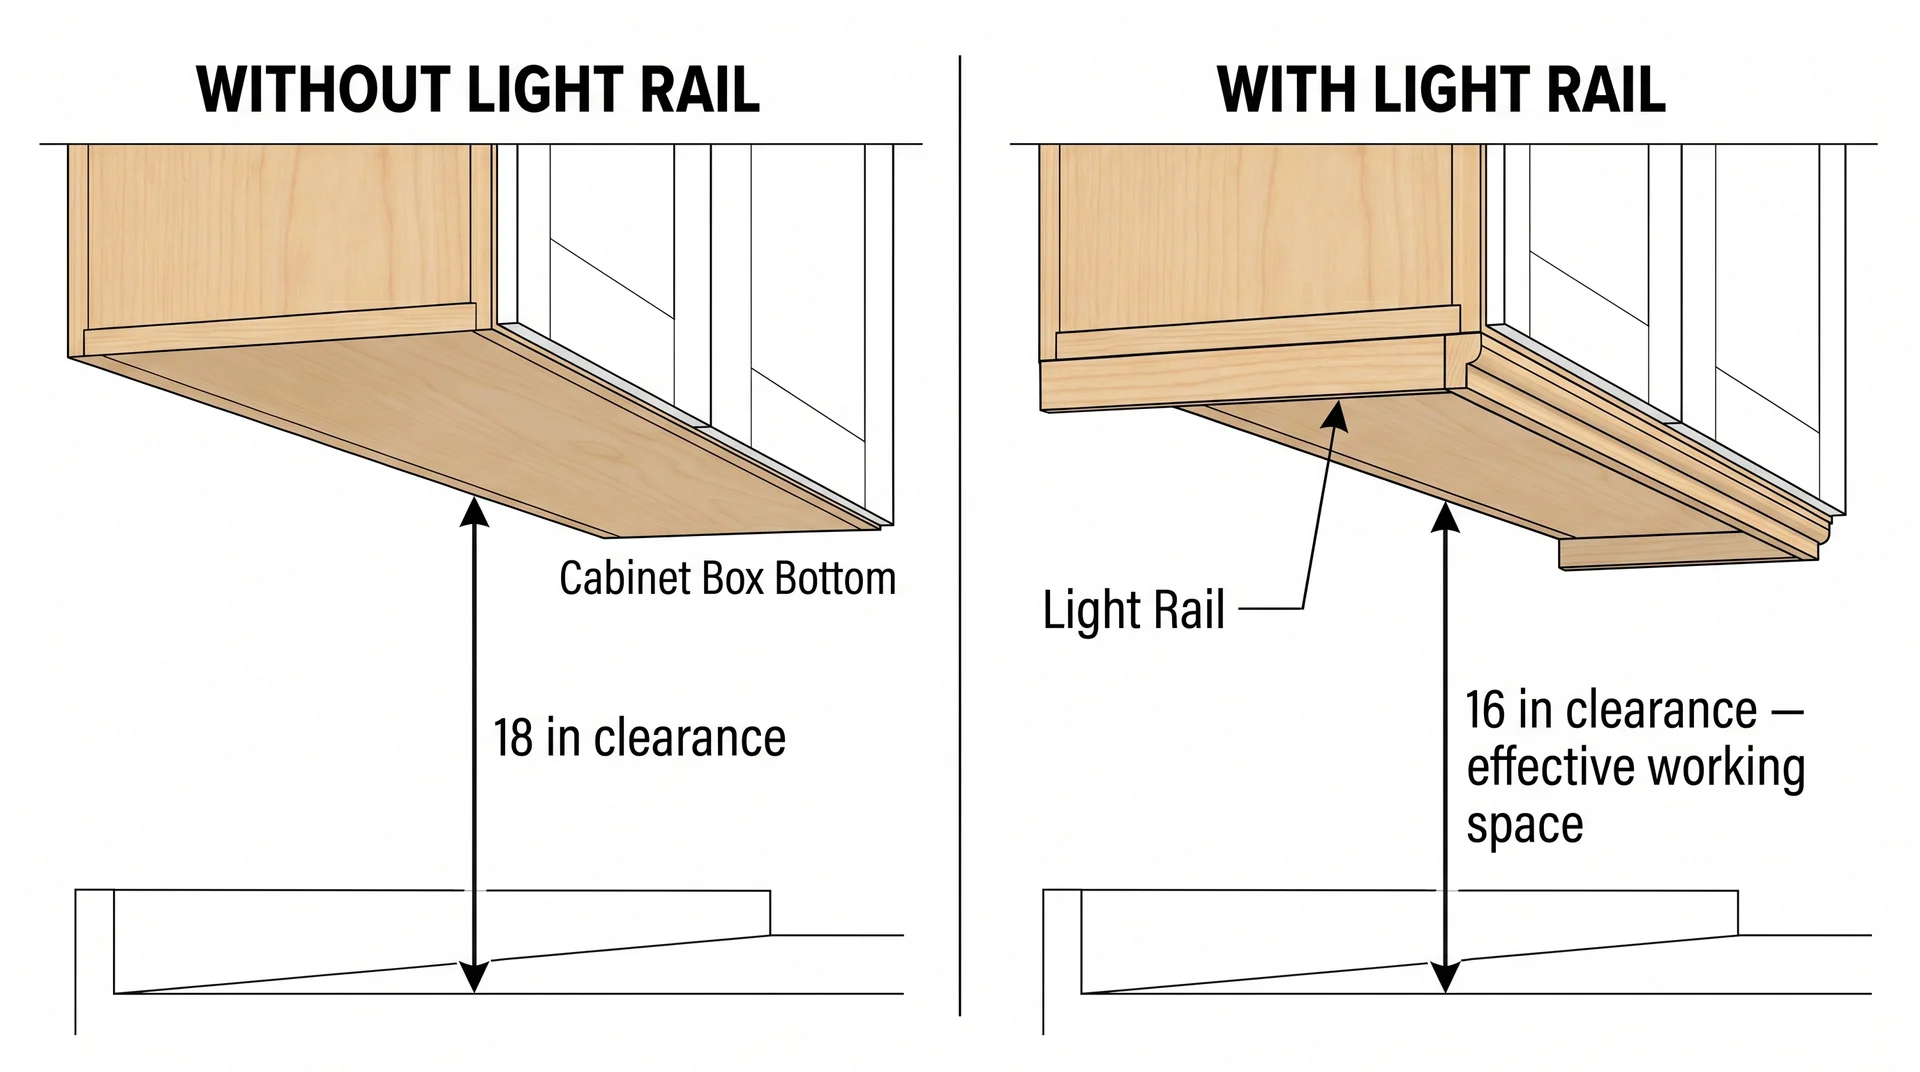
A decorative light rail below the cabinet box reduces effective clearance by 1.5 to 3 inches, and it is rarely discussed before installation.
A light rail is a decorative wood trim piece that attaches to the bottom of the cabinet box, covering the gap between the box and the lower door edge. It looks like a finishing detail. Homeowners and designers choose it late in a renovation, after cabinet height has already been set.
Plan 18 inches of clearance, then add a 2-inch light rail. Your working clearance is 16 inches. That is already below the NKBA minimum if any taller appliance is involved.
Under-cabinet lighting belongs in the same calculation. Fixtures mounted to the underside of the cabinet consume additional clearance depth. If under-cabinet lighting is in the plan, the fixture depth needs to be part of the gap calculation before cabinet height is locked.
Once the cabinet is hung, the tile is grouted, and the rail is trimmed out, correcting the clearance means pulling the cabinetry. That photograph is in my kill file, a folder of real rooms where this exact sequence went wrong. Trust me, it is not a small fix.
Above the Stove Is a Different Calculation
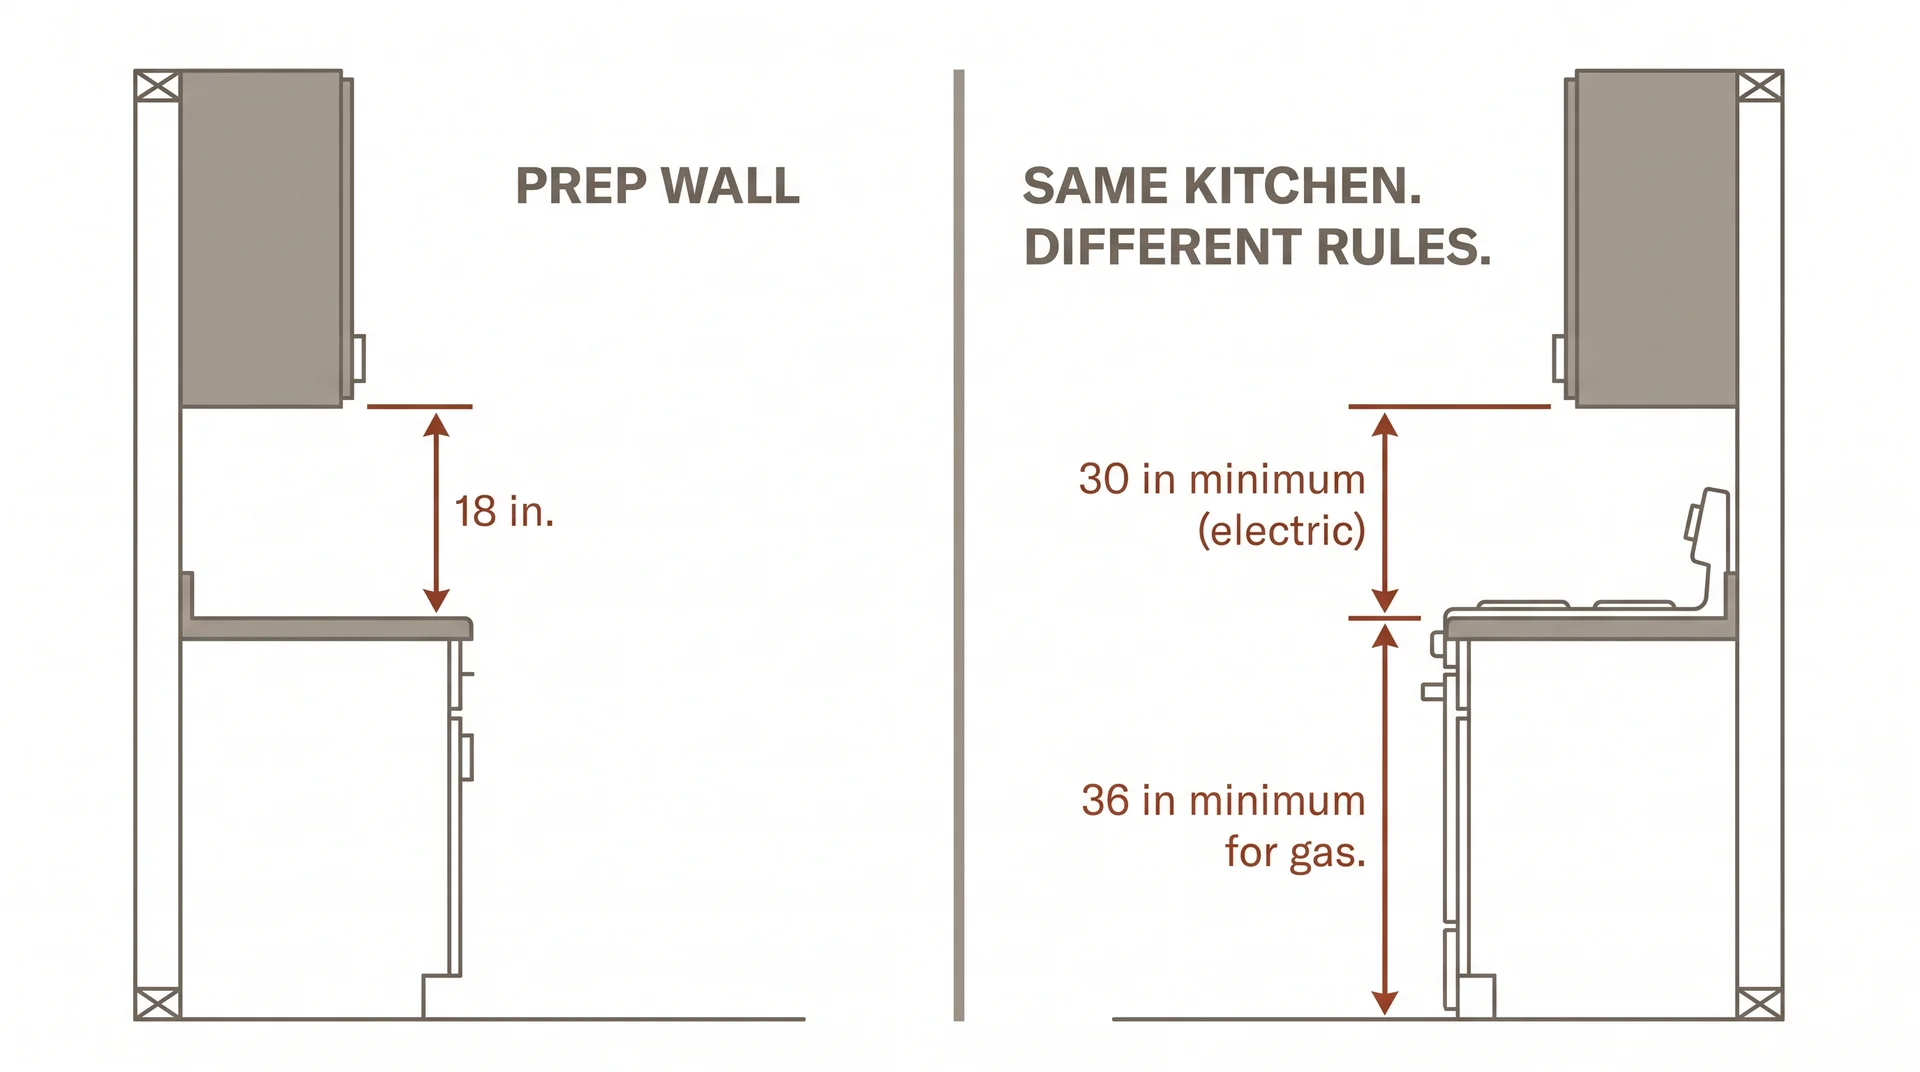
The range wall is a separate planning problem with a different minimum clearance and a completely different starting number.
Electric Range vs. Gas Range: Why the Number Changes
- The minimum clearance from the surface of an electric range to an unprotected cabinet above it is 30 inches.
- Above a gas range, that minimum rises to 36 inches.
“Unprotected surface” means a combustible material. Standard wood cabinet faces are combustible. The NKBA guidelines and building codes derived from the International Residential Code both specify these minimums. This is fire safety compliance, not a design preference.
Plan the range wall separately from every other wall in the kitchen.
If you set a uniform upper cabinet mounting height across all walls, the range wall will be non-compliant. It starts at 30 or 36 inches, not 18.
That is why upper cabinets on the range wall sometimes hang noticeably higher than the ones on the prep side. It is compliance and not a mistake.
When You Have a Range Hood or Over-Range Microwave
Your range hood manufacturer’s installation specs govern clearance above the cooking surface, and not the typical 18-inch rule, nor the general fire-safety minimums.
Most manufacturers specify the minimum distance from the cooking surface to the bottom of the hood. Those specs vary by unit. The spec sheet is the authority and overrides the general guidelines when they conflict.
An over-range microwave follows the same logic. Clearance requirements vary significantly by model. Check the installation manual before the wall is framed. Both of those answers come before the rough-in, not after.
How to Arrive at Your Number Before Anything Gets Installed
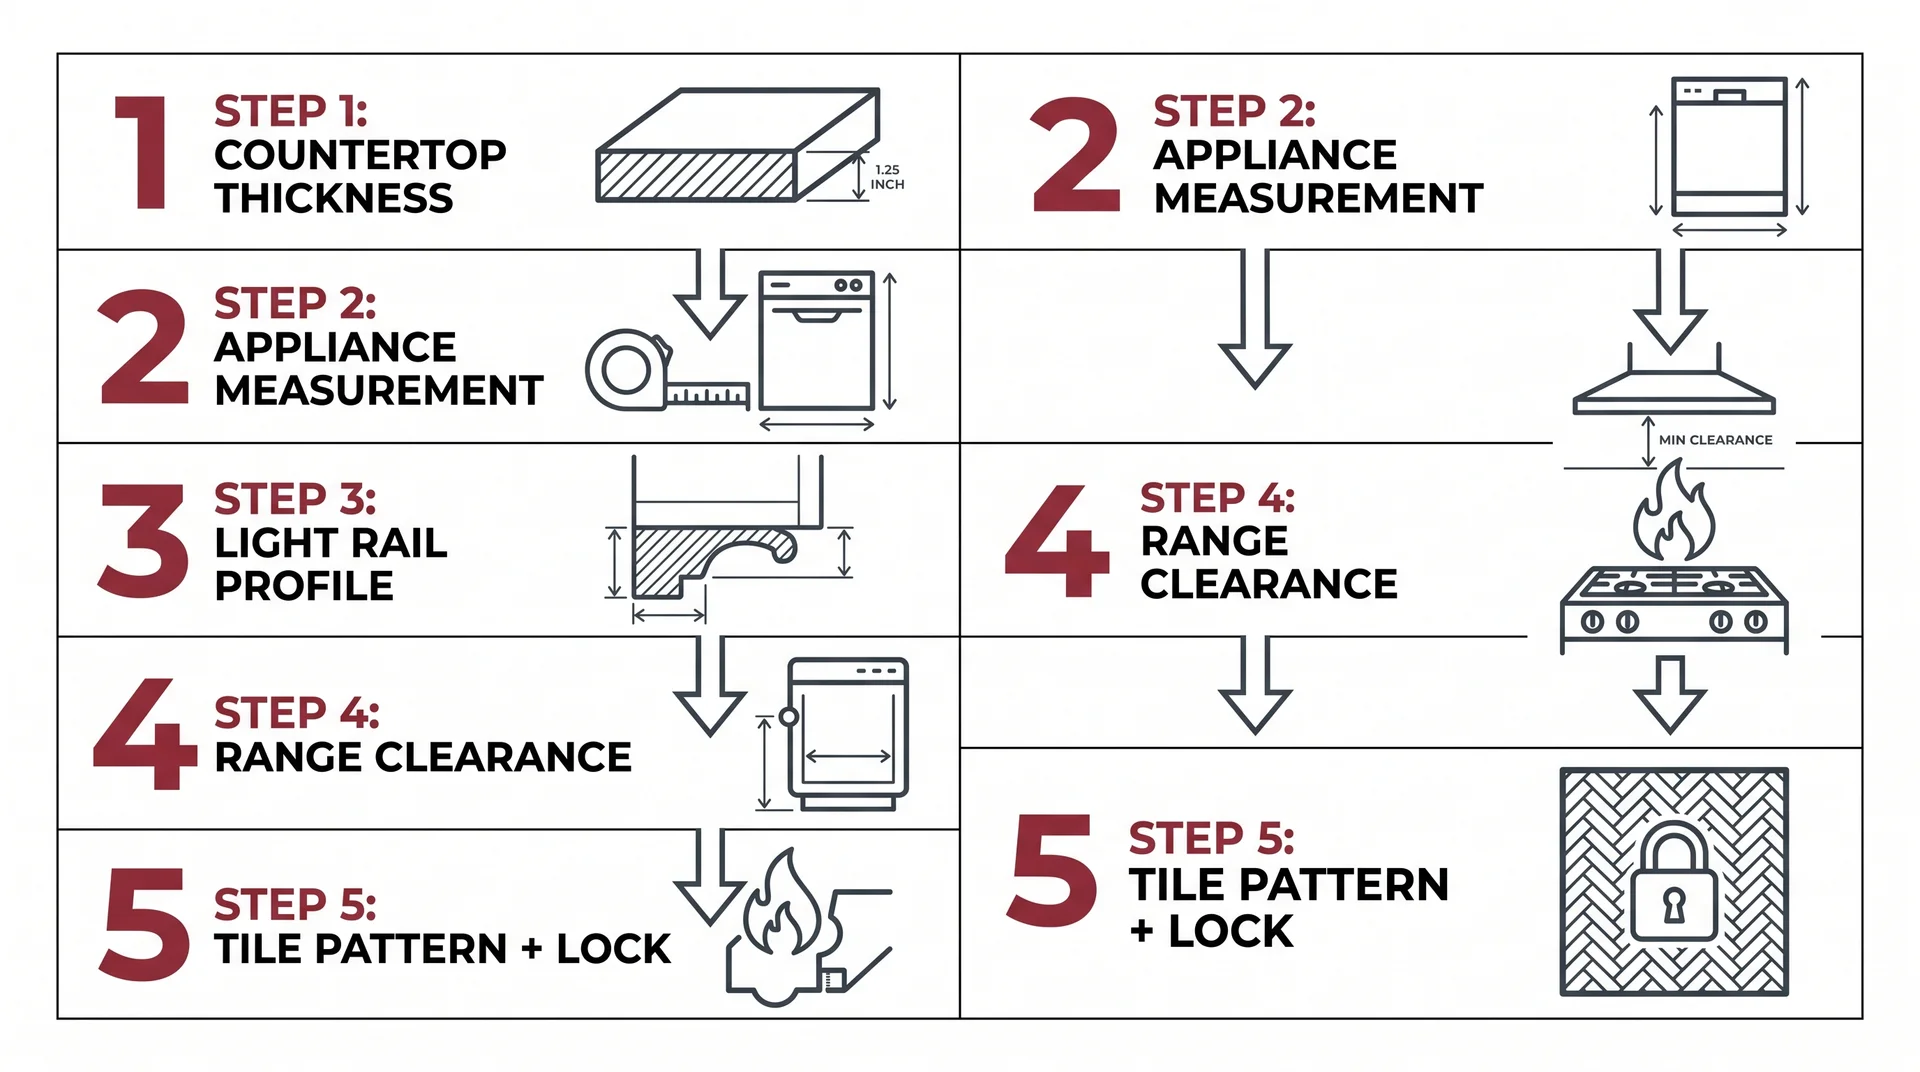
This is the sequence that actually produces the right measurement for your kitchen, before anything goes into the wall.
- Confirm your countertop thickness. The 54-inch floor-to-cabinet figure assumes a 1.5-inch countertop. Thicker quartz slabs can reach 2 inches or more. A thicker countertop raises your finished surface height. It shifts where the gap lands relative to the floor, even when the 18-inch clearance stays the same. Also, confirm whether your countertop overhangs the base cabinet face. The standard overhang is 1.5 inches, which protects the cabinet face from spills. Use a confirmed thickness from your countertop specification sheet, not a contractor estimate.
- Measure your tallest countertop appliance in operating position. Lid open. Head raised. Carafe in place. That measurement is your clearance floor. The standard follows from your appliances, not the other way around.
- Decide on a light rail before finalizing cabinet height. If one is in the plan, subtract its height from the intended gap. Check whether the remaining clearance still works for your appliances and any under-cabinet lighting fixtures.
- Identify which walls sit above cooking surfaces. Any wall above a gas range starts at 36 inches of clearance. Any wall above an electric range starts at 30 inches. Plan those walls separately from the prep and storage walls.
- Lock the number. Then order the backsplash tile. The gap between the counter and the upper cabinet is the tile field. Tile format, grout line spacing, and outlet placement all have to fit inside it. Changing the gap after the tile has been ordered means waste and may make the format unworkable around your outlets.
When to Adjust the 18- Inch Standard?
The 18-inch standard works in many kitchens and fails in some.
The Case for Going Higher (20 to 24 Inches)
Going higher than 18 inches makes sense in specific situations and not as a general preference for visual openness.
Three situations that warrant it:
- The primary cook is taller than 5 feet 10 inches and finds 18 inches of clearance visually cramped when working at the counter
- The appliance collection includes a full-size stand mixer or a tall espresso machine that exceeds 18 inches in operating position
- Under-cabinet task lighting is a design priority, and the fixtures require 2 or more inches of depth to sit cleanly against the cabinet’s underside
Every extra inch of clearance below the upper cabinet is an inch removed from cabinet height on an 8-foot ceiling. Going from 18 to 21 inches may mean choosing a shorter upper cabinet. That means less shelf storage.
The constraint is where the real decision lives. Work out the storage trade-off before committing to a number that looks better on a drawing than it works in the room.
The Case for Staying (18 Inches or Lower)
A shorter primary cook often benefits from staying at 18 inches or dropping slightly, because upper shelf access matters more than appliance clearance in that kitchen.
The NKBA floor is 15 inches. Going below that makes the lower shelves of the upper cabinet difficult to reach without a step stool. The visual proportion also shifts, and the kitchen starts to feel heavy above the counter line.
Going to 15 or 16 inches trades appliance clearance for easier reach. It’s a real trade-off. The person using the kitchen every day is the one who decides which matters more.
The Ceiling Height Factor
Your ceiling height sets the outer limit of this decision.
In an 8-foot ceiling kitchen, a 54-inch bottom-of-cabinet and a 42-inch upper cabinet put the top of the cabinet at exactly 96 inches, flush with the ceiling, no room for crown molding.
Crown molding typically needs 4 to 6 inches of clearance between the top of the cabinet and the ceiling. In most 8-foot kitchens, that means choosing a 36-inch upper cabinet rather than a 42-inch one. That choice is made at the planning stage.
The Backsplash You Haven’t Ordered Yet
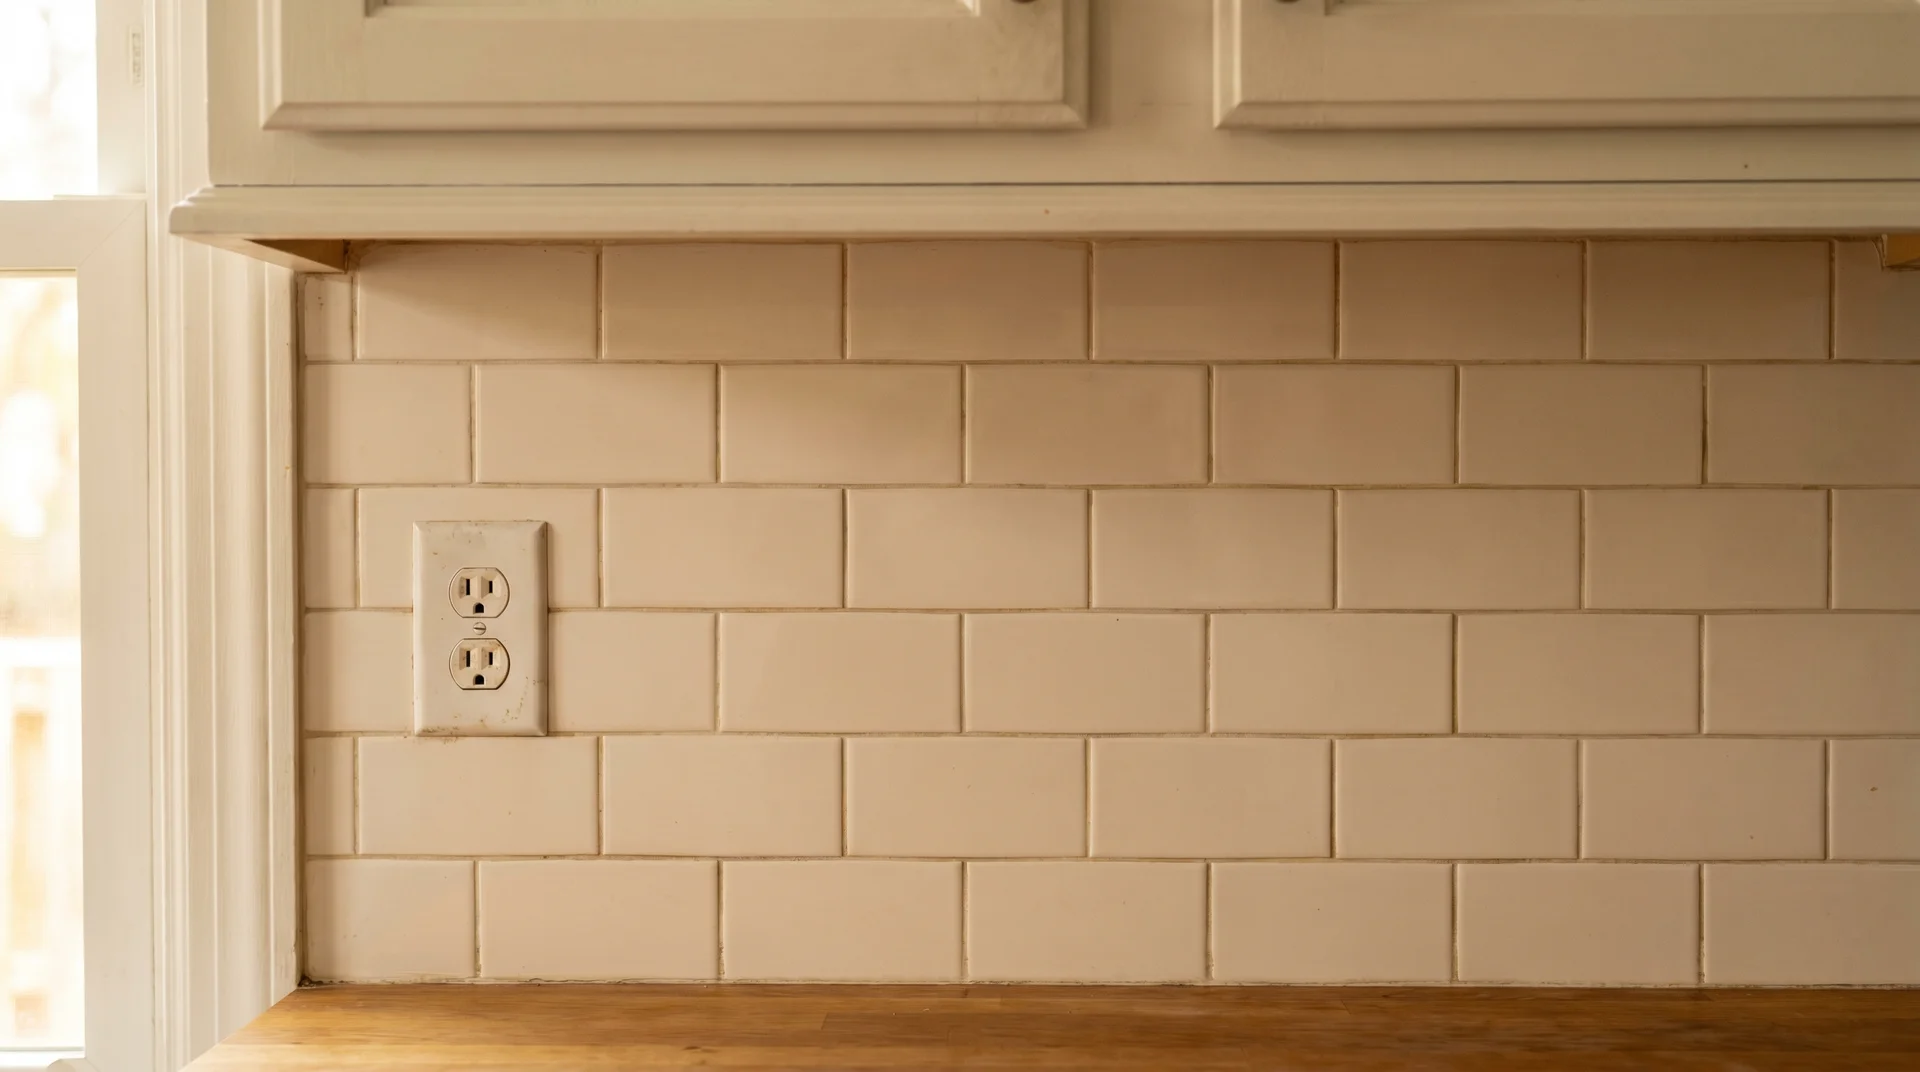
The gap between your countertop and upper cabinet is also your backsplash field, and that makes this measurement a design decision, not just a clearance number.
Do this right now. Walk up to that wall. Look at the space between where the counter surface lands and where the bottom of the upper cabinet will sit. Every tile, every grout line, every outlet, and every under-cabinet light trim lands inside that strip.
This is where the one-hero rule applies. I developed it from a kitchen I redesigned entirely at my own cost, after I over-specified every surface and watched them compete. The same failure happens in miniature inside this gap.
A complex tile pattern, a light rail, and a prominent outlet cannot all be resolved cleanly in 18 inches. Something has to lead.
And remember that 2-inch light rail from earlier in this piece. It brings the tile field from 18 inches down to 16. Some tile formats handle that. Some formats produce forced cuts at every row.
A 3-by-6-inch running bond reads well in an 18-inch field. A large-format tile in a field bond where the grout lines carry the visual weight needs the measurement confirmed first, so the format works without forced cuts at the cabinet line or the counter edge.
A Note on Height for Taller and Shorter Cooks
The 18-inch standard was calibrated for a height range that doesn’t serve every cook equally.
- A 5-foot-2-inch cook can reach the first shelf of a 30-inch upper cabinet, but the upper shelves are effectively out of reach without a step stool.
- A 6-foot-2-inch cook at the same counter feels 18 inches as a compression, not a comfort.
There is no single number that solves this for everyone. What the framework in this piece gives you is the variables and the sequence.
The measurement that comes out of it belongs to your kitchen, your height, and your actual daily use. I’d tell any client the same thing.
