

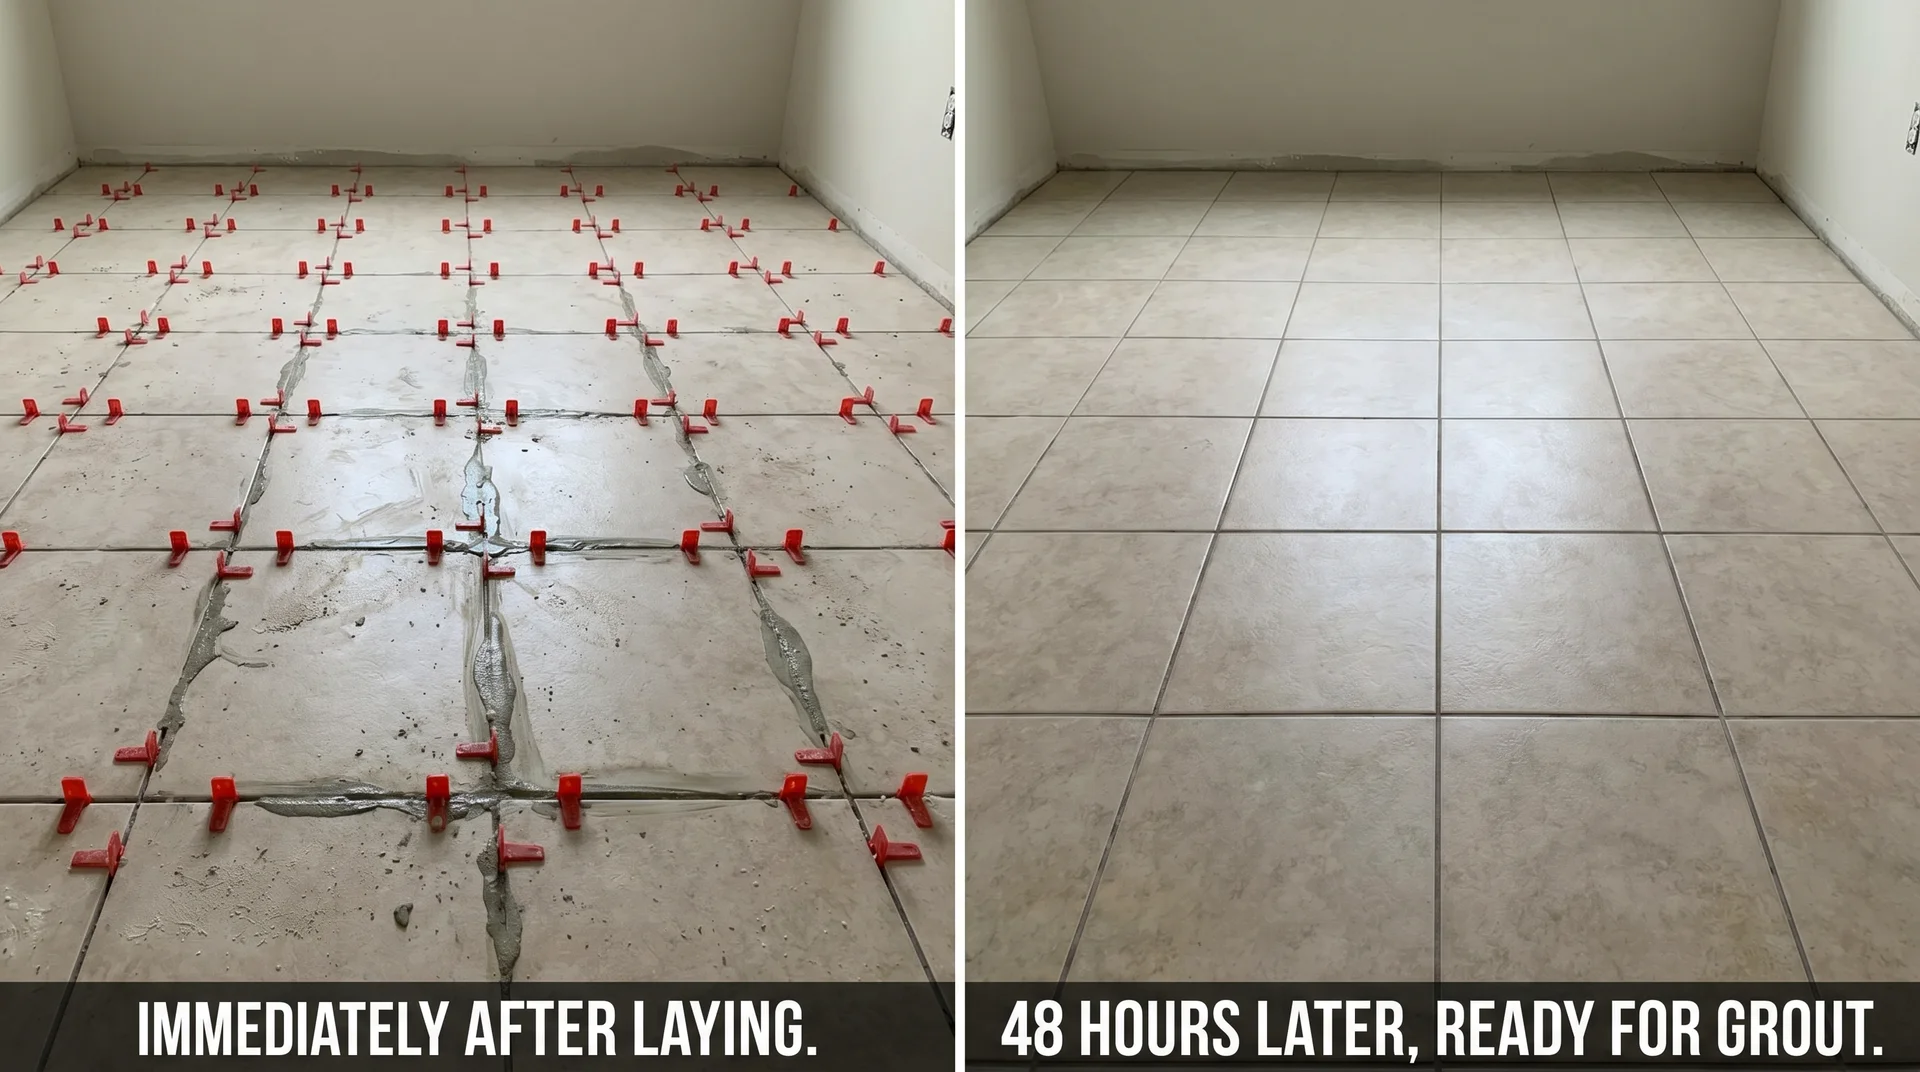
Wait at least 24 hours before grouting if you used standard thinset mortar.
Wait 48 hours if the room is humid, the tile is large-format, or you’re working on a floor. If you used rapid-set thinset, check the bag because some products allow grouting in as little as two hours.
That’s the short version. The longer version explains why those numbers conflict across many sources, what the two separate waiting periods are, and what happens to a tile job when you rush either one.
How Long to Wait to Grout Tile?
The 24-hour figure is real, but it only applies in one specific situation.
Standard cement-based thinset mortar, applied in a room between 60°F and 90°F with normal humidity, at a typical thickness, under tiles that aren’t unusually heavy: grout after 24 hours. That covers most kitchen backsplash jobs, most bathroom wall tile, most standard-sized ceramic floor tile in normal indoor conditions.
Change any of those variables, and the number changes with them. A cold basement floor in November is not the same situation as a bathroom wall in July. Large-format porcelain on a wood subfloor is not the same situation as 4-inch subway tile on cement board.
The bag of thinset you used already has the answer for your specific project. Look at the product before reading anything else. The manufacturer’s cure time is the governing document.
Can you grout tile the same day?
- With standard thinset: no. The adhesive needs time to release moisture and complete its chemical cure.
- With rapid-set thinset: sometimes yes. Some products are genuinely ready in two to three hours. But “rapid-set” has to be printed on the bag you actually used, not the product you wish you’d bought.
The Two Waits Nobody Explains Together
Every tile project has two distinct waiting periods, and mixing them up is how good work quietly fails.
Wait One: Thinset Cure Before You Grout
Thinset doesn’t dry the way a puddle dries. It cures. Like a chemical process where the cement hydrates and forms crystal bonds with the tile and the substrate beneath it. Moisture needs to migrate out of the mortar during this process.
The floor will look ready before it is. The thinset visible in your grout lines may look and feel completely set well before the mortar under the center of a large tile has finished curing.
If you grout before that curing is complete, the thinset continues to release moisture after the grout is in place. That moisture has nowhere to go.
It migrates through the grout, weakening the bond and causing shrinkage cracks. Tiles that aren’t fully bonded can also micro-shift under the pressure of a grout float, creating uneven grout lines that no amount of sponging will correct.
The standard minimum is 24 hours for standard thinset in good conditions.
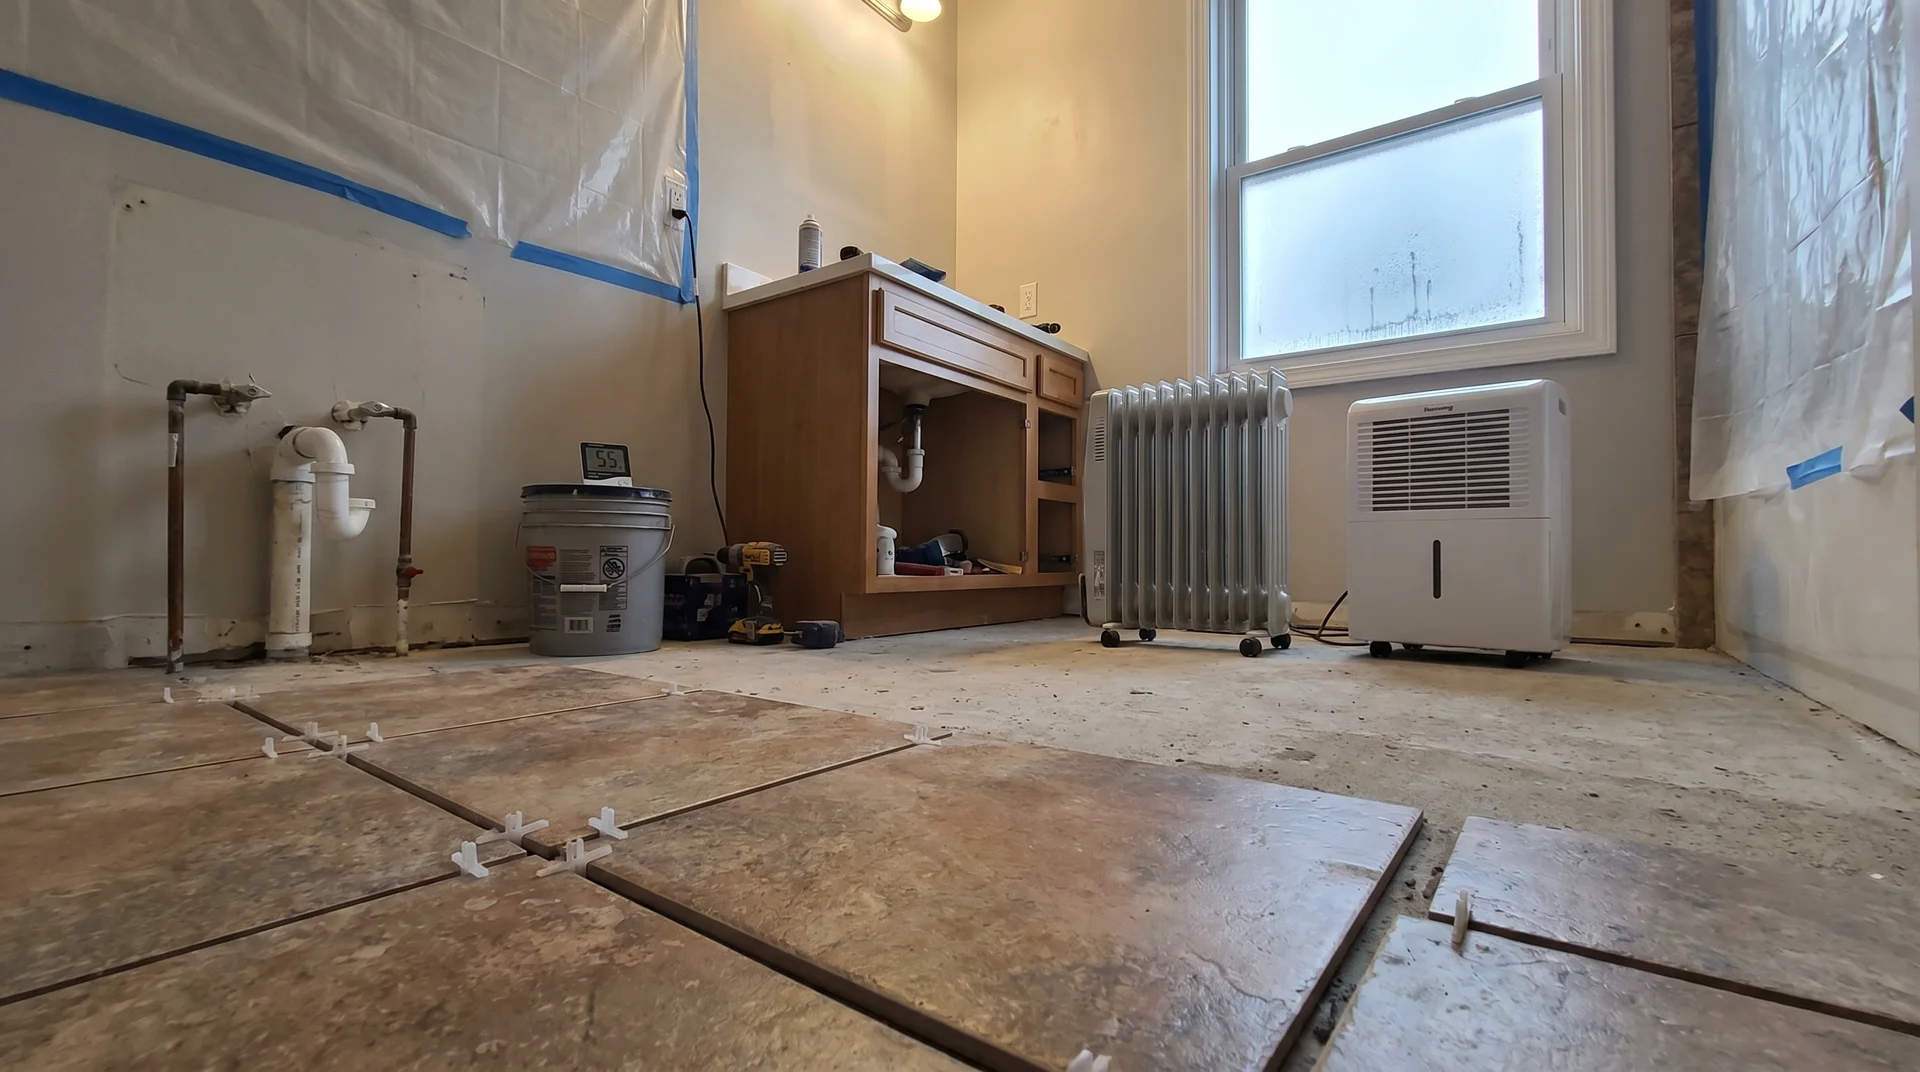
In cool, humid conditions like a finished basement, a bathroom during a damp season, or any winter renovation with the heat off, professional installation specifications from the Tile Council of North America put the minimum at 72 hours.
In hot, dry conditions, 48 hours. These aren’t just conservative estimates. They come from the industry’s actual installation standard, ANSI A108.10, which governs grout installation procedures.
Wait Two: Grout Cure Before Traffic and Sealing
You grouted correctly. You waited the right amount of time before doing it. You cleaned the haze off beautifully. Now you need to know when the floor is usable.
This is a completely separate timeline, and it starts from when you applied the grout, not from when you laid the tile.
- Light foot traffic (socks, careful movement): 24 hours minimum
- Normal household foot traffic: 48 to 72 hours
- Moving furniture back in or heavy use: full 72 hours minimum
- Applying grout sealer: minimum 48 to 72 hours after grouting, the grout must be fully cured to absorb the sealer properly
Cement-based grout takes up to 72 hours to reach its functional cure strength, even when it looks and feels completely hard at 24 hours.
Walking on it too early doesn’t usually cause visible damage immediately. It causes micro-cracking that appears a month later and looks exactly like a product defect or a mixing error. It’s almost always a timing problem.
I’ve documented this failure in real projects more times than I’d like. It looks like someone sold the homeowner bad grout. It wasn’t bad grout.
Variables That Change the Timeline
Start with the adhesive type, not the tile type.
Most articles lead with ceramic versus porcelain versus natural stone. Tile material matters, but it matters less than what you used to bond the tile to the wall or floor. Here’s the practical breakdown:
| Adhesive Type | Minimum Wait Before Grouting | Conditions and Notes |
|---|---|---|
| Standard thinset mortar | 24 hours (normal conditions) | 48 hours for floors, large-format tile, or humid rooms |
| Rapid-set thinset | 2–5 hours (product-specific) | Check the bag. Custom Building Products Speedset: 2 hours. Rapid Set All Tile: 5 hours. Do not assume across brands. |
| Mastic or organic adhesive | 24 hours minimum | Some require 48 hours. Never use mastic in wet areas – showers, steam rooms, or anywhere with standing water. |
| Epoxy adhesive | Product-dependent | Cures chemically, not by moisture release. Follow the manufacturer’s data sheet exactly. |
Temperature and Humidity Shift the Numbers More Than Most Guides Acknowledge
You’re standing in a room that isn’t 70 degrees and 50 percent humidity. That matters.
The 24-hour baseline assumes conditions between 60°F and 90°F with relative humidity below about 60 percent. Outside that range, the timeline changes:
- Cold or humid conditions (below 60°F, or above 70% relative humidity): minimum 72 hours before grouting, per TCNA installation specifications
- Hot, dry conditions: 48 hours – very fast surface drying can weaken the cement bond by pulling moisture out before the cure completes
- Ideal conditions: around 70°F and 50% relative humidity
A bathroom mid-renovation in January, with the heat off to avoid fumes and the window cracked, is not 70°F and 50% humidity. It’s probably 55°F and 65% humidity.
That changes the wait from 24 hours to something closer to 48 or 72. Running a dehumidifier in the room during the cure window genuinely helps.
Does humidity affect how long to wait before grouting?
Yes, significantly. High humidity slows moisture release from the thinset, which slows the chemical cure. In humid conditions, the TCNA minimum is 72 hours. Low humidity with high heat speeds surface drying, which can also be a problem — it looks cured before it is.
Tile Format and Weight
Large-format tiles, like 12 by 24 inches or larger, should wait the full 48 hours regardless of adhesive type.
More mass means more downward pressure on uncured thinset and more leverage if a tile shifts even slightly.
The mortar bed is also thicker under large-format tile, which means the cure progresses more slowly in the center.
Mosaic tile on mesh backing is lighter, but the mesh can slow moisture release from the thinset beneath it. A small tile doesn’t automatically mean a faster cure.
What Happens When You Grout Too Soon
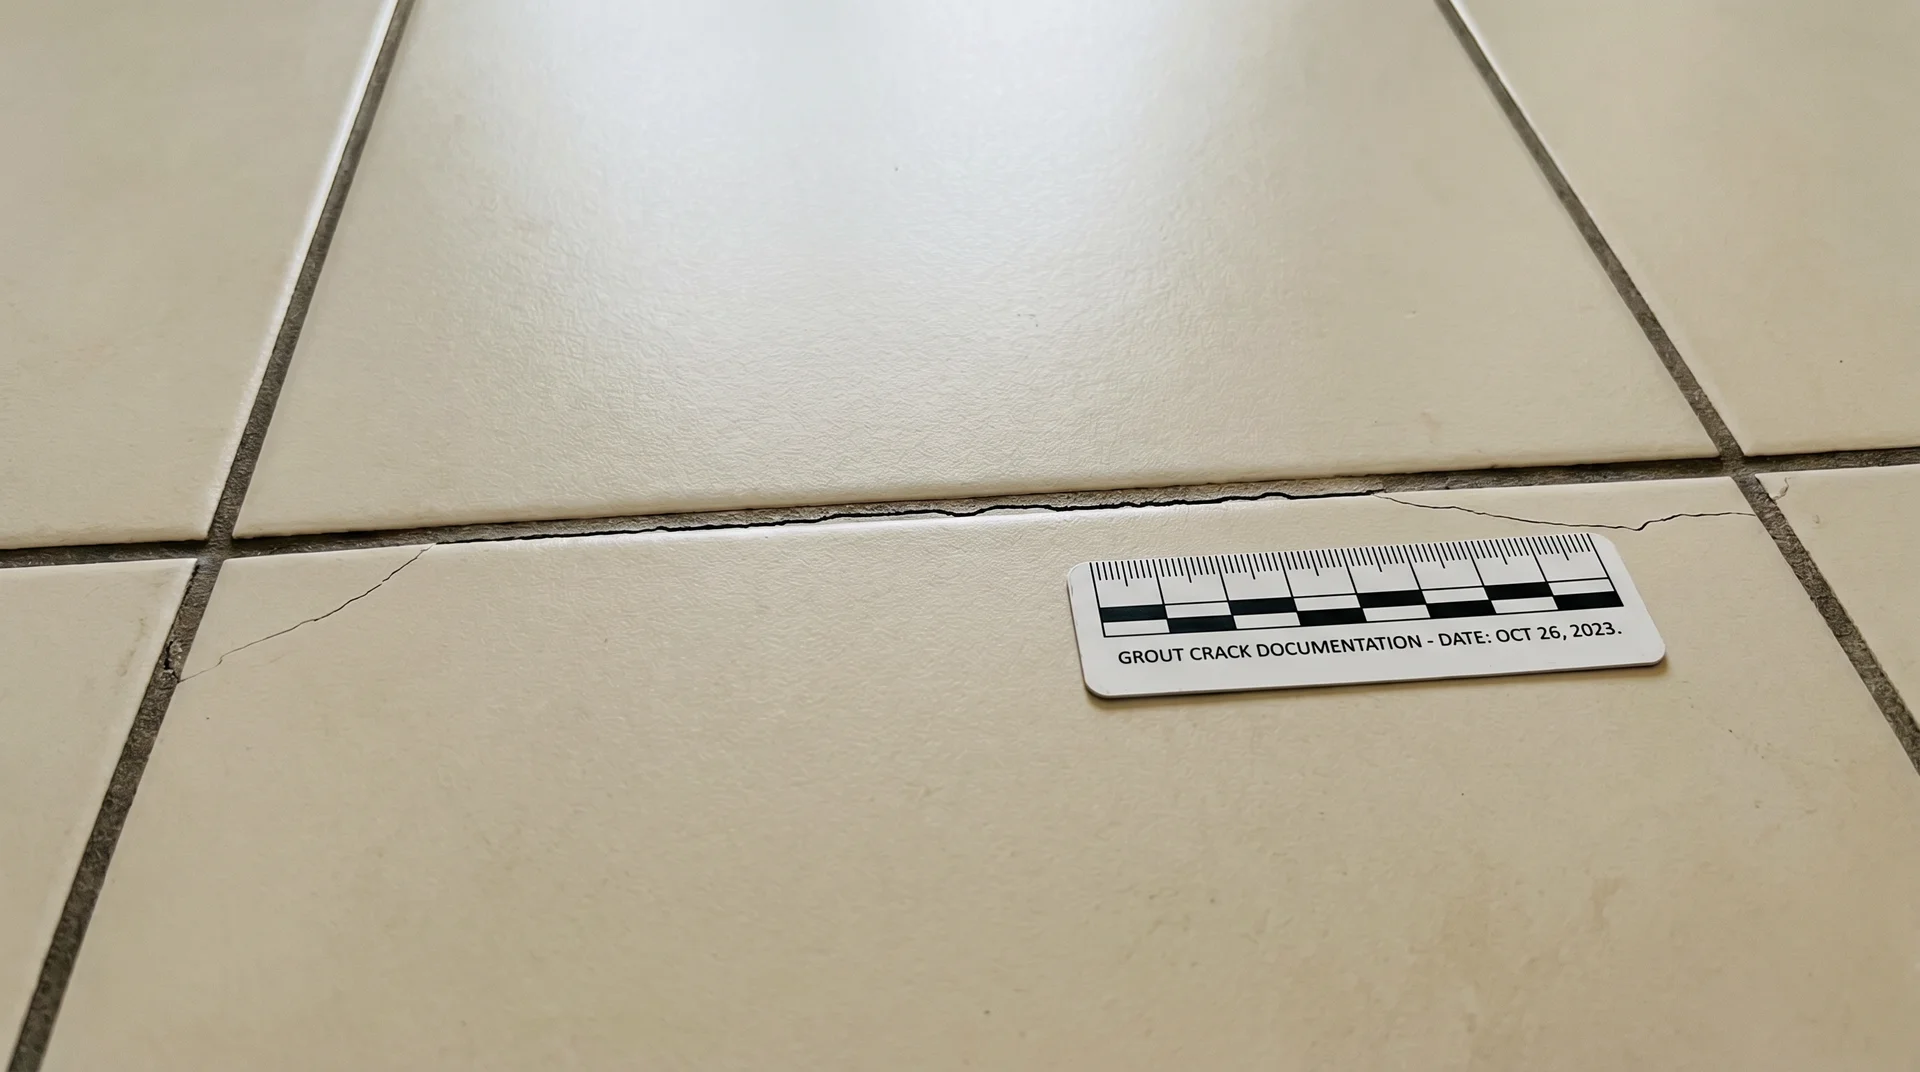
Cracked grout lines appearing within the first month are the most common sign.
The cracks follow the joint precisely. They don’t run diagonally through the tile, which would point to a structural problem. They’re clean, consistent, and they look exactly like a grout mixing error. They’re not. They’re the result of the thinset continuing to shrink after the grout locked everything in place.
Discolored grout is the second failure mode. When moisture from uncured thinset migrates up through freshly placed grout, it pulls mineral salts with it. This process is called efflorescence.
White grout turns blotchy. Gray grout develops patchy, lighter areas. The discoloration is permanent because it’s baked into the cured grout matrix.
In wet applications, premature grouting creates a third problem that’s harder to fix than either of the above.
Trapped moisture between an incomplete thinset cure and fresh grout in a shower or bathroom floor is a warm, humid environment with no airflow. Mold can develop behind the tile. The remediation almost always involves removing tile to address it. None of these failures announce themselves during the grouting session. The work looks fine.
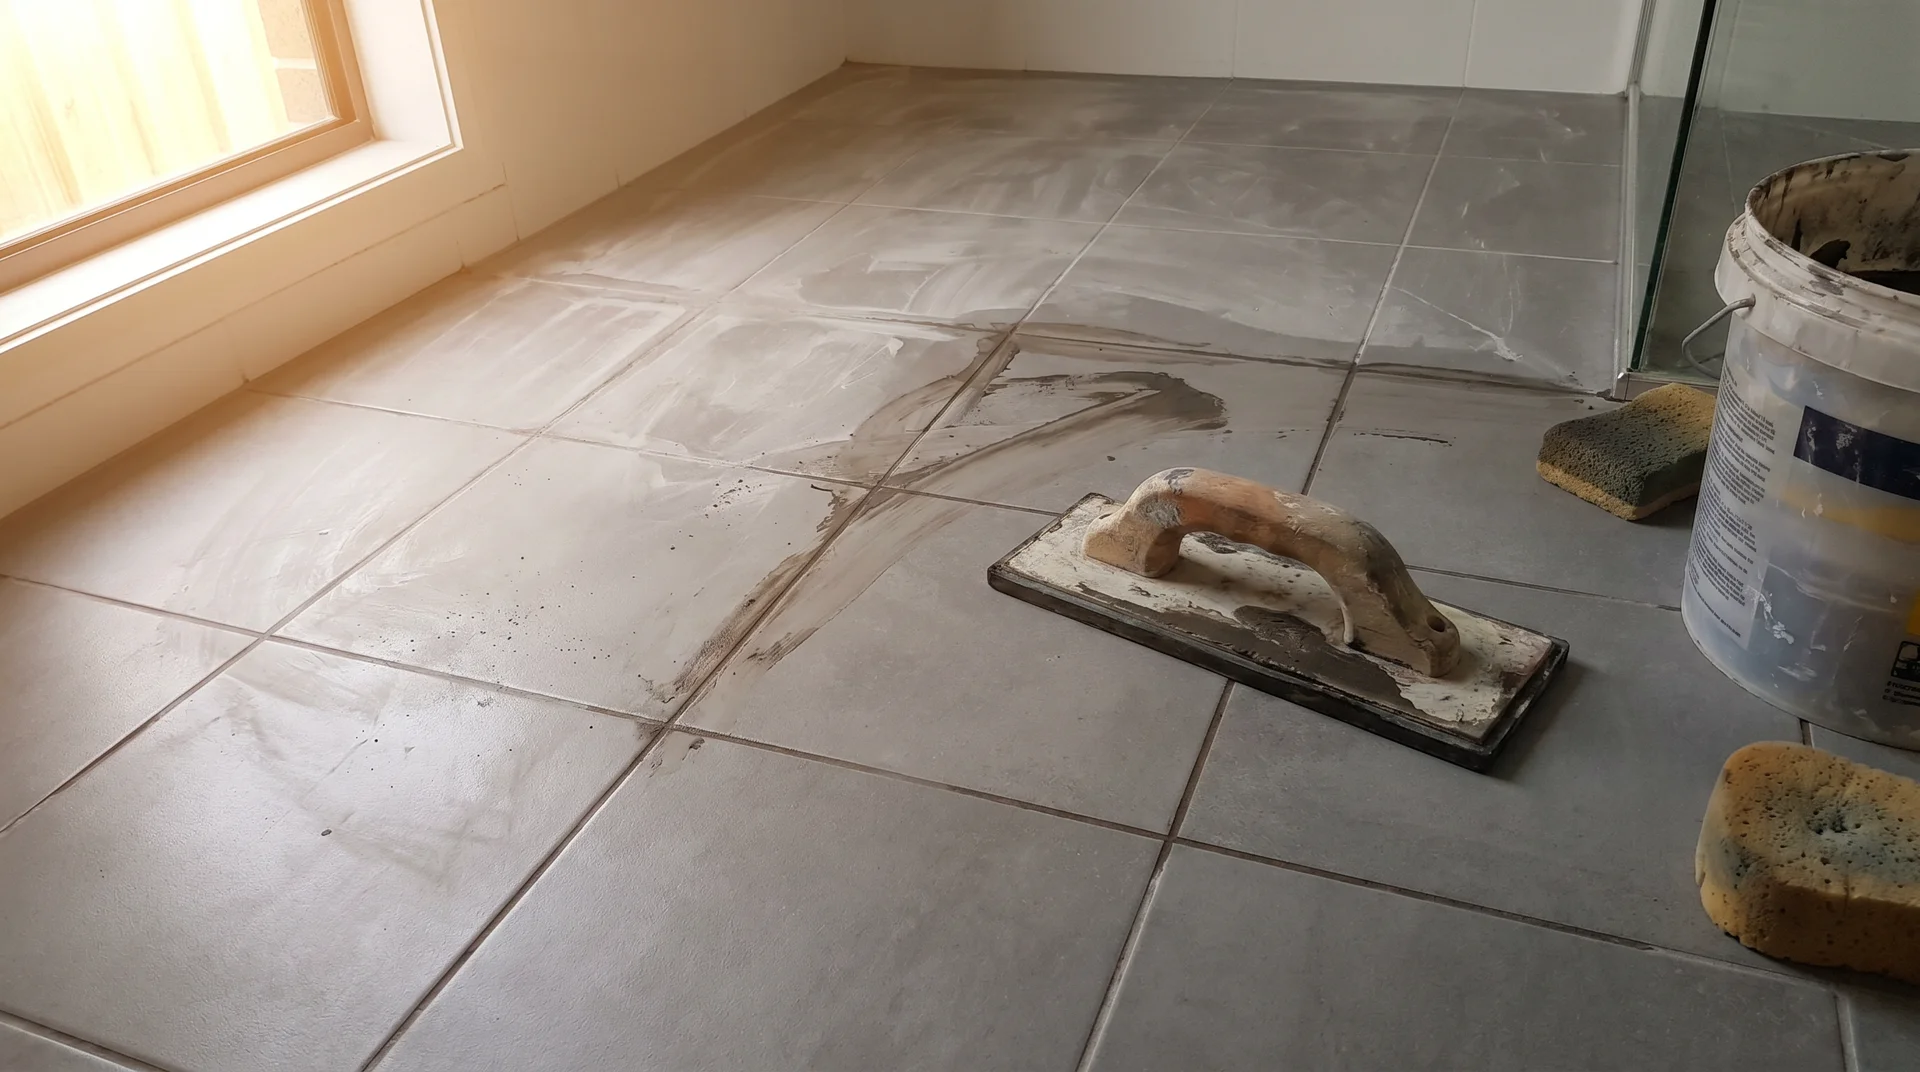
The Thumb Press Test
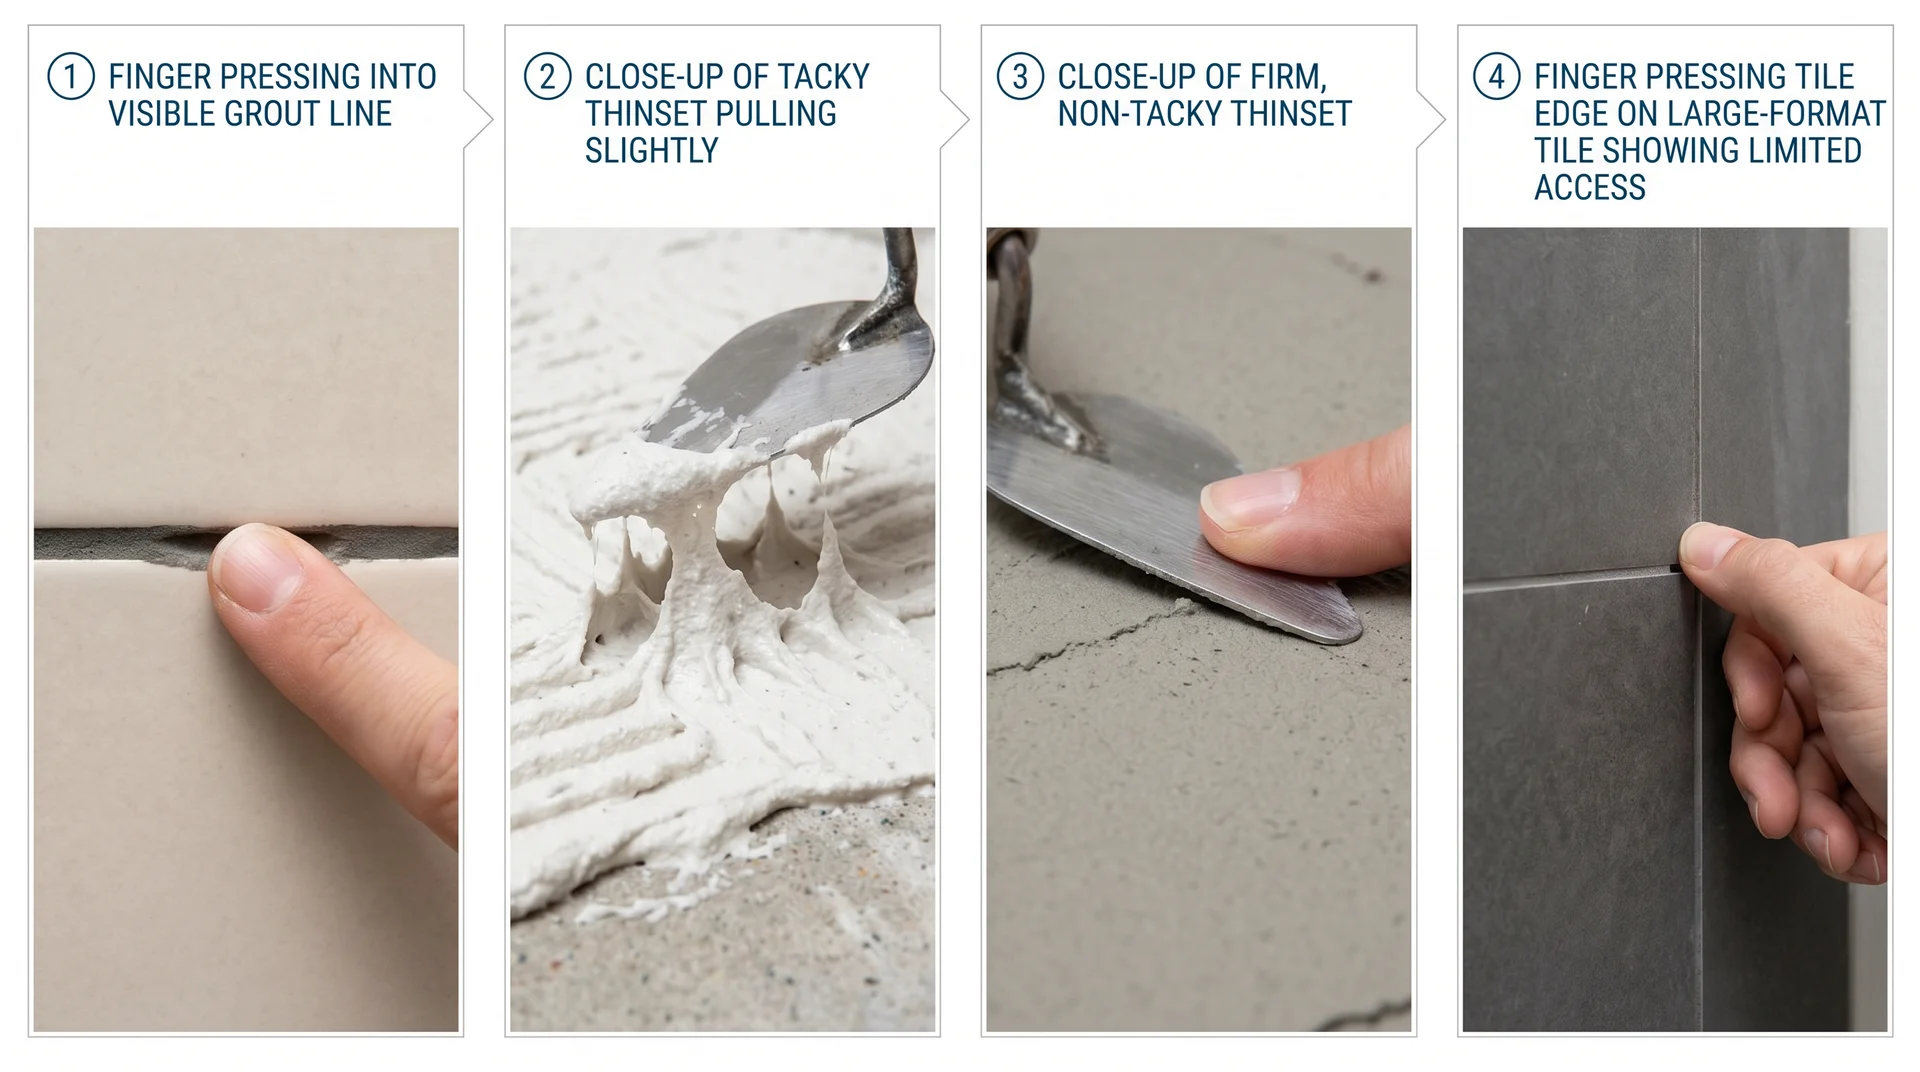
The best readiness check doesn’t require any equipment.
Press your thumb firmly into the thinset mortar visible in an open grout line. You’re looking for two things: the mortar should feel solid with no give, and it should not be tacky.
If it depresses under firm pressure or clings to your thumb when you pull away, it is not ready.
How to Do the Test
- Find a grout line near the center of the tiled area – not at an edge, where the mortar gets more airflow and cures faster than the middle.
- Press your thumb straight down with firm, consistent pressure. Hold for two full seconds.
- Pull your thumb straight up. If any mortar lifts with it, wait longer.
- Check the color as well: gray thinset that’s actively curing often appears darker in patches. Uniform color across the grout lines is a good sign.
- Do the test in two or three spots, especially under any large tiles where the mortar bed is thicker.
When the Test Doesn’t Work
Large-format tile leaves almost no exposed thinset at the grout line. You can’t get a meaningful press in a 1/8-inch gap under a 24-inch porcelain.
For these installations, use a tap test instead: knock lightly on the face of the tile near the center with your knuckle. A hollow sound means the thinset hasn’t bonded fully – which also means it hasn’t cured fully.
A solid, dense sound is what you’re listening for. This test is less precise than the thumb press, which is exactly why large-format tile should default to the full 48-hour wait rather than relying on it.
Room-by-Room Guidance
The variables above combine differently depending on where you’re tiling, and the right wait time shifts with the application.
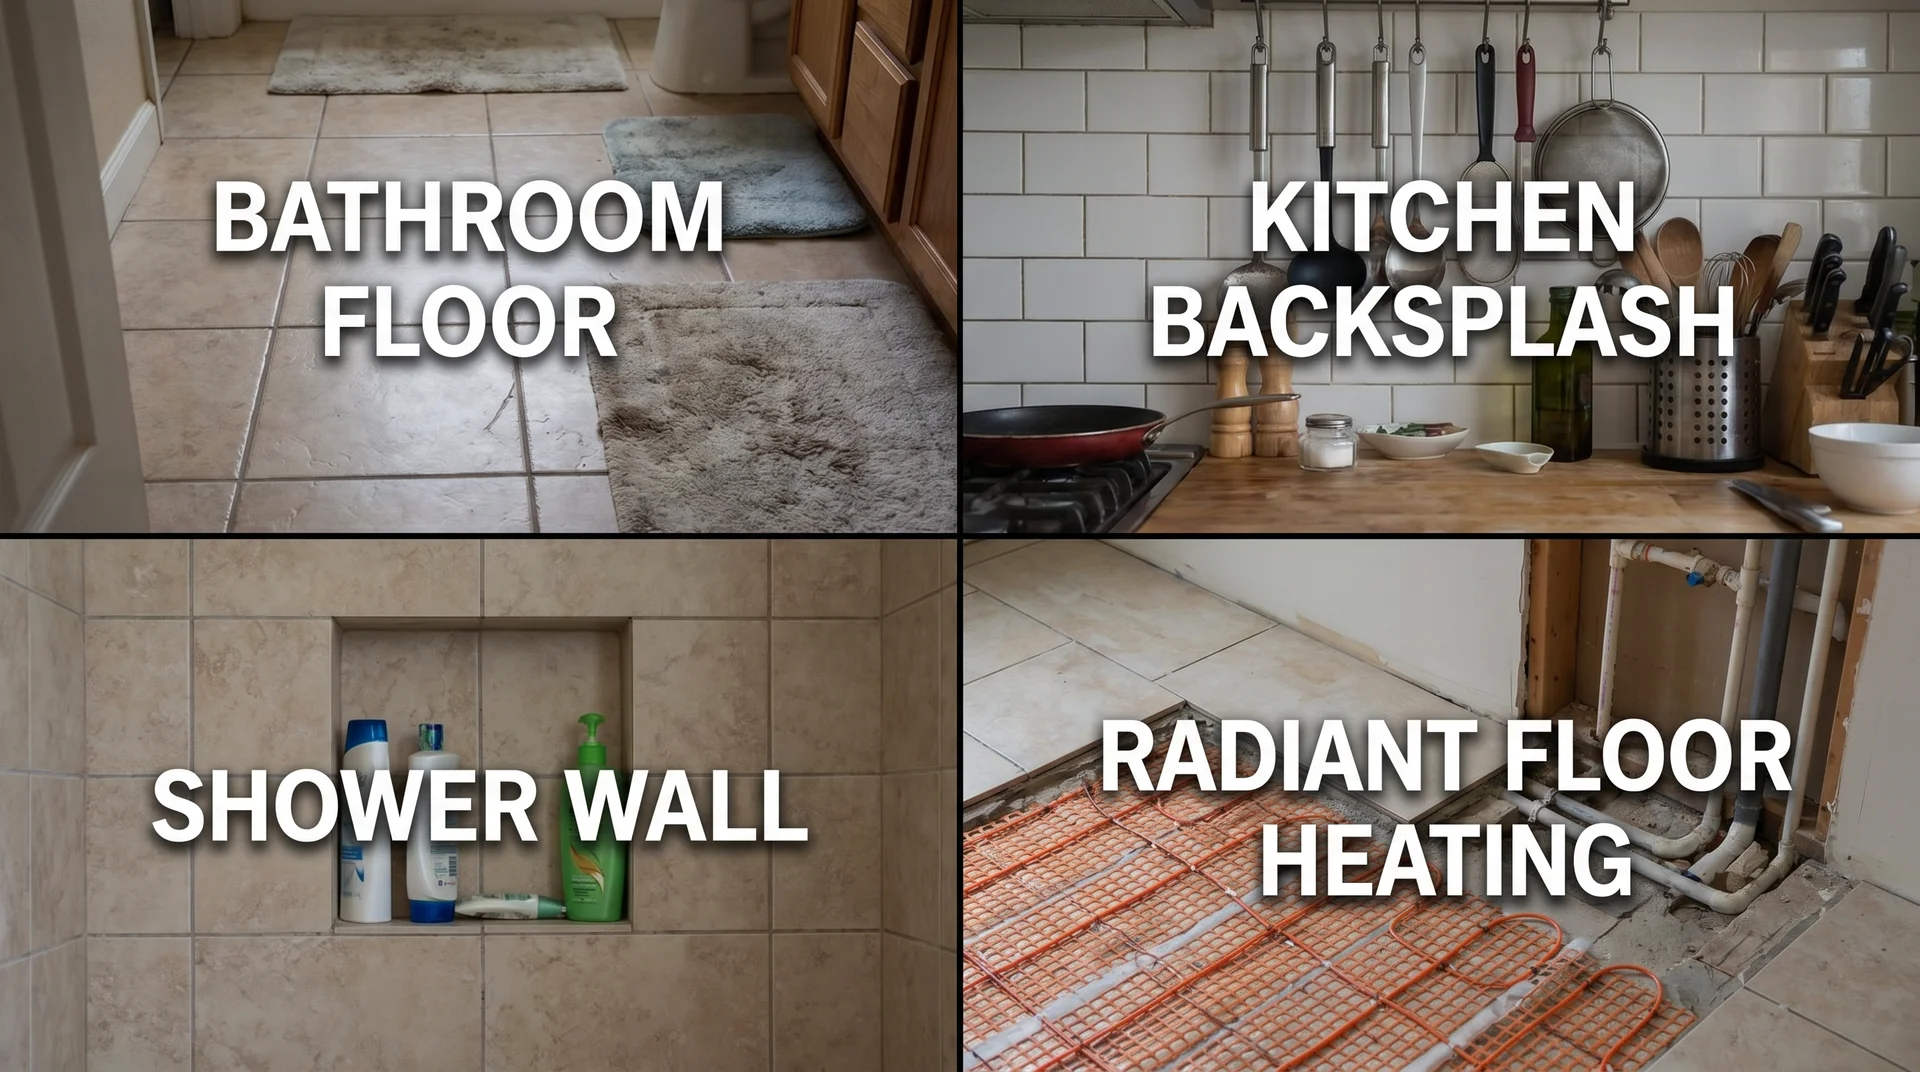
Bathroom Floor
Minimum 48 hours before grouting. This is not the place to test what 36 hours gets you.
Bathrooms are naturally humid, especially during a renovation when ventilation is compromised. Floor applications carry foot traffic load. Both conditions push the safe minimum toward the longer end of the range.
Kitchen Backsplash
Standard thinset at 24 hours is generally fine for a kitchen backsplash.
Wall applications have no foot traffic pressure, and backsplashes typically use standard-sized tile with consistent adhesive coverage.
A small note: some kitchen backsplash installations use mastic adhesive rather than thinset, particularly where the substrate is drywall rather than cement board. Mastic has its own timing requirements.
Check the product before assuming the 24-hour rule applies.
Shower Walls
Wait the full 48 hours minimum. Lean toward 72 if conditions are anything less than ideal.
Shower walls live in a permanently wet environment. A rushed thinset cure in a shower isn’t a cosmetic problem; it’s a moisture intrusion problem. The waterproofing membrane beneath your tile also has its own cure time before tiling should begin.
That’s a separate project stage, but the principle is the same: the layers you can’t see after the job is done are the ones that matter most.
Heated Floors (Radiant Heat)
Turn off the radiant heat system before tiling and keep it off through the grout cure.
Heat accelerates the surface cure of thinset while deeper layers are still active, which creates uneven cure across the mortar bed.
Resume heat 24 hours after grouting is complete, and bring it up gradually rather than returning to full temperature immediately.
A Note on Rapid-Set Thinset
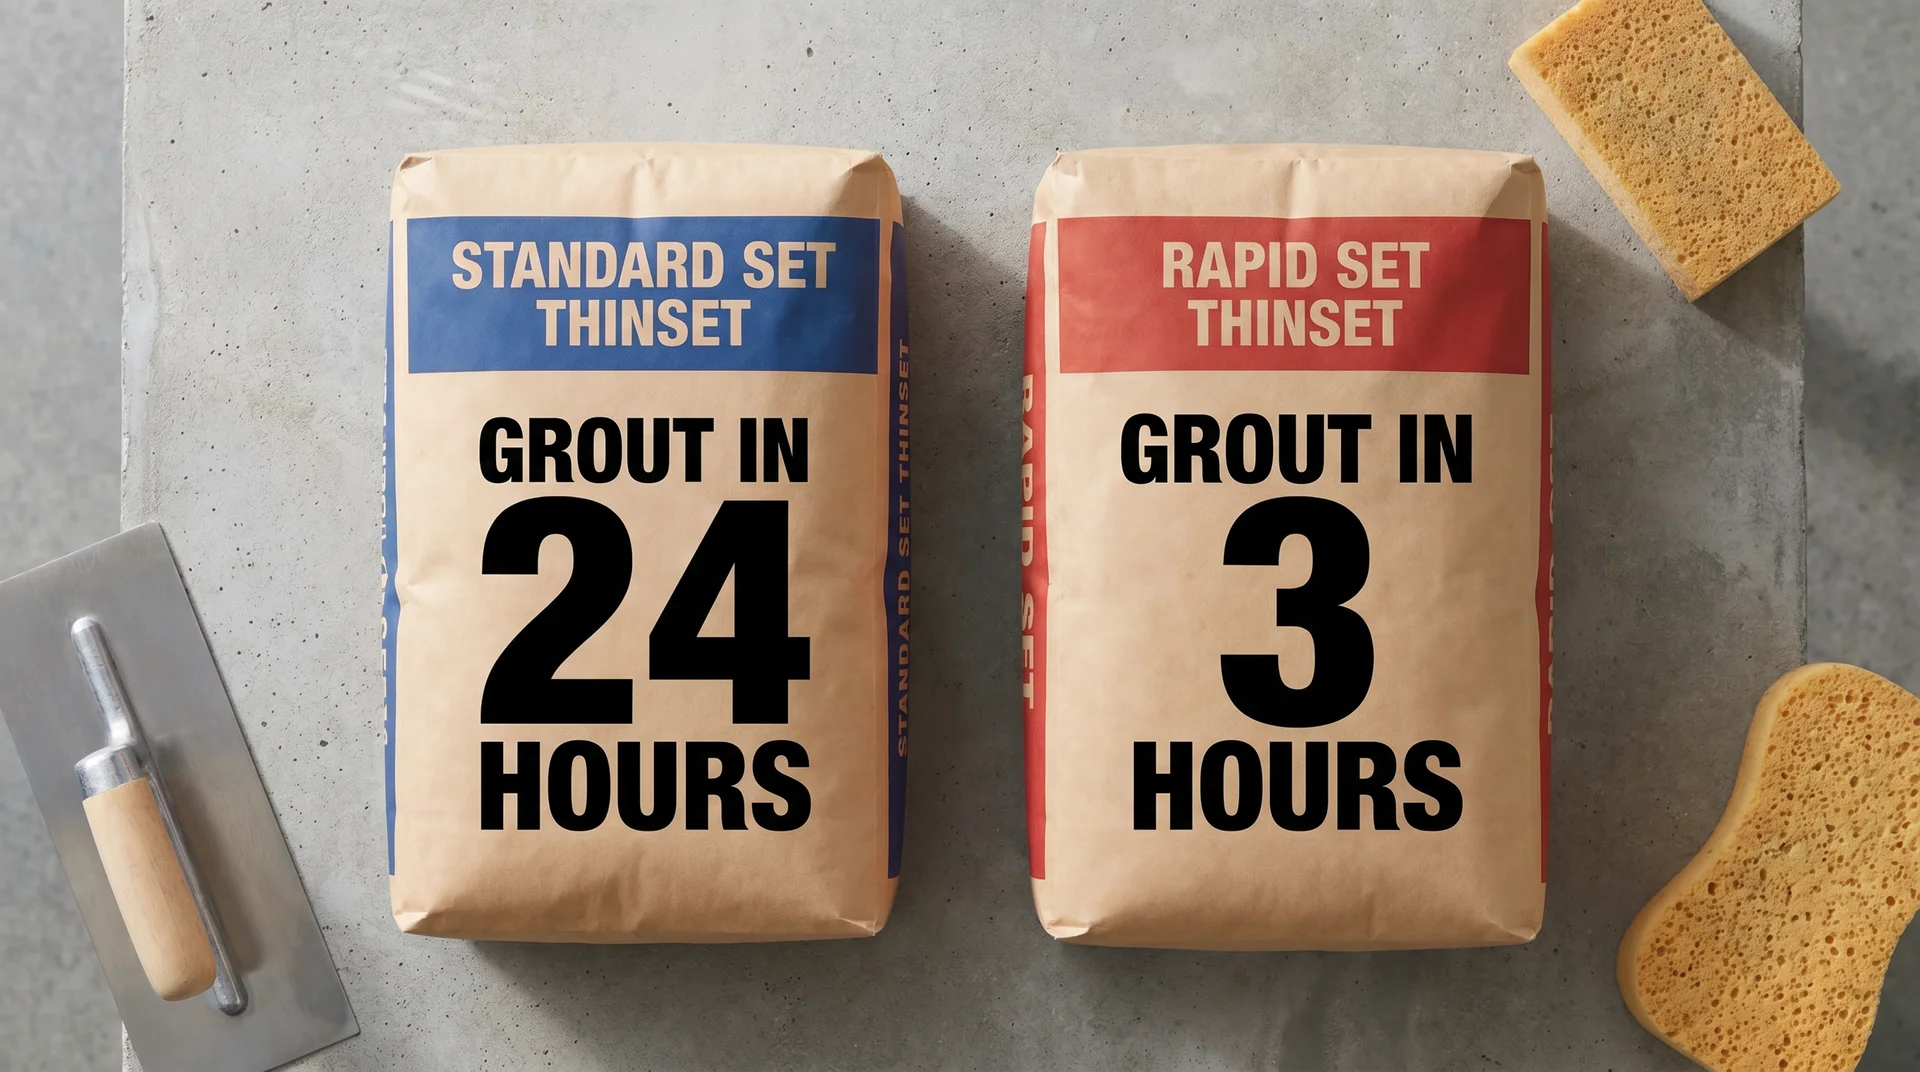
Rapid-set thinset is a genuinely different product, not marketing language for standard thinset that works a bit faster.
Products like Custom Building Products Speedset specify a 2-hour wait before grouting. Rapid Set All Tile specifies 5 hours. These times are real and reliable under normal conditions, which is why Rapid-Set is the product of choice on professional jobs where same-day completion matters.
The complication for DIYers is that rapid-set compresses the entire working window, not just the wait. You have less time to adjust tiles after placing them.
You have less time between grouting sections before the grout starts to harden beyond the tooling range. Working in sections of no more than 10 square feet at a time matters more with rapid-set than with standard thinset.
Going back to the section I mentioned on grouting too soon, this is where timing trips up first-timers who are working fast with a product that has a narrow margin for recovery.
