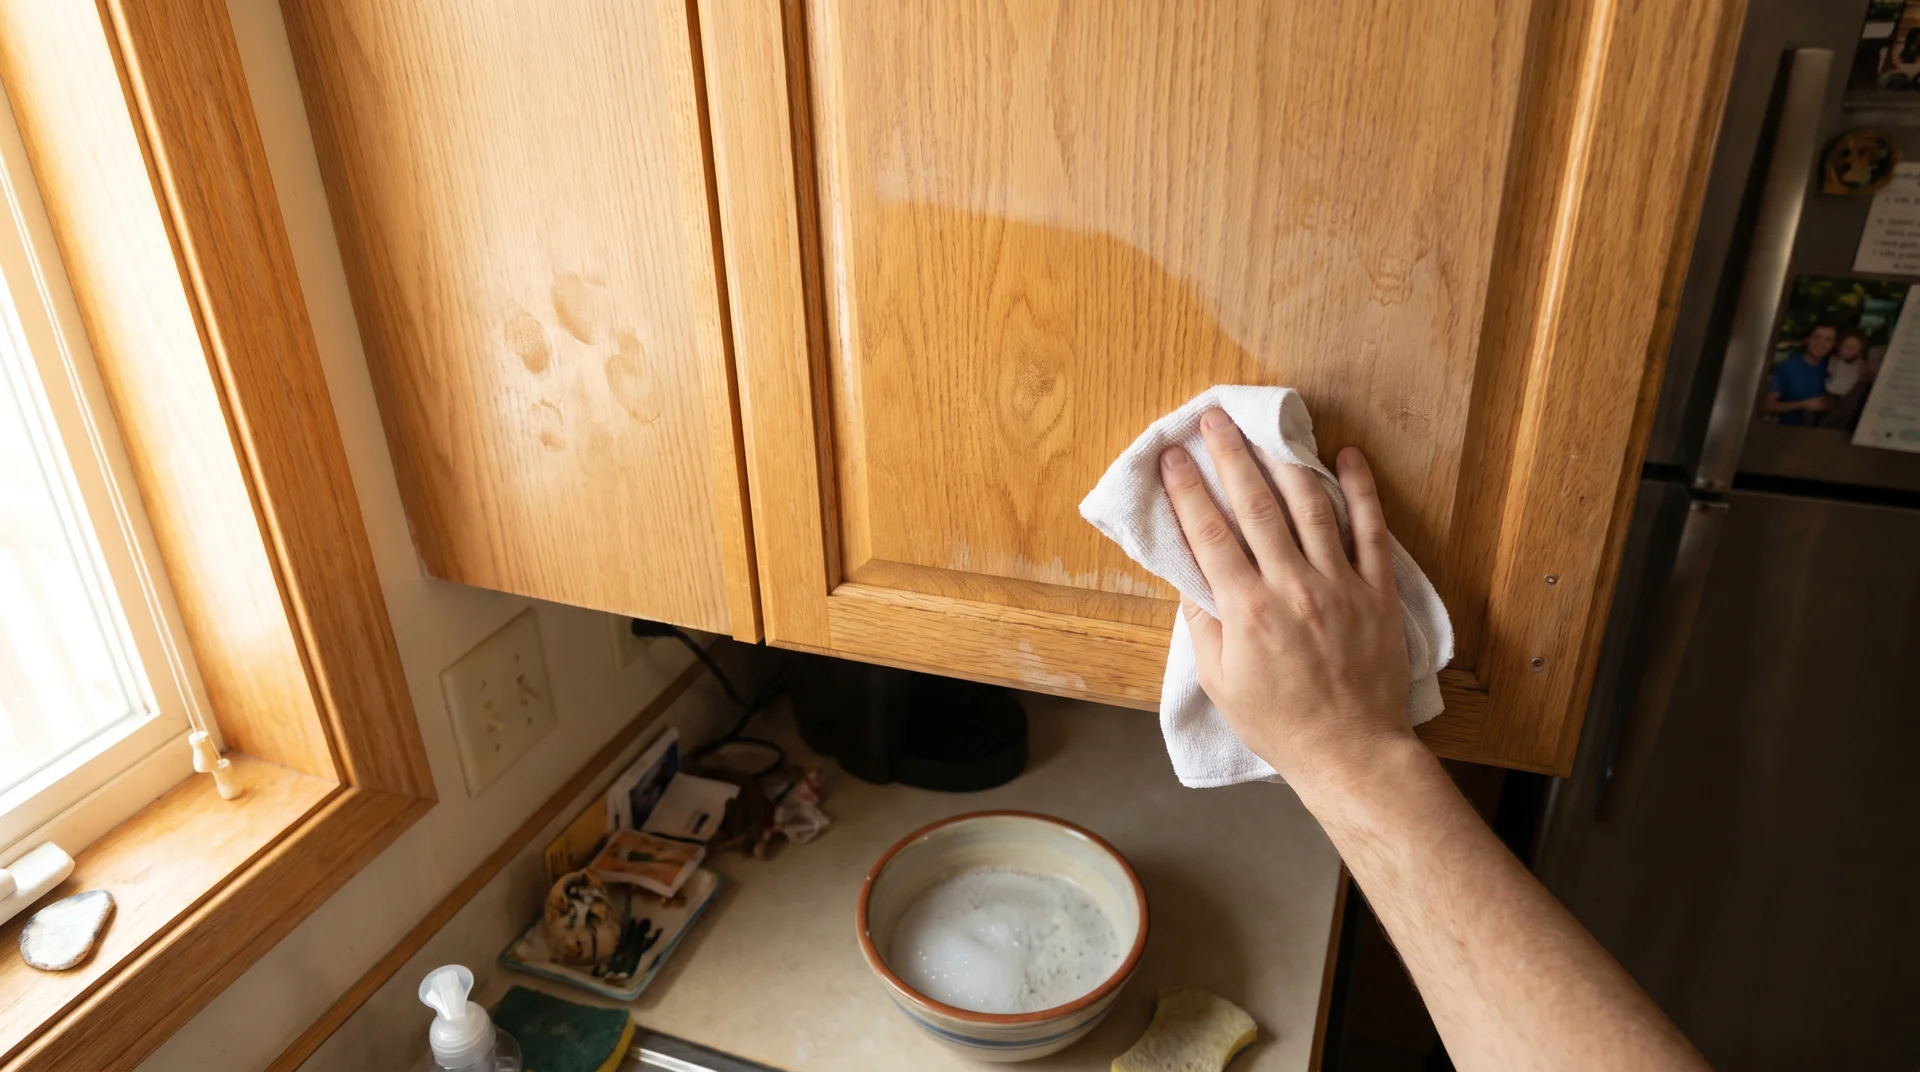
The safest way to clean kitchen cabinets without removing the finish is with dish soap, warm water, and a barely damp microfiber cloth. That combination works on every intact finish type.
It is also the lowest-stakes version of the answer. Whether vinegar, Murphy Oil Soap, or a commercial degreaser is safe for your cabinets depends entirely on what finish type you have.
What You Are Actually Cleaning
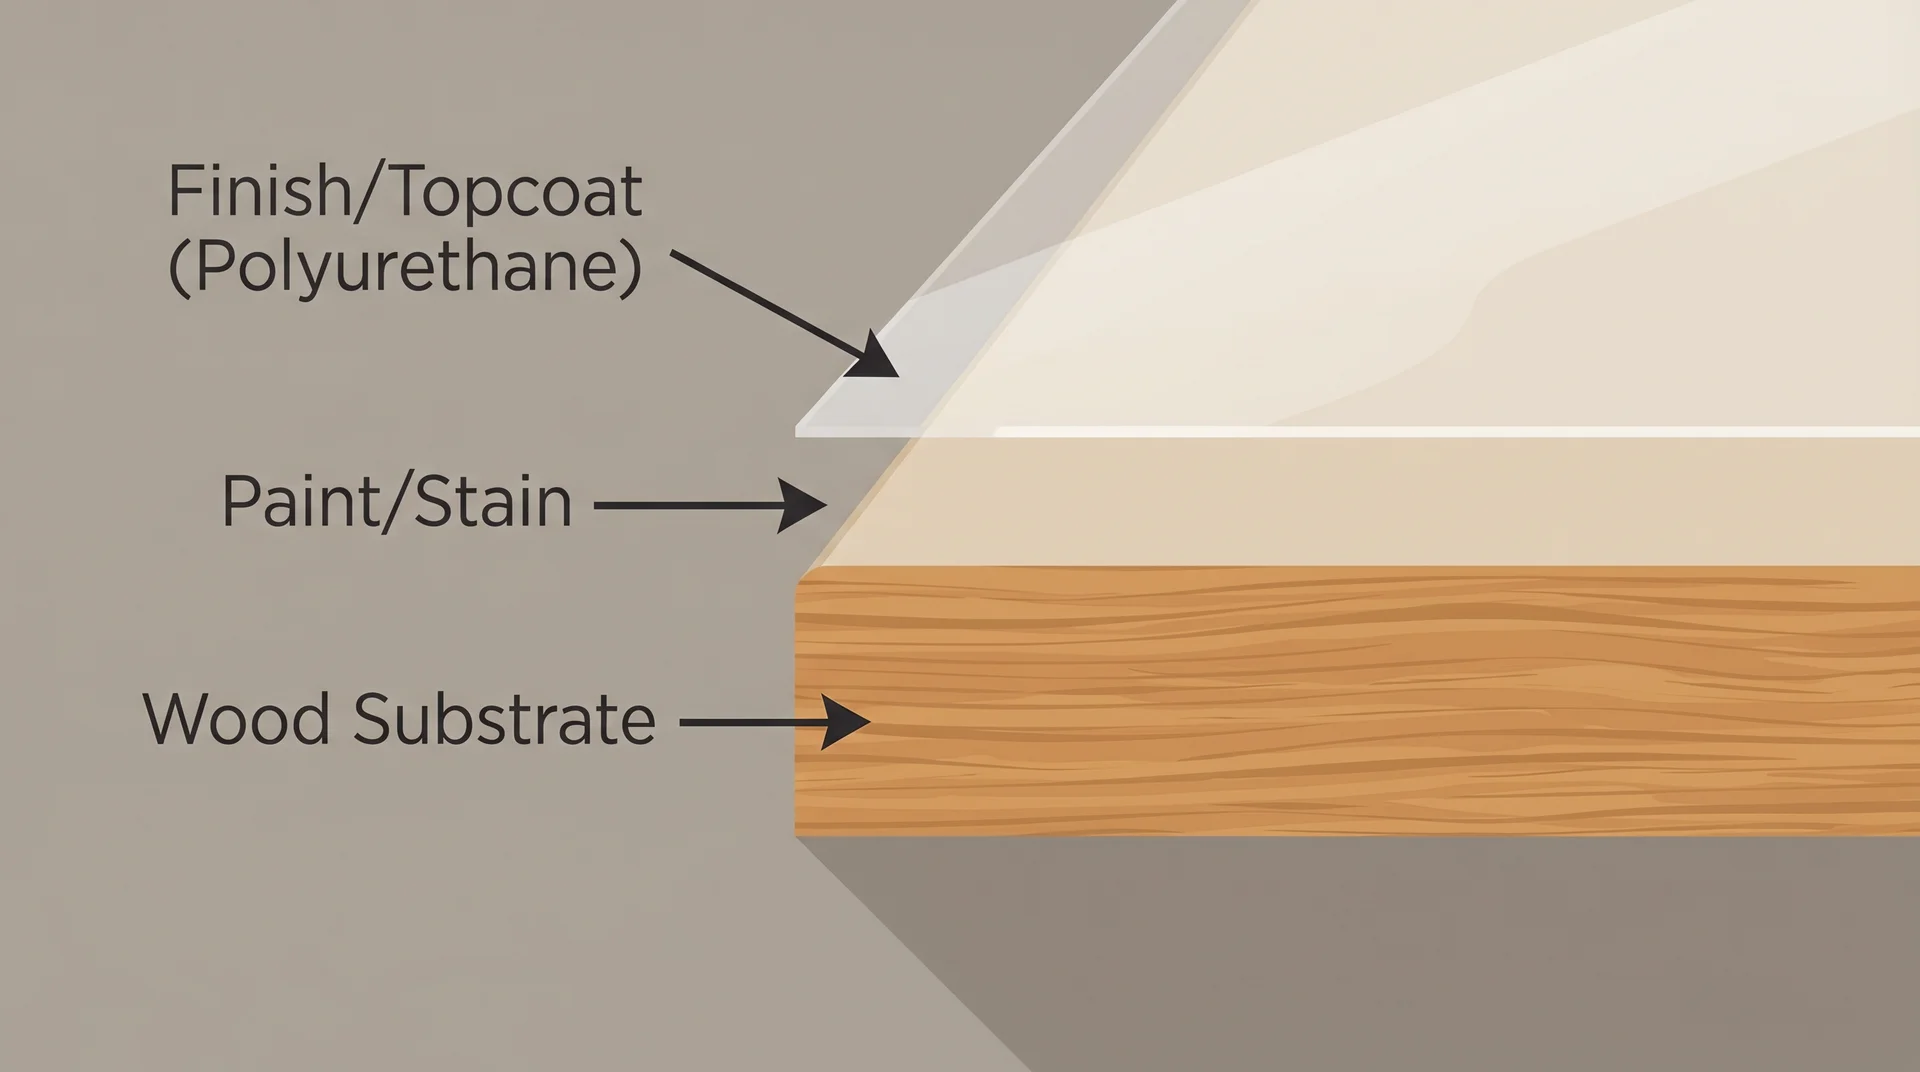
You are cleaning the finish, not the wood underneath it.
When you wipe down a kitchen cabinet, your cloth contacts a sealed topcoat. That topcoat is polyurethane, lacquer, paint, or oil. It sits between your cleaning solution and the wood substrate.
The EPA classifies sealed wood as a hard, nonporous surface, the same category as sealed countertops and doorknobs. An intact finish repels liquids, grease, and cleaning products. The wood underneath behaves like an absorbent material only after the finish wears through.
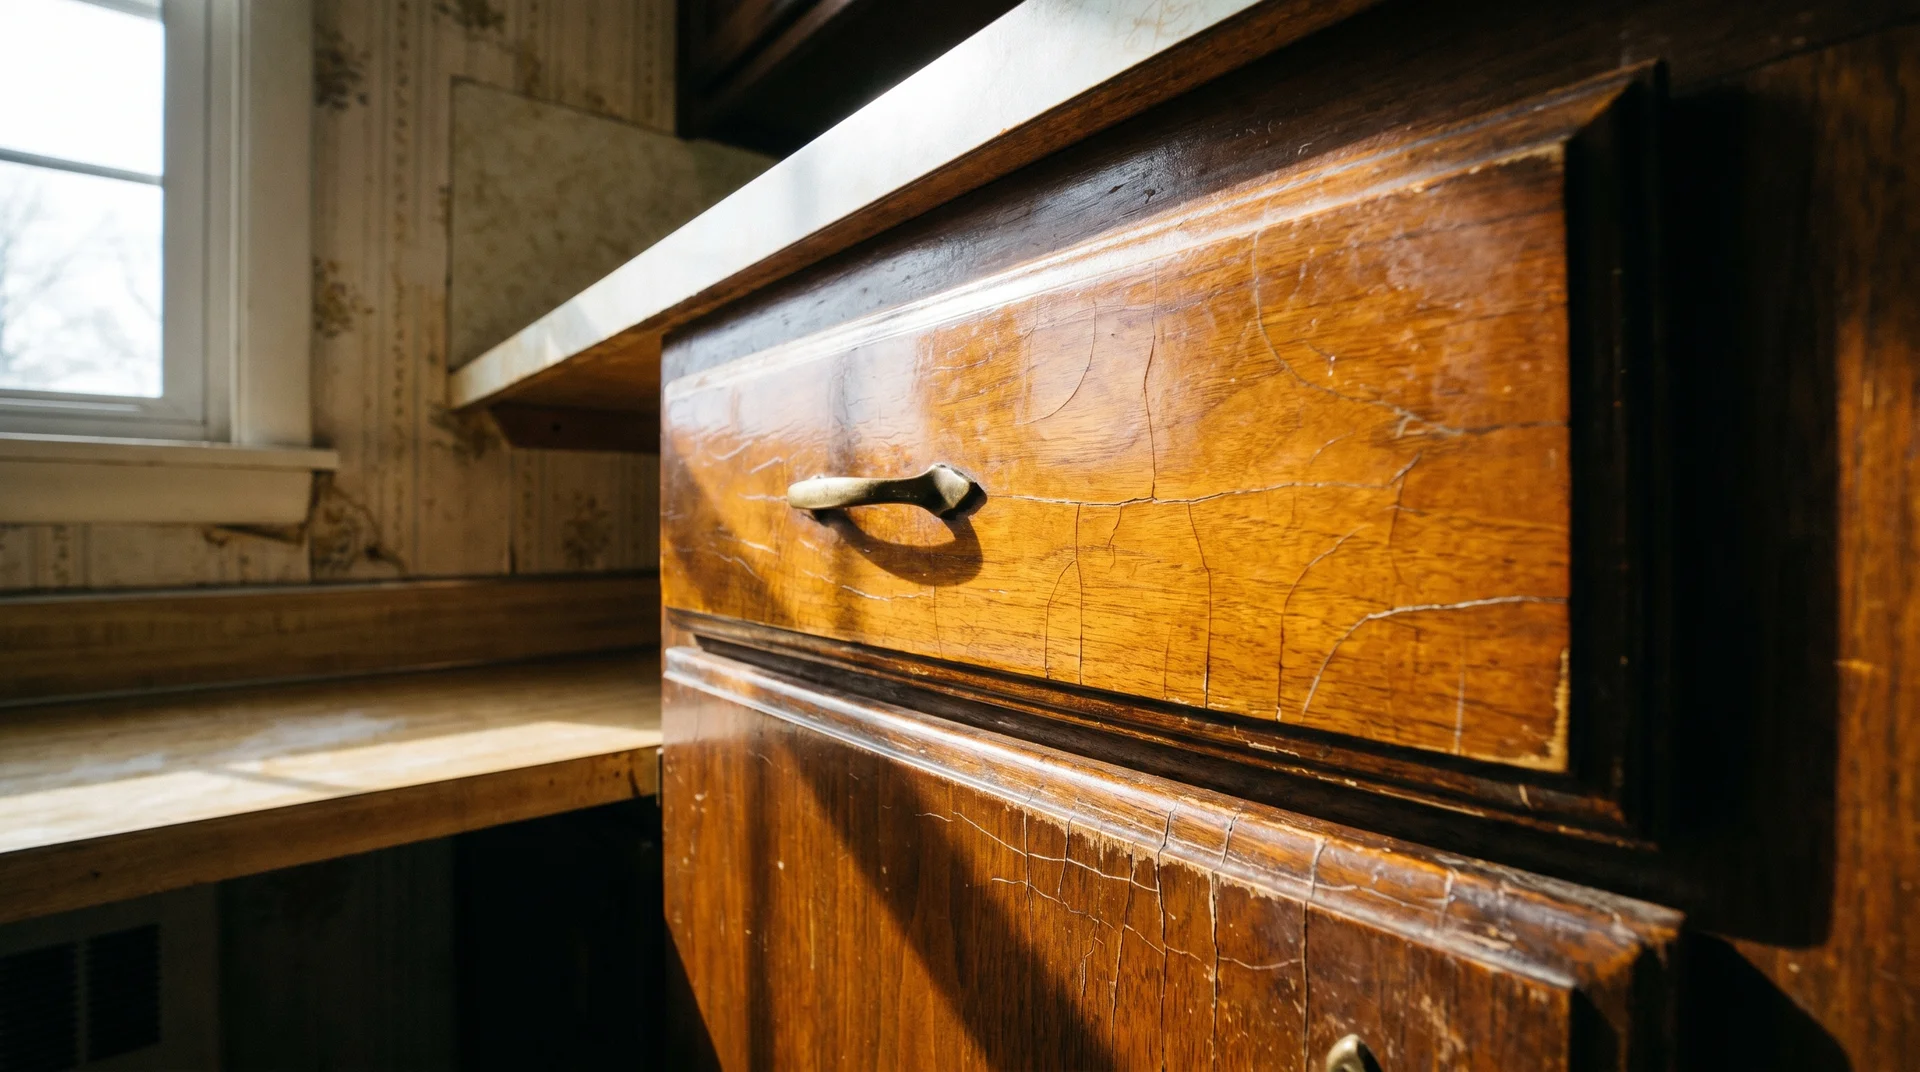
A compromised coating becomes hygroscopic. It absorbs moisture and grease instead of repelling them. The grease buildup compounds with each cleaning cycle. If your cabinets are getting harder to clean despite regular effort, the problem is the finish, not the grease.
I build my own cutting boards from maple and walnut, and I understand wood surface behavior from working with the material directly. Finished and bare wood respond differently to the same products. Treating them identically is the core error in most cabinet cleaning advice.
Signs that your finish may already be compromised:
- Dull or cloudy patches that do not improve after cleaning
- Uneven sheen between cabinet faces, especially near the stove
- Water absorption marks near handles or high-contact edges
- Color change at cabinet edges from repeated moisture exposure
- Grease that appears to sink into the surface rather than sit on top of it
If you are seeing these signs, routine cleaning is the wrong intervention. Cleaning a failed finish is preparation for refinishing, and that requires a different process with different chemistry.
Identifying Your Finish Before You Clean Anything
Most residential cabinet finishes fall into four categories. Knowing which one you have takes five minutes.
Those five minutes change every product decision that follows, particularly the vinegar question that appears in nearly every cleaning guide you will find online.
Why Finish Type Changes Everything
Vinegar is the cleaner that makes finish identification non-negotiable.
White vinegar appears in almost every cabinet cleaning guide, typically in a 1:1 ratio with water. That recommendation is not wrong for polyurethane finishes. It is wrong for oil-finished cabinets, shellac, and older or worn lacquer. Repeated acid application on those surfaces gradually strips the protective layer.
The label on white vinegar does not tell you which surfaces it degrades with repeated use. That recommendation appears in so much cleaning content that it has become the default answer, even when it is wrong.
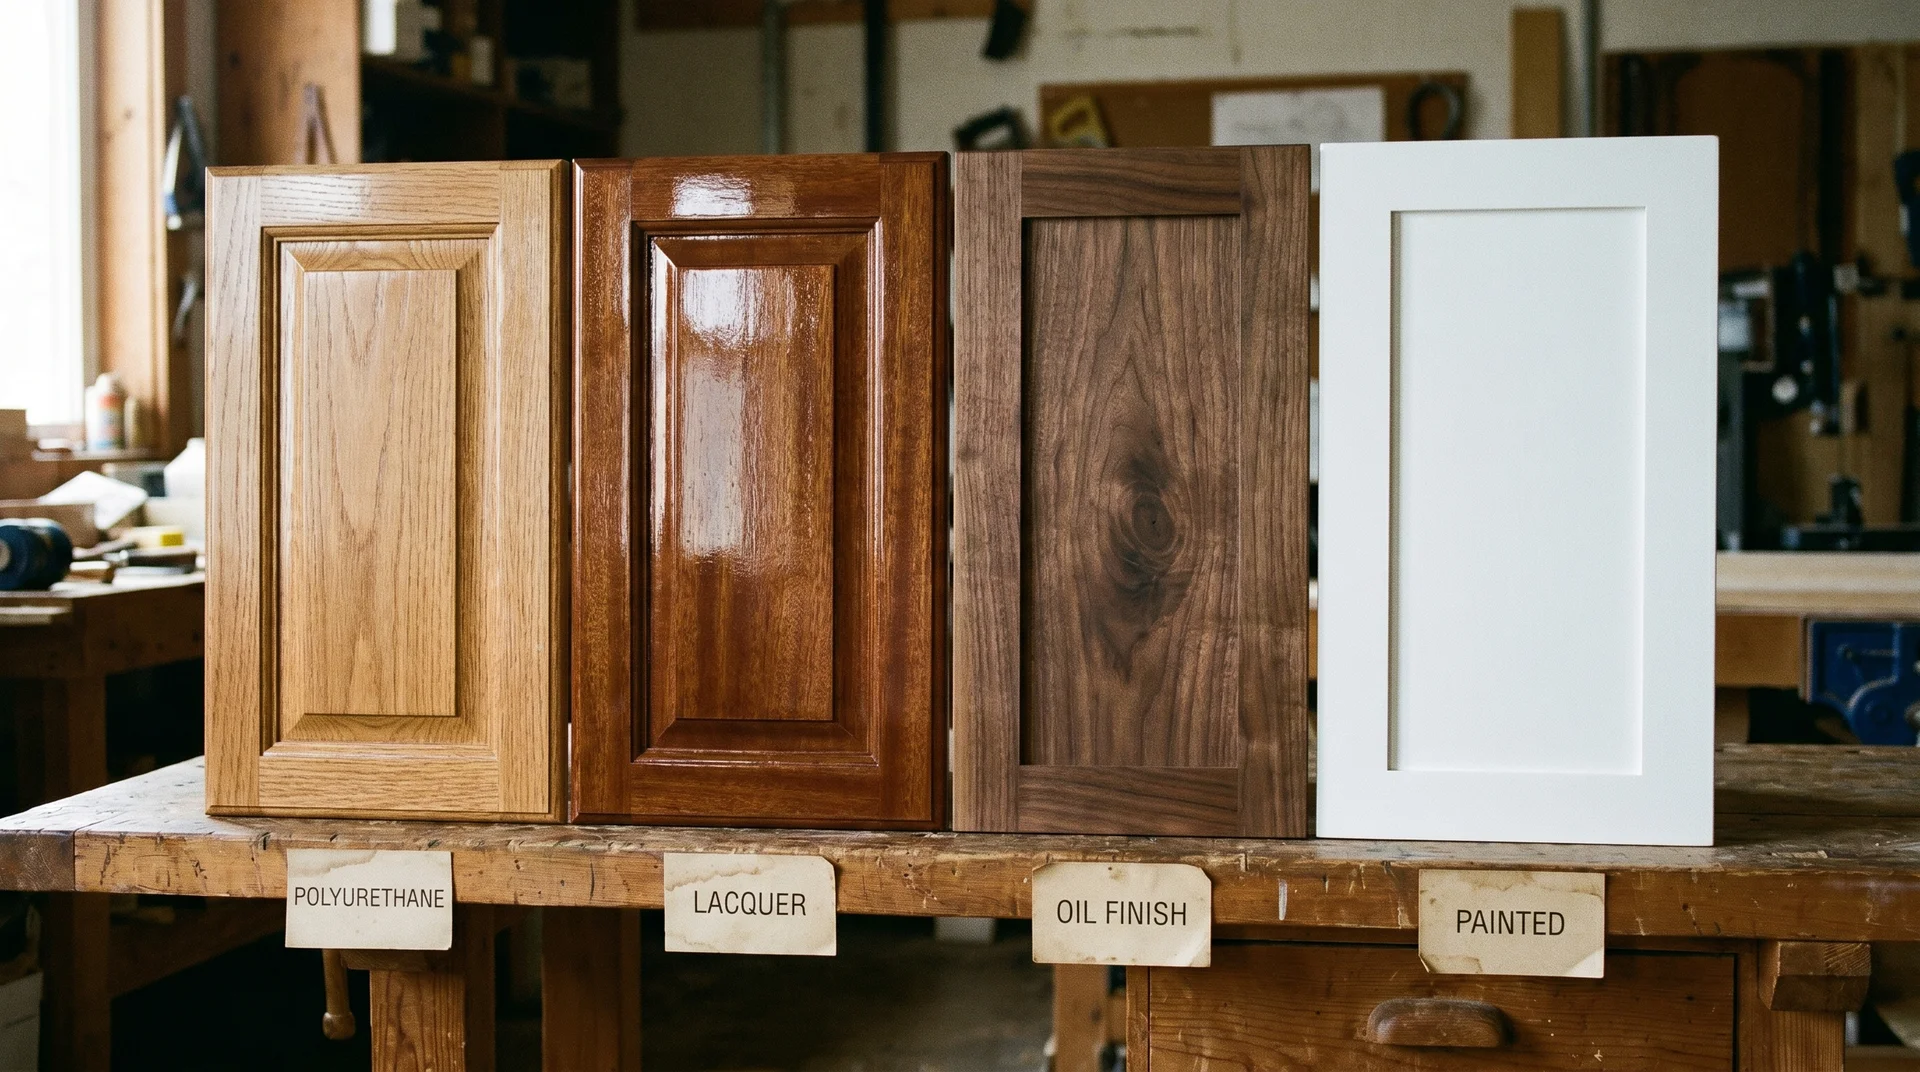
Polyurethane and Conversion Varnish
Polyurethane is the most common cabinet finish in homes renovated or built since the mid-1990s.
It is a clear, hard coating that resists water, heat, and mild cleaning products under normal use. Conversion varnish is similar but more durable, common in higher-end cabinetry. Both tolerate diluted vinegar, dish soap, and mild degreasers without degrading.
If your cabinets were installed in the last 30 years and you do not know the finish type, polyurethane or conversion varnish is the most likely answer.
Lacquer
Lacquer was the standard cabinet finish through most of the 20th century and remains common in builder-grade cabinetry today.
It dries hard and clear but is more solvent-sensitive than polyurethane. Alcohol-based cleaners, ammonia, and high-acid solutions degrade it.
Older lacquer, anything 20 or more years old, may have thinned in high-use areas and become more vulnerable to any chemical exposure.
Lacquer and polyurethane can look nearly identical on a finished cabinet. The identification test in this section is the only reliable way to distinguish them without documentation from the original installer.
Oil-Based Finishes
Oil-finished cabinets have a matte, natural-wood appearance and need a completely different cleaning approach than sealed finishes.
Tung oil and linseed oil penetrate the wood grain rather than forming a surface film. They condition the wood directly. Acidic cleaners strip the oil and dry the wood grain with repeated use.
I want to be precise about one limitation. Distinguishing a fresh oil finish from a worn polyurethane finish by sight is not reliably possible.
If your cabinets have an unfamiliar history, the identification tests below matter most for this finish type.
Paint
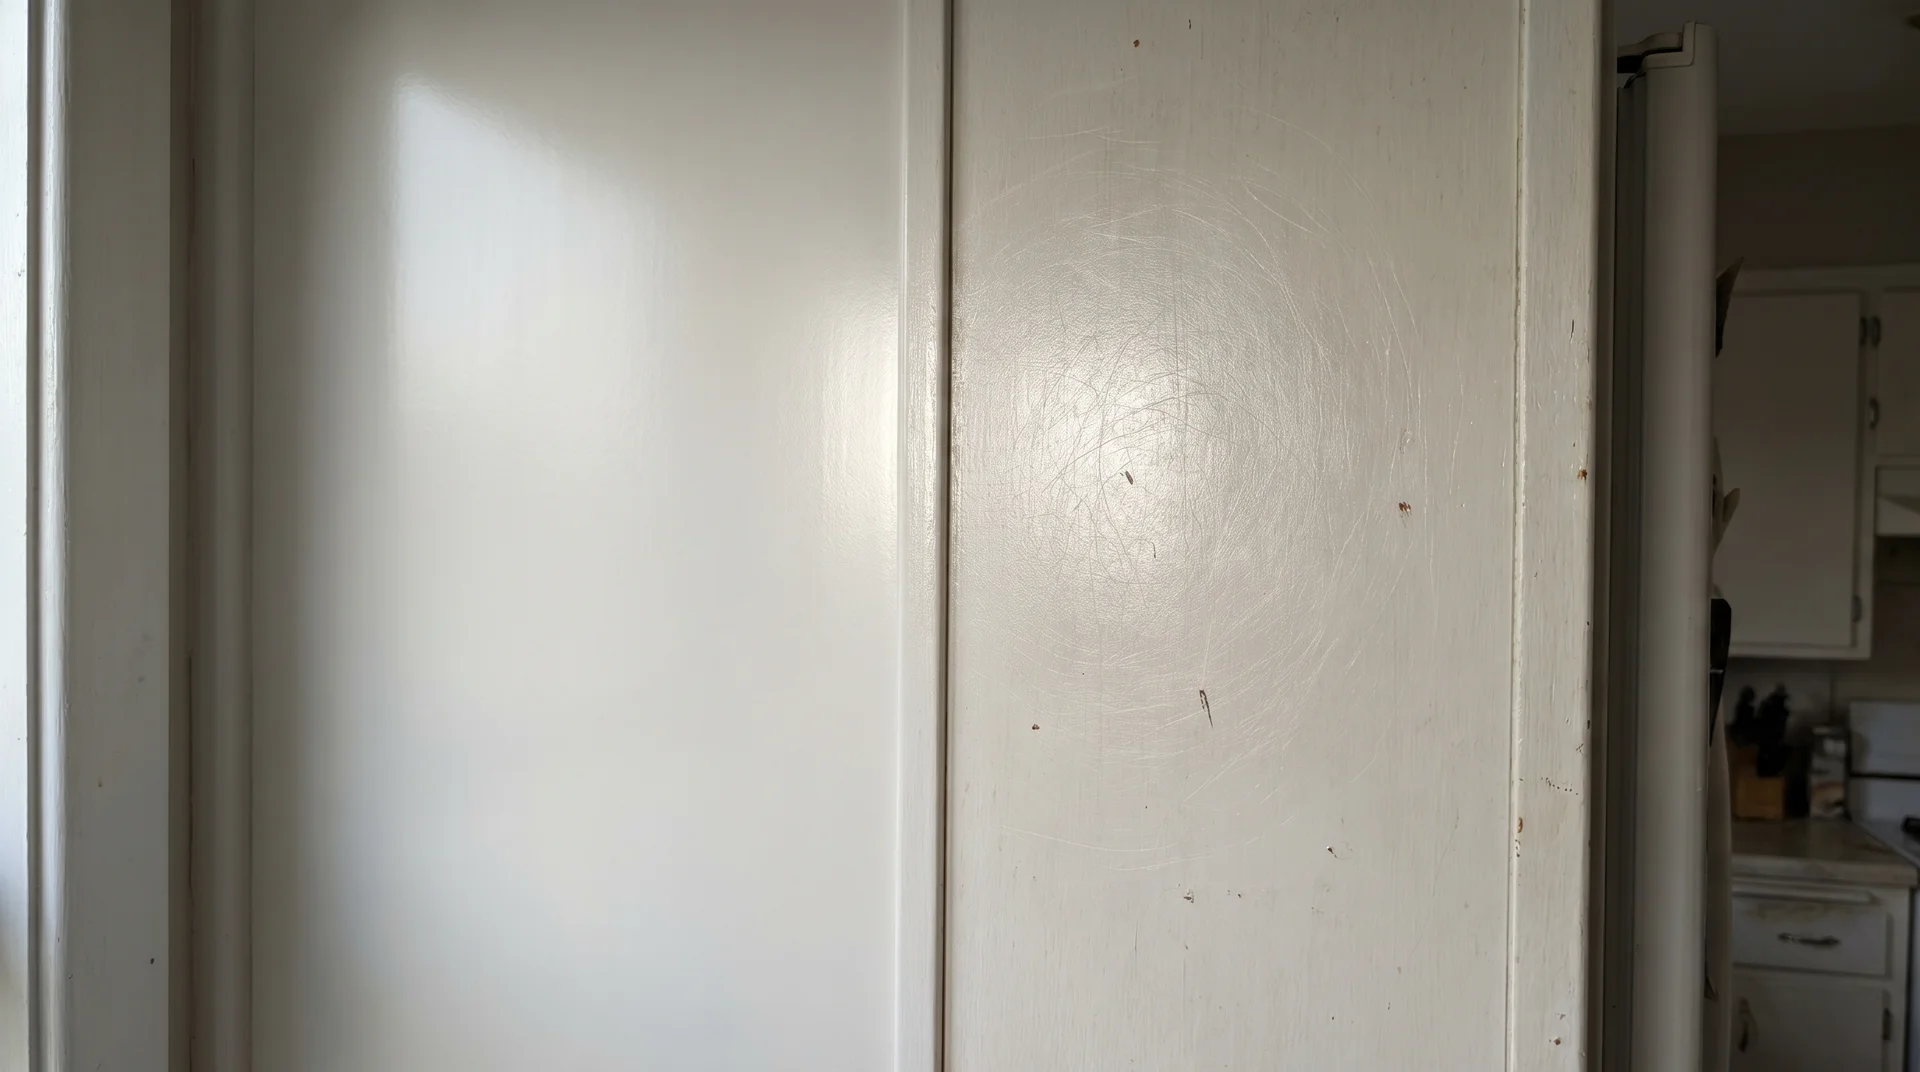
Painted cabinets are the most abrasion-sensitive finish type in a residential kitchen.
The paint layer sits over primer over the wood or MDF substrate. Aggressive scrubbing removes gloss. Alkaline cleaners strip paint at the surface level. Dish soap and a microfiber cloth are the correct tools, without exception for stubborn spots.
Magic Erasers cause specific damage here. The melamine foam is micro-abrasive by composition.
It removes grime and paint sheen at the same time, leaving the surface clean and visibly duller. That is not the same thing.
How to Identify Your Finish
Two tests identify most residential cabinet finishes in under five minutes.
Choose an inconspicuous area for both: the inside edge of a door, or near the floor on a lower cabinet. You are looking for a surface reaction, so use a small amount of each test material.
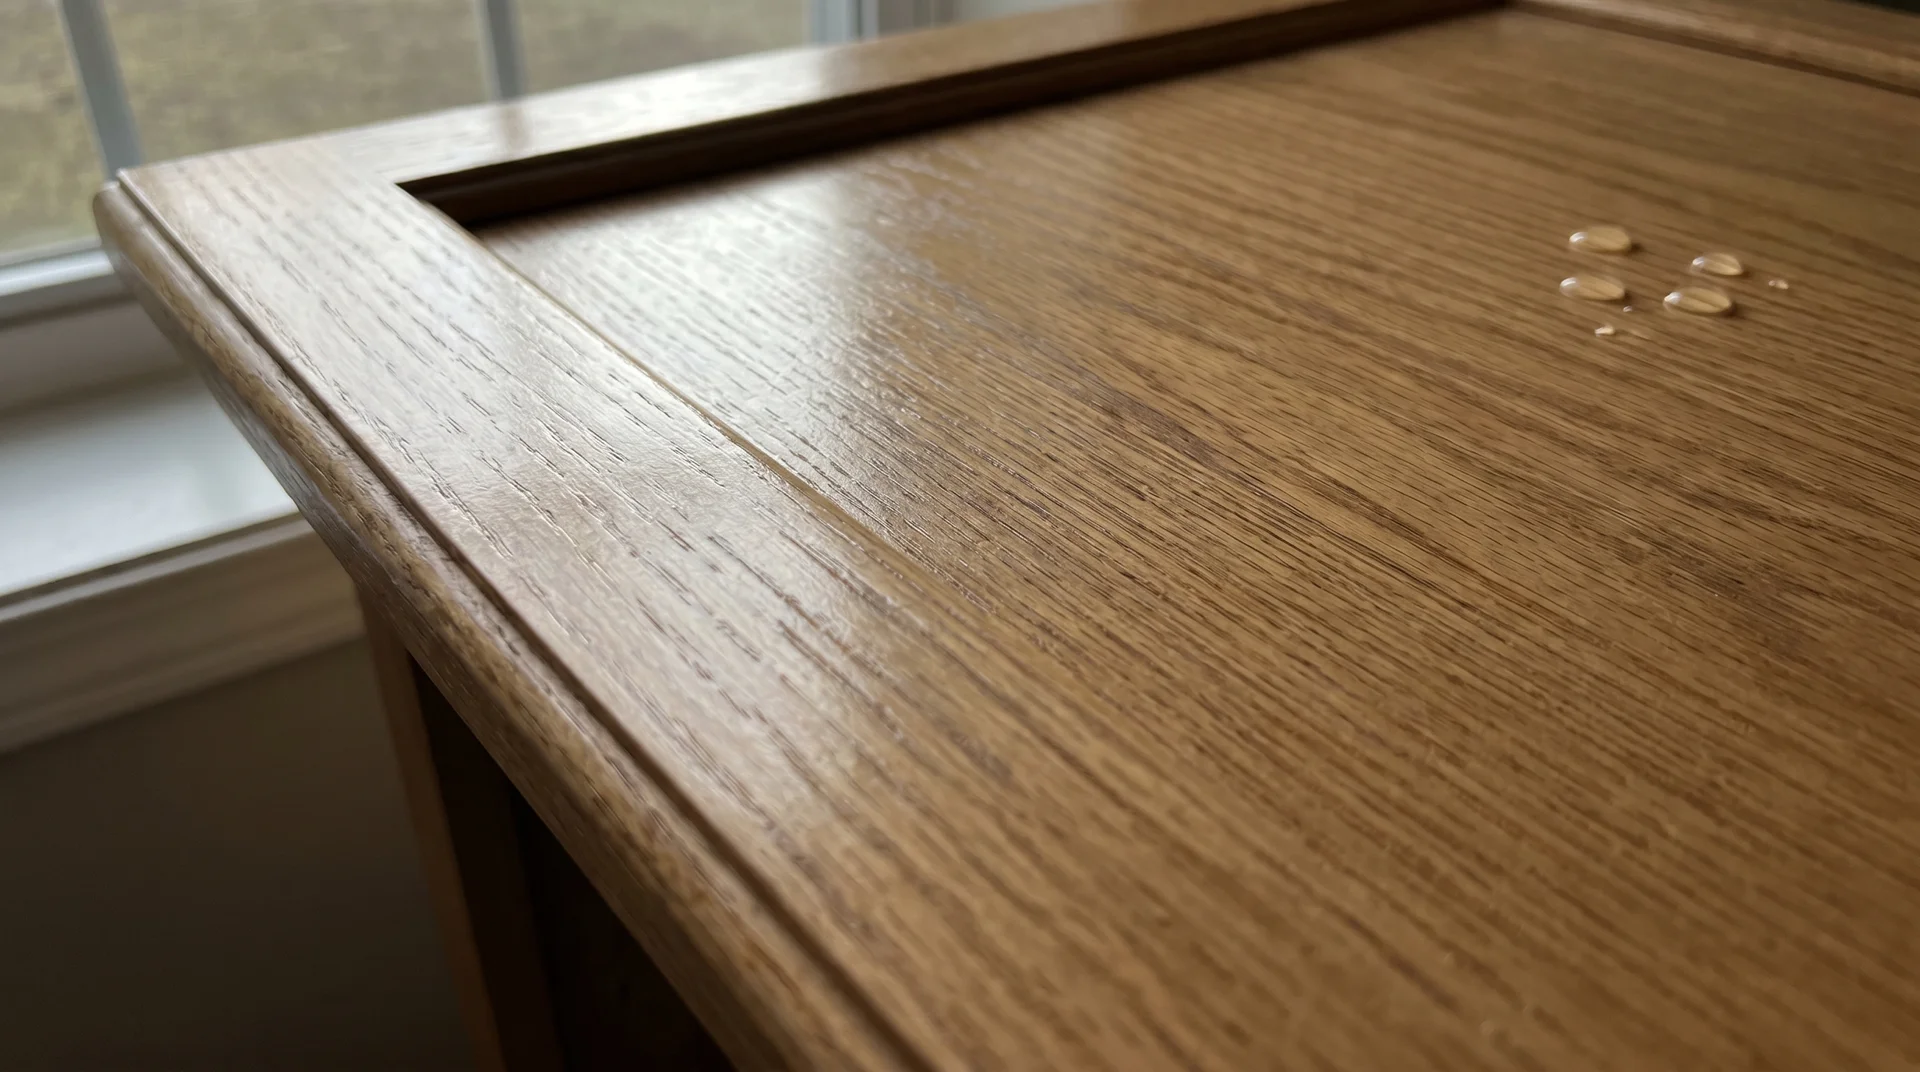
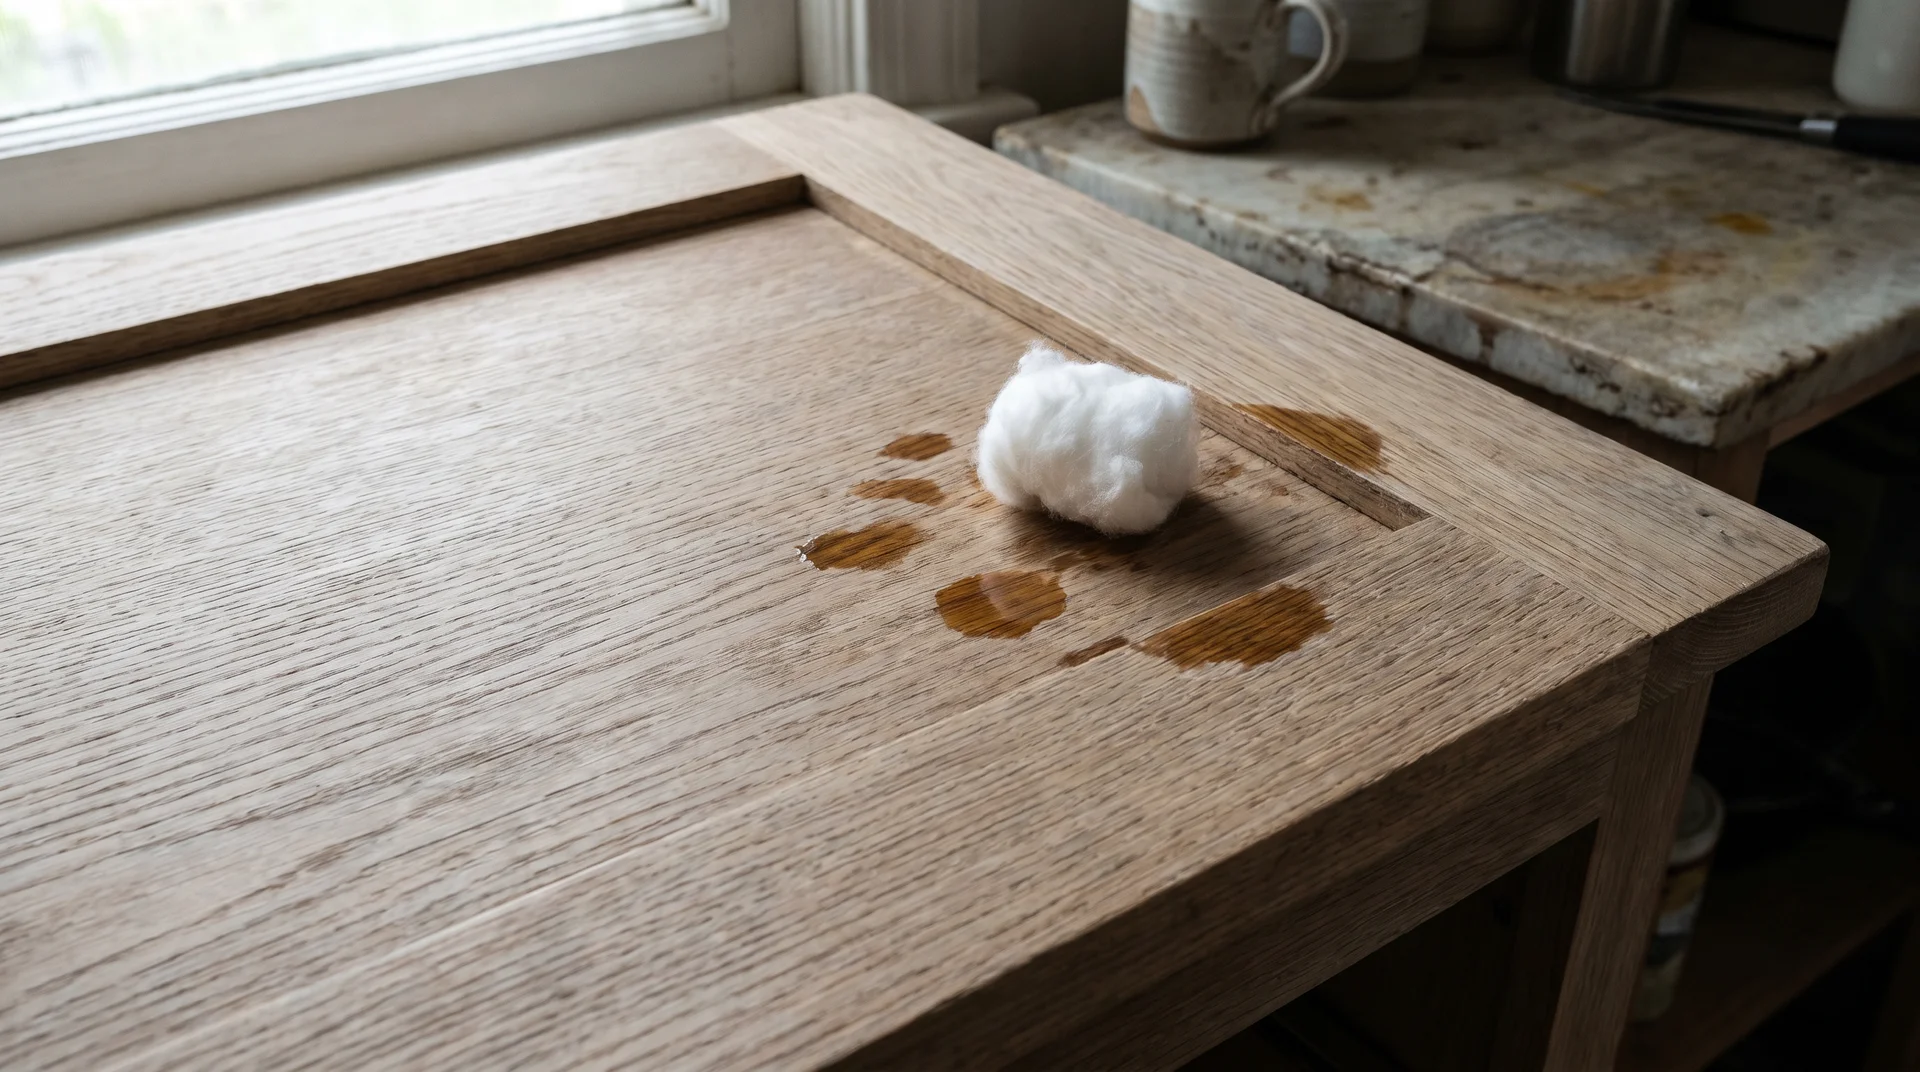
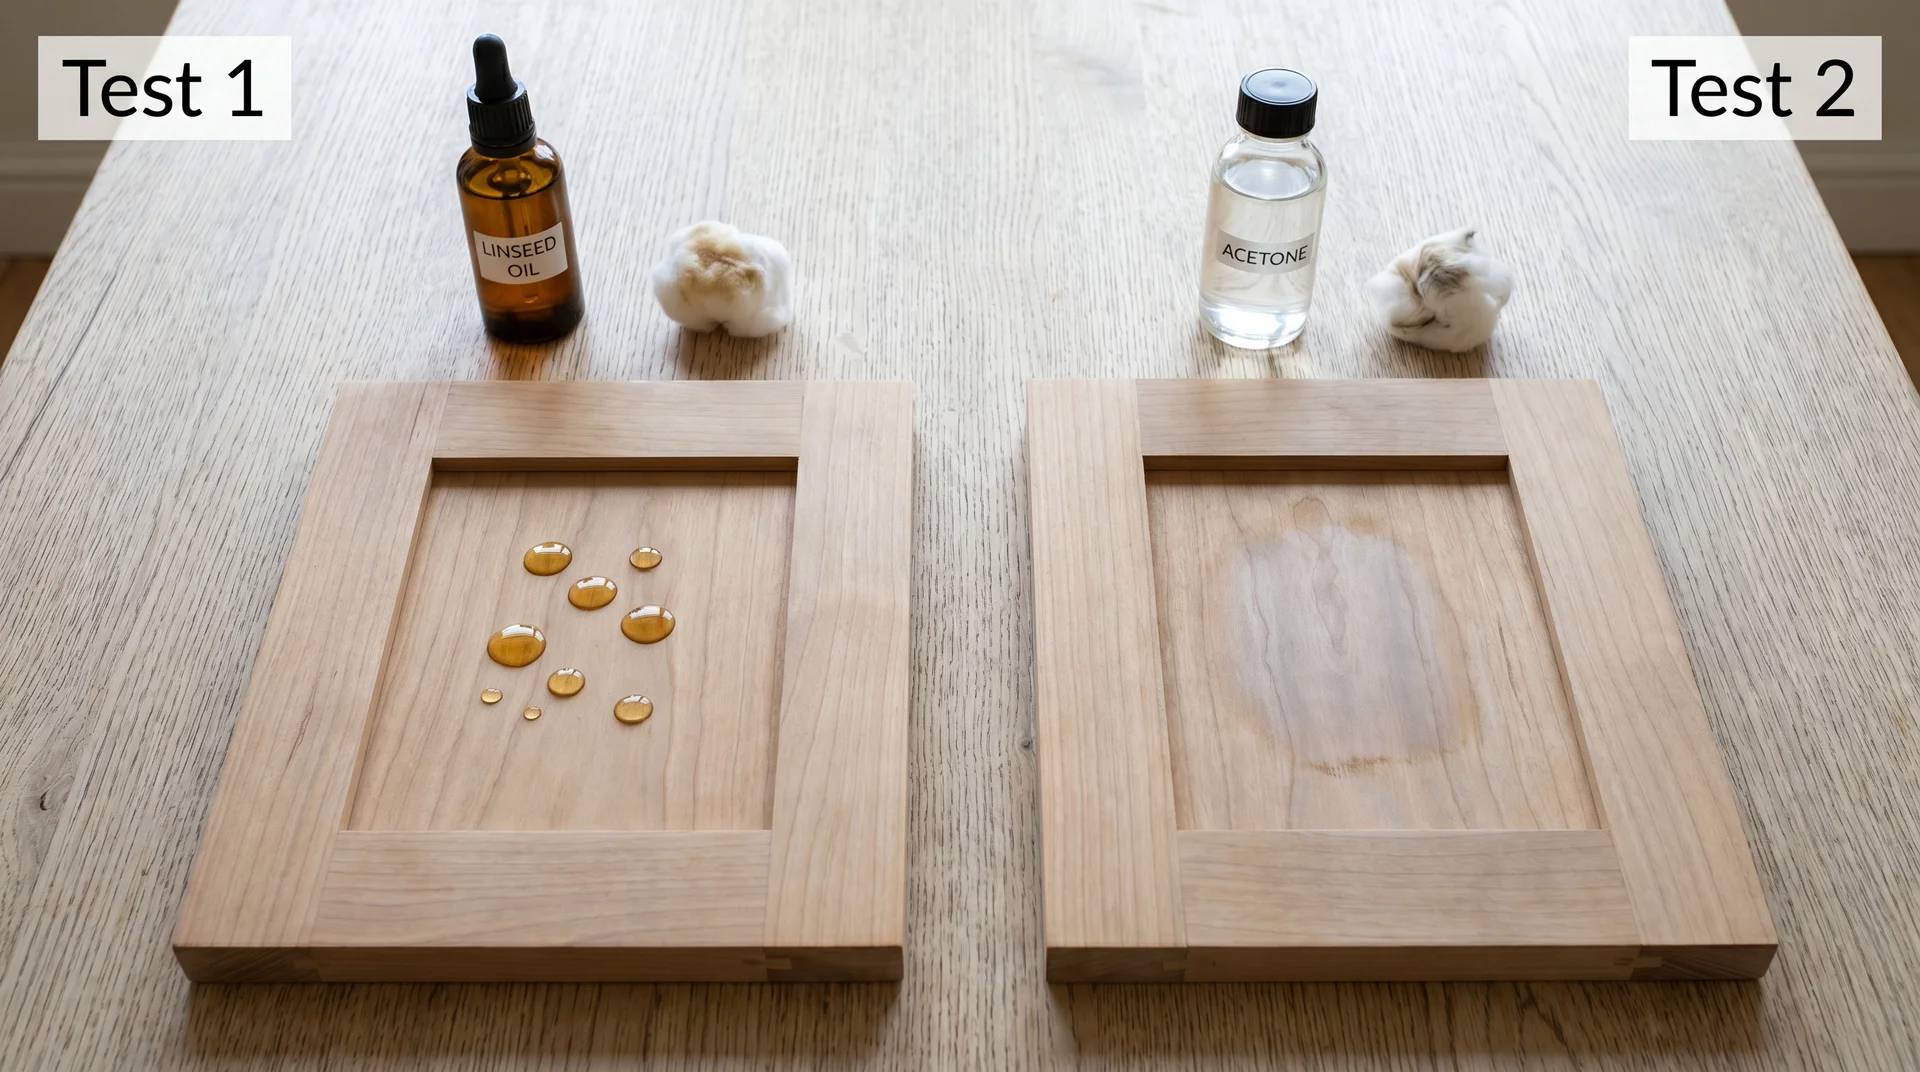
Test 1: The Linseed Oil Test
Rub a few drops of boiled linseed oil into the test area with a cotton ball. Wait two minutes.
- Oil beads up on the surface: hard film finish (polyurethane, lacquer, or conversion varnish)
- Oil absorbs into the surface: penetrating oil finish (tung or linseed oil)
Test 2: The Acetone Test (for hard film finishes only)
Do this in a well-ventilated space; acetone is flammable, and its fumes accumulate quickly in an enclosed kitchen. Apply a small amount of acetone (standard nail polish remover) to the test area using a cotton ball. Work in a small circular motion and wait three to five minutes.
- No visible change: polyurethane or conversion varnish
- Surface begins to dissolve: lacquer
- Surface becomes sticky: shellac or older varnish
If you cannot run these tests, treat your cabinets as oil-finished.
Every cleaner safe for oil-finished surfaces is safe for polyurethane and lacquer as well. It eliminates the risk of applying the wrong product to the wrong surface.
How to Clean Kitchen Cabinets Without Removing the Finish
The right method depends on the finish type and the type of mess.
Step One: Remove Dry Debris Before Any Wet Cleaning
Wet cleaning over loose grime grinds particulate debris into the finish surface.
- Use a dry microfiber cloth or a soft duster on cabinet exteriors first.
- Work top to bottom on each cabinet face.
- If you are also cleaning cabinet interiors, use a vacuum with a crevice attachment before any wet cleaning begins.
This step takes two minutes. Skipping it converts the cleaning pass from a surface wipe into an abrasive pass against the finish.
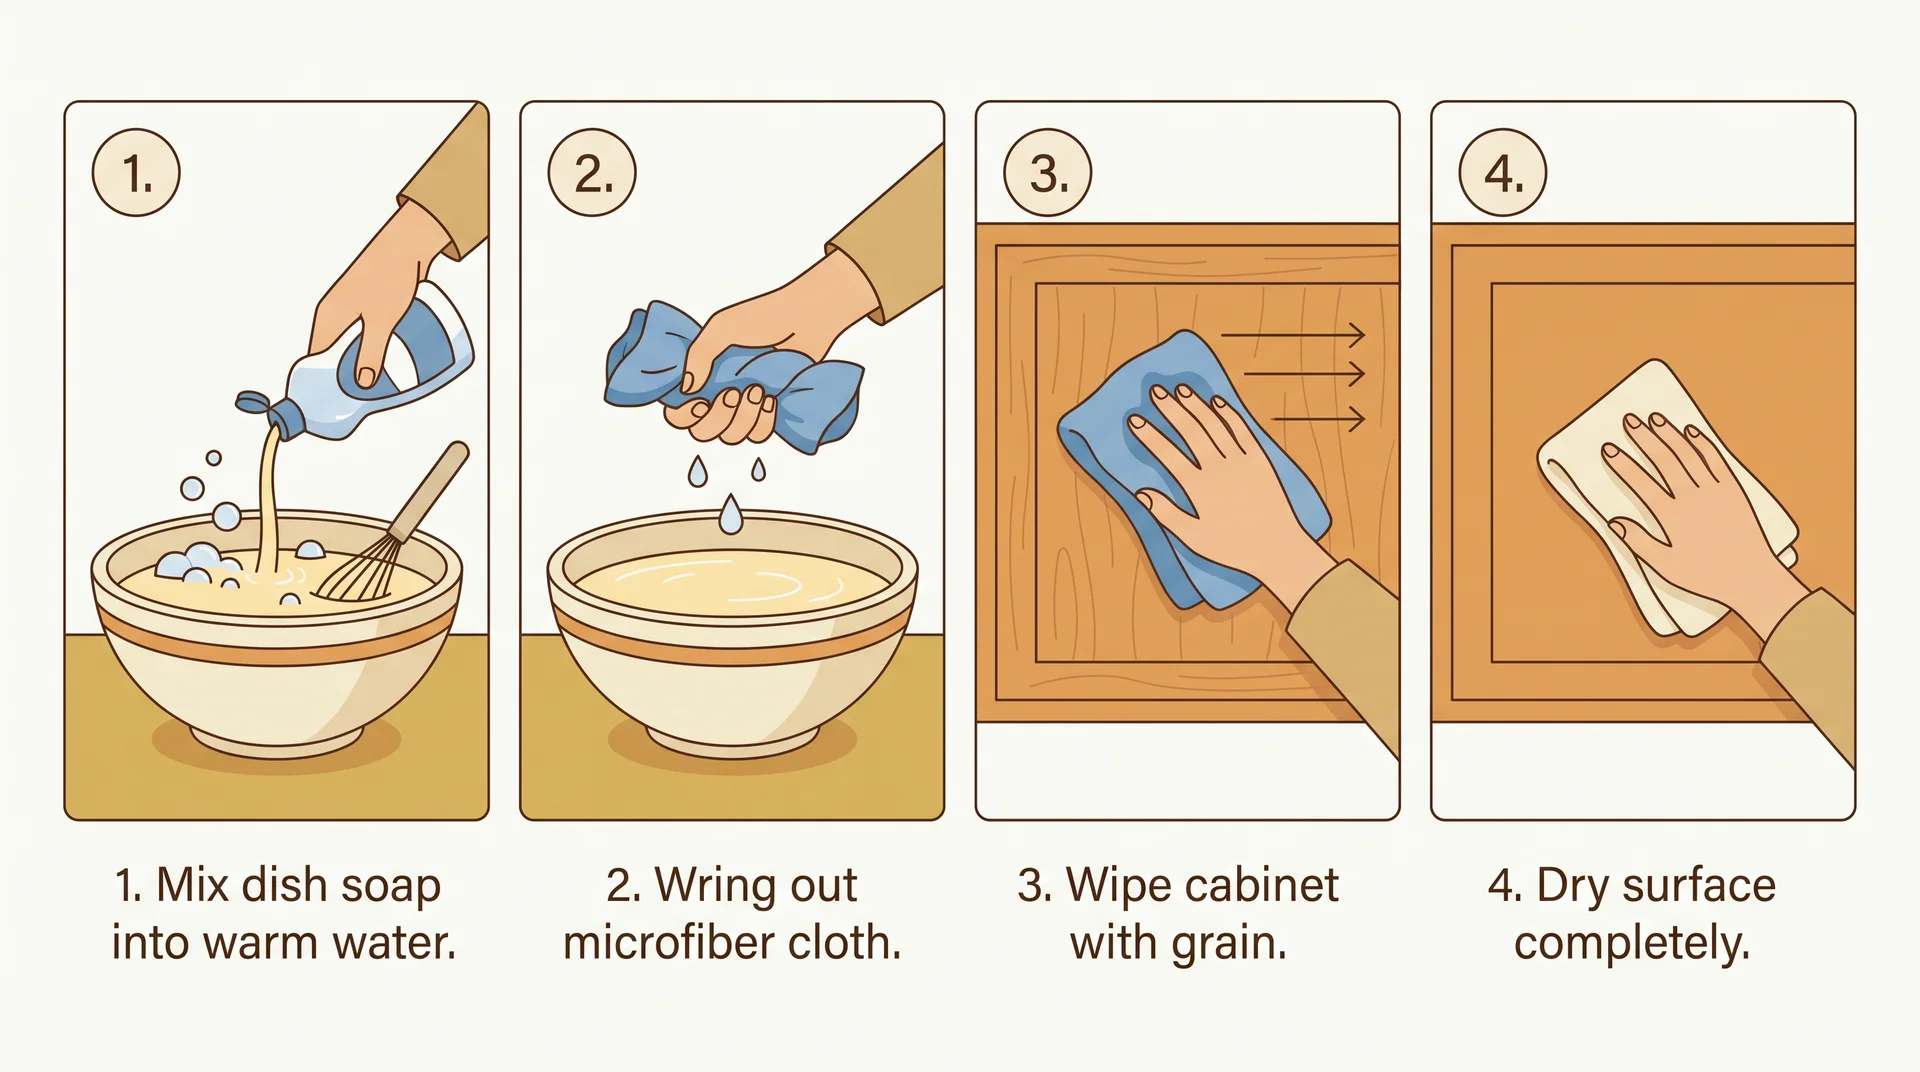
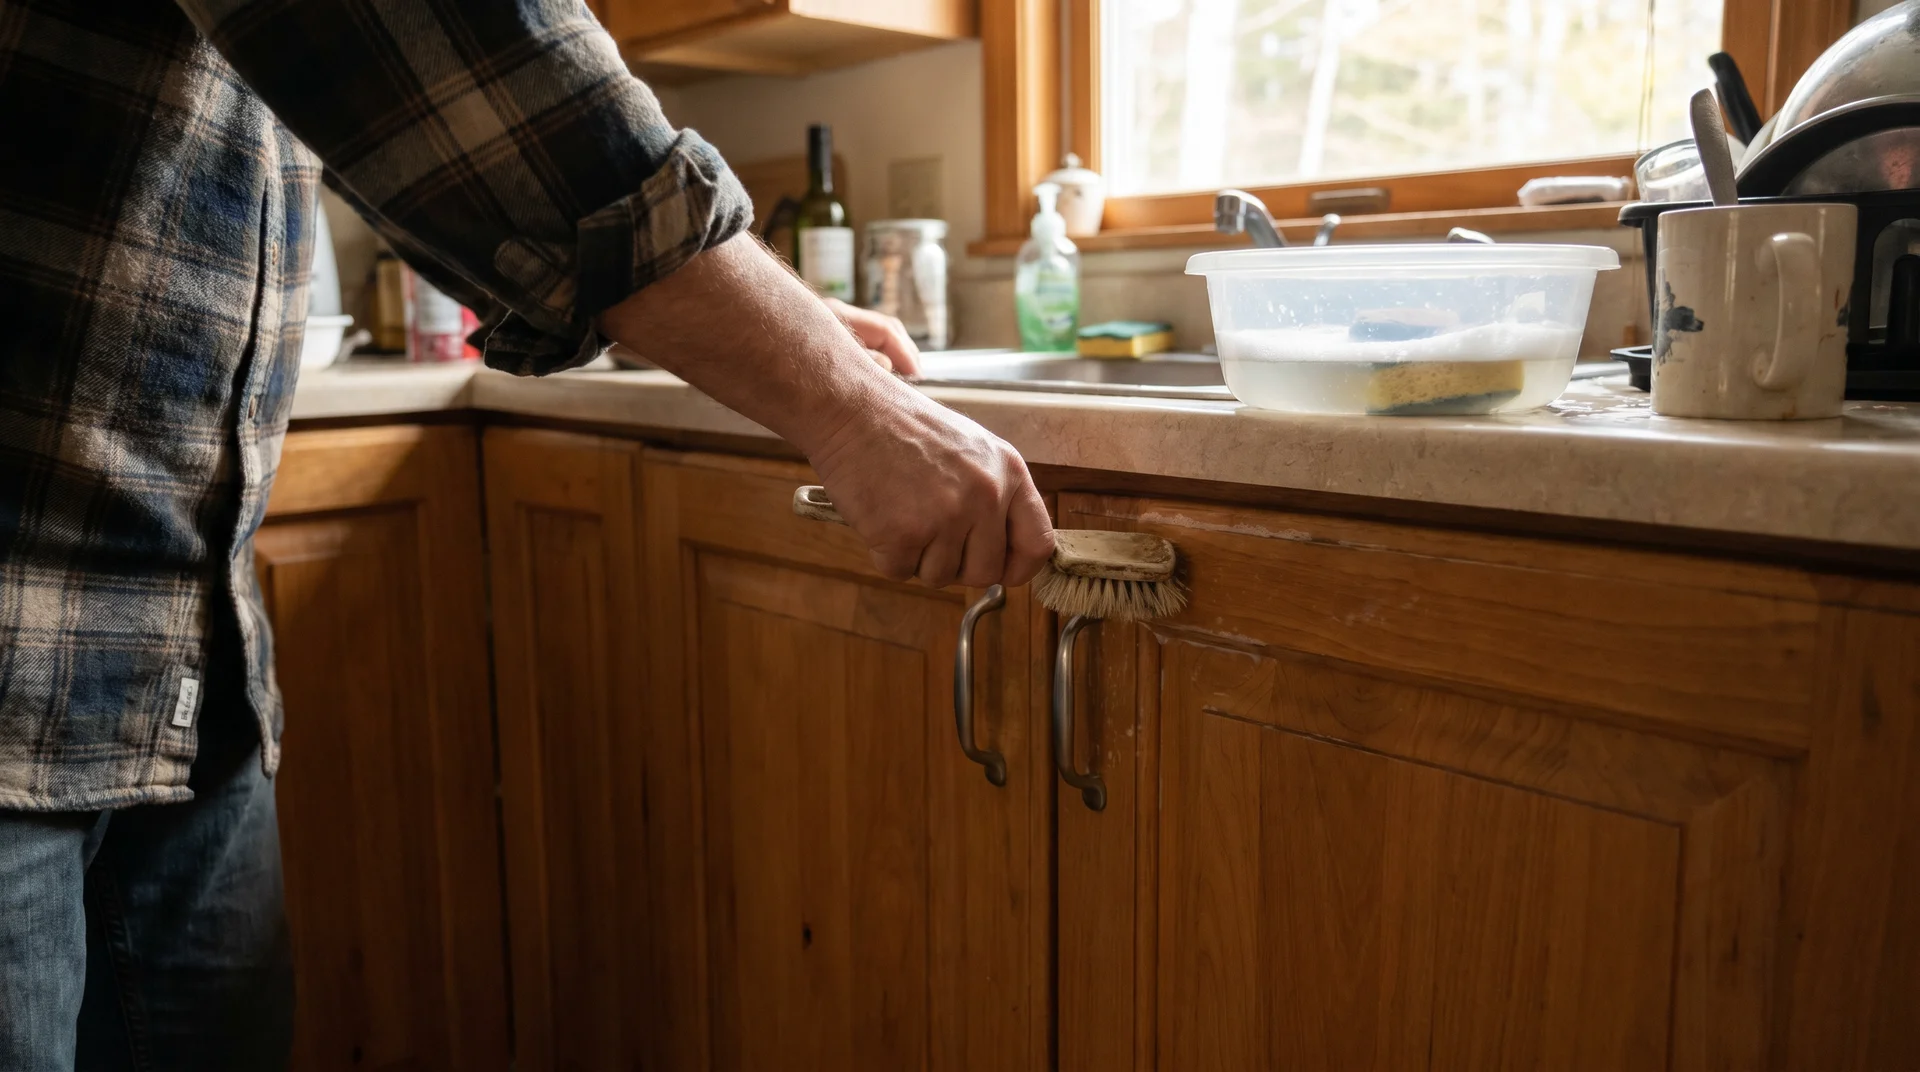
The Dish Soap Method
Mix two to three drops of dish soap into one cup of warm water. Dawn is a reasonable choice. Any mild liquid dish detergent does the same job.
- Contact time: 60 seconds.
- Surface type: all intact finishes.
- Sequence: apply to cloth, wipe, rinse with plain water, dry immediately.
Dampen a microfiber cloth and wring it until barely damp. If the cloth drips when held up, it holds too much moisture. Apply in straight passes with the wood grain.
Apply the solution to the cloth, not directly to the cabinet face. Direct spraying introduces more moisture than the surface needs.
Water pooling at the bottom edge of a door causes damage before you finish cleaning the top half.
The Vinegar Method
Diluted vinegar cuts through grease buildup on polyurethane surfaces and should not be used on other finish types.
Mix one part distilled white vinegar with two parts warm water. If uncertain about your finish type, stay with dish soap. Adding two to three drops of dish soap to the vinegar solution improves performance on significant grease buildup.
- Contact time: 60 to 90 seconds.
- Surface type: polyurethane and conversion varnish only.
- Sequence: apply to cloth, wipe clean, rinse with plain water, dry.
Do not use undiluted vinegar on any cabinet surface. The failure mode of extended acid contact is gradual dulling that compounds with each application. You will not notice it happening. You will notice it when it has happened.
The Baking Soda Paste
Baking soda is effective on hardened grease buildup and should be used as a spot treatment, not a full-cabinet method.
Mix two parts baking soda with one part warm water to form a thick paste. Apply to the affected spot with a soft cloth. Work gently in the direction of the wood grain.
- Contact time: three to five minutes.
- Surface type: sealed finishes, spot application only.
- Sequence: apply, wait, rinse completely, dry.
Do not skip the rinse. Alkaline residue left on the finish surface attracts new grime. The spot will be sticky within days if baking soda residue is not fully removed.
Murphy Oil Soap
Murphy Oil Soap is appropriate for sealed wood cabinet finishes and is not the right product for painted or laminate surfaces.
The label describes it as safe for wood. What that means in practice is safe for sealed wood finishes. Painted cabinets and laminate are a different surface category, and the label does not make that distinction.
Use a 5:1 ratio of water to Murphy Oil Soap. Apply to a cloth, wipe, follow with a plain-water pass, and dry.
People apply it to painted and laminate cabinets more often than they should, because the label does not tell them not to.
What Not to Use on Kitchen Cabinet Finish
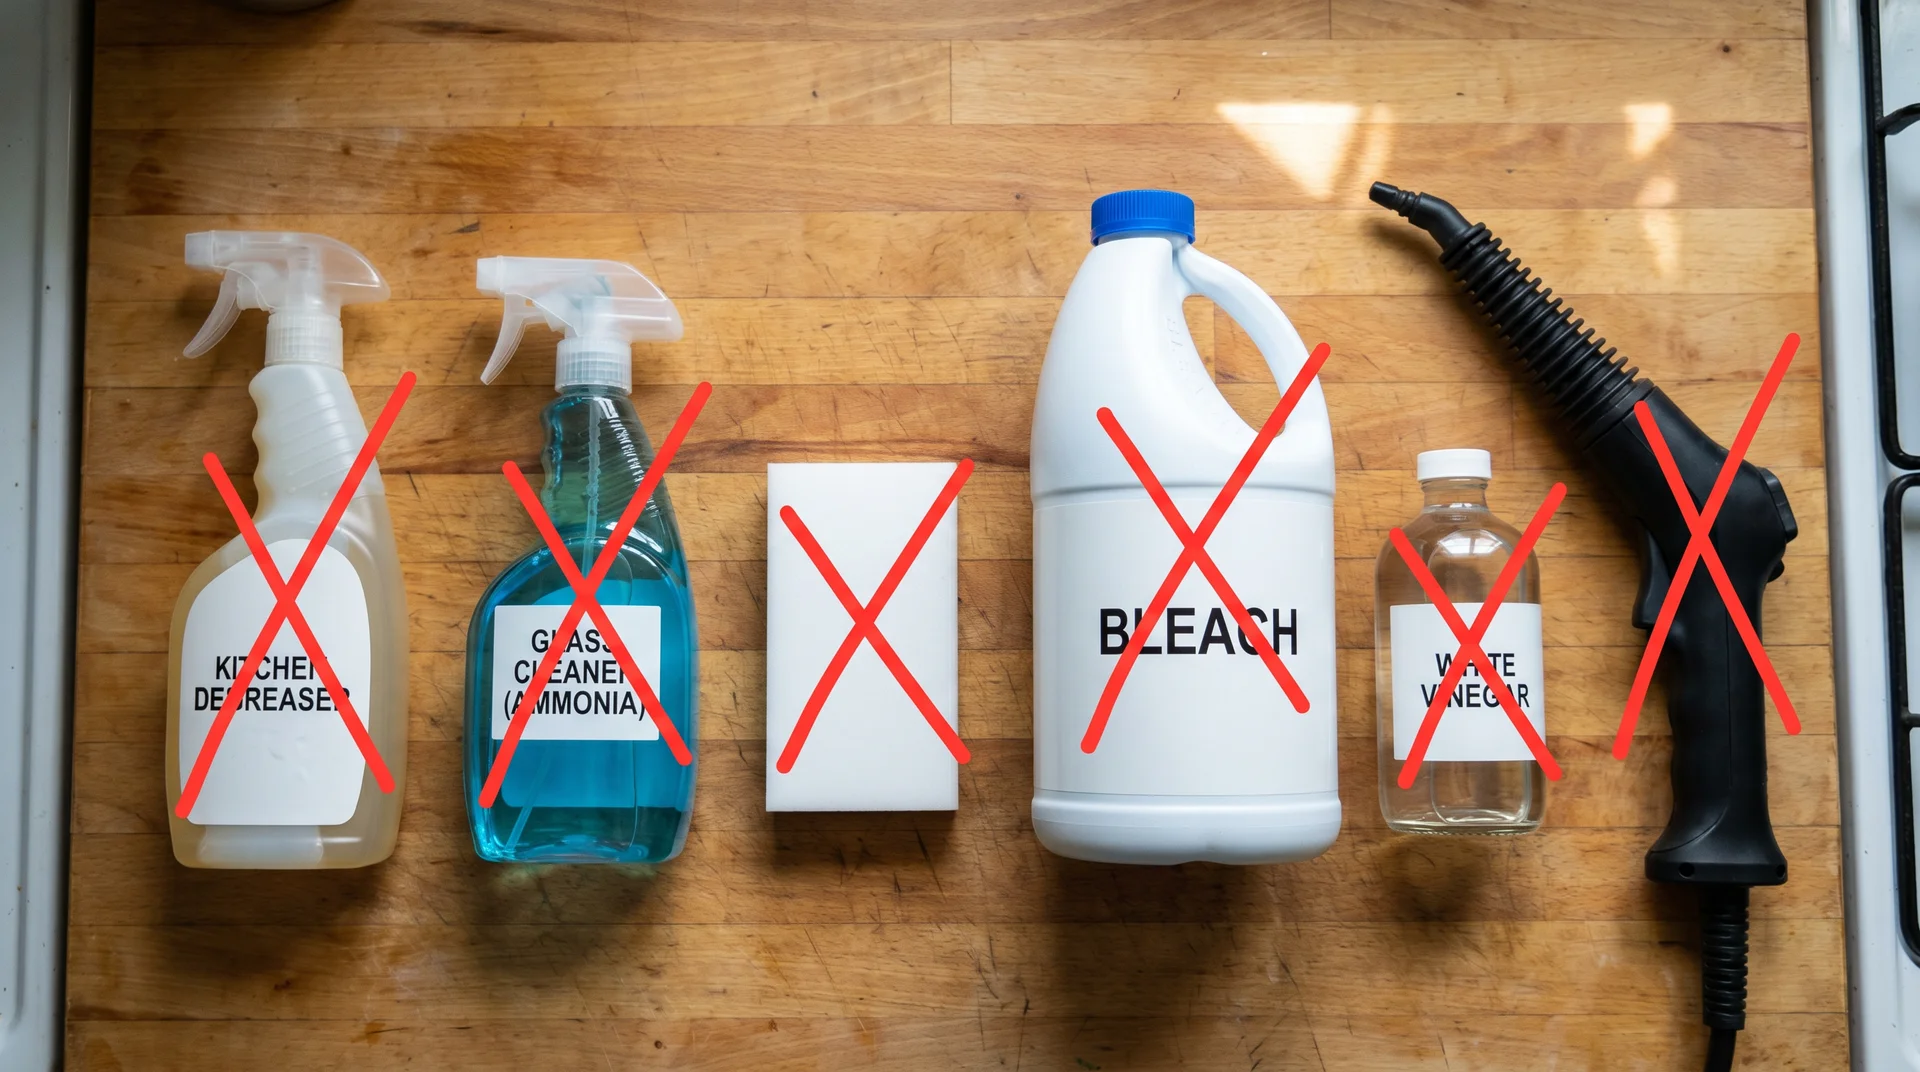
The most damaging cleaners are the ones already under your sink.
Bleach, ammonia, generic kitchen degreasers, and antibacterial spray bottles all degrade cabinet finish with repeated use. None of them is necessary for a surface that does not contact food directly.
Bleach is where kitchen safety instincts and cabinet surface chemistry diverge most directly.
My father spent thirty years inspecting commercial kitchens for Baltimore City. He thinks bleach solves everything. He is not entirely wrong.
He is also not entirely right. Bleach corrodes protective coatings and discolors paint with repeated use on finished wood.
A cabinet face is not a food-contact surface.
Dish soap removes grease and any bacteria accompanying it. For a surface that never contacts food directly, that is sufficient.
Products to remove from your cabinet cleaning routine:
- Bleach and bleach-based cleaners: Corrosive to protective coatings; discolors painted finishes; risks warping wood substrate with repeated use
- Ammonia and ammonia-based cleaners: Degrade finish coatings over time; most glass cleaners contain ammonia
- Generic kitchen degreasers and antibacterial sprays: Formulated for tile and stainless steel; pH too aggressive for finished wood
- Magic Erasers: Micro-abrasive melamine foam; removes finish sheen and paint gloss alongside surface grime
- Undiluted vinegar: Acid concentration too high for any sustained contact with any finish type
- Steam cleaners: Uncontrolled moisture delivery; heat degrades lacquer and can loosen veneer adhesive at edges
I keep a documented record of cleaning products I have tested and removed from my recommendations. Generic kitchen degreasers and antibacterial sprays appear in that record more than any other category.
The label says safe for kitchen surfaces; the product’s actual pH on finished wood often says otherwise.
Knowing your finish type, which the identification section above walks through, lets you evaluate a product’s actual chemistry rather than its label language.
Label language is written for the broadest possible use case. Your cabinets are not a generalized kitchen surface.
Cleaning by Cabinet Type
Each finish type carries at least one specific risk that general advice ignores.
The table below covers safe products, what to avoid, and realistic cleaning frequency. Look at the What to Avoid column first. It is the more consequential half of the table.
| Cabinet Finish | Safe Cleaners | What to Avoid | Cleaning Frequency |
|---|---|---|---|
| Polyurethane / Conversion Varnish | Dish soap and water; vinegar at 1:2 dilution; Murphy Oil Soap at 5:1 | Undiluted vinegar; bleach; abrasive pads; steam | Weekly wipe-down; quarterly deep clean |
| Lacquer | Dish soap and water only | Vinegar; alcohol-based cleaners; ammonia; steam; solvent cleaners | Weekly wipe-down; quarterly deep clean |
| Oil-Based Finish | Dish soap and water, used sparingly; Murphy Oil Soap at 5:1 | Vinegar; citrus cleaners; alcohol; steam; most commercial degreasers | Biweekly wipe-down; semi-annual oil conditioning |
| Painted Finish | Dish soap and water are applied to the cloth only, never sprayed directly | Magic Erasers; abrasive pads; undiluted vinegar; bleach; ammonia | Weekly wipe-down; quarterly deep clean |
Painted Cabinets
Painted cabinets need consistent light cleaning more than periodic heavy cleaning.
Grease that sits for weeks is harder to remove without scrubbing, and scrubbing removes paint sheen. Light cleaning done regularly causes less cumulative damage than aggressive cleaning done quarterly. Apply the solution to the cloth only. Allow no water pooling at door edges or around hardware.
Thermofoil and vinyl-wrapped cabinet fronts are not painted wood. They have specific failure risks involving heat and solvent exposure, and cleaning them requires different guidance. That is a separate article with different criteria.
Stained Wood with a Clear Topcoat
Stained wood cabinets cover two very different finish types, and the distinction determines which products are safe.
Polyurethane-topped stained wood tolerates more product variation than lacquer-topped stained wood. The visual difference between the two is not reliable to the naked eye. If you have stained wood with a clear coat and skipped the acetone test, run it now.
Do this before using anything stronger than dish soap and water. The acetone test takes five minutes and is the only reliable way to tell these two finish types apart.
Wipe in the direction of the wood grain. Cleaning across the grain creates micro-scratches that catch grease. They are nearly invisible on the first pass and compound into a dulled, harder-to-clean surface over time.
Natural Wood with Oil Finish
Oil-finished cabinets are the most restrictive for product selection and the most renewable for maintenance.
Dish soap and water, applied sparingly and dried immediately, is the routine cleaning method. Murphy Oil Soap at 5:1 is appropriate for regular use. Check the finish condition once or twice a year.
If the surface looks dry or dull despite regular cleaning, a light application of the original oil type restores the protective layer. That is a maintenance task. If you are unsure whether your cabinets have an oil finish, go back to the linseed oil test earlier in this piece.
Building a Routine That Protects the Finish Over Time
Frequency without method is not a protocol.
Cleaning more often with the wrong product on the wrong finish does more damage faster. I keep a whiteboard in my kitchen tracking which surfaces were cleaned and when. The most consistent pattern: the cabinets nearest the stove accumulate the most grime.
- Daily: Wipe splatters while wet. Dried grease requires more effort and stronger products to remove. This one habit prevents most stubborn buildup.
- Weekly: Dry microfiber wipe of exterior cabinet faces, especially around the stove. No cleaning product is needed for light dust and fingerprints on an intact finish.
- Quarterly: Full cleaning pass using the method appropriate for your finish type. Check the finish condition near handles and high-contact edges.
- Annually: Apply a protective wax or polish appropriate for your finish type to polyurethane and lacquer surfaces. This creates a layer that takes cleaning wear before the finish does.
Cabinet hardware, the pulls and handles, accumulates grease at the edges from daily contact. Wipe it with the same cloth during your weekly pass. A toothbrush with dish soap solution handles the edges of hinges and the backs of pulls, where cloths don’t reach.
Run your range hood while cooking.
Range hoods that go without cleaning stop drawing air effectively, and the grease load on nearby cabinet surfaces increases significantly when ventilation fails. A dirty filter is not a ventilation system.
Ventilation, cleaning frequency, and the right product for your specific finish type are not three separate decisions. They function together, and getting one wrong compounds the other two.