

Painting your own cabinets is a real renovation option. Done right, a painted finish holds up in a working kitchen for three to seven years and costs a fraction of full replacement.
The deciding factor is prep. Pick the color last. The decisions that determine whether this finish holds up happen before the paint opens.
Are Your Cabinets Worth Painting?
Not every cabinet is a good candidate for paint. Some surfaces take paint well and hold it for years. Others look fine at first and fail at the edges within a year.
Before you buy anything, spend ten minutes figuring out which situation you’re working with.
Cabinet Materials That Paint Well (And One That Doesn’t)
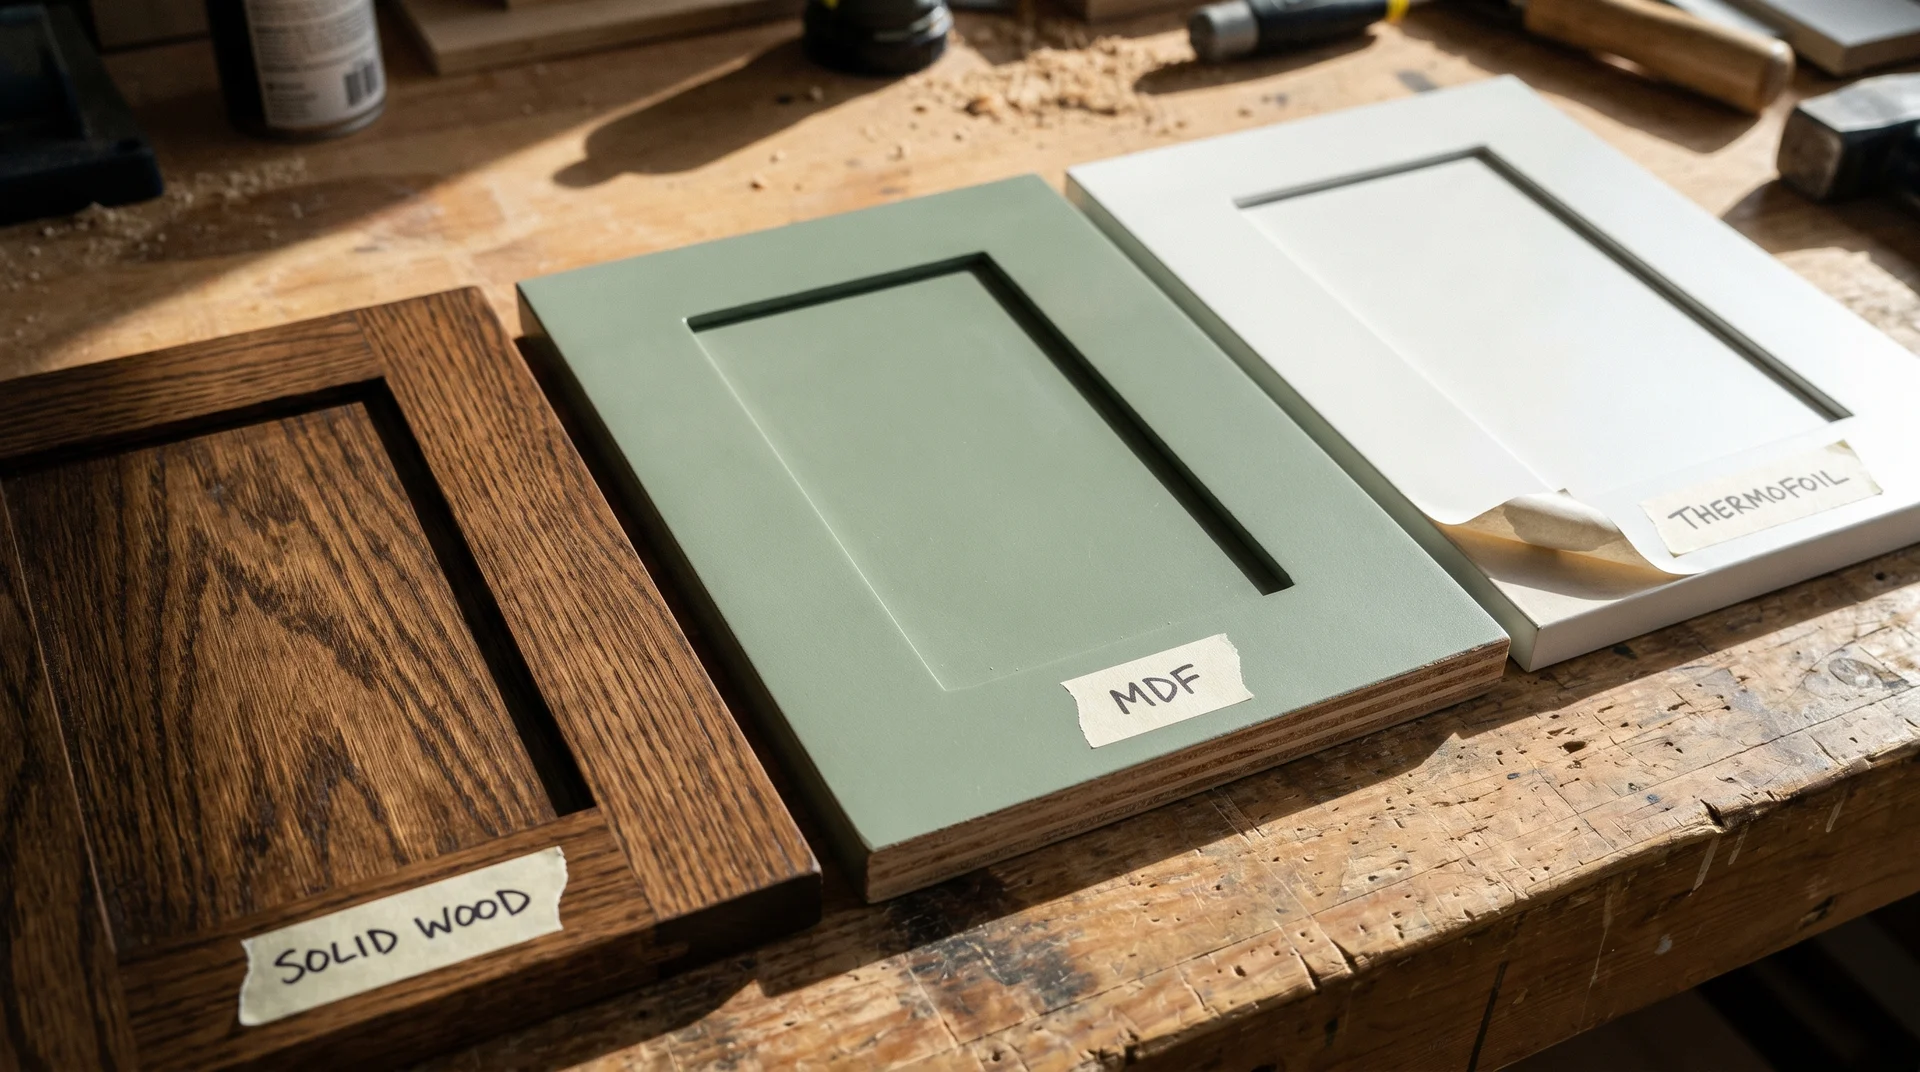
Solid wood and MDF take paint well. Thermofoil does not.
Solid wood kitchen cabinets are the best candidates. They bond reliably with primer, sand cleanly, and hold a finish for years when the prep is right.
MDF (medium-density fiberboard) is also a reliable option, though its edges need a shellac-based primer to prevent the material from absorbing moisture and swelling when it contacts water-based products.
Standard laminate cabinets can work if the surface is in good structural condition and you use a bonding primer designed for non-porous surfaces. The surface needs to be smooth, intact, and free of any existing peeling or lifting.
Thermofoil and vinyl-wrapped cabinets are the exception. The heat-applied film doesn’t bond reliably with paint, and the edges, where the wrap meets the substrate, almost always fail within a year.
If your cabinets have a film coating that’s already lifting at the corners, paint will follow that same failure path.
Condition Check
Paint won’t fix structural damage, and trying to hide it makes the eventual repair harder.
Check for water swelling in the cabinet boxes, especially around the sink. Look for delamination where the laminate meets a seam, and inspect hinge areas for cracks in the face frame.
Any of these problems needs a fix or a replacement before paint touches the surface.
What to Buy Before You Start Painting Cabinets
Your material choices here determine the result more than your technique does.
Most people make the first mistake in the paint aisle. They pick a color, grab a generic primer, and start. The primer decision especially, is where the outcome gets determined before a brush touches wood.
The materials are set once you’ve made these three choices. Then prep determines whether any of it holds.
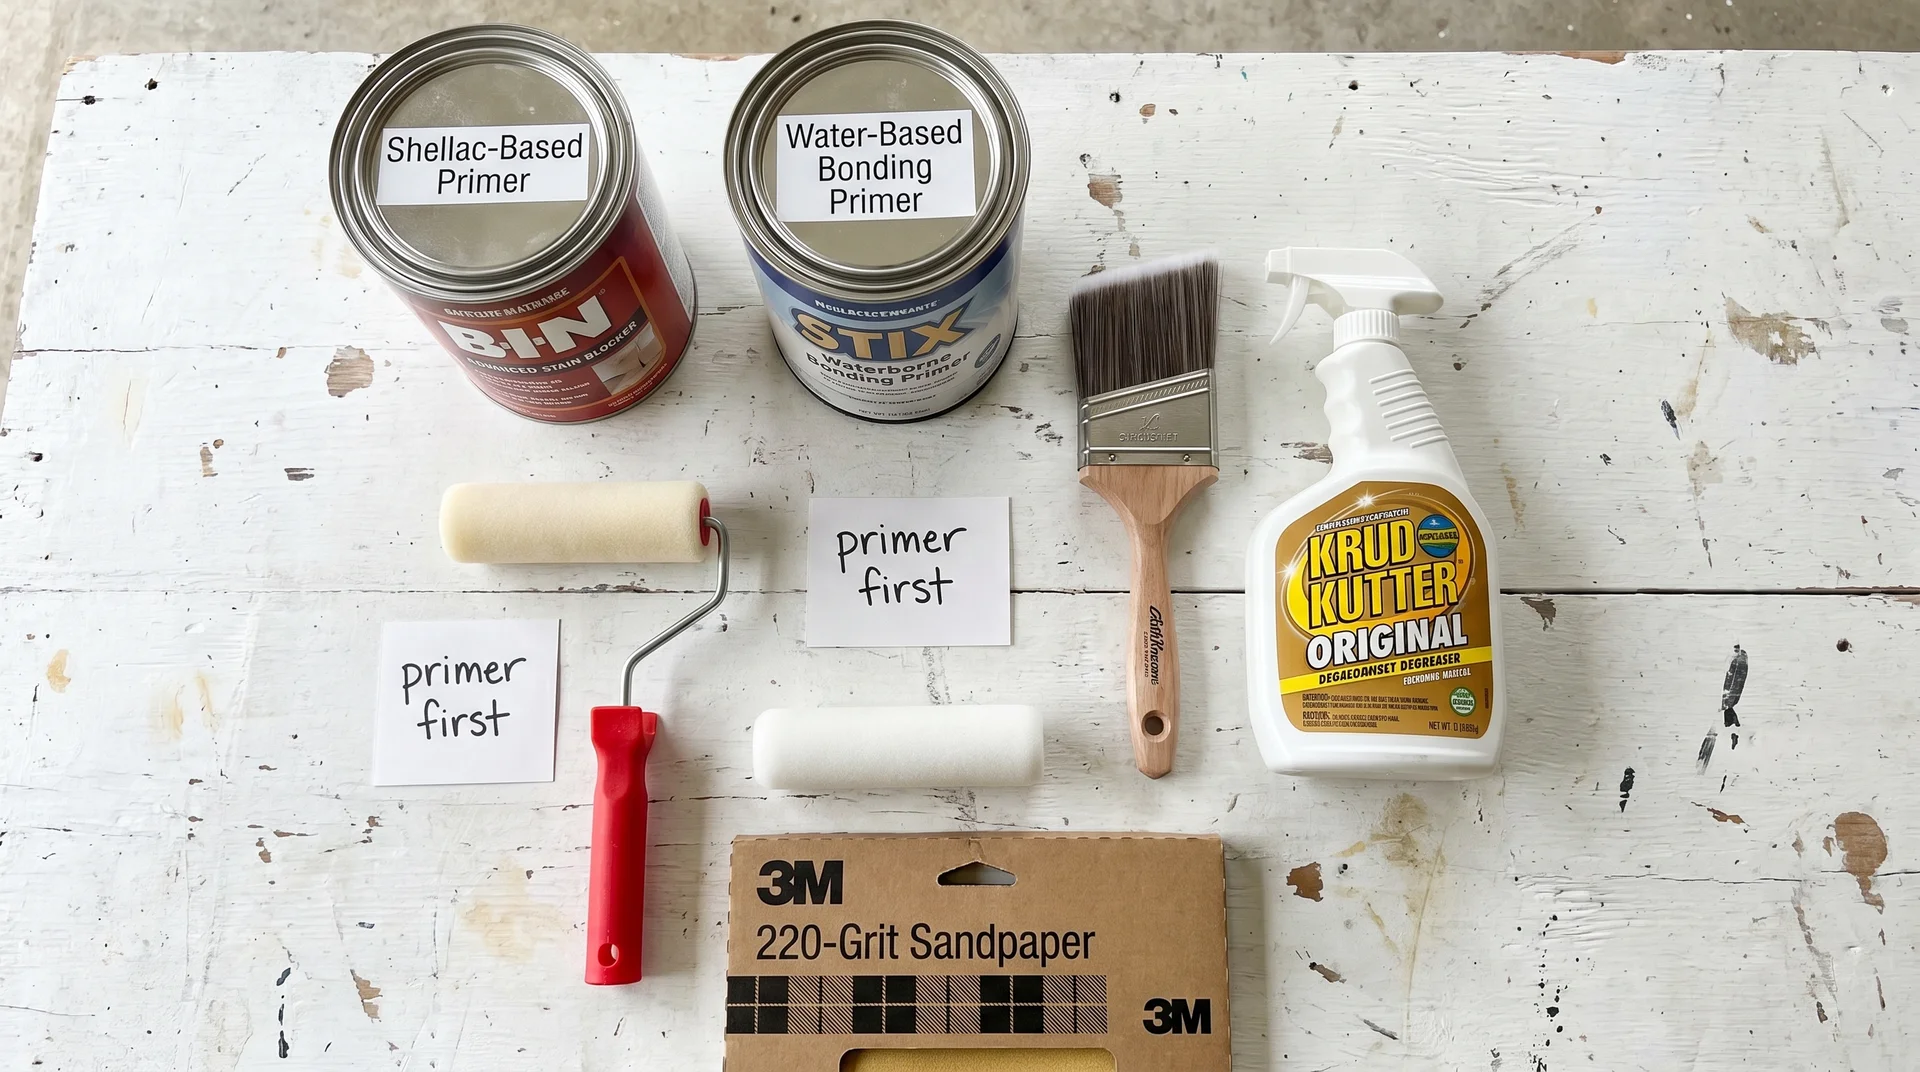
Primer
The wrong primer is the most common reason painted cabinets peel.
The primer question comes up in every r/DIY thread and YouTube comment section on cabinet painting.
The answers are almost always “use Zinsser BIN” with no context for surface type. The right primer depends on what you’re painting.
| Surface | Recommended Primer | Why It Matters |
|---|---|---|
| Solid wood (bare or stained) | Water-based bonding primer or oil-based primer | Penetrates wood grain; blocks tannin bleed in darker species |
| MDF – especially cut edges | Shellac-based primer (Zinsser BIN) | Seals porous edges; prevents water-based products from swelling the material |
| Laminate in good condition | Water-based bonding primer (KILZ Adhesion, Zinsser Bulls Eye 1-2-3) | Designed to grip non-porous surfaces without sanding to bare material |
| Thermofoil or vinyl-wrapped | Not recommended | Adhesion at edges fails reliably; the film substrate resists bonding |
Application method matters as much as product choice. Brush marks in primer become brush marks in paint.
Apply thin coats with a quality brush or foam roller and give each coat the full recommended dry time before moving on.
Paint Type and Finish
Water-based alkyd hybrid paints are the best option for most kitchen cabinets today.
Water-based alkyd hybrids (a formula that cures as hard as oil-based paint but cleans up with water) outperform standard latex in a kitchen environment.
Traditional oil-based paints build a harder finish but yellow over time and are increasingly difficult to find due to VOC regulations in many states.
Standard latex dries fast but stays slightly soft, which means it dents and marks easily in a high-use kitchen.
For sheen level, satin or semi-gloss are the practical choices for kitchen cabinet surfaces. A higher sheen is more durable and easier to wipe clean. Flat and eggshell finishes look softer but show every watermark and grease smear more clearly than they appear to in the paint store.
I’ve watched clients fall in love with a flat finish in the paint fan deck and regret it within a year. Satin is the lowest sheen I’d put on any kitchen surface that gets handled daily.
Brush, Roller, or Sprayer
A foam roller on flat door faces, paired with a quality angled brush for the frames and detail areas, is the combination that works for most DIYers. Foam rollers leave a much finer texture than nap rollers and require no spray setup or overspray management.
A paint sprayer produces the smoothest possible finish. It also produces the most setup time, the steepest learning curve, and the highest consequence for getting viscosity wrong.
The hardware cost and the learning curve are the real design problems here. For someone painting their kitchen once, that investment rarely pays back in finish quality.
How to Prepare Cabinets for Painting?
Prep is where the project succeeds or fails.
I’ve overseen enough kitchen renovations to say this plainly: a painted finish that failed almost always failed in prep. Skipping or rushing any step in this sequence is what makes a finish peel before it should. Do it in order.
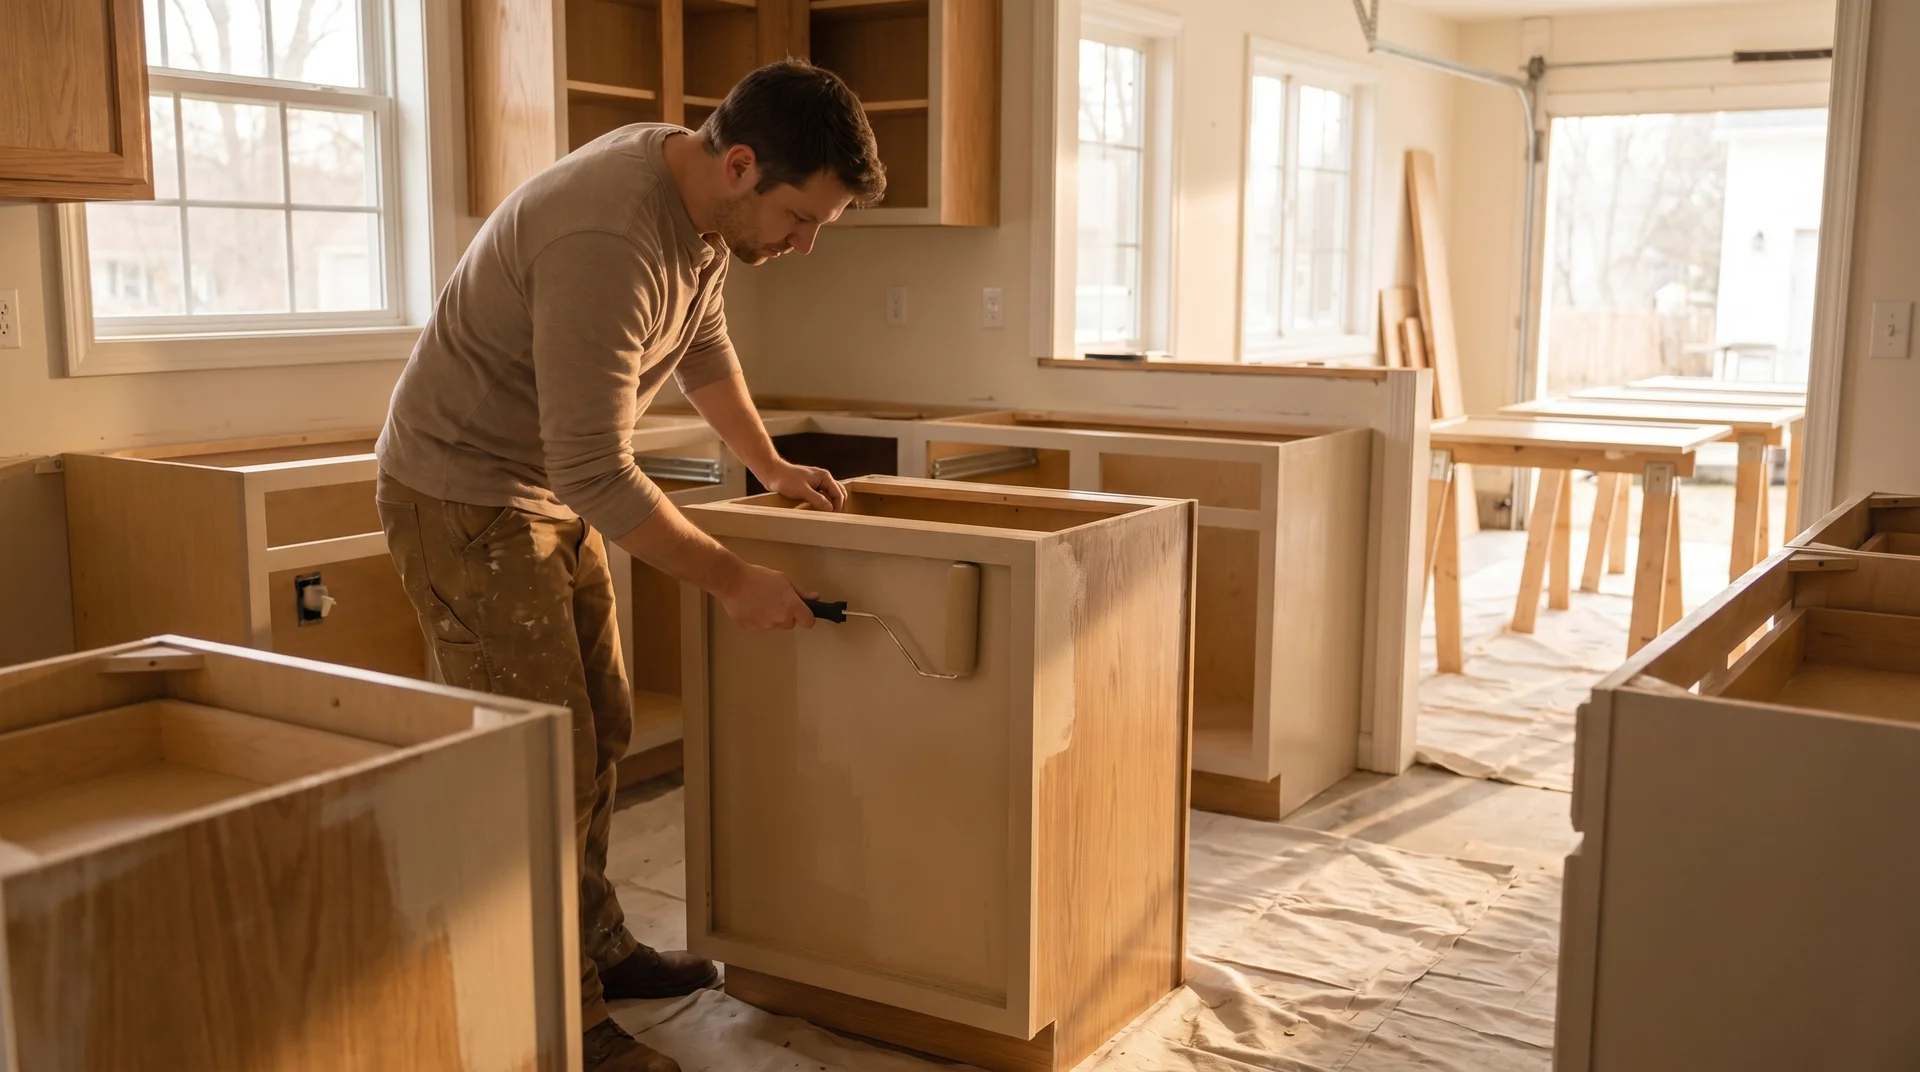
Step 1: Remove Hardware and Doors Before Anything Else
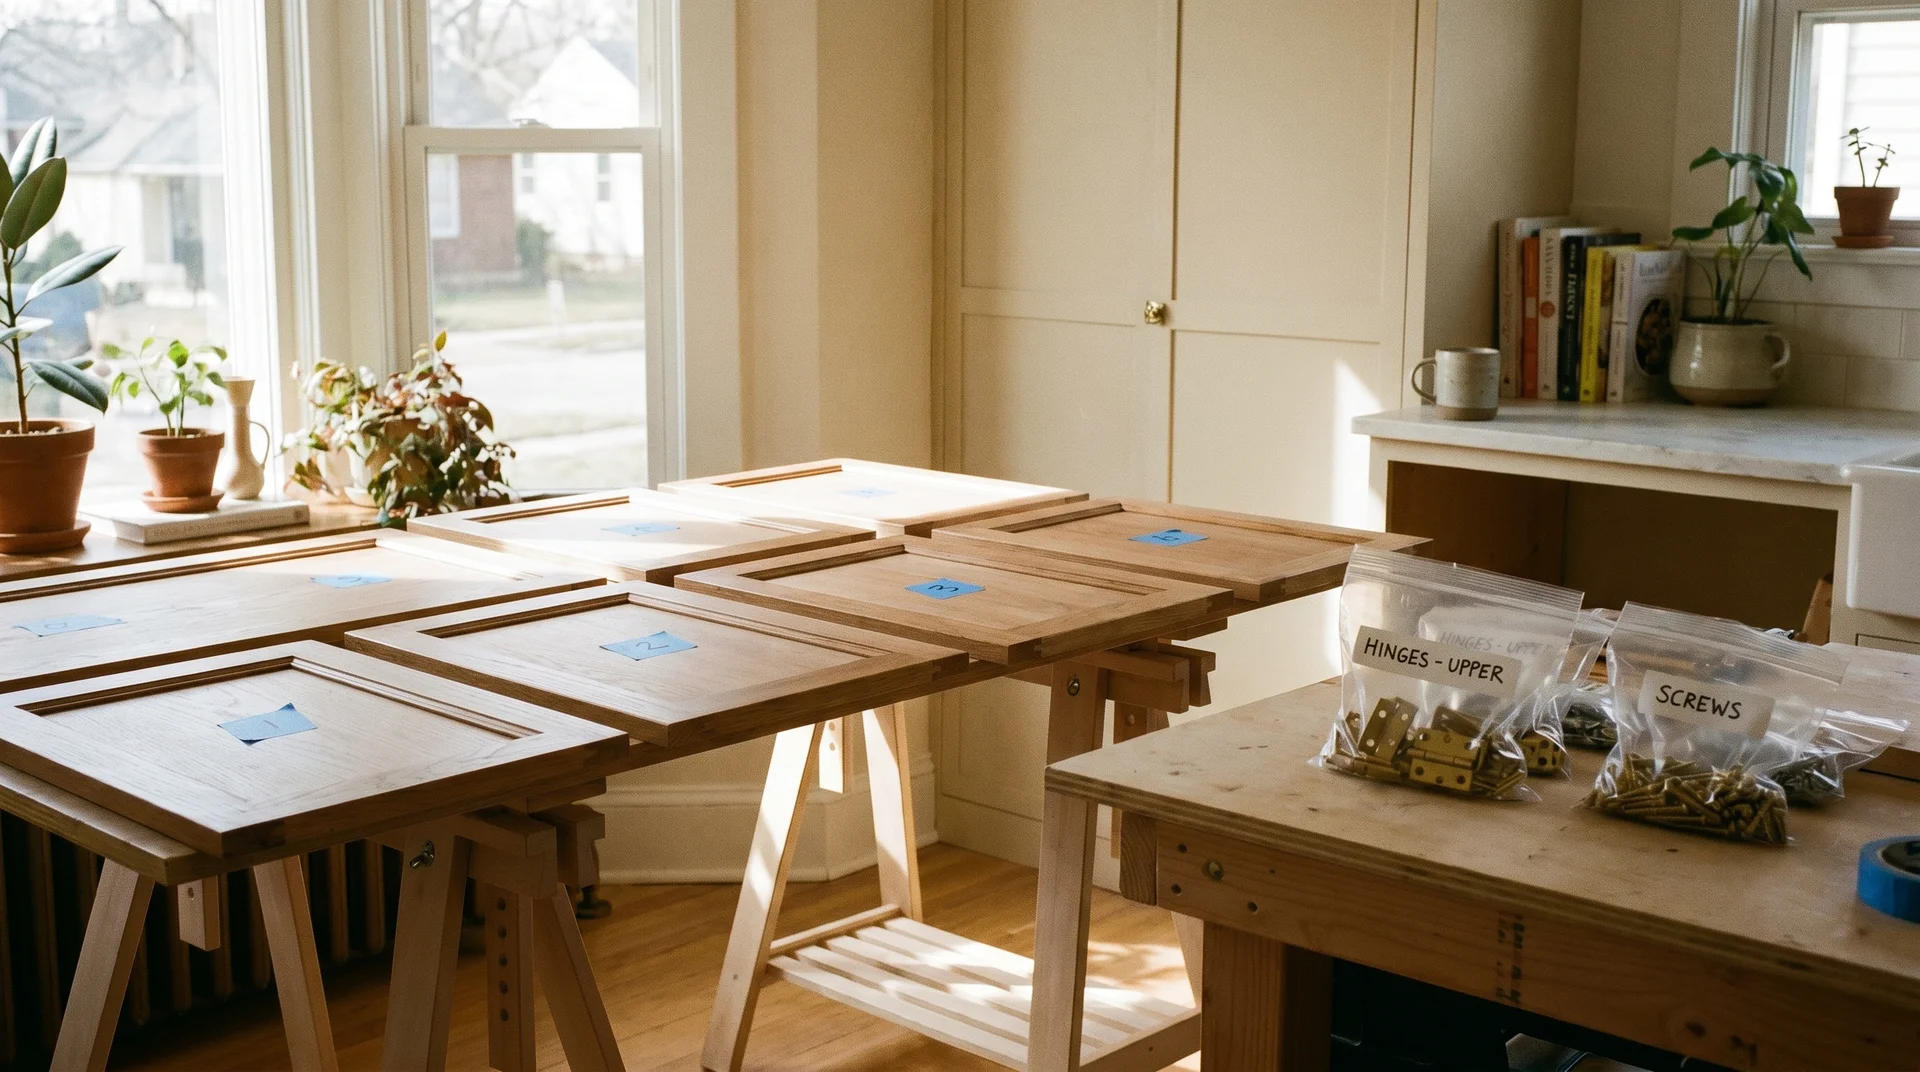
Label everything before anything comes off the cabinet.
Use painter’s tape and a marker to number each door and its corresponding cabinet opening. Remove hinges and hardware completely.
Painting around hardware produces edges that fail first, and doors left on during painting never get a consistent coat across the full face.
Keep hardware sorted in labeled zip-lock bags. Losing a hinge screw on day three of a painting project is a small thing that wastes a surprising amount of time.
Step 2: Degrease First & then Clean
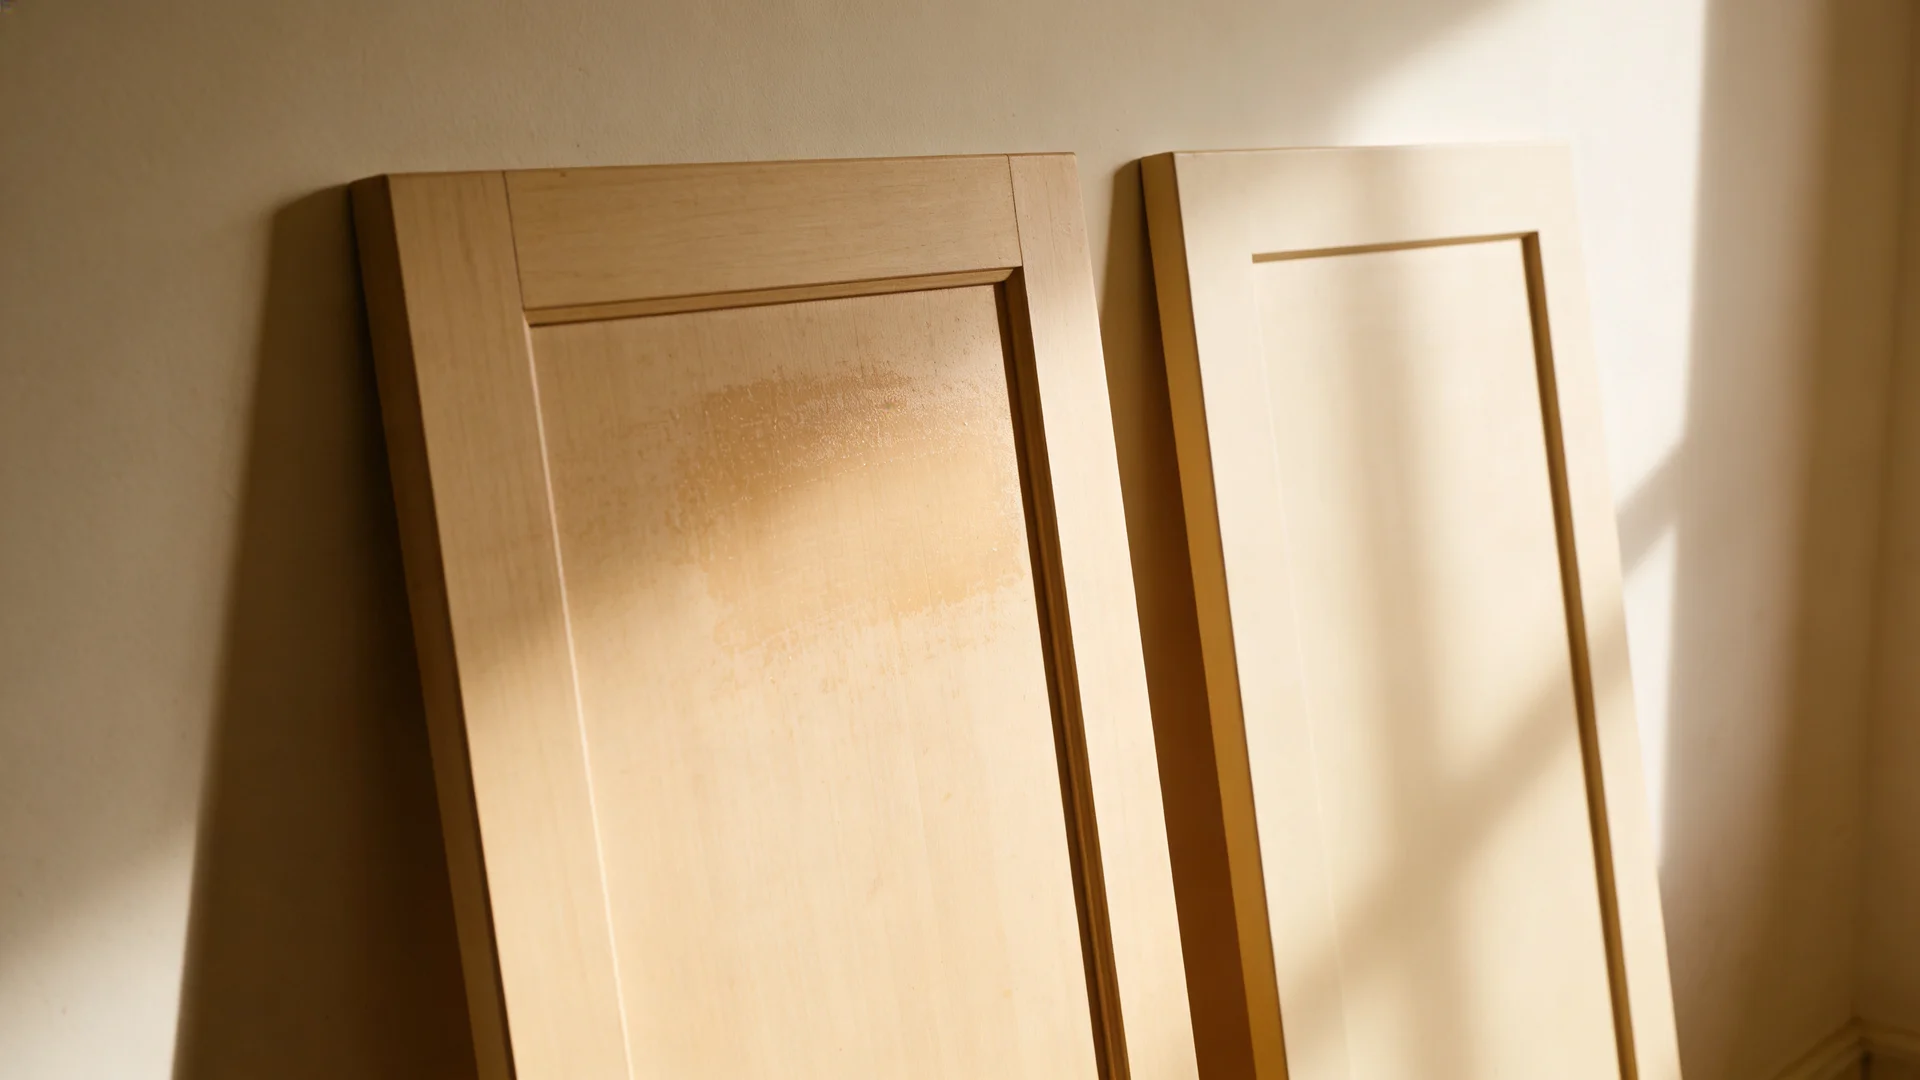
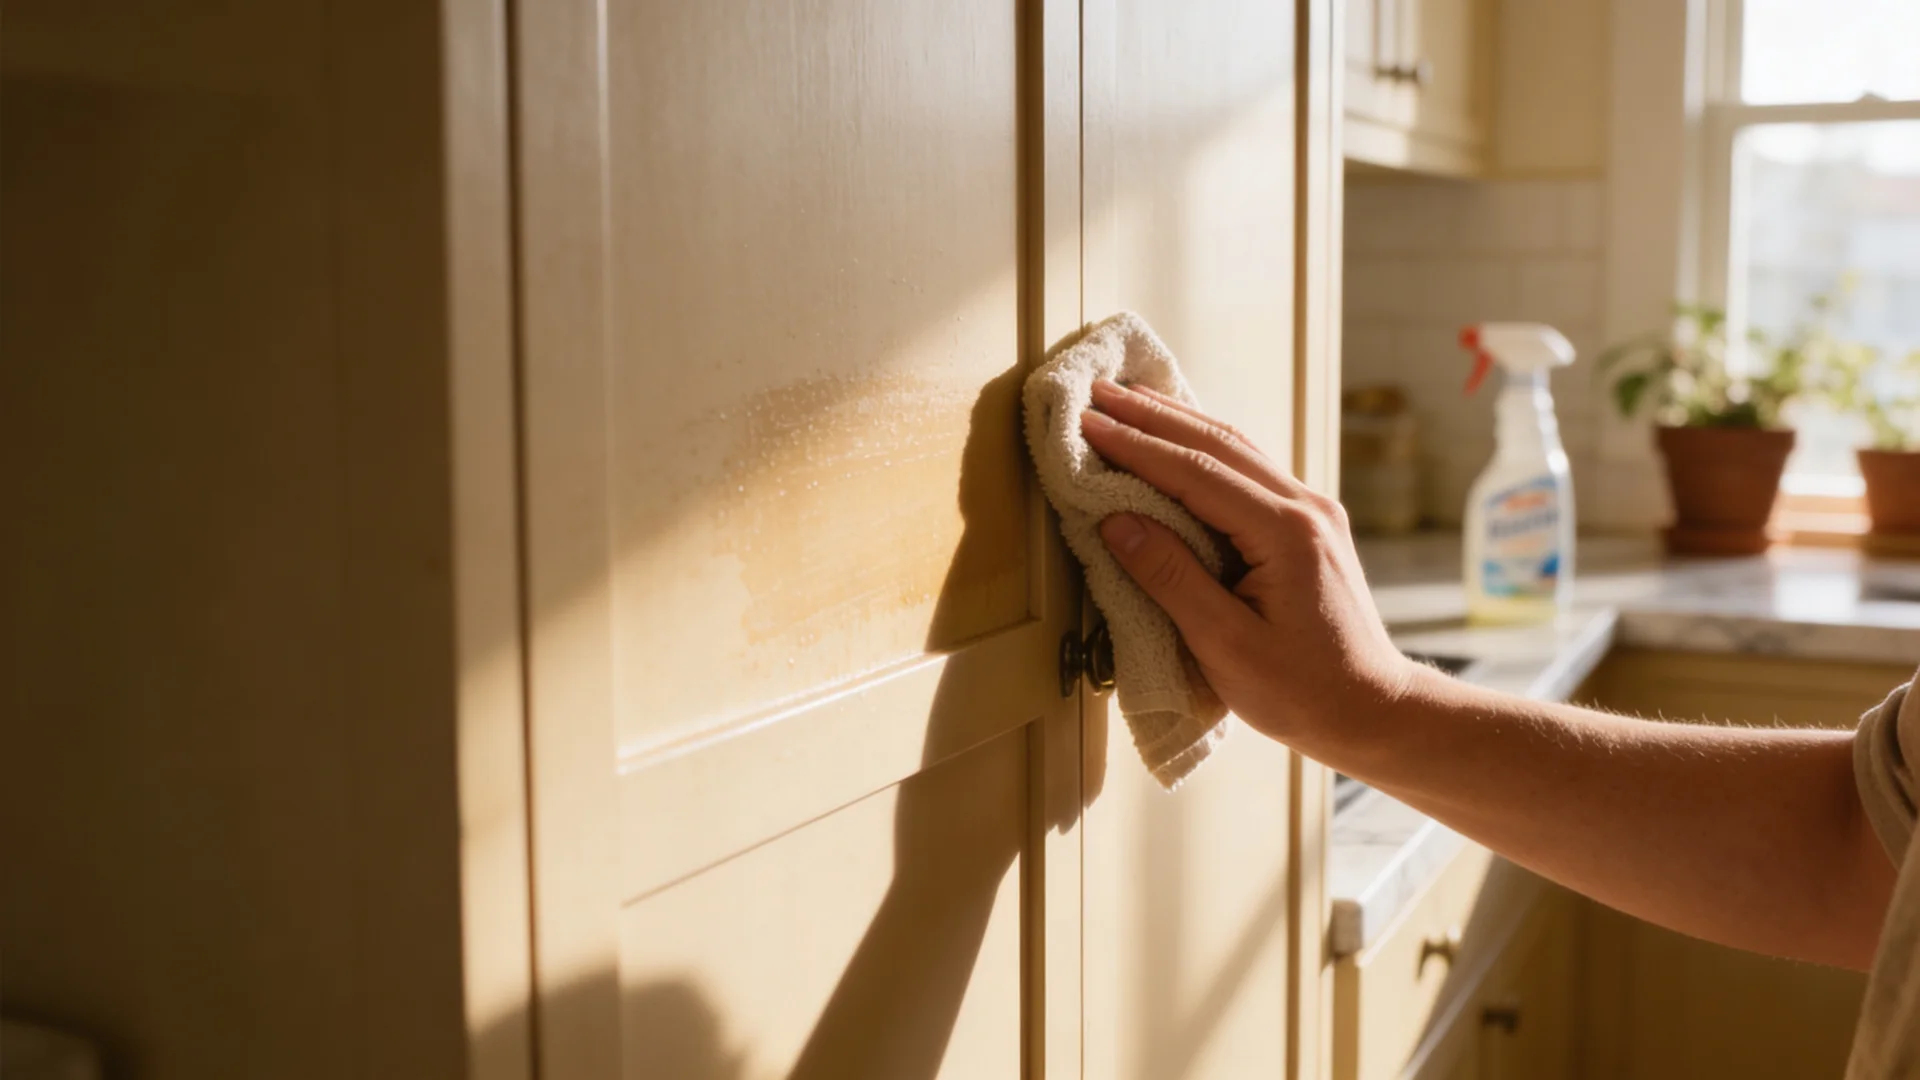
Kitchen cabinet surfaces accumulate a layer of grease vapor and cooking residue over the years of use. Standard household cleaners move that residue around without fully breaking it down.
No primer bonds reliably over the residue that remains. A finish that looks perfect in month one can start lifting at the edges within a year.
Use a TSP substitute or a dedicated degreaser such as Krud Kutter or a diluted TSP substitute solution. Work in a ventilated space and wear gloves.
These products are stronger than standard kitchen cleaners. Apply, let it work for the product’s recommended contact time, wipe thoroughly, and follow with a clean water rinse.
Let the surface dry completely before primer touches it.
- If the surface still feels even slightly tacky after cleaning, clean it again.
- Tacky means the residue is still present.
- A primer applied over a tacky surface will fail. It’s a question of when, not if.
Step 3: Do You Need to Sand?
| Cabinet Condition | Sanding Needed? | Why |
|---|---|---|
| Matte finish in good condition | Usually no | Bonding primer can adhere |
| High-gloss finish | Yes | Primer struggles to grip |
| Peeling or damaged coating | Yes | The existing finish is unstable |
| Repairs or filler used | Yes | Smooth transitions required |
You can skip sanding only if three conditions are true: the existing finish is in good condition, it has no high-gloss sheen, and there’s no peeling anywhere. You also need a bonding primer designed for slick surfaces.
The no-sanding tutorials that rank at the top of search results aren’t exactly wrong. They’re incomplete. They work for factory-finished cabinets in genuinely good condition with a bonding primer doing the adhesion work. They don’t work reliably anywhere else.
You need to sand if your cabinets have a high-gloss existing finish, any areas where the coating is already lifting, or any repairs made to the substrate. I’ve watched no-sanding projects work well, and I’ve watched them fail.
The difference is almost always in how good the original factory finish was to start with, and that’s genuinely hard to assess before you begin, and I won’t pretend otherwise.
When you do sand, 120 to 150 grit is appropriate for scuffing a previously finished surface. Sanding creates fine dust, so work with the cabinet doors flat, in a ventilated space, and wipe surfaces clean with a tack cloth before priming.
The goal is surface texture for primer to grip, not stripping to bare wood.
Step 4: Caulk Gaps & then Prime
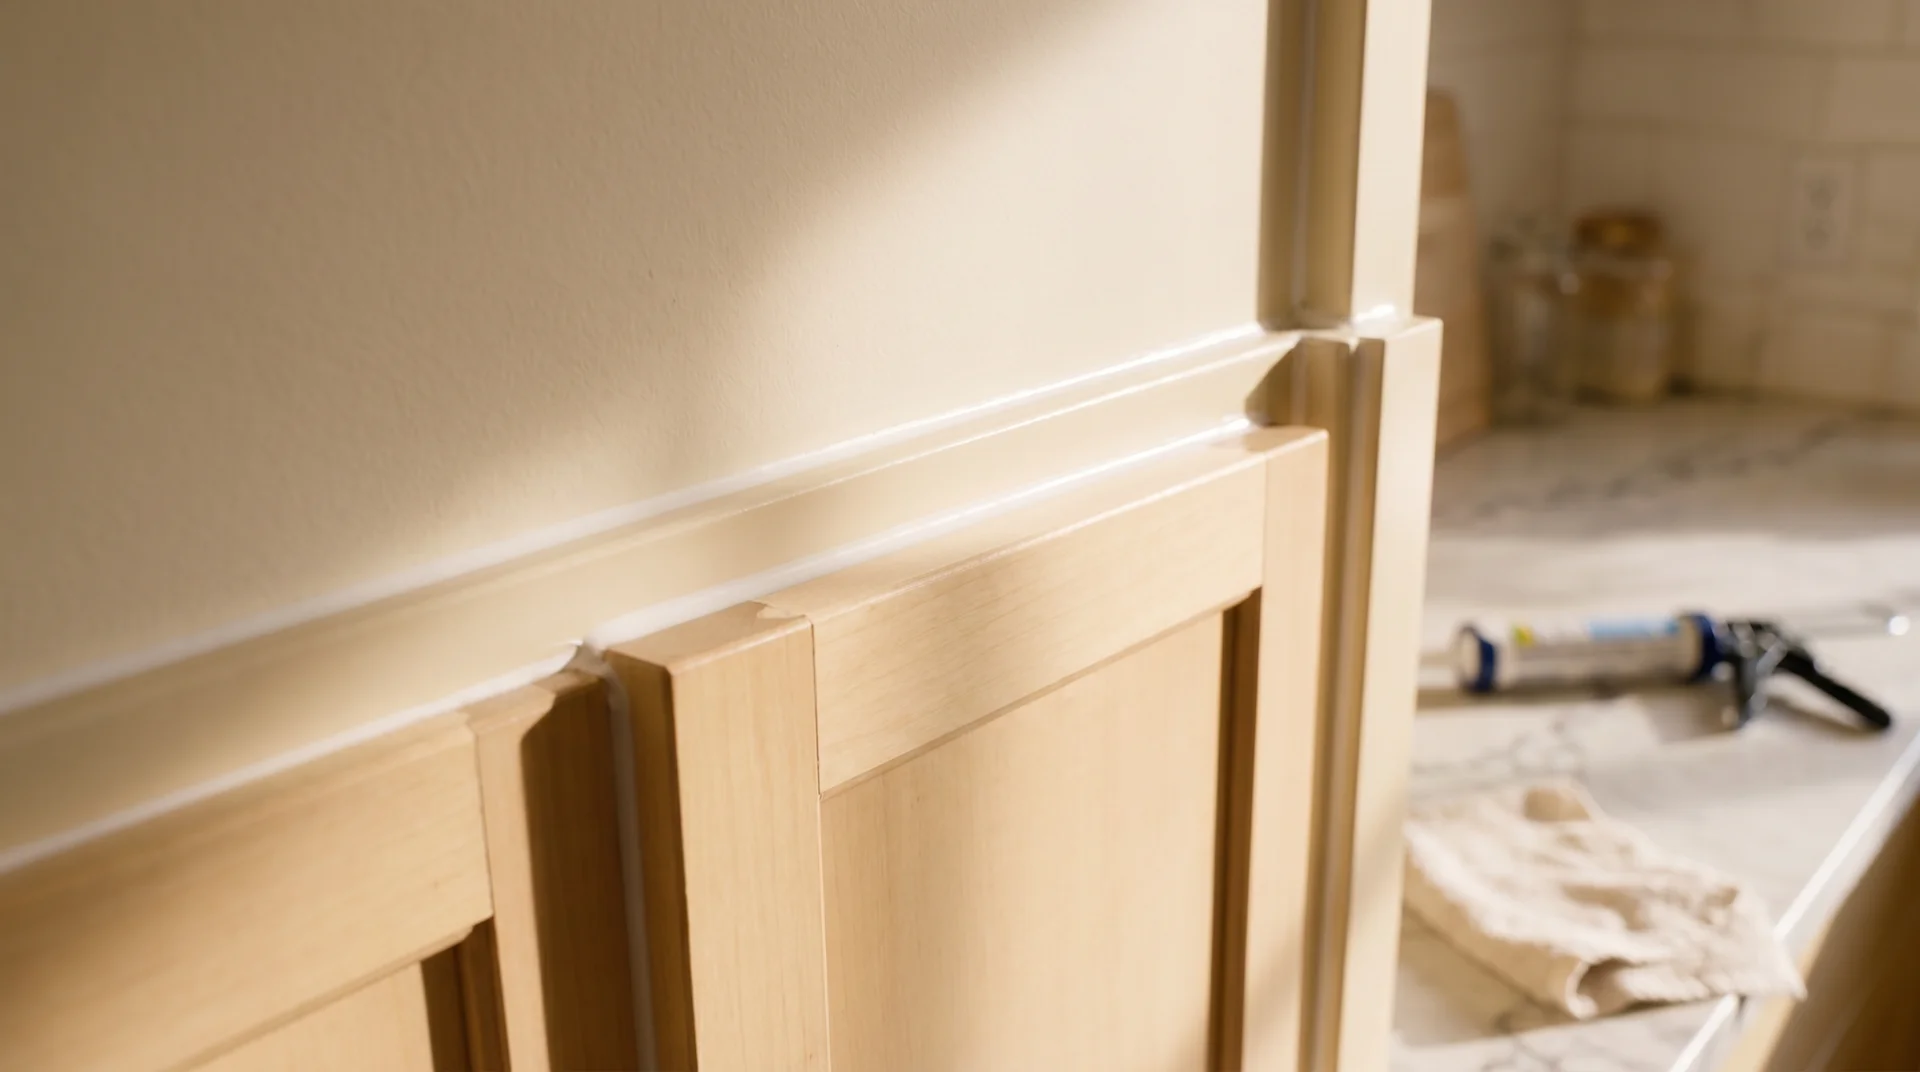
Two steps most people skip right before priming: caulking and patience.
Before primer, run a thin bead of paintable caulk along any gap where the cabinet box meets the wall or where the face frame meets the cabinet box.
Smooth it with a damp finger and let it dry completely. These gaps collect grime after painting and are far more visible than people expect.
Then prime. Apply in the direction of the wood grain where grain is visible, in thin, consistent coats. Let the first coat dry fully before assessing whether a second coat is needed. On wood with visible grain or MDF edges that absorbed the first coat heavily, a second coat is almost always necessary.
Light scuff-sanding with 220 grit between primer coats on wood surfaces knocks down raised grain and gives paint a smoother foundation. Wipe clean with a tack cloth before painting.
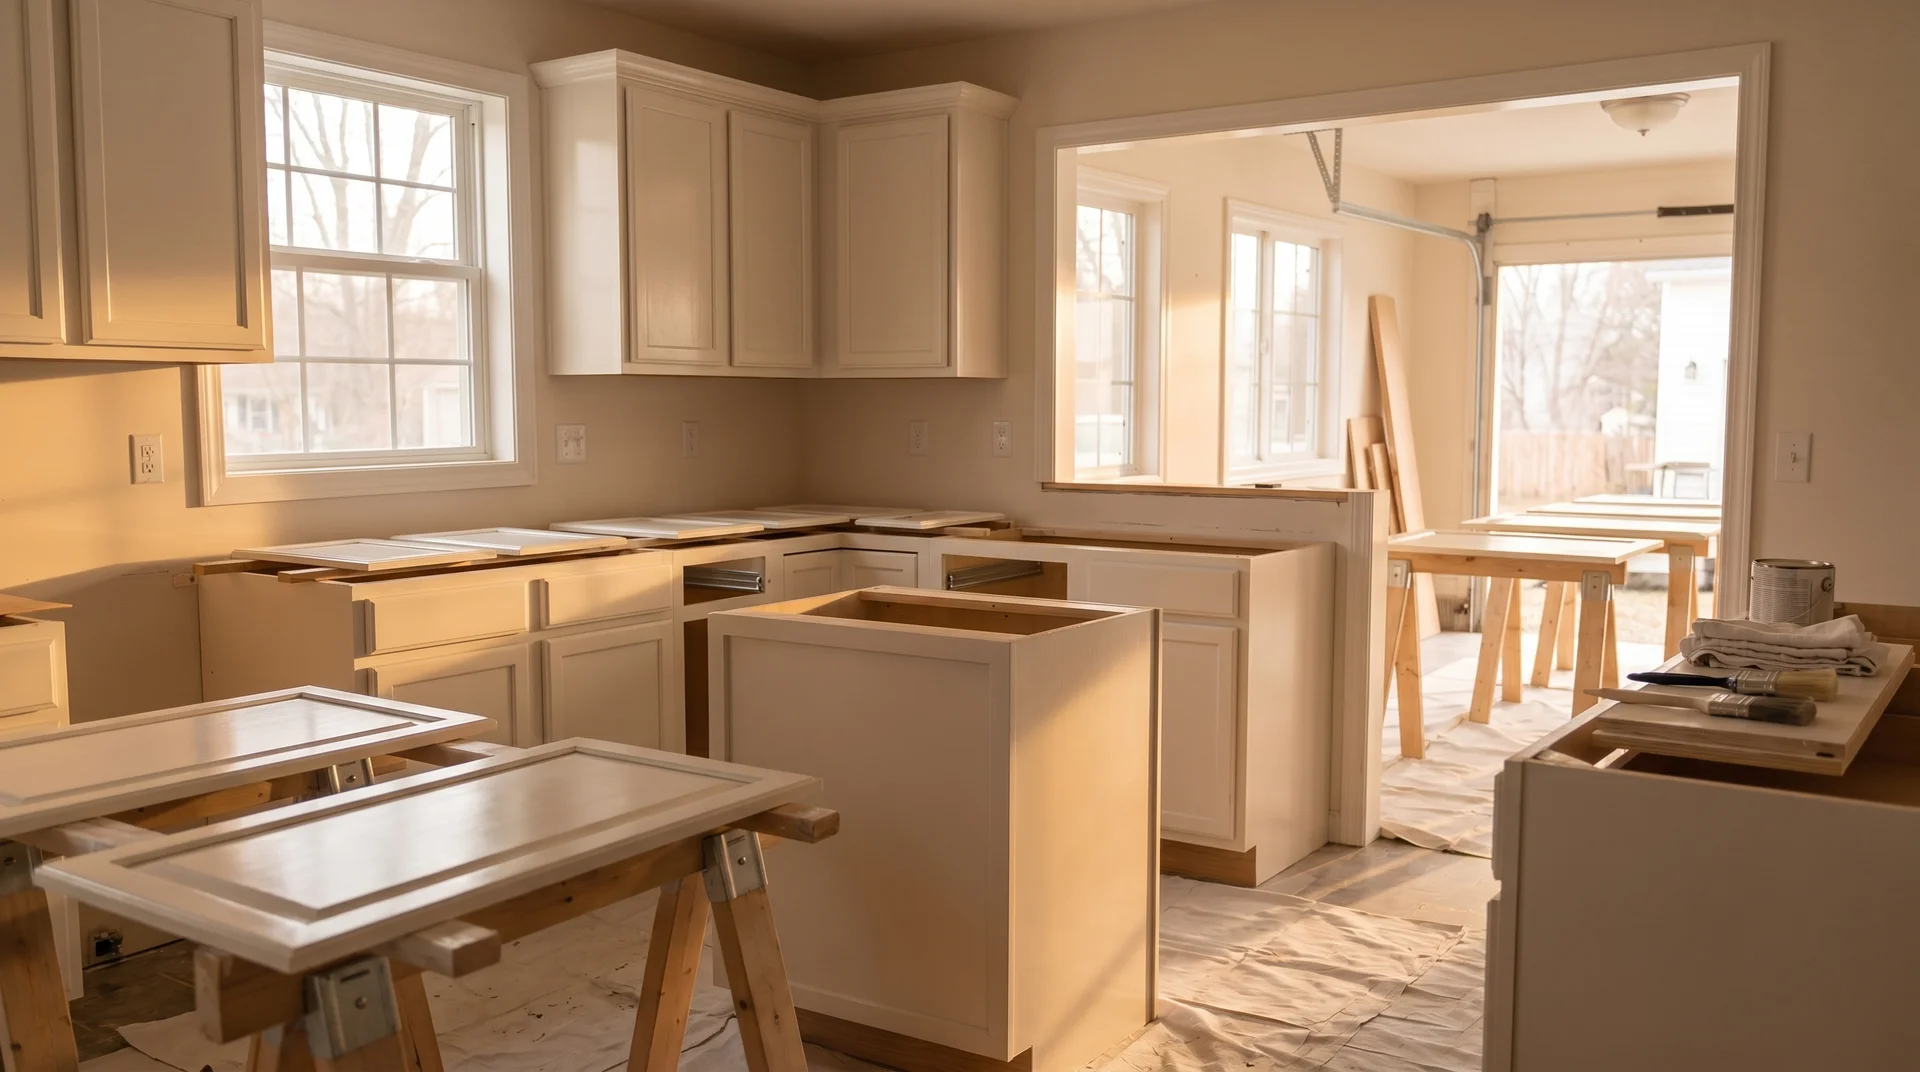
How to Paint Cabinets Step by Step?
Start with the doors, before the boxes.
Working on flat surfaces first lets you find your rhythm with the paint before you’re dealing with the more awkward positions that cabinet frames and box interiors require.
Any early technique inconsistencies happen where they’re least visible.
Step 1: Paint Cabinet Doors
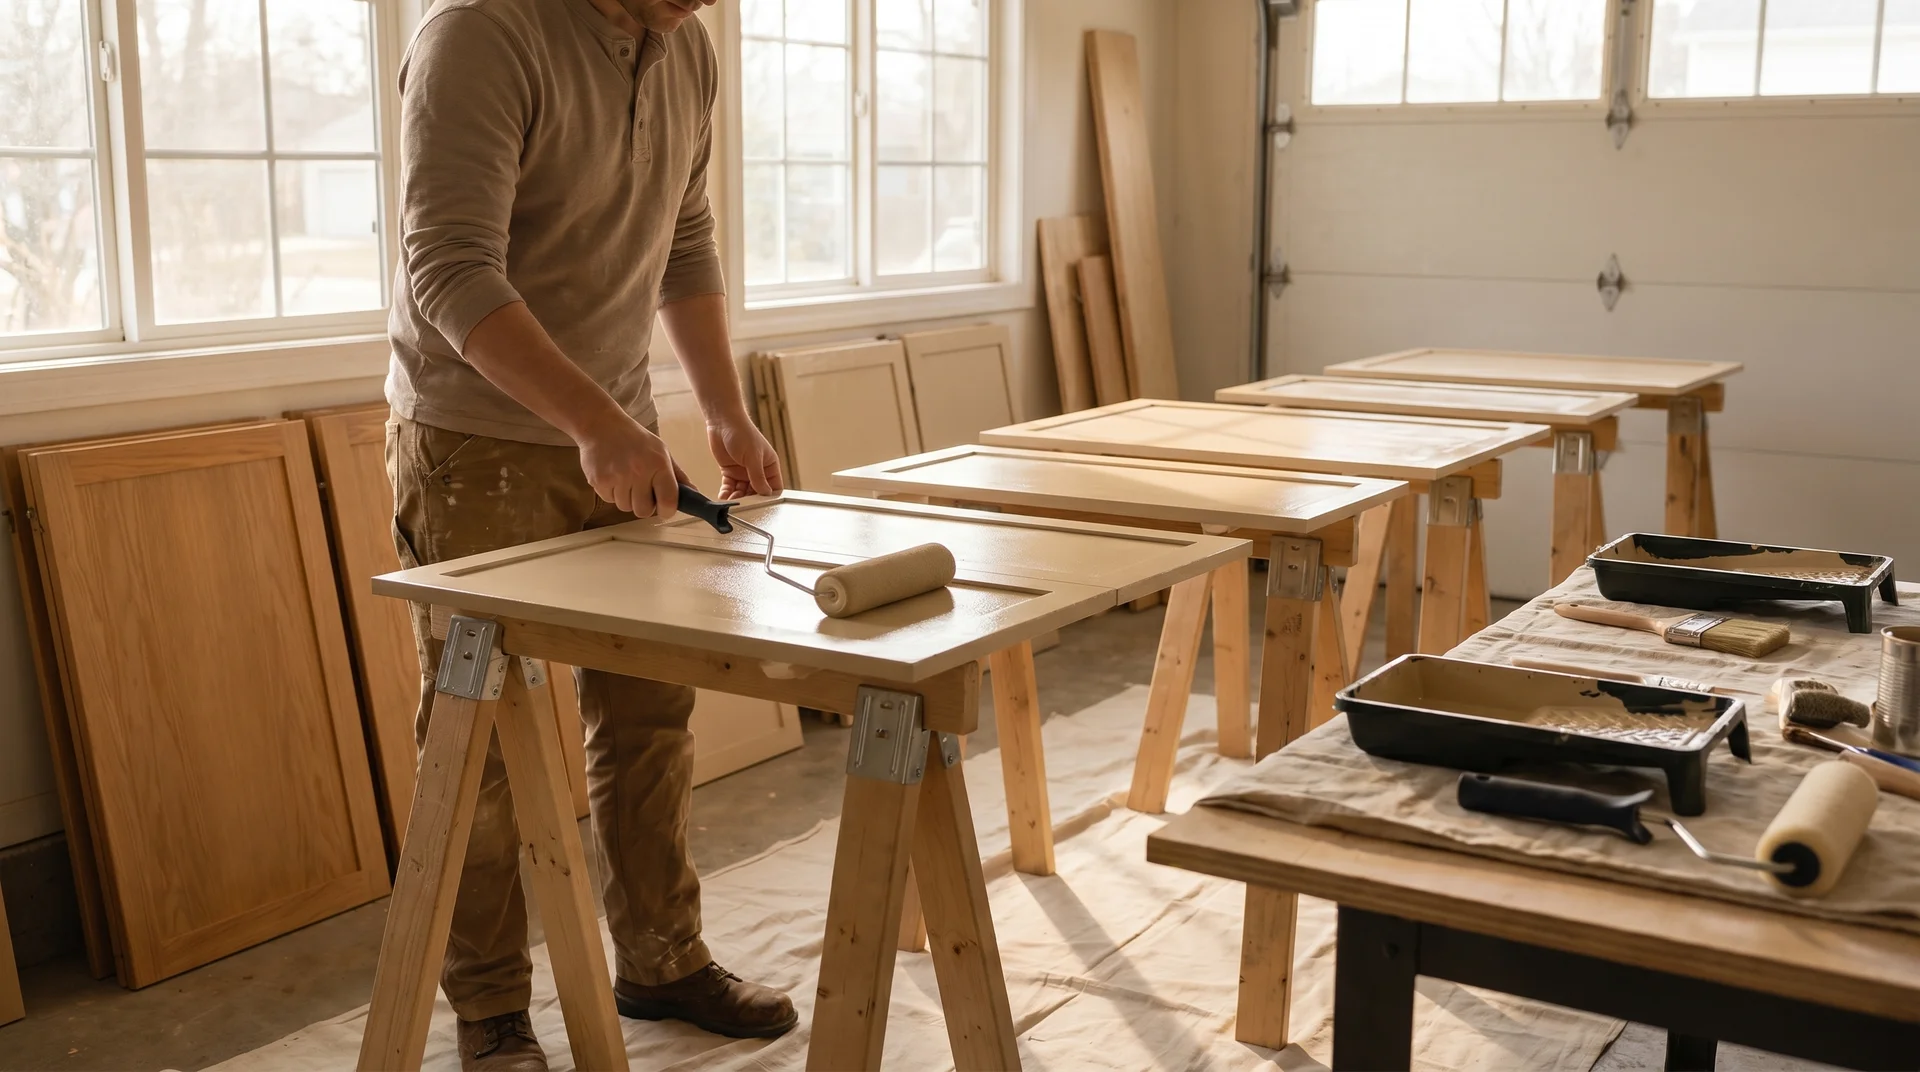
Paint the back face of each door before the front, so any early inconsistencies happen on the inside-facing surface.
Your doors are flat on sawhorses or a work surface. Start with the back (inside-facing) surface: a foam roller on the flat panel, a brush for any recessed detail work.
Let it dry. Flip to the front face and repeat. Do the edges last, with a brush, after both flat surfaces have dried and been checked for any drips or runs.
For white or very light colors over dark-stained wood, expect three coats for full, even coverage. White specifically requires this because stain bleeds through lighter paint layers, even over primer. This is normal and not a sign that something has gone wrong with your prep.
Step 2: Paint the Cabinet Boxes and Frames
Paint the interior of each box before the face frame, and work from the back wall toward the front.
Stand at your open cabinet and paint the back wall first, then the top, then the sides, then the floor. This order keeps drips from landing on already-painted surfaces. Then move to the face frame: inside edges before the outer face that’s visible when the door is closed.
The face frame is the most-handled part of any kitchen cabinet. It gets touched every time a door opens, and hand grease transfers differently than cooking vapor.
This is where the degreasing step from your prep work matters again. A clean, well-primed face frame holds paint in a way that a poorly degreased surface simply won’t.
Step 3: Second Coat and Cure Time
This is the one-hero rule applied to a painting project: one dominant decision, and everything else submits to it.
I built this principle from a kitchen I had to redesign at my own cost, $6,000 out of pocket, after getting the original specification badly wrong.
The one decision that determined whether that fix held was patience. Here, it’s the same.
Water-based alkyd paints feel dry to the touch in two to four hours and take 21 to 30 days to reach full hardness. Rehanging cabinet doors before the paint has cured means every hinge plate and piece of hardware leaves an impression in the finish.
The marks look like a bad paint job. They’re actually premature reassembly.
Wait a minimum of 48 to 72 hours before rehanging, and handle painted surfaces as little as possible for the first two weeks.
Step 4: Reinstall Hardware
You’re standing in front of your newly painted kitchen, and the hardware is the first thing your eye goes to next. That’s what I’ve observed in project after project across twelve years of renovation work.
Freshly painted cabinets with the original builder-grade hardware from 2004 read as unfinished.
The aesthetic side: matte black, brushed nickel, or unlacquered brass from a Saturday flea market all produce a fundamentally different result from standard production hardware. I source vintage pulls and knobs with real surface character that off-the-shelf hardware can’t replicate, and the difference in how a kitchen feels is significant.
The execution side: if you’re changing to hardware with a different hole spacing, you need to fill the original holes with wood filler, let it cure, and sand flat, prime that area, and repaint before drilling new holes. Plan for this before you reach the reinstall stage, not after.
How to Clean Painted Cabinets?
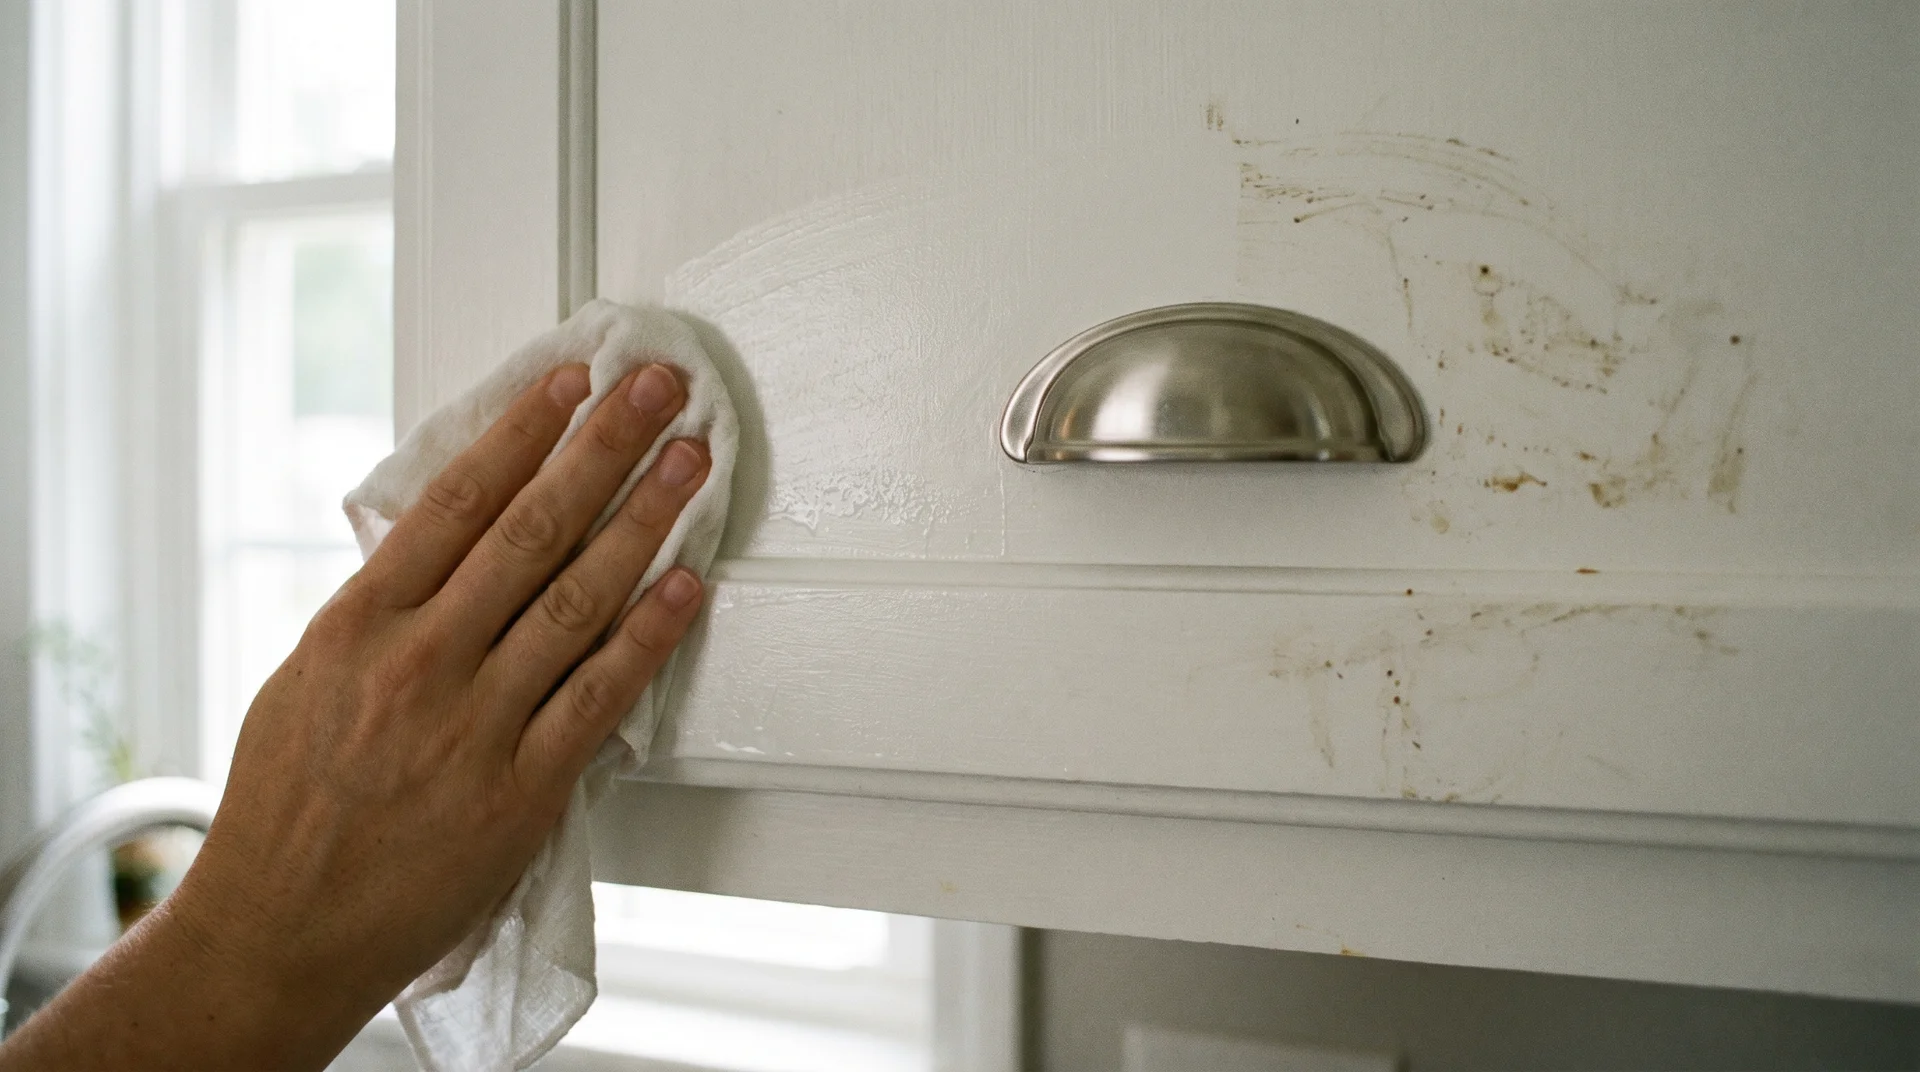
Poor maintenance damages a painted cabinet finish faster than poor application does.
The cleaning habits that work on sealed factory cabinets don’t always translate to a DIY painted finish. Regular light cleaning prevents the buildup that forces aggressive cleaning, and aggressive cleaning is what damages paint.
Safe Daily and Weekly Cleaning for Painted Cabinets
Warm water and a small amount of dish soap on a soft cloth are all you need for regular cabinet cleaning.
Wipe cabinet faces and handles after cooking, or at a minimum, once a week in an actively used kitchen. Grease and steam accumulate on cabinet surfaces after painting exactly as they did before.
The difference is that a painted finish is more vulnerable to buildup than a factory-sealed surface.
Dry the surface immediately after wiping. Water sitting at the bottom edges of upper cabinets and around the perimeter of cabinet doors is one of the primary causes of finish lifting over time.
What Not to Use on Painted Cabinets
Several common cleaning products damage a painted finish faster than grease buildup does.
| Product or Method | Safe for Painted Cabinets? | Reason |
|---|---|---|
| Dish soap and warm water | Yes | Gentle, effective, won’t affect paint chemistry |
| White vinegar (diluted) | Use with caution | Mildly acidic; can dull or etch some paint finishes with repeated use |
| Magic Eraser or melamine foam | No | Micro-abrasive; removes the sheen from painted surfaces permanently |
| All-purpose spray cleaners | Check the label | Many contain solvents or degreasing agents that weaken the paint binder over time |
| Ammonia-based cleaners | No | Breaks down paint binder and causes finish degradation |
| Scrubbing pads or steel wool | No | Scratches the surface and permanently damages the sheen level |
Sherwin-Williams surface care guidance for painted finishes recommends warm water and mild dish soap applied with a soft, lint-free cloth as the standard cleaning method. That guidance applies to DIY cabinet paint finishes as reliably as it does to factory-applied coatings.
When Do the Finishes Show Wear? Touch-Up vs. Full Repaint?
Chips and scuffs around hardware are touch-up territory. Widespread peeling means the original prep didn’t hold.
For chips at corners or around hardware holes, clean the damaged area, lightly scuff with 220-grit, and apply a small amount of the original paint with a fine brush. Feather the edges outward and let the area cure fully before it goes back into daily use.
Touch-ups are rarely invisible, but they’re far less visible than an unaddressed chip collecting grease.
If you’re seeing adhesion failure across multiple cabinet faces, and paint lifting at edges, peeling near hinges, flaking in multiple locations, then touch-up is not the answer.
That’s the finish, telling you the primer bond failed at prep. A full repaint, done with correct prep this time, is the more honest option, and it starts in exactly the same place: the degreasing step.
How Long Do Painted Cabinets Actually Last?
The range is wide, and that’s the honest answer.
In a working kitchen with proper prep and the right paint system, a DIY cabinet finish realistically lasts three to seven years before it needs significant attention. The lower end of that range applies to high-use kitchens where the prep cuts corners.
The upper end applies to kitchens where the prep was right, and the cleaning is consistent.
The variables that determine longevity are ones you controlled during this project: degreasing thoroughness, primer choice, cure time, and ongoing cleaning habits. These are decisions, not luck.
