

Yes, granite countertops can be refinished. What that actually means for you depends entirely on which problem the surface has.
Stand at your counter and look at what’s bothering you. Whether it’s dull near the sink, scratched where you prep food, or chipped at the corner, those are different problems, and each has a different fix.
The word “refinishing” covers all of them, which is why reading six articles on this topic can leave you no clearer on what to actually do.
What “Refinishing” Actually Means for Granite?
Four interventions are called “refinishing,” and they are not the same thing.
| Intervention | What It Does | Typical Cost | DIY or Professional? | Solves |
|---|---|---|---|---|
| Polishing | Buffs surface haze and light film buildup | $15–$50 (product) | DIY | Light surface dullness, water spots |
| Resealing | Applies a new protective layer inside the porous stone | $20–$60 (product) | DIY | Sealer failure, absorption vulnerability, staining risk |
| Resurfacing | Removes a thin stone layer using diamond-grit abrasives, exposing fresh surface below | $500–$1,200 (professional) | Professional | Deep scratches, widespread surface wear, and acid etching |
| Finish conversion | Changes polished to honed finish, or reverse, via abrasive grinding | $800–$1,500 (professional) | Professional | Aesthetic overhaul, outdated or inconsistent finish |
The table above covers four different problems. Knowing which one you have before spending anything is the whole decision.
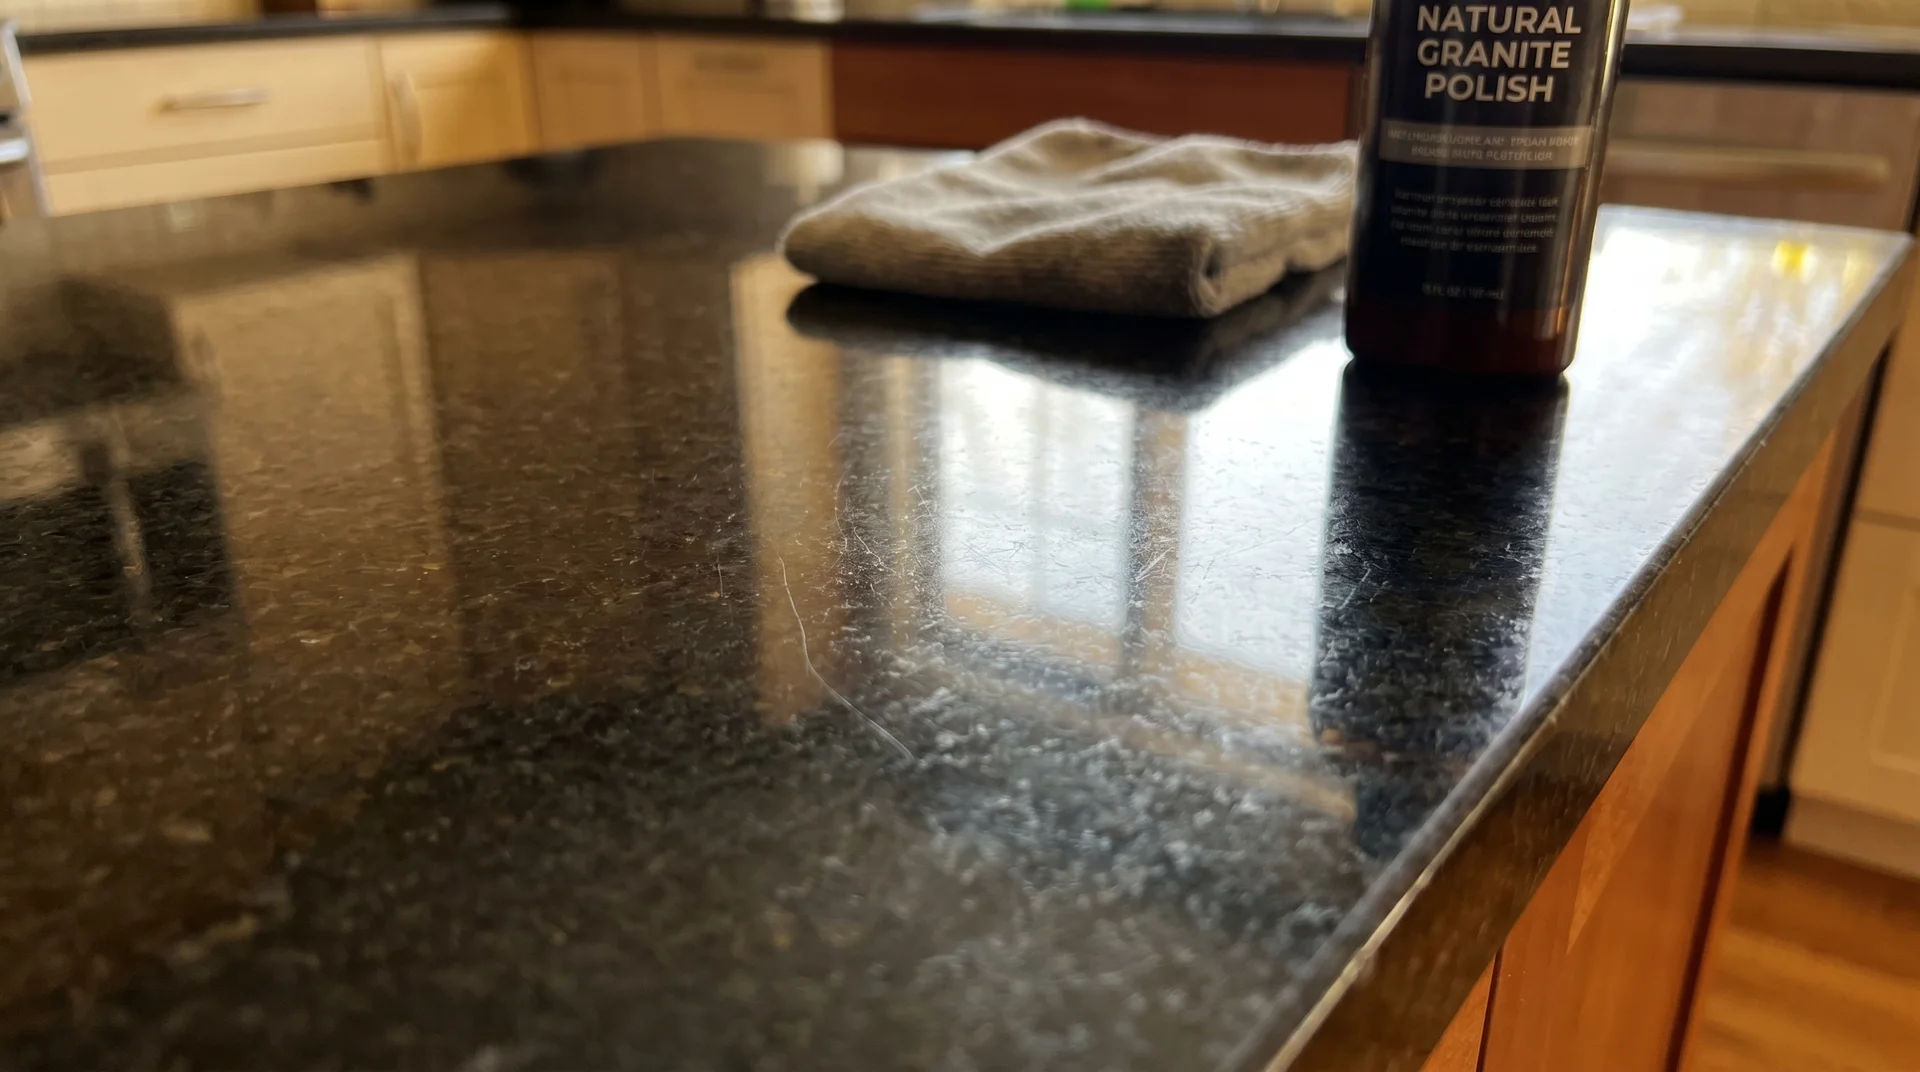
Polishing: Restoring Surface Shine
Polishing addresses surface haze and film buildup. It does not repair the stone itself.
A granite polish works on the topmost layer of the surface. It removes water spots, light film buildup, and the dullness that comes from using the wrong cleaner over time.
What it cannot do is fix scratches, repair a failing sealer, or restore granite worn down by years of daily use.
Consumer polishing products are finishing tools, not restoration tools.
Most product labels will not tell you that distinction clearly, and most people discover it only after they’ve already bought the wrong thing.
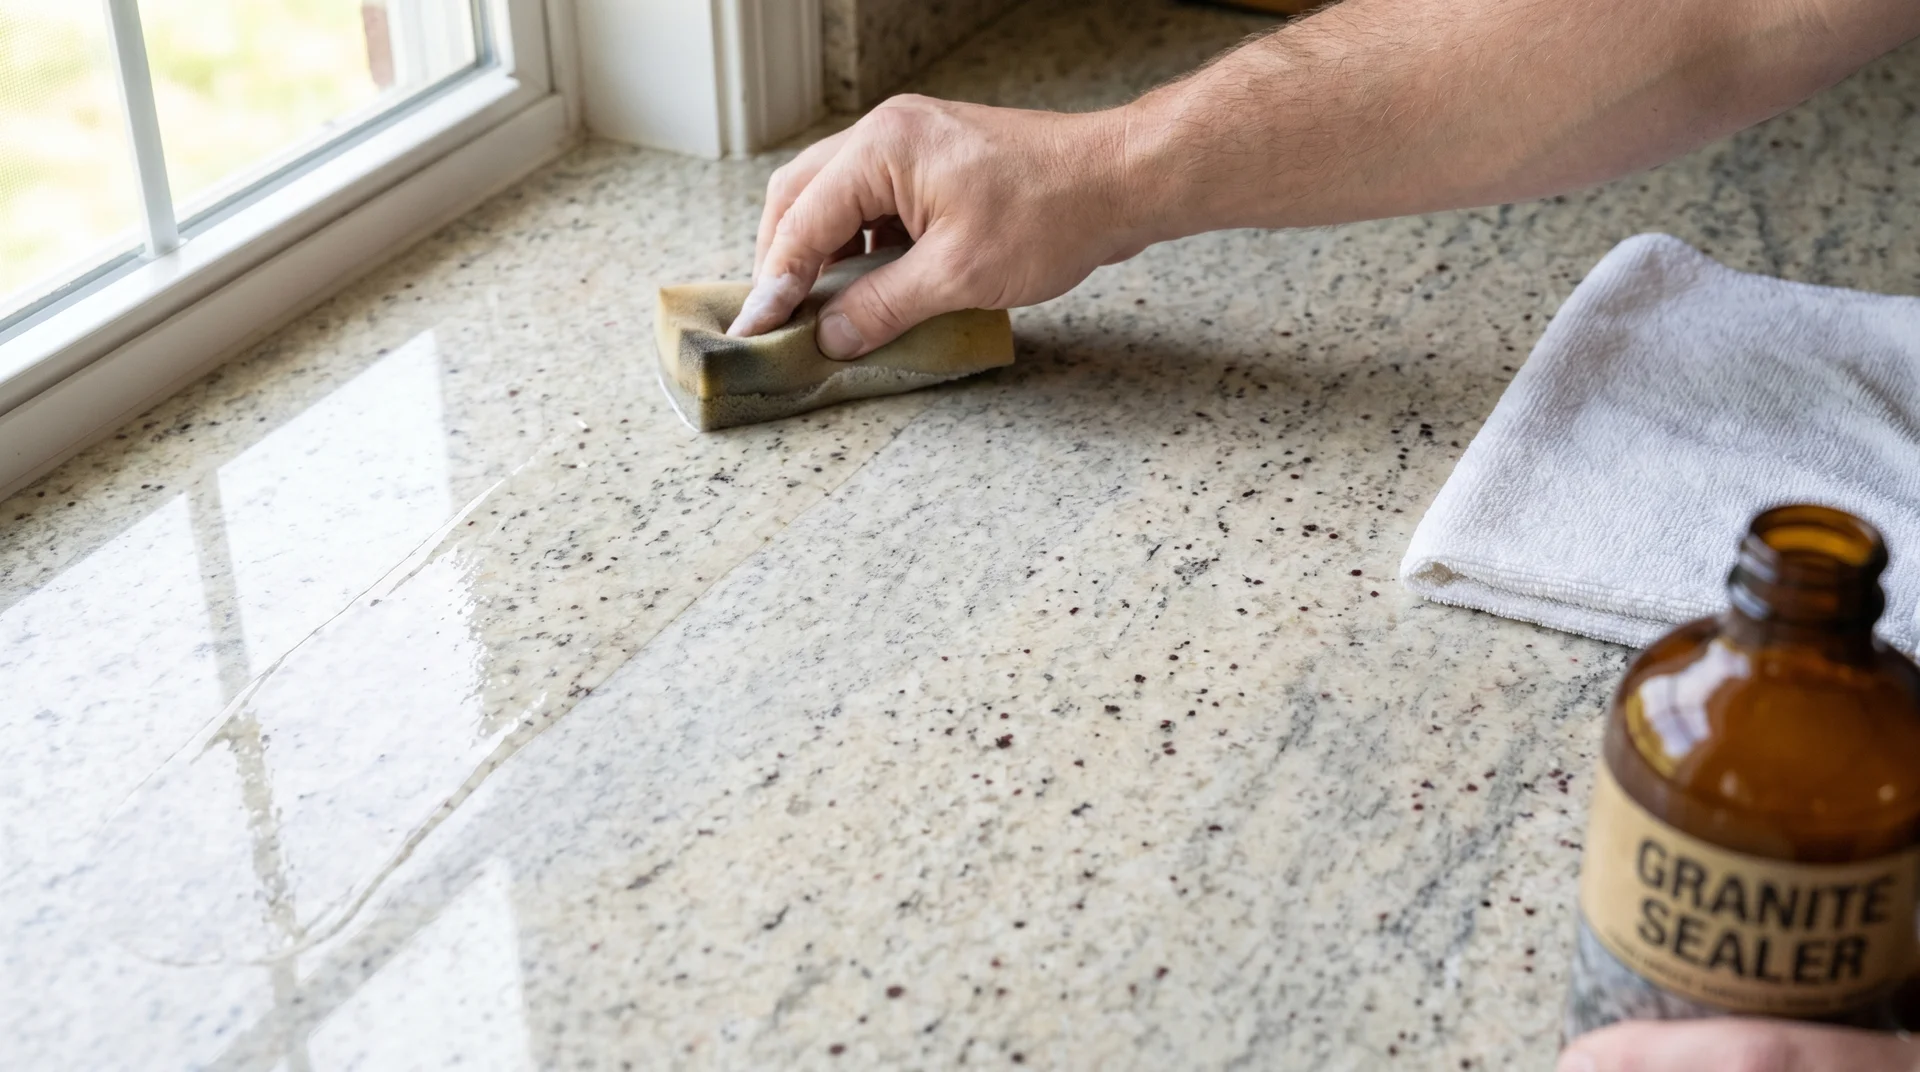
Resealing: Protecting the Stone
Resealing protects the granite from the inside. It does not change how the surface looks.
A granite sealer penetrates the porous stone and blocks liquids from absorbing into it. It does nothing to the surface appearance on its own.
This is the intervention most people apply incorrectly, and I have twelve years of photographed kitchen projects that show exactly what happens when you get the sequence wrong.
Most of what homeowners call “dull granite” is actually sealer failure. The sealer has worn away, the stone is absorbing grime, and the surface looks flat and lifeless, no matter how much you clean it.
The correct fix is resealing, not polishing. Apply polish first and you are treating the symptom while leaving the cause completely intact.
Resurfacing: Professional Stone Grinding
Resurfacing removes a thin layer of granite using diamond-grit abrasives. This is not a DIY project.
A professional uses progressive diamond-grit polishing pads, working from coarser to finer grits. The process grinds away scratches, etching, and surface damage to expose fresh stone underneath. A professional then re-polishes and re-seals the surface from scratch.
The work takes several hours for a standard kitchen. You lose kitchen access during the process and until the new sealer cures.
Based on HomeGuide’s 2025 cost data, professional stone resurfacing runs between $500 and $1,200, depending on surface area, the stone’s condition, and the specialist you hire.
This is the fix for genuine surface damage: deep scratches that polishing cannot touch, widespread wear, or etching from acidic cleaners used over time.
If you have tried polishing and resealing and the granite still looks wrong, resurfacing is likely what is needed.
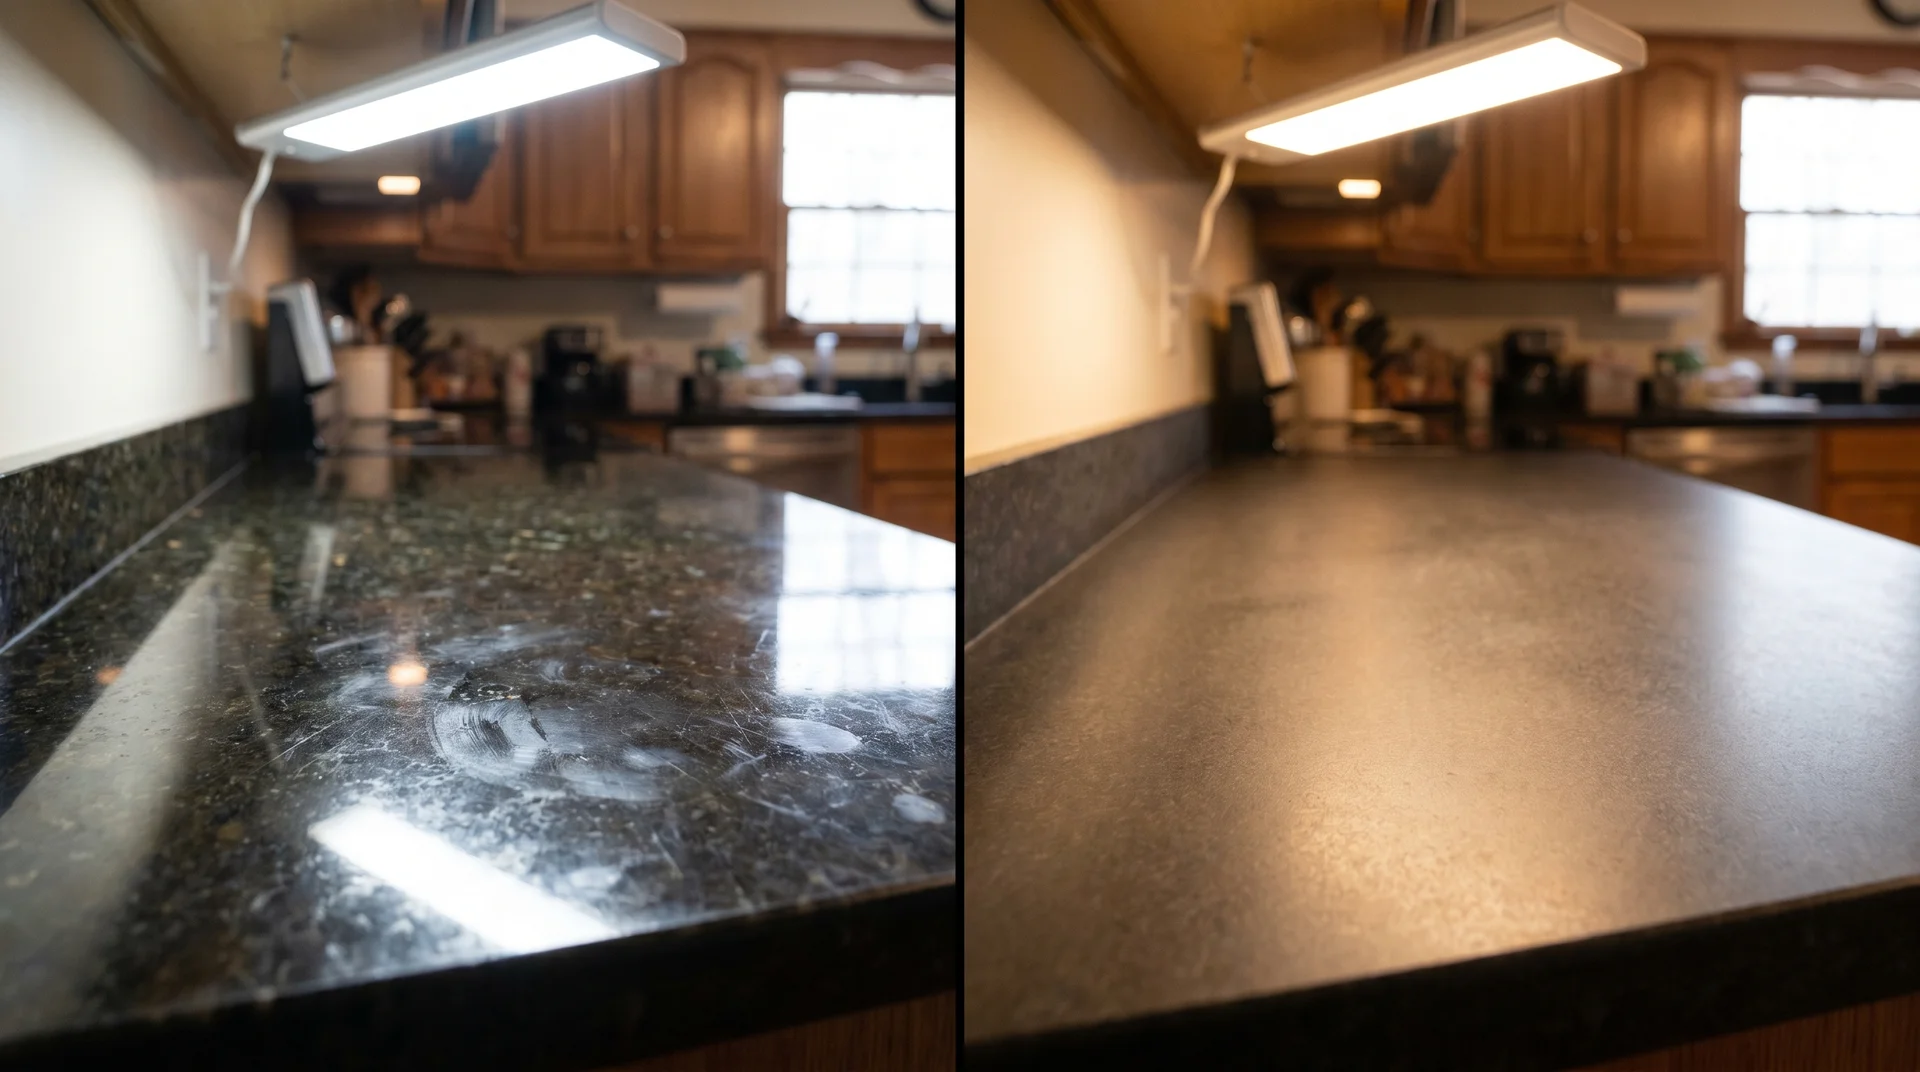
Finish Conversion: Changing Polished to Honed (or Back)
Changing your granite’s finish is a design decision, not a maintenance decision.
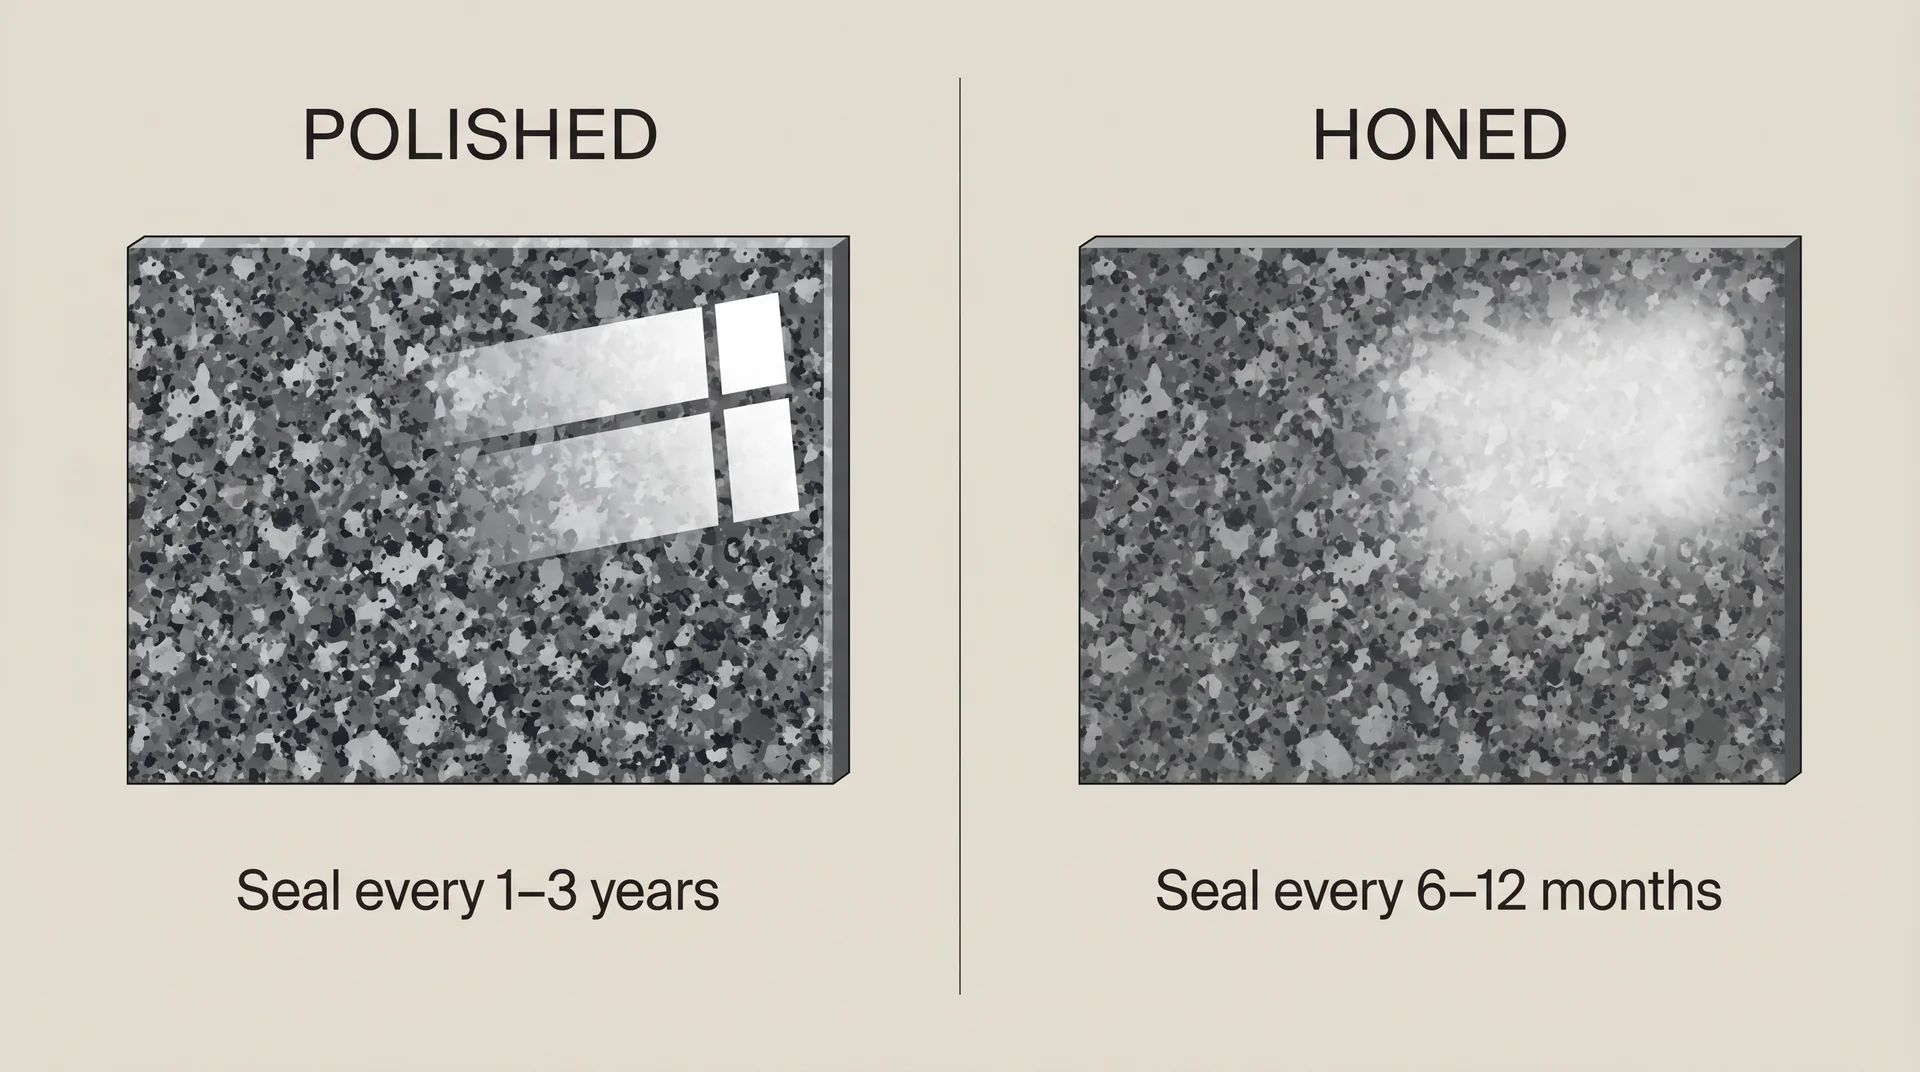
- Polished granite has a high-gloss surface that reflects light and shows fingerprints readily.
- Honed granite is matte, softer in appearance, and warmer in most kitchen light.
Converting between the two requires a professional using diamond-grit abrasive equipment, the same surface-grinding process used in resurfacing. This is not a coating applied over the stone. It is a physical change to the stone’s surface.
I have sat in client kitchens where someone chose honed granite because they had seen it on a design blog, without understanding the maintenance commitment that comes with it.
Every kitchen needs one dominant visual element, and everything else supports it. I developed this framework after a costly mistake, a kitchen where I over-specified every surface and had to redesign the whole room at my own cost. The countertop either commands the room or it recedes.
Polished granite commands. Honed granite recedes, which can let the cabinetry or backsplash carry the room instead.
Changing your granite’s finish changes the visual weight of that surface in the room. Know which role your countertop is playing before you change it.
The honed surface hides scratches better and reads warmer in natural light. It also needs resealing every six to twelve months, compared to the one to three years typical of polished granite, because the matte surface is more porous.
How to Know What Your Granite Actually Needs
One simple test gives you most of the information you need before spending anything.
The Water Bead Test
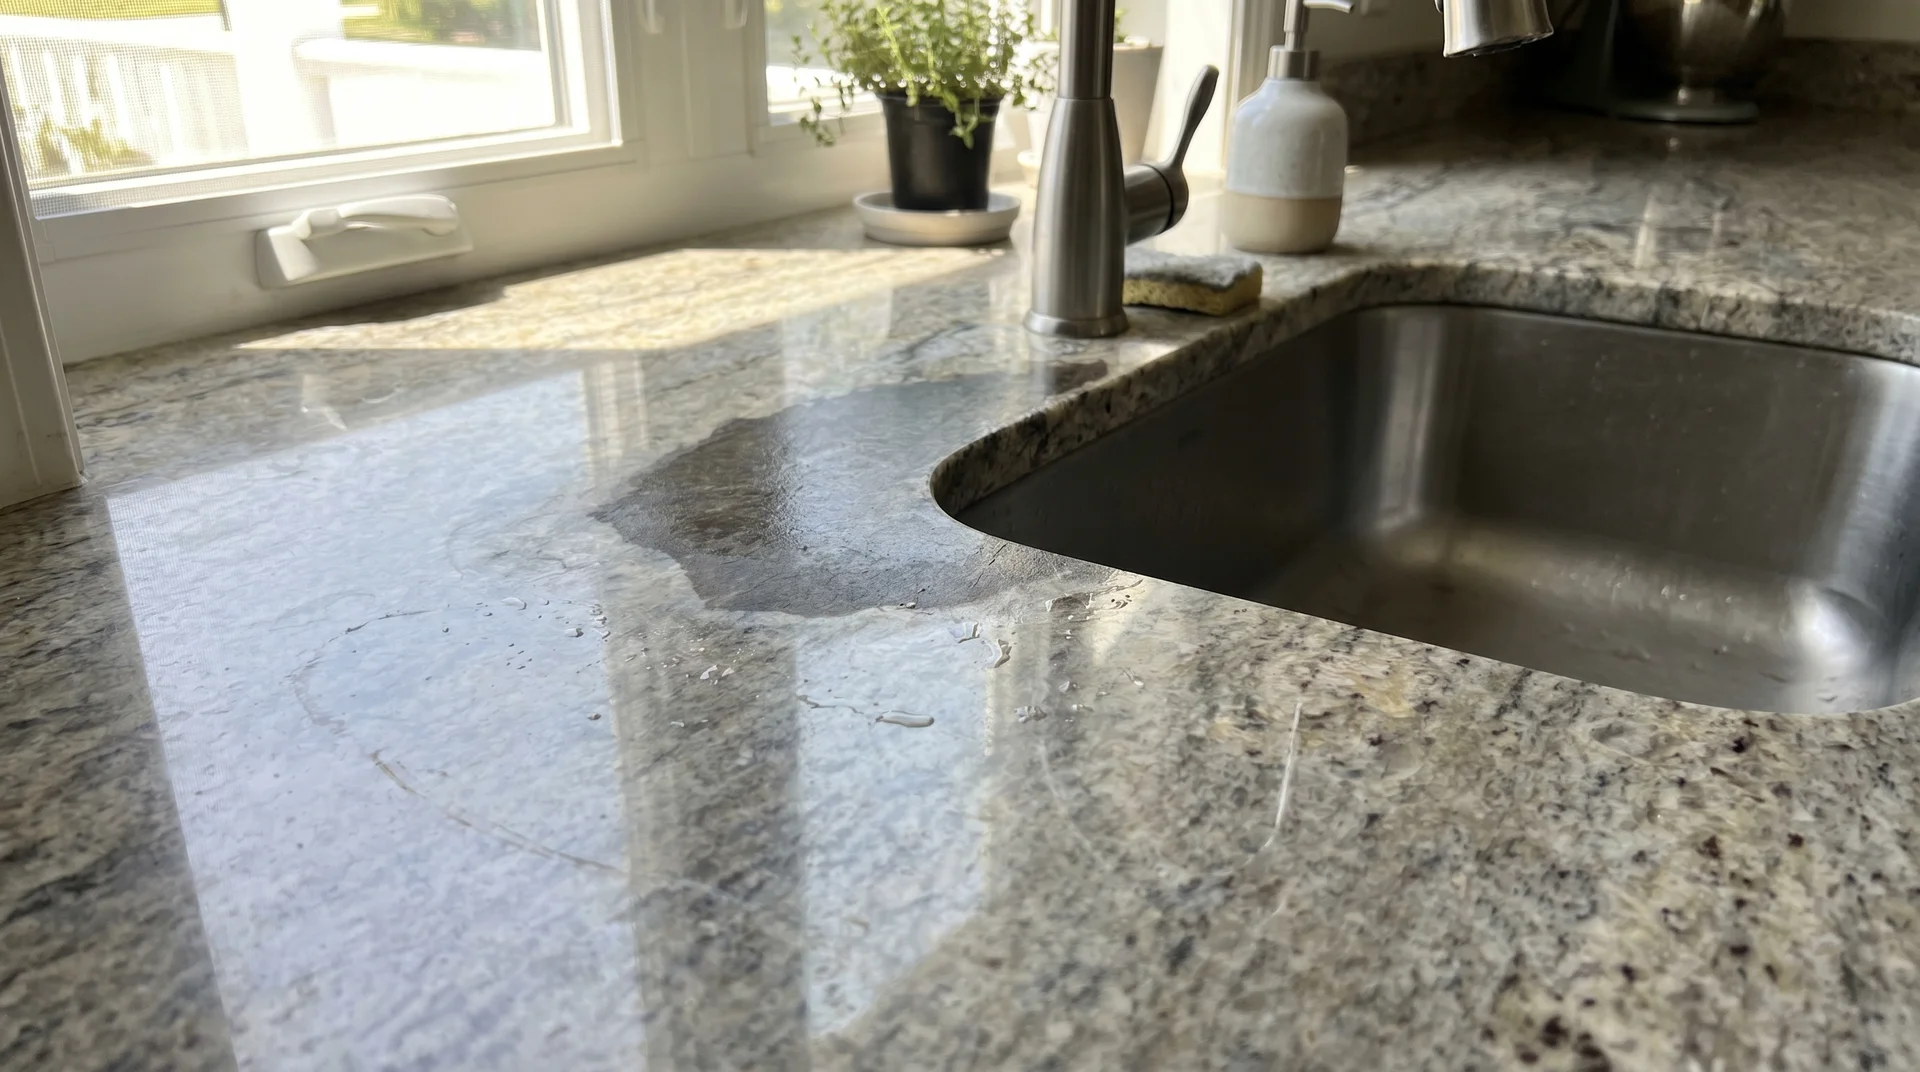
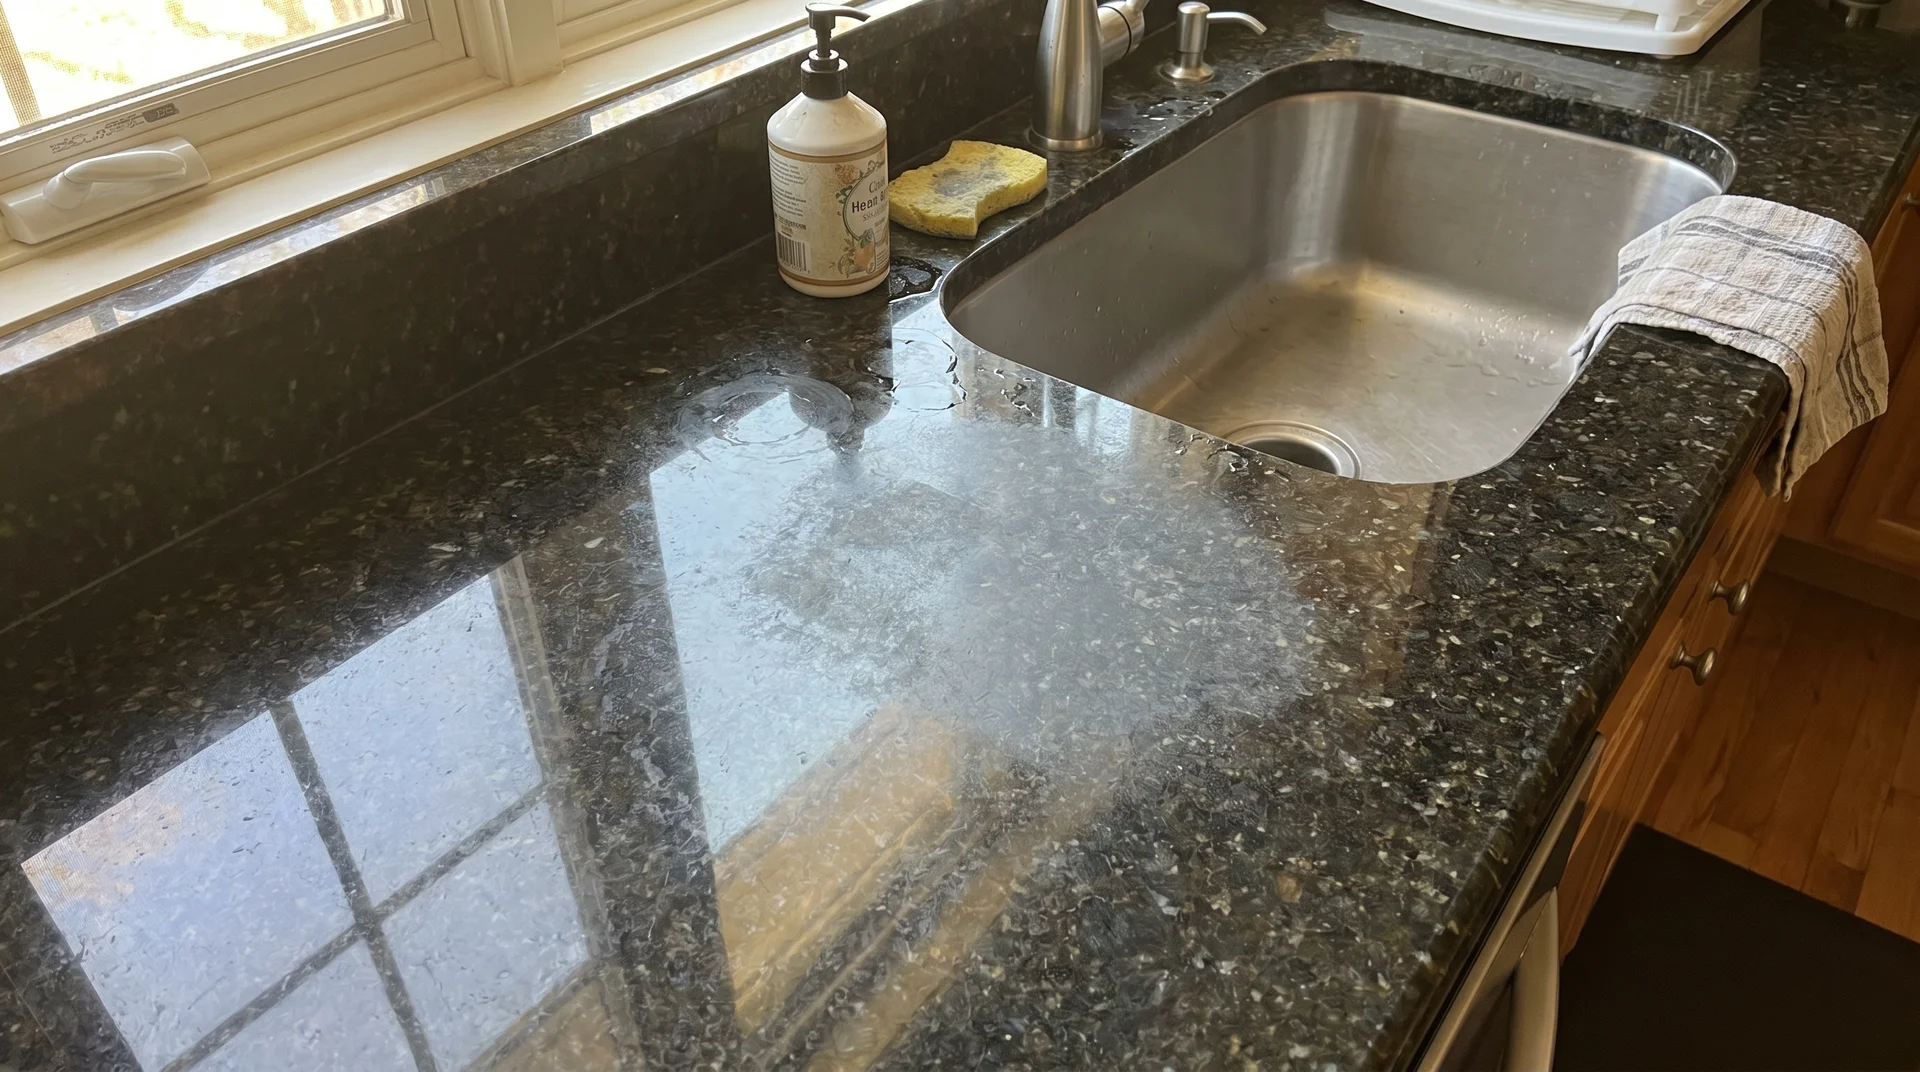
This test tells you directly whether your granite’s sealer is still working.
Pour a few drops of water onto the countertop in a high-use area, like the section near the sink or where you prep food most often. Wait ten to fifteen minutes, then check the result.
- Water beads up and stays on the surface: the sealer is intact. Dullness has a different cause.
- Water flattens out and absorbs slowly, leaving a dark spot: the sealer is failing. Resealing is the right first step.
- Water absorbs quickly with visible darkening of the stone: the stone is completely unprotected. Reseal before doing anything else.
Run this test before buying any product. It narrows the actual problem before you spend a dollar.
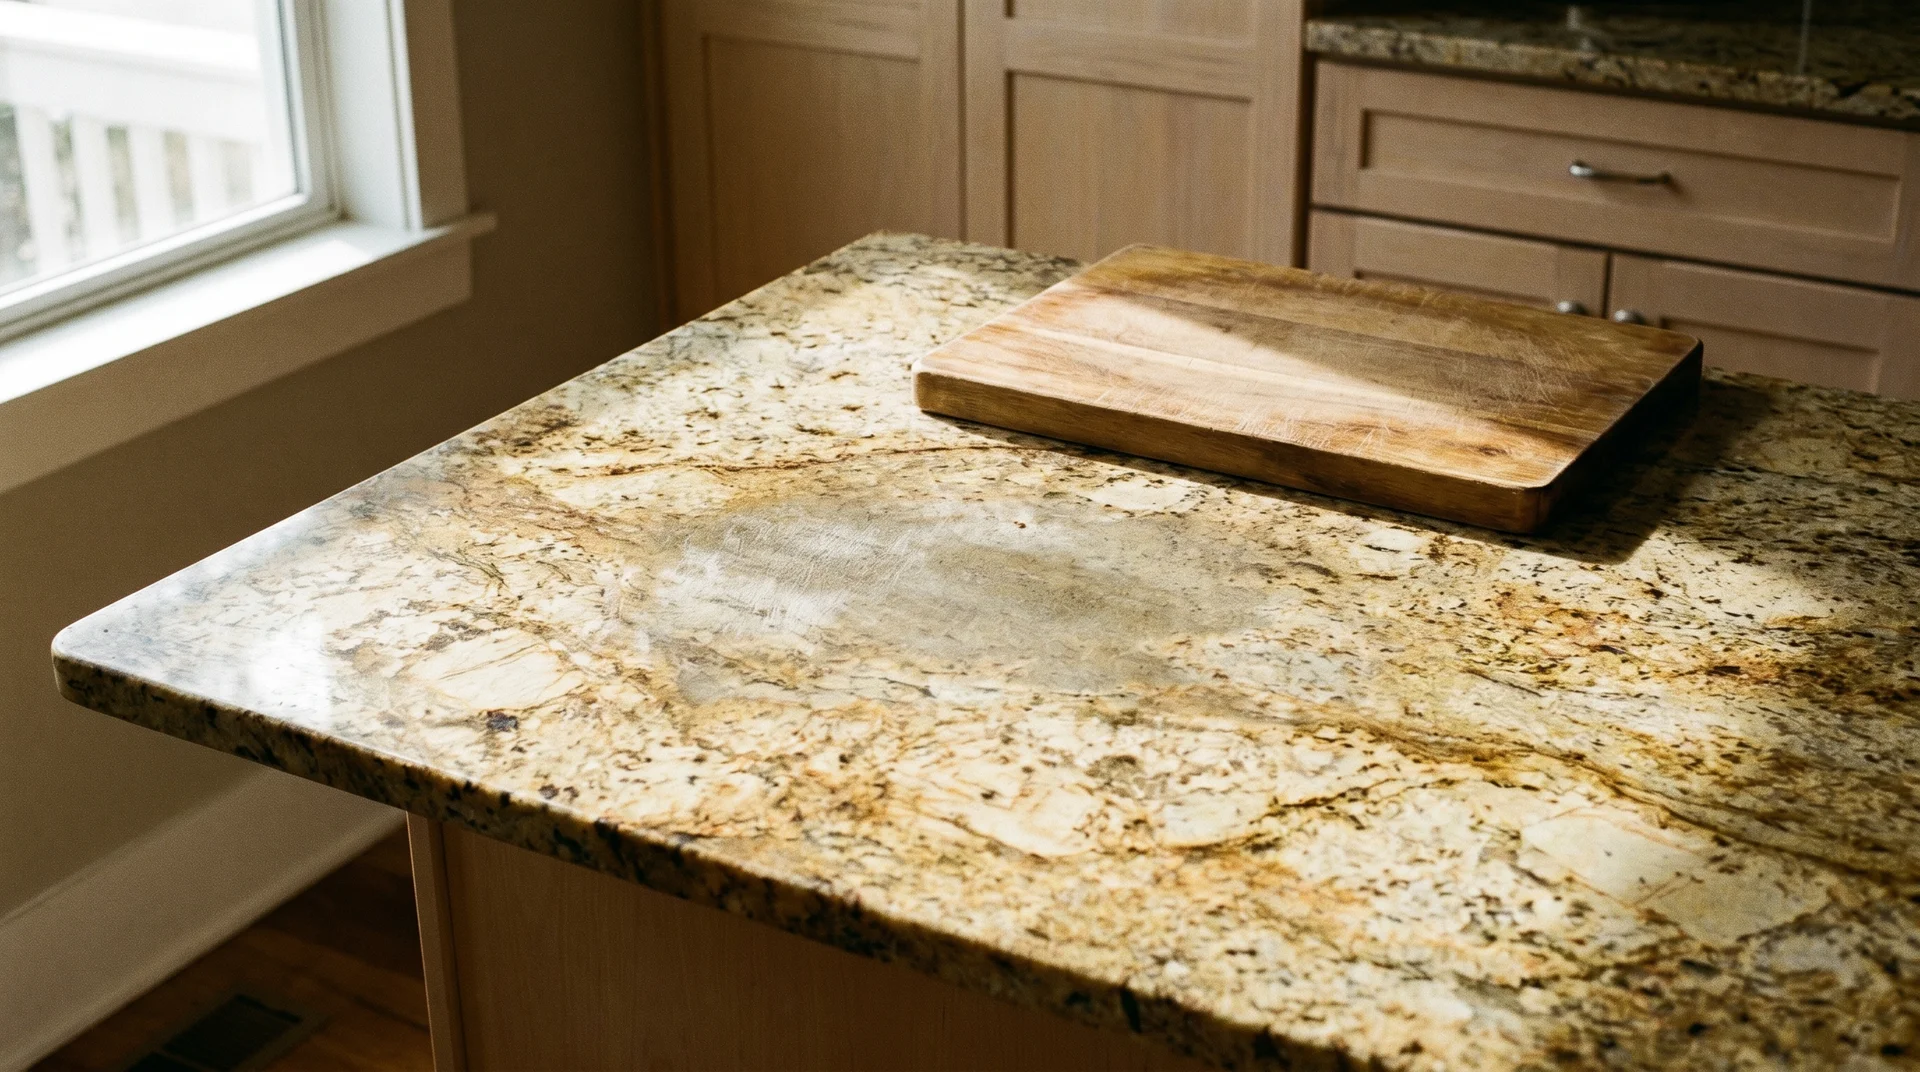
Dullness Near the Sink or High-Traffic Areas
Localized dullness near the sink is almost always sealer failure, not damage to the stone itself.
Water, soap residue, and daily contact wear the sealer away fastest in the highest-use areas. The stone starts absorbing instead of repelling. The surface looks flat and cloudy regardless of how much you clean it.
Mineral deposits sit on top of the stone rather than absorbing into it. They respond to a stone-safe, pH-neutral cleaner rather than to resealing. If the dullness has a faintly chalky or grayish cast and feels slightly rough when you run your finger across it, hard water buildup is the more likely cause.
Run the water bead test before reaching for any product. It separates the two problems cleanly.
To know more about this in depth, read this piece Marcuss Webb wrote on how to shine granite, where he talked about keeping the shine of the granite intact and how to maintain it long term.
Scratches: Light Surface Marks vs. Deeper Damage
Polishing helps with light surface marks, and professional granite restoration helps with the more serious damage.
Scratching the stone itself requires something harder than what most kitchen activities can do. What usually shows as a scratch is a mark in the sealant or the topmost surface layer. A polishing compound can reduce these significantly, though the marks will not disappear entirely.
Scratches you can feel with your fingernail, where the nail catches on the edge, are in the stone itself. Polishing will not touch those. Professional granite restoration using diamond abrasive polishing is the only real solution. Whether that is worth the cost depends on how much of the surface is affected and how long you plan to keep the countertops.
Chips and Cracks
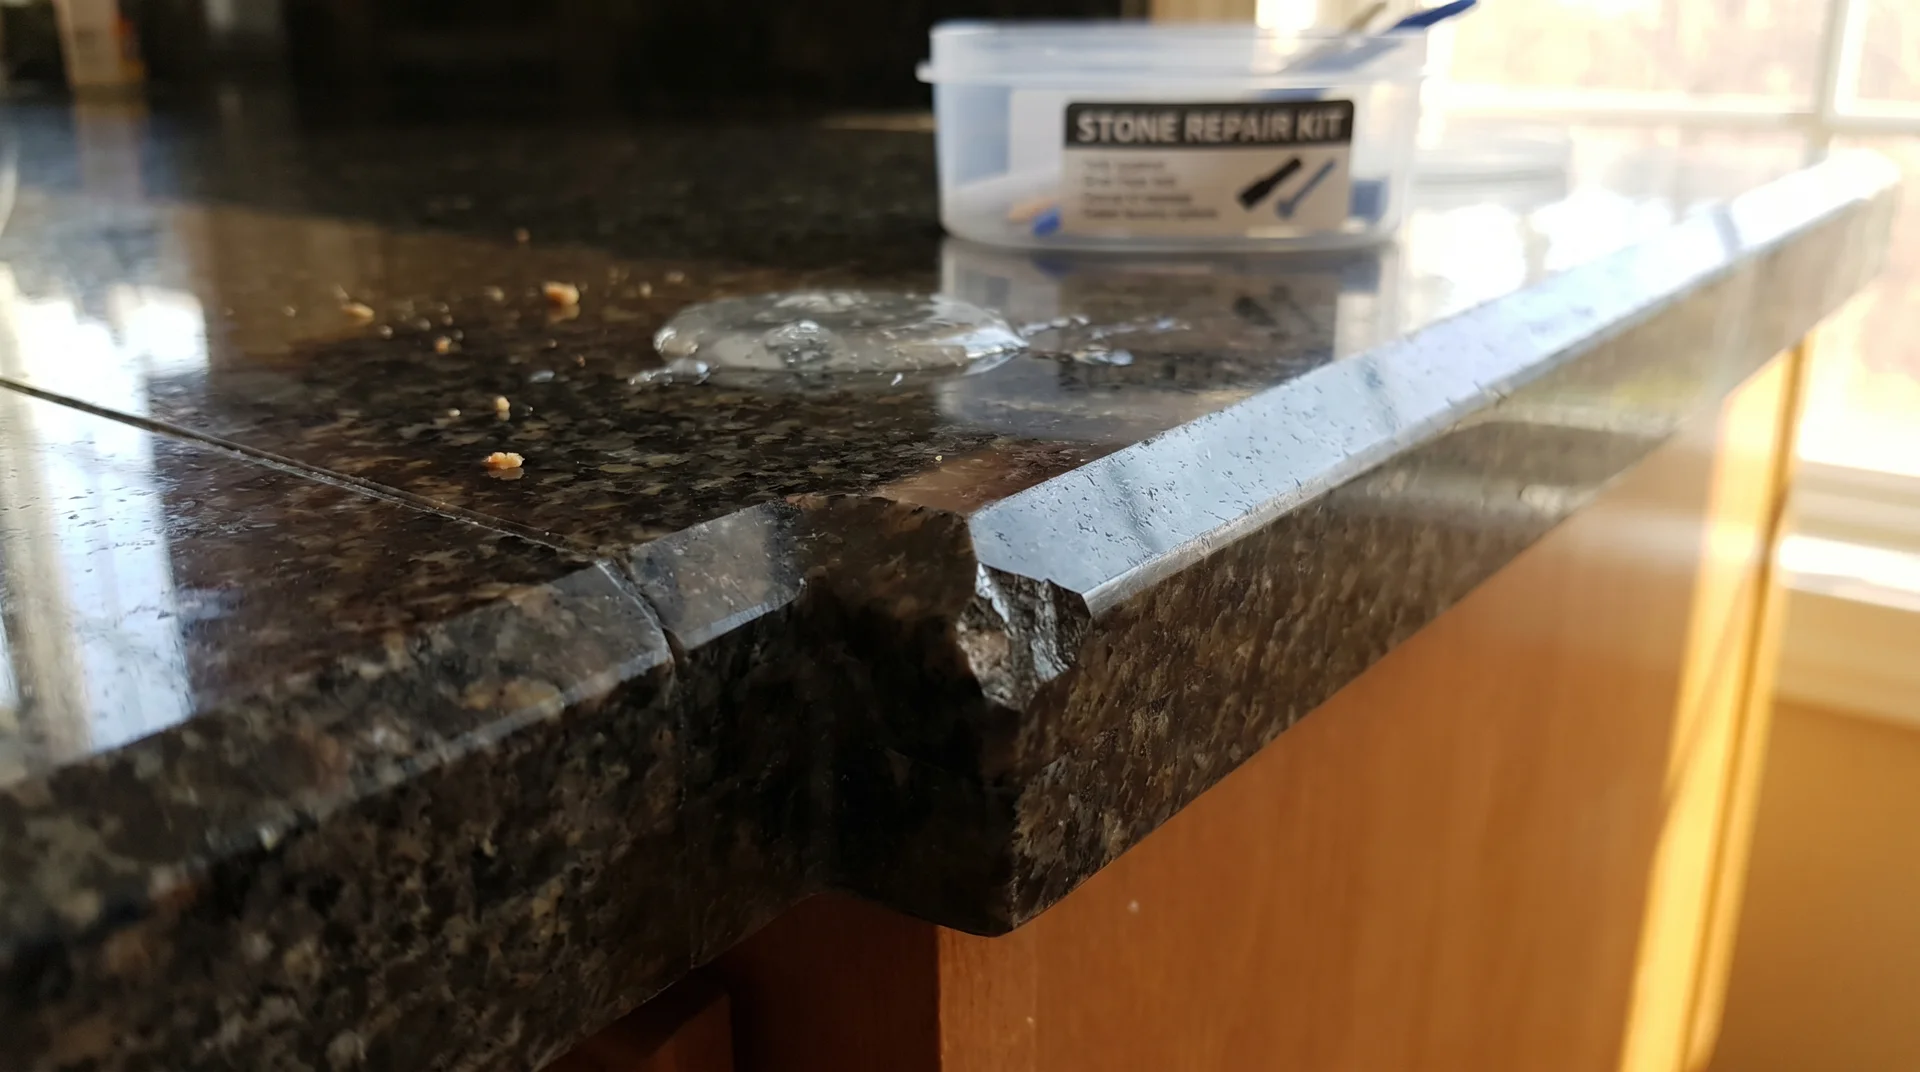
Small chips can be repaired at home. A chip larger than a dime, or any crack at a seam, belongs to a professional.
Epoxy chip repair kits work reasonably well on small chips at edges and corners.
The honest limitation is color matching: an epoxy that cures slightly off-color is often more visible than the original chip, especially on lighter stone or granite with complex veining. Test in a hidden area before committing to the visible surface.
Cracks running along seams or across a larger section of the slab are structural. That is a fabricator conversation, not a homeowner repair.
What You Can Realistically Do Yourself
Three repairs are reasonable for a homeowner without specialized equipment.
Cleaning and Polishing for Surface Dullness
A stone polish works on surface haze and film buildup. It is not a restoration product.
Look for a product labeled specifically for natural stone or granite with a neutral pH, like Weiman Granite & Stone 3-in-1 Clean.
Products designed for ceramic tile or general surfaces can strip granite sealers. This is one of those categories where reading the label before buying is not optional.
Apply with a soft cloth, work in small sections, and set your expectations clearly. A polish will improve granite that looked good a few years ago and now looks flat. It will not fix granite that has been missing a functioning sealer for months.
Resealing Your Own Granite
Resealing is a straightforward DIY task. The step most homeowners skip is the one that determines whether it actually works.
The step most homeowners skip is proper cleaning before applying the sealer. Any oil, soap residue, or previous polish sitting on the surface gets locked under the new sealer.
- Clean the countertop thoroughly with a pH-neutral stone cleaner. Let it dry for at least two hours.
- Open a window or run the exhaust fan before you begin. Stone sealers can off-gas in an enclosed kitchen during application.
- Run the water bead test in a few spots to confirm the sealer has actually failed before proceeding.
- Apply the sealer in thin, even sections using a soft cloth or foam applicator. Work two to three square feet at a time.
- Let the sealer penetrate for the time specified on the product label, typically five to ten minutes.
- Wipe off the excess before it dries. Dried sealer left on the surface creates a hazy residue that is difficult to remove without starting over.
- Allow full cure time before using the countertop. Most products specify twenty-four hours. Follow the label, not your schedule.
How often you need to reseal depends on the stone’s porosity, how it was originally sealed at fabrication, and how heavily the countertops get used.
I cannot give you a universal schedule, and I would be skeptical of anyone who claims they can. The water bead test is the honest answer for this.
Chip Repair With Epoxy
Epoxy repair works for small chips. The application is straightforward. The color match is the variable you cannot fully control.
For a chip smaller than a dime on an edge or corner, a granite repair kit is a reasonable DIY approach. Gather these materials before you start:
- A granite or stone epoxy repair kit, color-matched where available
- Isopropyl alcohol for cleaning the repair area
- Painter’s tape to protect the surrounding stone
- A razor blade or putty knife for removing excess epoxy
- Fine-grit sandpaper, 400-grit, then 800-grit, for final smoothing
Then follow these steps:
- Clean the chip with isopropyl alcohol and let it dry completely.
- Tape off the surrounding stone to protect it.
- Apply the epoxy slightly overfilled into the chip.
- Let it cure for the full twenty-four hours. Partially cured epoxy shears instead of shaving cleanly, which creates a worse result than waiting.
- Shave the excess flat with a razor blade, working carefully to stay flush with the surface.
- Sand lightly with 400-grit, then 800-grit, to smooth the repair.
- Finish with a stone polish on the repaired area.
The repair will be less visible than the chip. That is the realistic outcome, and it is worth knowing before you start rather than after.
When to Call a Professional
Three situations call for a stone restoration specialist, not a general contractor or handyman.
Deep Scratches or Widespread Surface Wear
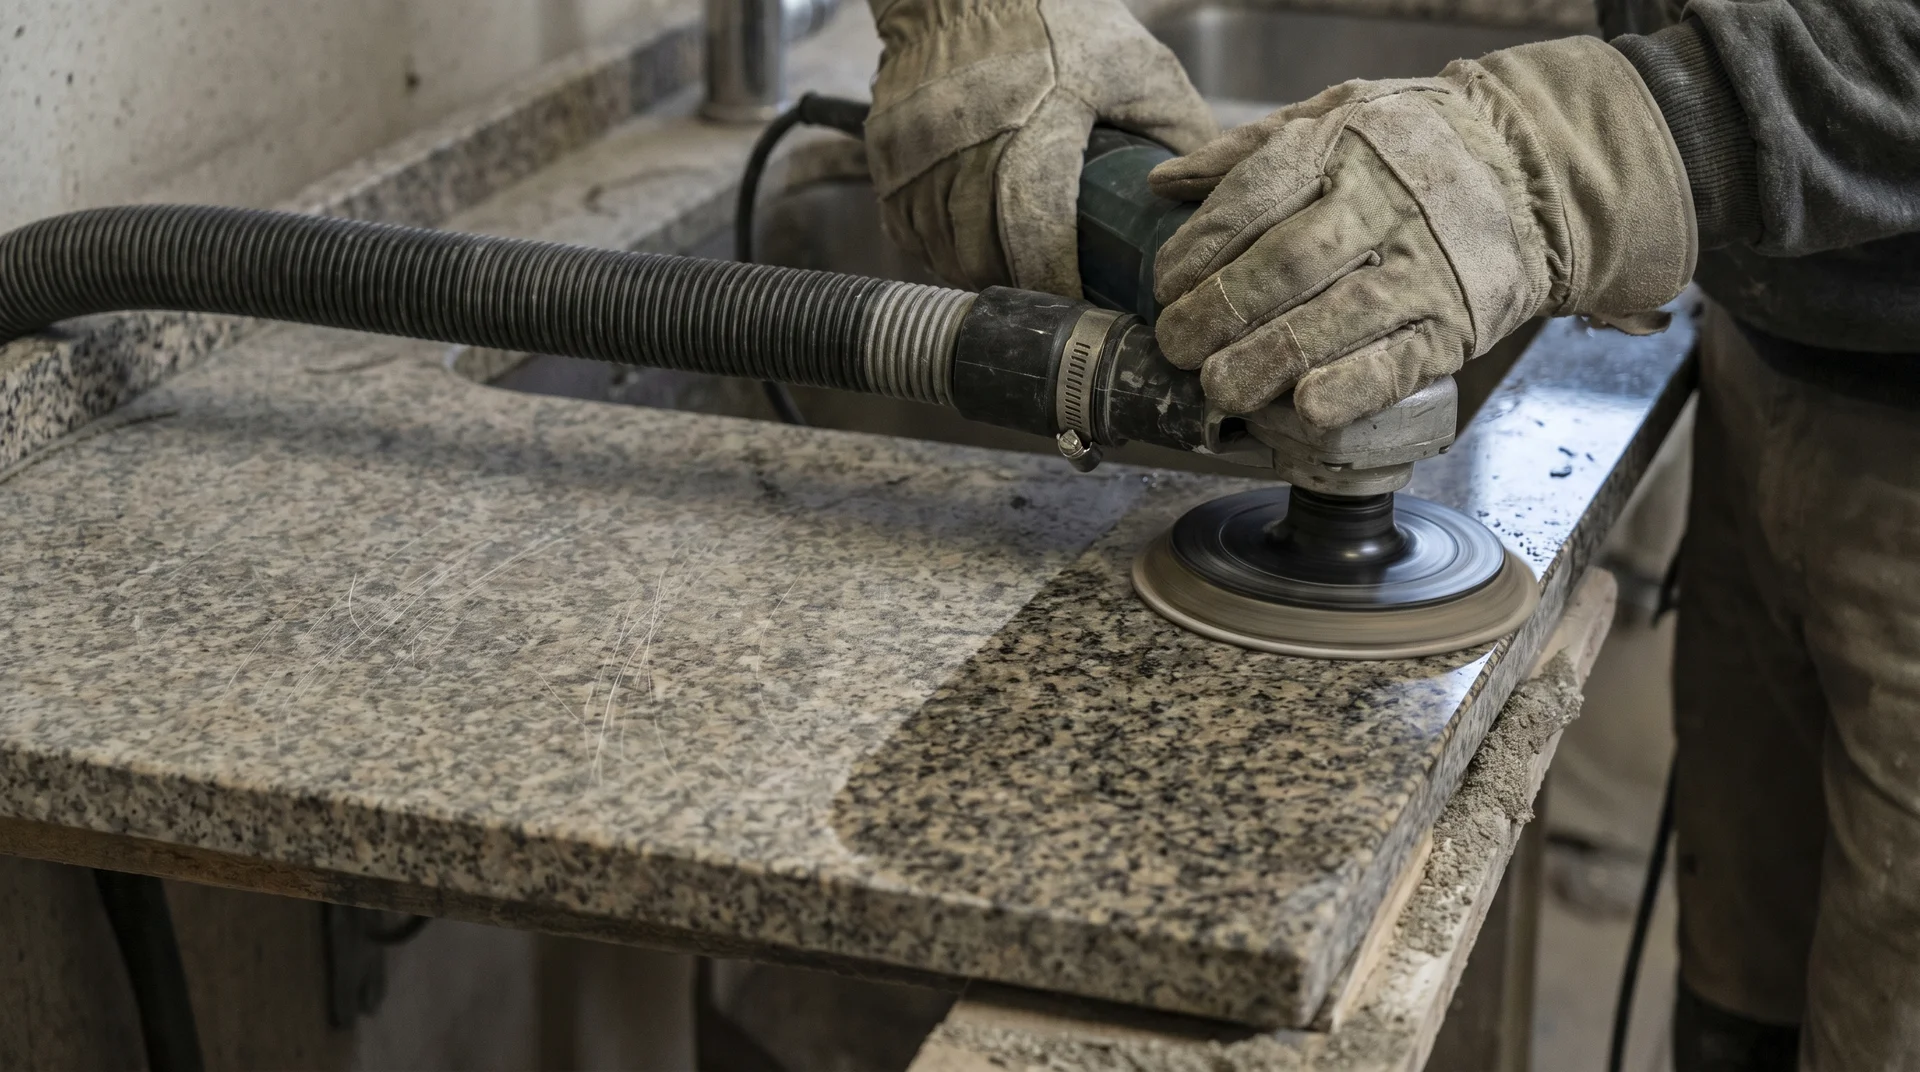
If your granite has scratches you can feel, widespread dullness across most of the surface, or etching from years of acidic cleaners, professional granite restoration is the appropriate response.
A specialist uses progressive diamond-grit pads to grind away the damaged surface layer, then re-polishes and re-seals the stone from scratch.
Based on HomeGuide’s 2025 cost data, this runs between $500 and $1,200 for a standard kitchen. The countertop is out of use for the day.
Who to call: look for a natural stone restoration specialist, not a tile contractor.
Stone restoration requires specific diamond-grit equipment and hands-on experience with granite’s hardness and porosity. A general contractor who handles tile is not the same thing.
Search for natural stone restoration or stone polishing specialists in your area. Before booking anyone, ask directly whether they work with granite countertops as a regular part of their service.
Changing Your Finish From Polished to Honed
The finish conversion requires professional stone-grinding equipment. No consumer product can achieve this.
A professional uses diamond-grit abrasive equipment to grind the polished surface down to a smooth matte finish. The process takes most of a day.
The honed surface hides scratches better and reads warmer in natural light. It also needs resealing every six to twelve months.
Is It Worth Refinishing, or Should You Replace?
The answer lies in what is actually wrong with the granite, not how old it is.
- Granite that is twelve years old but only needs resealing is worth keeping.
- Granite that is eight years old with deep scratches across a large portion of the surface faces a harder calculation.
Professional resurfacing at $500 to $1,200, compared to replacement granite at $80 to $150 per square foot installed, is not always the obvious choice in either direction.
After about fifteen years of heavy daily use, polishing and resealing may no longer fully restore the surface, even when done correctly.
If you have passed that mark and the granite still looks wrong after proper resealing, a professional assessment is worth getting before committing to either resurfacing or full replacement.
| What You Are Seeing | Recommended Next Step | Approximate Cost |
|---|---|---|
| Water bead test fails; surface looks flat or dull | Reseal (DIY) | $20–$60 |
| Surface haze, water spots, and cleaning-related dullness | Polish (DIY) | $15–$50 |
| Small chips at edges or corners | Epoxy repair kit (DIY) | $15–$40 |
| Deep scratches you can feel; widespread surface wear | Professional resurfacing | $500–$1,200 |
| Want to change polished to honed, or vice versa | Professional finish conversion | $800–$1,500 |
| Damage covers a significant portion of the surface | Get a professional stone assessment first | Varies |
Final Thoughts
If you are planning a full kitchen renovation in the next couple of years, the math on restoration changes significantly. Most stone restoration professionals will assess the countertop honestly before you commit to anything.
What this piece covers is restoring existing granite: polishing, resealing, professional resurfacing, and finish conversion. Painting granite or applying an epoxy color overlay to change the color entirely is a different decision with different criteria.
That conversation belongs in a piece about countertop alternatives for kitchens where the stone itself is beyond saving or the homeowner wants something completely different.
