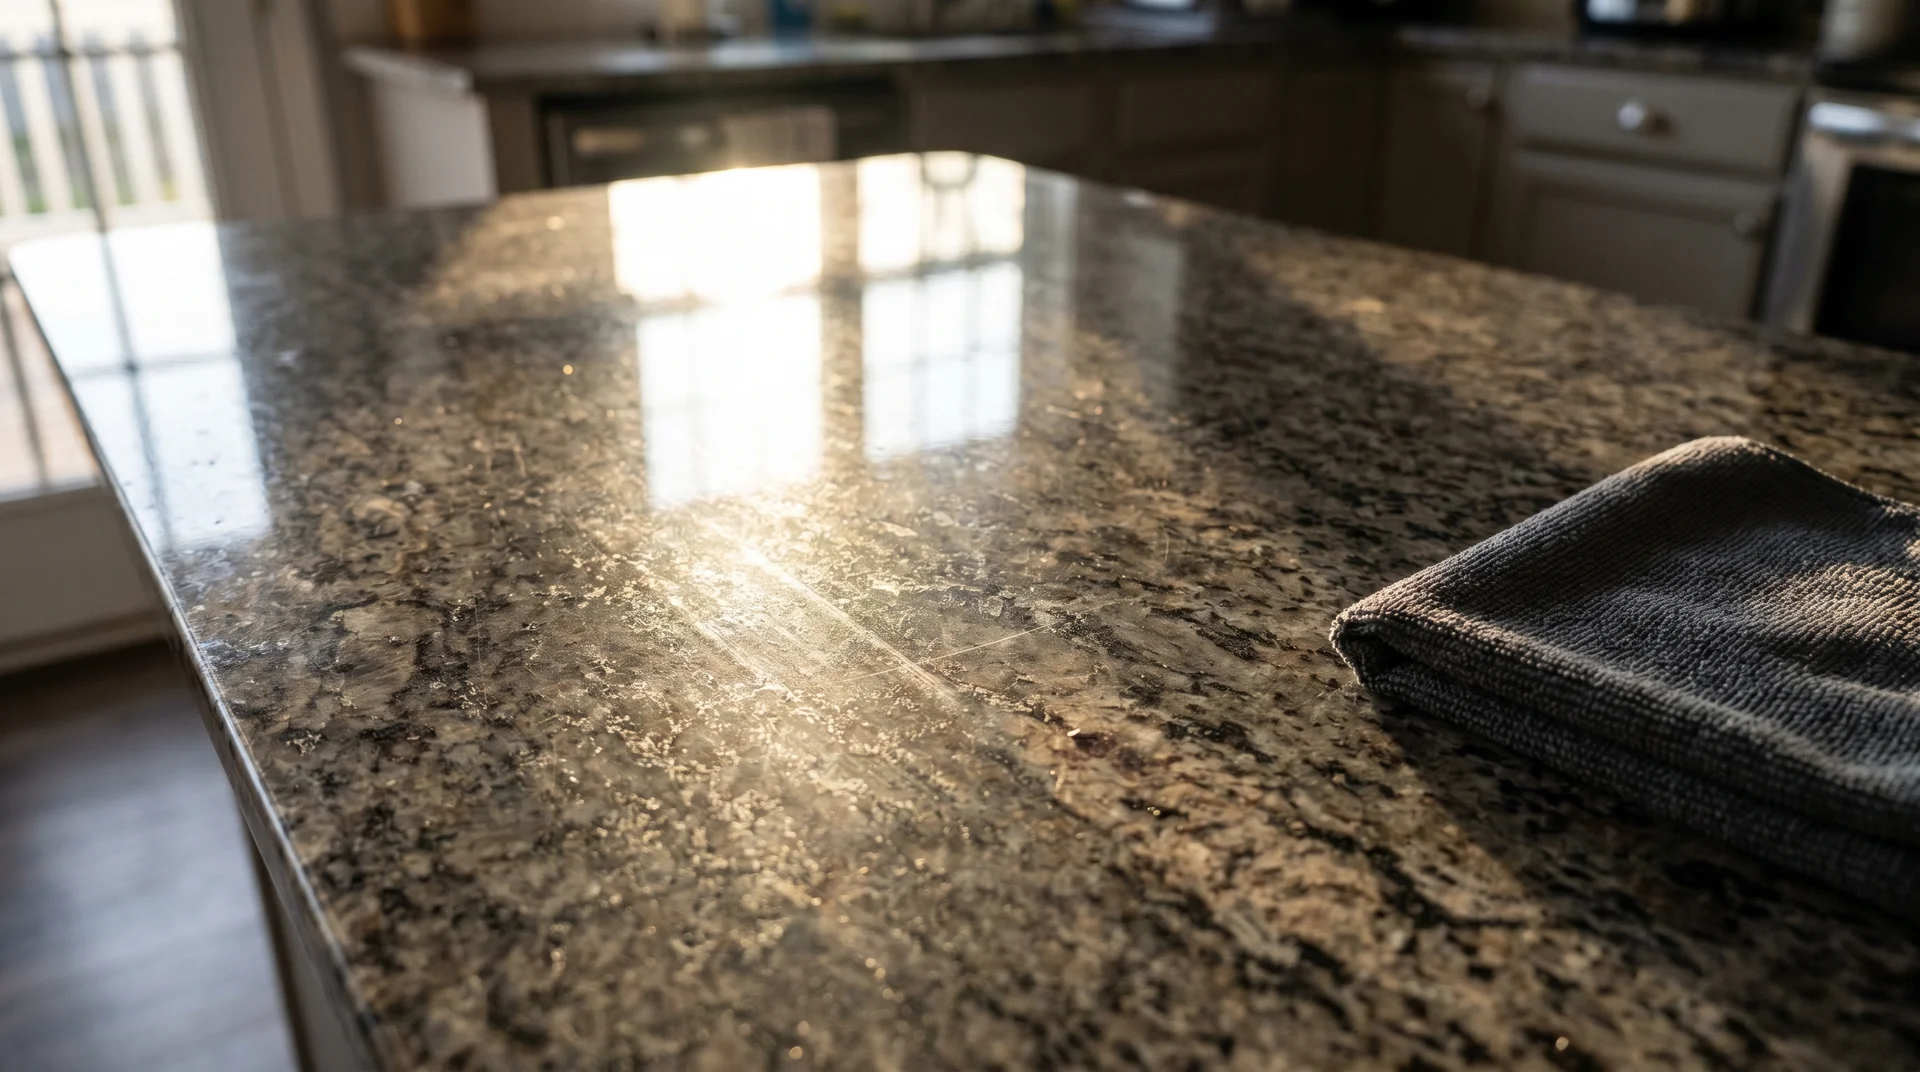
Granite loses its shine for one of four reasons. The fix depends entirely on which one you have.
Most people skip the diagnosis and reach for a product. That is why the shine comes back for a few days and then disappears again. This piece works through the cause first, then the correct sequence for each fix.
Why Does Your Granite Look Dull?
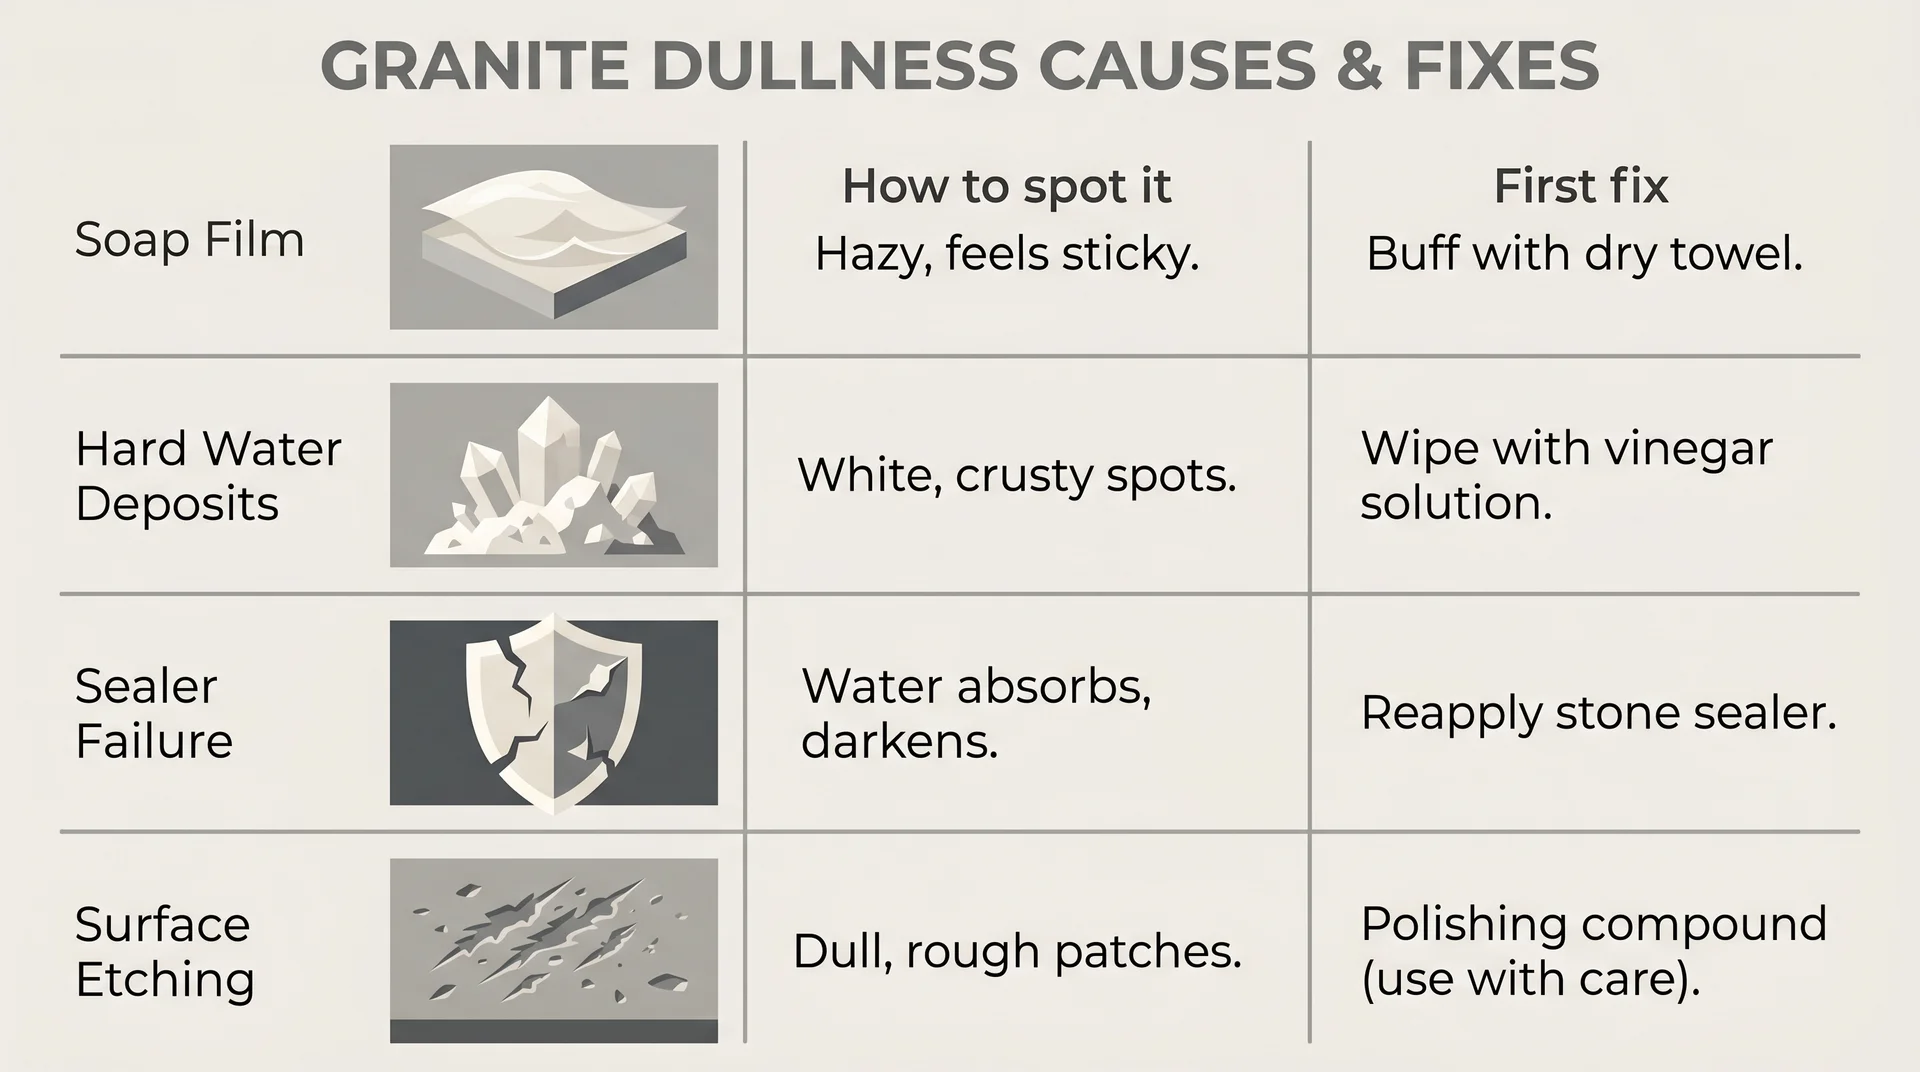
The four causes are:
| Causes | How to Diagnose It | First Fix |
|---|---|---|
| Soap and grease film | Clean a small section with isopropyl alcohol and water in equal parts. If that section looks noticeably shinier than the rest, this is your cause. | Remove the film with a stone soap scum remover or isopropyl alcohol solution before sealing or polishing anything. |
| Hard water deposits | Dull areas are whitish or chalky-looking, concentrated near the sink or wherever water pools and evaporates. | Use a mineral deposit remover formulated specifically for natural stone. Standard bathroom limescale removers are acidic and will etch granite. |
| Sealer failure | Water test: place a few drops on dry granite and wait five minutes. If they soak in and darken the stone, the sealer has failed. | Reseal with a penetrating granite sealer, then polish. |
| Surface etching | Dull spots feel slightly rough to the touch and are localized, not spread evenly across the counter. | Polishing powder for light etching. Professional refinishing for significant damage. |
They require completely different interventions. Applying the wrong fix does nothing, and in some cases makes the underlying problem harder to address.
Soap and Grease Film Buildup
Dish soap is mild enough for granite in a single use. Each wash leaves a thin residue that does not fully rinse away, and over months, that residue builds into a film across the surface that blocks the stone’s natural reflectivity.
The diagnostic test:
- Clean a small section with isopropyl alcohol and water in equal parts,
- Then dry it immediately with a clean microfiber cloth.
- If that section looks noticeably shinier than the rest of the counter, soap film is your problem.
If you skip this test and go straight to polish, the polish sits on top of the film and temporarily masks it. The film breaks down the polish layer from beneath within days.
Polishing before cleaning is the most common sequence failure in granite care, and it produces the most frustrating result because it feels like you did everything right.
Hard Water Mineral Deposits
Hard water deposits are a separate problem from soap film, and they require a different product to address.
When water evaporates on granite, it leaves behind dissolved minerals, primarily calcium and magnesium. Those deposits accumulate as a whitish, chalky haze, most visible near the sink and around the faucet. They look similar to soap film but do not respond to the same removal method.
The fix is a mineral deposit remover formulated for natural stone. This is not the same as standard bathroom lime scale removers. Most limescale products are acidic. The label will not say that plainly.
What the EPA registration data and ingredient lists show is that the active descaling agents in general household limescale products are hydrochloric or phosphoric acid derivatives. Both will etch polished granite on contact.
Use a product specifically rated for natural stone surfaces, apply it per the contact time on the label, and rinse completely before any other step.
Sealer Failure
When the sealer fails, the granite becomes microscopically more porous at the surface, and that texture scatters light instead of reflecting it cleanly.
A penetrating sealer, meaning one that absorbs into the stone rather than coating it, is applied at installation to fill granite’s natural pores and slow liquid absorption.
That sealer degrades over time from daily cleaning, heat exposure, and general wear. The Marble Institute of America recommends resealing most residential kitchen granite at least once per year, though counters near a cooking zone may need it more often.
The water test identifies sealer failure without guesswork:
- Place a few drops of water on a dry section of the counter
- Leave them undisturbed for five minutes.
Water that beads and wipes away cleanly means the sealer is intact. Water that soaks in and darkens the stone means the sealer has failed, and resealing comes before anything else.
Surface Etching
Etching is physical damage to the polished surface layer, and cleaning and sealing will not fix it.
Vinegar, lemon juice, tomato sauce, and wine are all acidic enough to etch polished granite on contact. Etching removes the microscopic polish layer from the stone itself, leaving dull spots that look like soap film or sealer failure. They do not respond to those fixes.
If the dull areas feel slightly rough compared to the surrounding surface and are localized rather than spread evenly, you are likely looking at etching.
Light etching responds to polishing powder applied with a circular buffing motion. Significant etching requires professional refinishing. That distinction matters before you spend time on any other step.
How to Clean Granite Before You Do Anything Else
Cleaning before sealing or polishing is not optional. It determines whether either of those steps does anything useful. Skip a step, and you set the next one up for failure.
Daily Cleaning Protocol
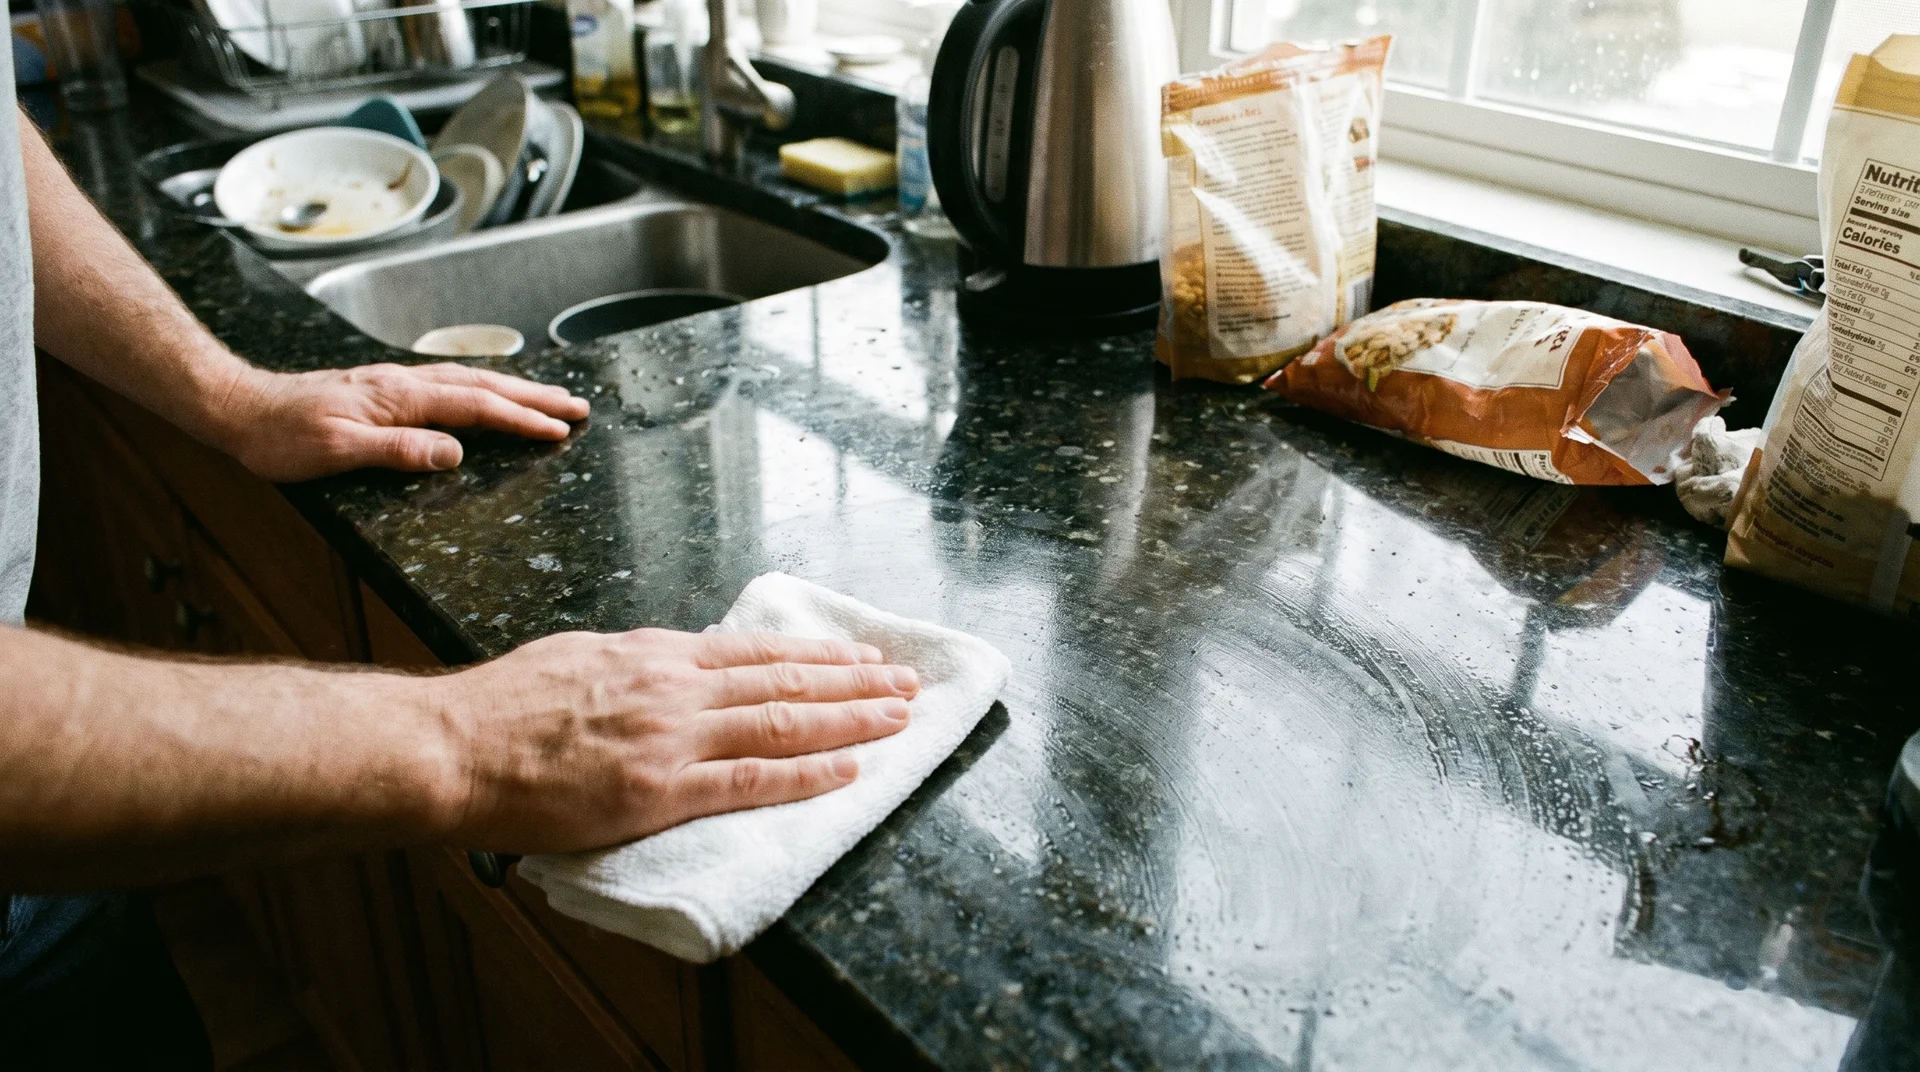
Daily cleaning should be gentle, pH-neutral, and complete. Complete means the surface is dried afterward, not just wiped down and left wet.
The correct daily sequence for polished granite countertops:
- Remove loose debris with a dry cloth before adding any liquid to the surface. Liquid makes debris harder to remove cleanly and pushes particles into crevices near the backsplash.
- Apply a pH-neutral stone cleaner lightly and evenly. A light spray is sufficient. Oversaturating pushes liquid under appliances and into backsplash seams where it sits.
- Wipe with a clean microfiber cloth using circular motions. Concentrate on the area near the sink and the cooking zone, where soap and grease film builds fastest.
- Allow 30 seconds of contact time before rinsing. On a food-prep surface, contact time is what allows the cleaner to break down grease rather than redistribute it across the stone.
- Rinse with clean water and dry immediately with a second dry microfiber cloth. Water left sitting on the surface is how hard water deposits begin accumulating.
The pH of the cleaner matters more than most labels make obvious. Granite sealers perform in a pH range of roughly 7 to 10.
Products below that range, including most vinegar-based sprays, citrus cleaners, and standard all-purpose household products, degrade the sealer over time with repeated use.
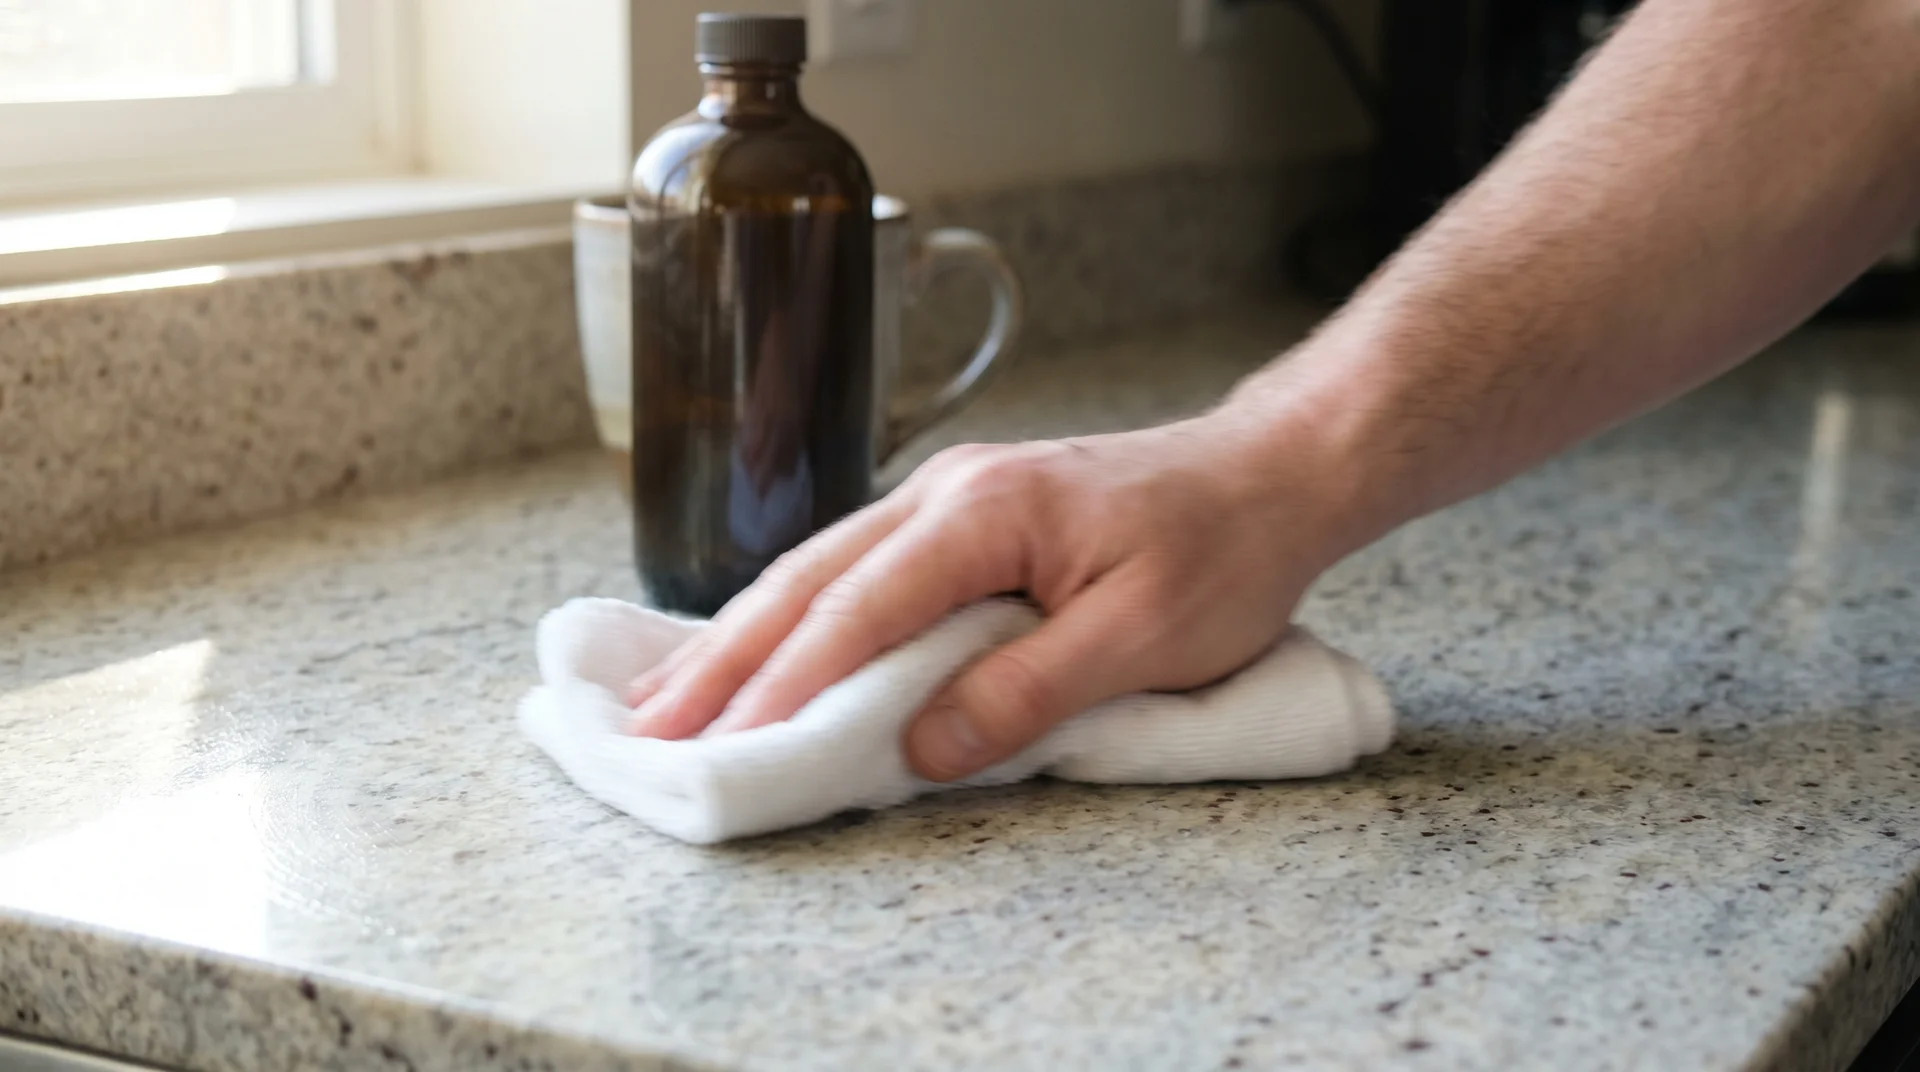
Removing Soap Scum and Grease Film
Dish soap will not remove soap film. Applying more soap to a soap-filmed surface creates more soap film. That is not the same thing as cleaning.
Two approaches that work on polished granite:
- Isopropyl alcohol and water in equal parts: Spray lightly across the surface. Allow 30 seconds of contact time. Wipe with a clean microfiber cloth in circular motions. Effective on light to moderate soap film buildup. Use in a ventilated space and away from open flame since isopropyl alcohol is volatile.
- Dedicated stone soap scum remover: Products formulated specifically for natural stone, such as MB Stone Care MB-3, will not degrade the sealer the way general bathroom soap scum products can. Apply following the contact time specified on the product label. Rinse thoroughly afterward.
After removing the film, dry the surface and run the isopropyl alcohol test again on the cleaned section. A visible improvement in sheen confirms the film is gone. Then run the water test to assess the sealer before moving to polish.
How to Seal Granite Countertops
Sealing addresses a different problem than cleaning, and the order between them is not flexible.
The sealer fills the stone’s natural pores and slows liquid absorption. It does not add shine directly. What it does is create the surface condition that allows polish to perform and last.
Apply sealer to a surface that still has soap film or mineral deposits on it, and you seal that residue in.
I have watched this happen: a slightly clouded, milky appearance that worsens after resealing rather than improving. It looks like a product failure. It is a cleaning failure that got sealed in.
The Water Test: How to Know If Your Sealer Has Failed?
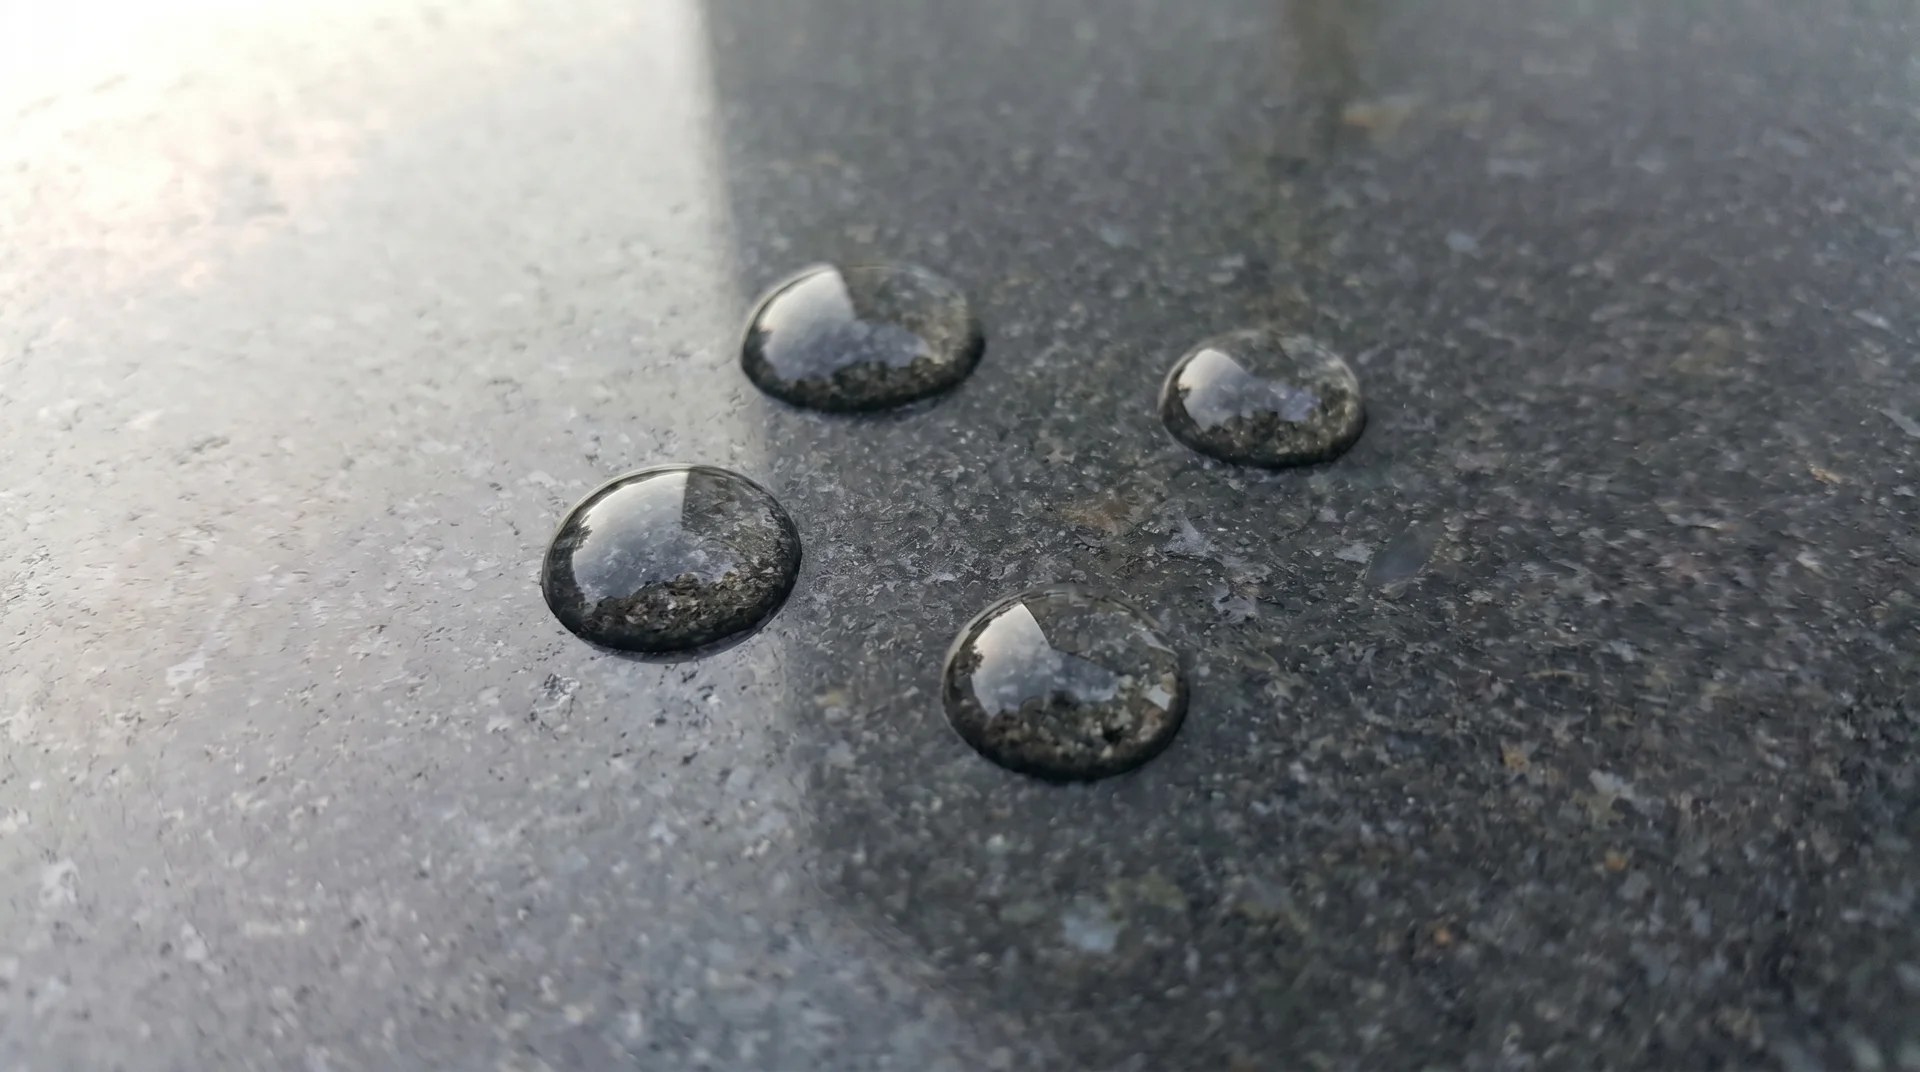
The water test takes five minutes and gives you a definitive answer before you touch any sealer product.
The test:
- Dry a section of granite completely.
- Place four or five drops of water on the surface and leave them undisturbed for five minutes.
Results:
- Water that beads and wipes away without darkening the stone means the sealer is intact, and you can move directly to polishing.
- Water that soaks in and darkens the stone means the sealer has failed, and resealing comes first.
- A dark spot appearing within two minutes indicates significant sealer degradation and makes this your priority.
How to Apply Granite Sealer
Sealer bonds to whatever is on the surface at the moment of application. Surface condition at that moment determines how well the sealer holds and how long it lasts.
- Complete the cleaning protocol and allow the surface to air dry for at least 30 minutes after the final rinse. Surface-dry to the eye is not the same as fully dry. A sealer applied to a surface with residual moisture will not penetrate correctly.
- Apply a thin, even coat of penetrating granite sealer to a small section using a clean soft cloth. Work in sections of roughly two square feet to maintain even coverage without the product beginning to dry ahead of you.
- Allow the sealer to sit for the contact time on the product label, typically 5 to 15 minutes. The label says 5 minutes. What a working kitchen surface actually requires is closer to the upper end of that range, where ambient cooking grease and residual cleaner traces compete with the sealer for the stone’s bonding capacity. The label gives you a floor, not a ceiling.
- Buff with a clean dry cloth using circular motions until no visible residue remains. Any sealer left on the surface will cure as a hazy film that cannot be polished out.
- Confirm the sealer product is rated food-safe after cure. Allow the full cure time on the label, typically 24 hours, before using the surface for food preparation. A cured penetrating sealer is inert. An uncured one is not.
How to Polish Granite Countertops
Polish is the final step in the sequence, not the first response to dullness.
Polish does not fix soap film. It does not fix a failed sealer. It enhances and protects a surface that has already been cleaned and sealed correctly.
Apply it to an uncleaned or improperly sealed surface, and you are shining the problem temporarily. The dullness returns because the underlying cause was never addressed.
Granite Polish vs. DIY Oil Methods
Cooking oil does produce a short-term shine on granite. It also creates a different problem on a food-prep surface that most granite care guides do not address.
The recommendation to buff granite with cooking oil is common. The oil fills minor surface irregularities and increases reflectivity for a few days.
My honest assessment: applying food oil to a food-prep surface and leaving it there creates organic residue on a surface where raw ingredients regularly make contact.
That residue accumulates with each application.
NSF guidance on food-contact surface materials addresses organic residue accumulation on food-contact surfaces as a contamination pathway, and a standard pH-neutral stone cleaner is not formulated to fully address oil residue left to sit between cleanings.
A dedicated stone polish does the same work without that trade-off. It produces better, longer-lasting shine, and it does not introduce a hygiene variable onto the surface you are using for food. Use the polish.
Polish Application Steps
Polish goes on a clean, sealed, dry surface. The timing of the buff step is what produces a streak-free result versus one that needs to be redone from scratch.
- Confirm the surface has been cleaned and, if needed, resealed. Allow the sealer 24 hours to fully cure before applying polish.
- Apply a small amount of granite polish to a clean microfiber cloth. Do not spray the product directly onto the stone. Pooling at the sink edge or in crevices near the backsplash leaves residue marks that require recleaning to address.
- Work in sections of two to three square feet using circular motions, overlapping each section slightly to avoid leaving edge lines between areas.
- Buff with a second dry microfiber cloth before the polish film dries on the surface. Polish that dries before buffing leaves a haze. Recleaning the surface is then required before you can restart correctly.
How often polishing is needed varies by kitchen, and I am not going to give you a number that applies everywhere.
A counter near a gas burner used daily handles differently from an island used mainly for prep work. Monthly is a reasonable starting point. Your surface tells you faster than any fixed schedule.
What to Stop Using on Granite
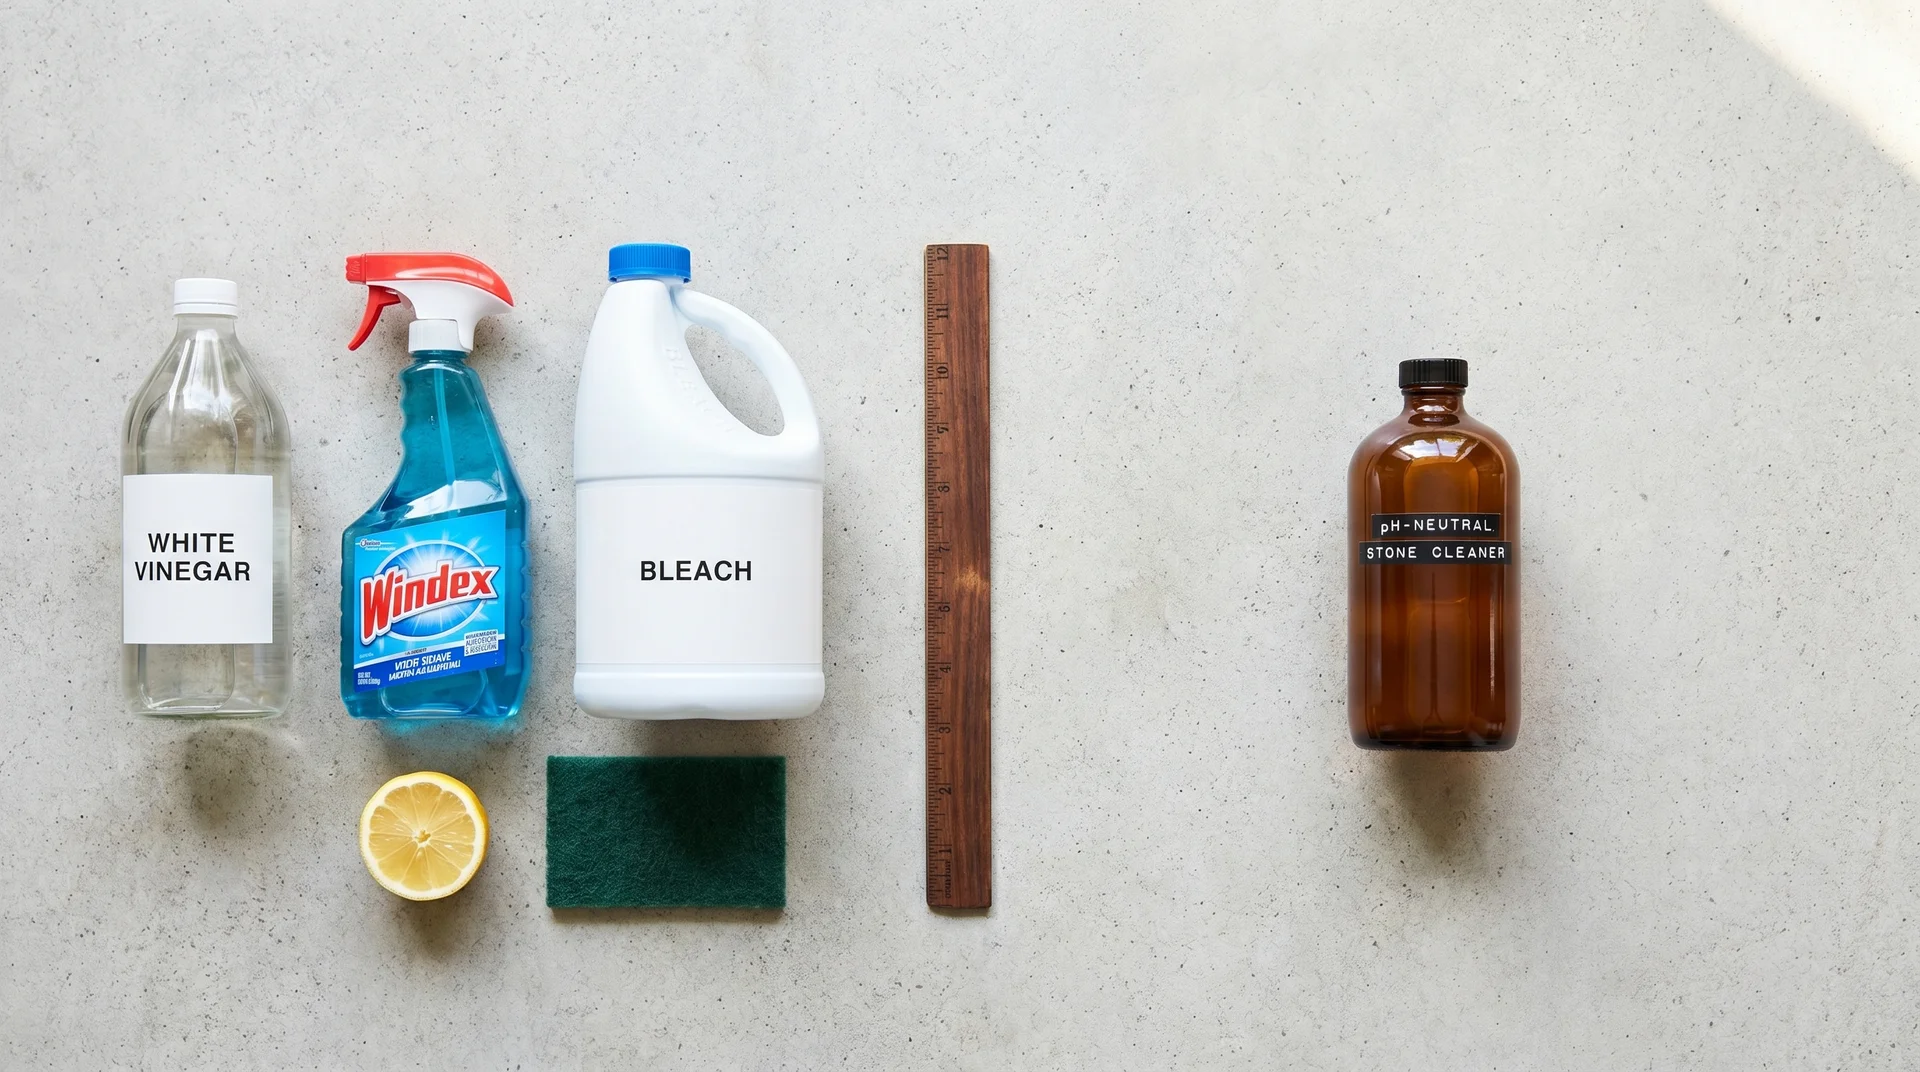
The wrong cleaner causes more long-term granite damage than most other kitchen habits combined.
My father spent thirty years as a commercial kitchen inspector for Baltimore City. He still believes bleach solves most cleaning problems at home. He is not entirely wrong. He is also not entirely right, and the distinction between those two positions is the thing most advice skips entirely.
Bleach degrades penetrating sealers with repeated use, regardless of dilution. A single emergency application will not ruin a countertop. Routine use as a weekly surface cleaner progressively breaks down the sealer, leaving the stone increasingly porous and dull.
This explains why careful, consistent cleaners end up with dull granite despite doing most things correctly.
Products that damage polished granite through sealer degradation, surface etching, or both:
- Vinegar and vinegar-based sprays: Acidic enough to etch polished granite with repeated contact. The fact that vinegar works well on other kitchen surfaces is not relevant here.
- Bleach and bleach-based disinfecting wipes: Degrades penetrating sealers over time. This includes wipes used regularly on the surface, not just liquid bleach applied directly.
- Ammonia-based glass cleaners, including Windex: Leave residue film on granite and weaken the sealer bond with repeated use. These are consistently in the cabinets of homeowners who cannot figure out why their granite keeps dulling despite regular cleaning.
- Hydrogen peroxide: Acceptable in a targeted stain-removal application using a baking soda paste. Corrosive to the sealer as a general-purpose cleaner. Use it narrowly and specifically, not as a routine product.
- Citrus-based all-purpose cleaners: The citric acid content puts these in the same damaging pH range as vinegar on stone surfaces. “Natural” and “safe for granite” are not the same claim.
- Abrasive scrub pads: Scratch the polished surface layer physically. Scratched polished granite scatters light rather than reflecting it, and no amount of polish corrects that without professional refinishing.
Every product on that list is designed to do a genuine cleaning job elsewhere. On polished granite, it does a different job than intended.
Keeping Granite Shiny Long Term
Long-term shine is mostly a matter of not undoing what the sequence above produces.
Three habits that matter in a working kitchen:
- Wipe acidic spills within a few minutes rather than letting them sit on the polished surface. Coffee, wine, citrus juice, and tomato-based sauces all qualify.
- Dry the surface after cleaning instead of letting it air dry. Standing water, particularly in areas with high mineral content in tap water, is a consistent contributor to the hazy appearance that most people attribute entirely to sealer failure. The hard water deposits described earlier in this piece build from exactly this habit.
- Reseal when the water test indicates it, rather than on a fixed calendar. High-traffic kitchen counters may need it every six months. A lightly used surface may hold for eighteen months or longer. Run the water test quarterly and let the result decide.
When the shine starts to drop again, return to the four-cause diagnostic table before reaching for any product.
In most kitchens, it is soap film, and clearing it takes ten minutes. That table is the fastest way through the problem.
When to Call a Professional?
Professional refinishing addresses physical damage that no cleaning, sealing, or polishing protocol reaches.
If dull areas feel rough or pitted to the touch, or if the surface has scratches that catch a fingernail, the damage is below the polish layer.
A professional uses diamond-pad grinding and resurfacing equipment to restore the surface itself, not the coating over it.