

The base is simpler than the top in one way: the joints are mechanical, not adhesive, and you can see what you’re doing at every step.
What makes it harder is that the visual decisions are embedded in the structural sequence. You need to know what you want the table to look like before you make the first cut.
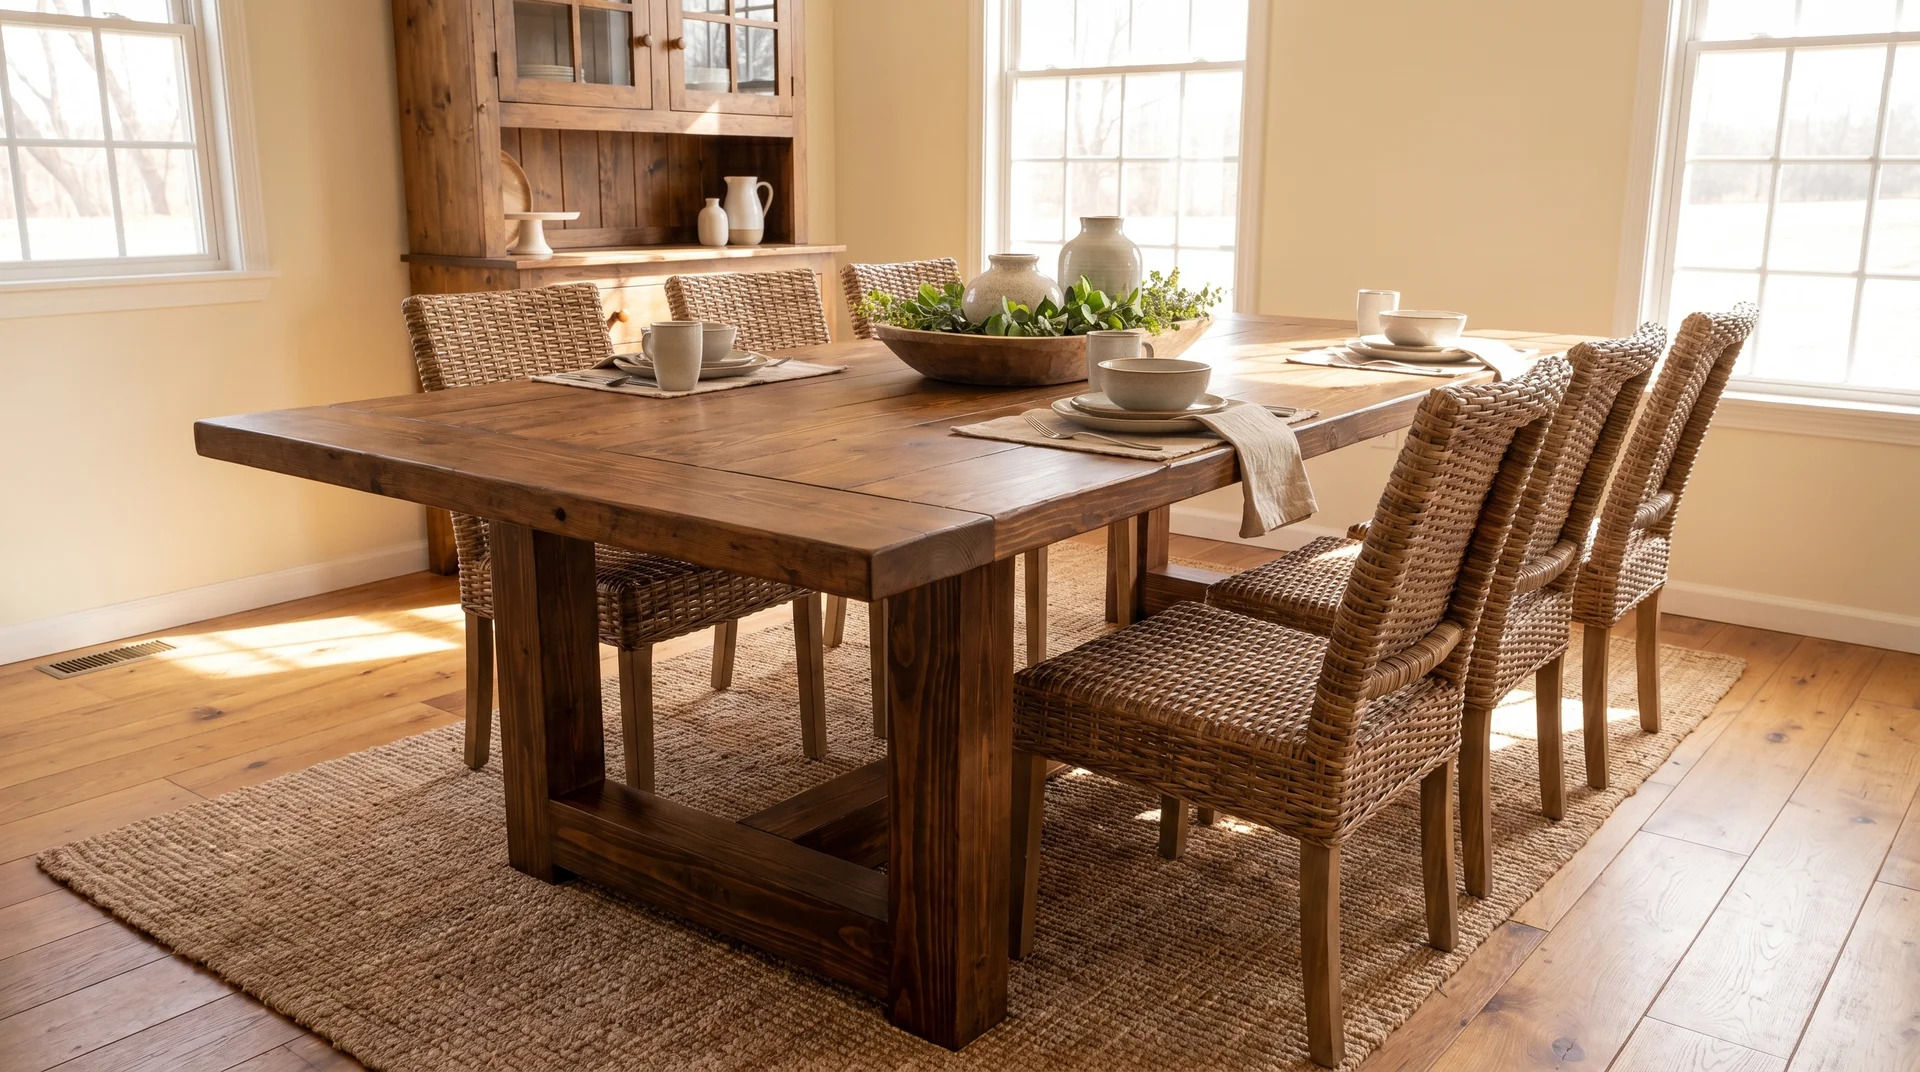
This article covers the full build sequence for a four-leg apron base, the most common style for a rectangular farmhouse table.
Follow it with your glued-up top on hand and your attachment hardware ready, and you’ll finish with a complete, square base ready for the top to go on.
What You Need Before You Start
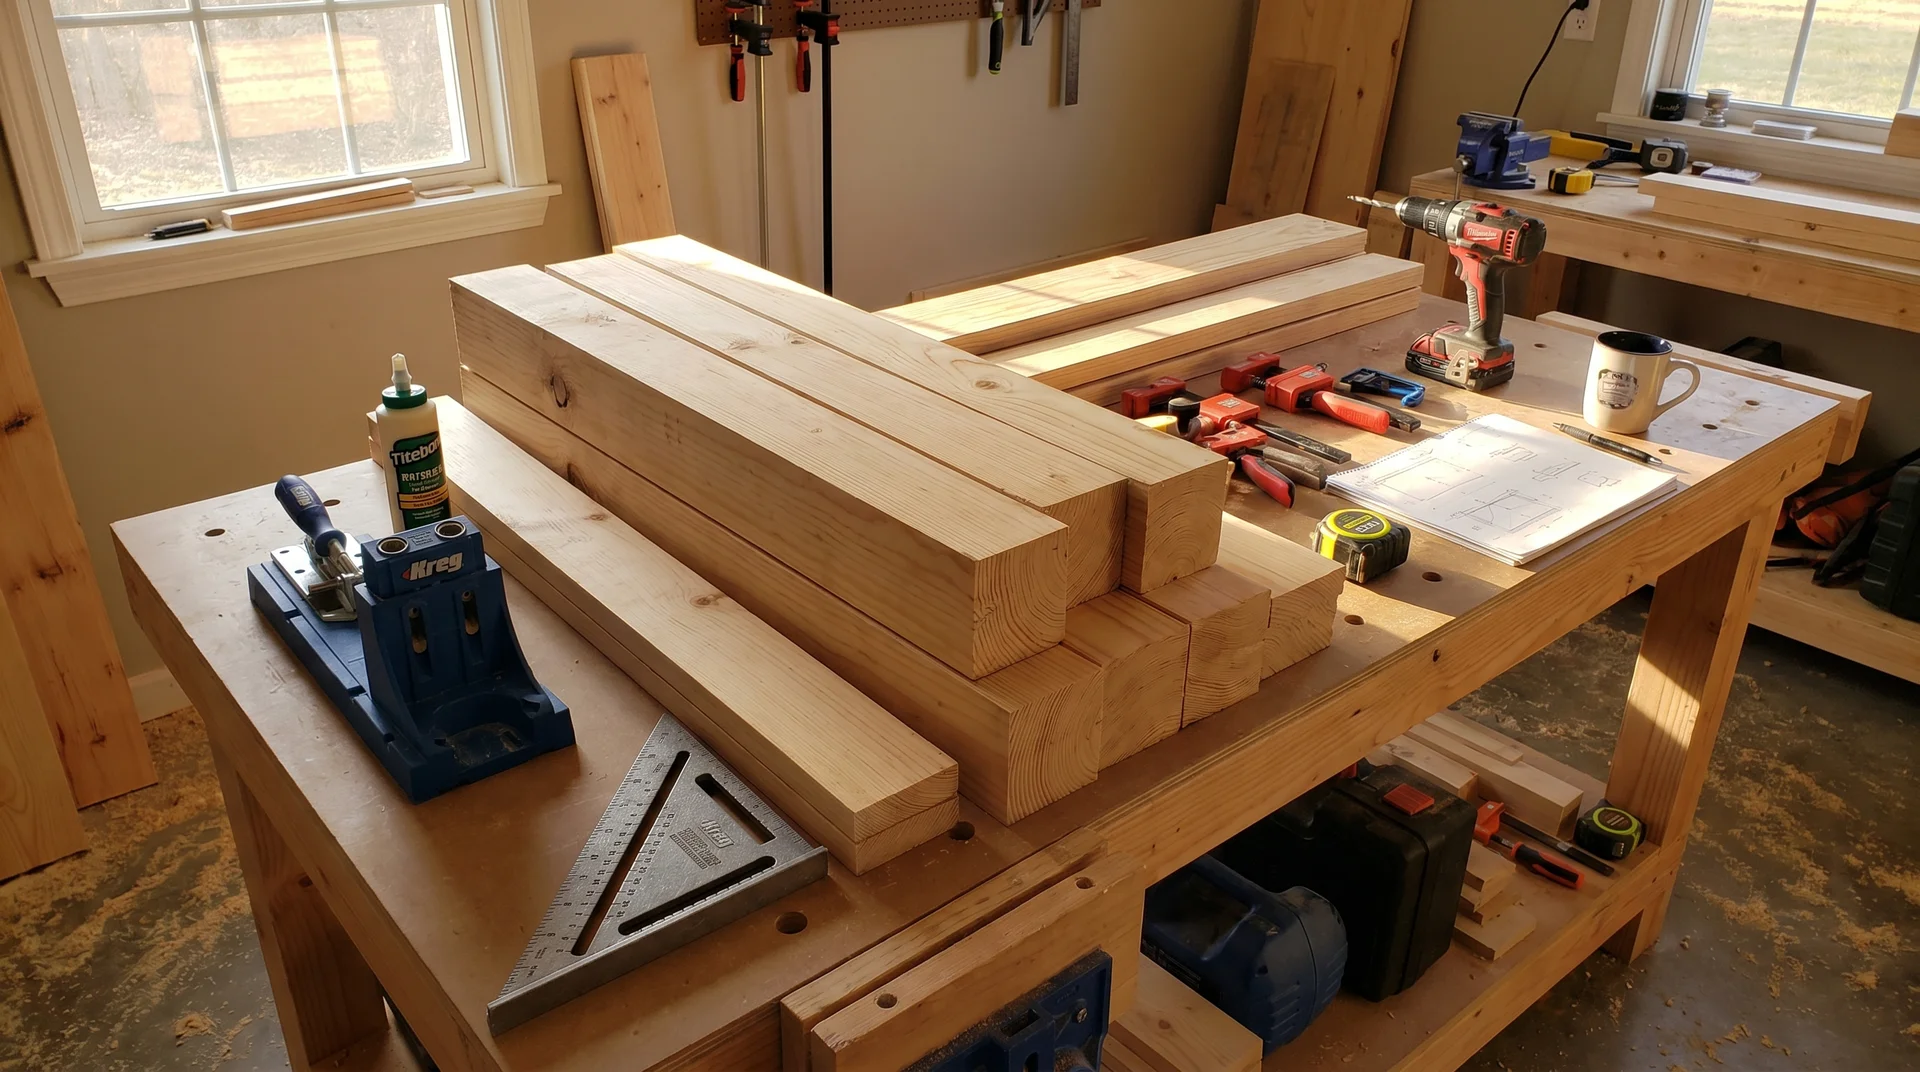
Have everything on this list before you cut anything.
The assembly sequence moves quickly once you start. Stopping to measure or source a missing piece after glue is on a joint is how bases end up out of square.
- Legs: Four 4×4 posts (cut to 28.5 inches for a 30-inch finished table height, accounting for the 1.5-inch tabletop thickness) or purchased turned legs at your chosen height
- Apron lumber: 2×6 boards for a substantial base; 2×4 for a lighter look (enough for two long and two short pieces, plus waste)
- Interior supports: Two pieces of 2×4 cut to span the width between the long apron pieces
- Pocket hole jig: Kreg or equivalent; set for 1.5-inch material (the thickness of your 2×6 or 2×4 apron)
- Pocket hole screws: 2.5-inch coarse-thread for 2×6 apron into solid legs
- Wood glue: Applied at every joint before screwing
- Clamps: At least four bar clamps for holding joints while driving screws
- Miter saw or circular saw: For cutting apron pieces to length
- Tape measure and framing square: For layout and the diagonal check
- Drill and driver bits
Your finished tabletop should be on hand or fully measured before you cut any apron pieces. Every apron dimension is calculated from the top dimensions. Cutting the apron before you have the top dimensions is how you build a base, the top doesn’t fit.
Choosing Your Legs
The legs determine what the table looks like from across the room.
A standard 4×4 post gives you a 3.5×3.5-inch square leg. It is sturdy, clean, and honest. A purchased turned leg adds visual character but introduces variation in surface profile that shows when you’re painting or staining.
Rubberwood and pine turned legs paint well. If you’re staining, buy legs in the same wood type as your apron lumber.
Leg Height and the 30-Inch Rule
Standard dining table height is 30 inches from the floor to the tabletop surface. Your legs need to account for everything stacked above them: the apron thickness, the top support thickness if you’re adding interior supports flush to the top of the apron, and the tabletop itself.
For a 2×6 apron (1.5 inches thick) flush to the top of the leg, with a 1.5-inch solid wood top, the leg height is 30 minus 1.5 equals 28.5 inches. Cut all four legs to exactly the same length. Any variation shows as a wobble.
Lay all four legs side by side after cutting and compare them. A 1/16-inch difference is acceptable. Anything over that, recut the short ones.
How Much Leg Shows Below the Apron
The amount of leg visible below the apron is a visual decision that changes the character of the entire table.
- More leg below the apron makes the base feel open and light.
- Less leg below the apron makes it feel grounded and heavy.
Most standard farmhouse bases show 20 to 24 inches of leg between the floor and the bottom of the apron. That proportion tends to read as balanced in a dining room with standard ceiling height. In a room with high ceilings, you can go longer.
Stand in the room where the table will live and hold a board at the height you’re considering for the bottom of the apron.
Look at it from the doorway before you commit. The proportion that looks right in the sketch doesn’t always look right in the room.
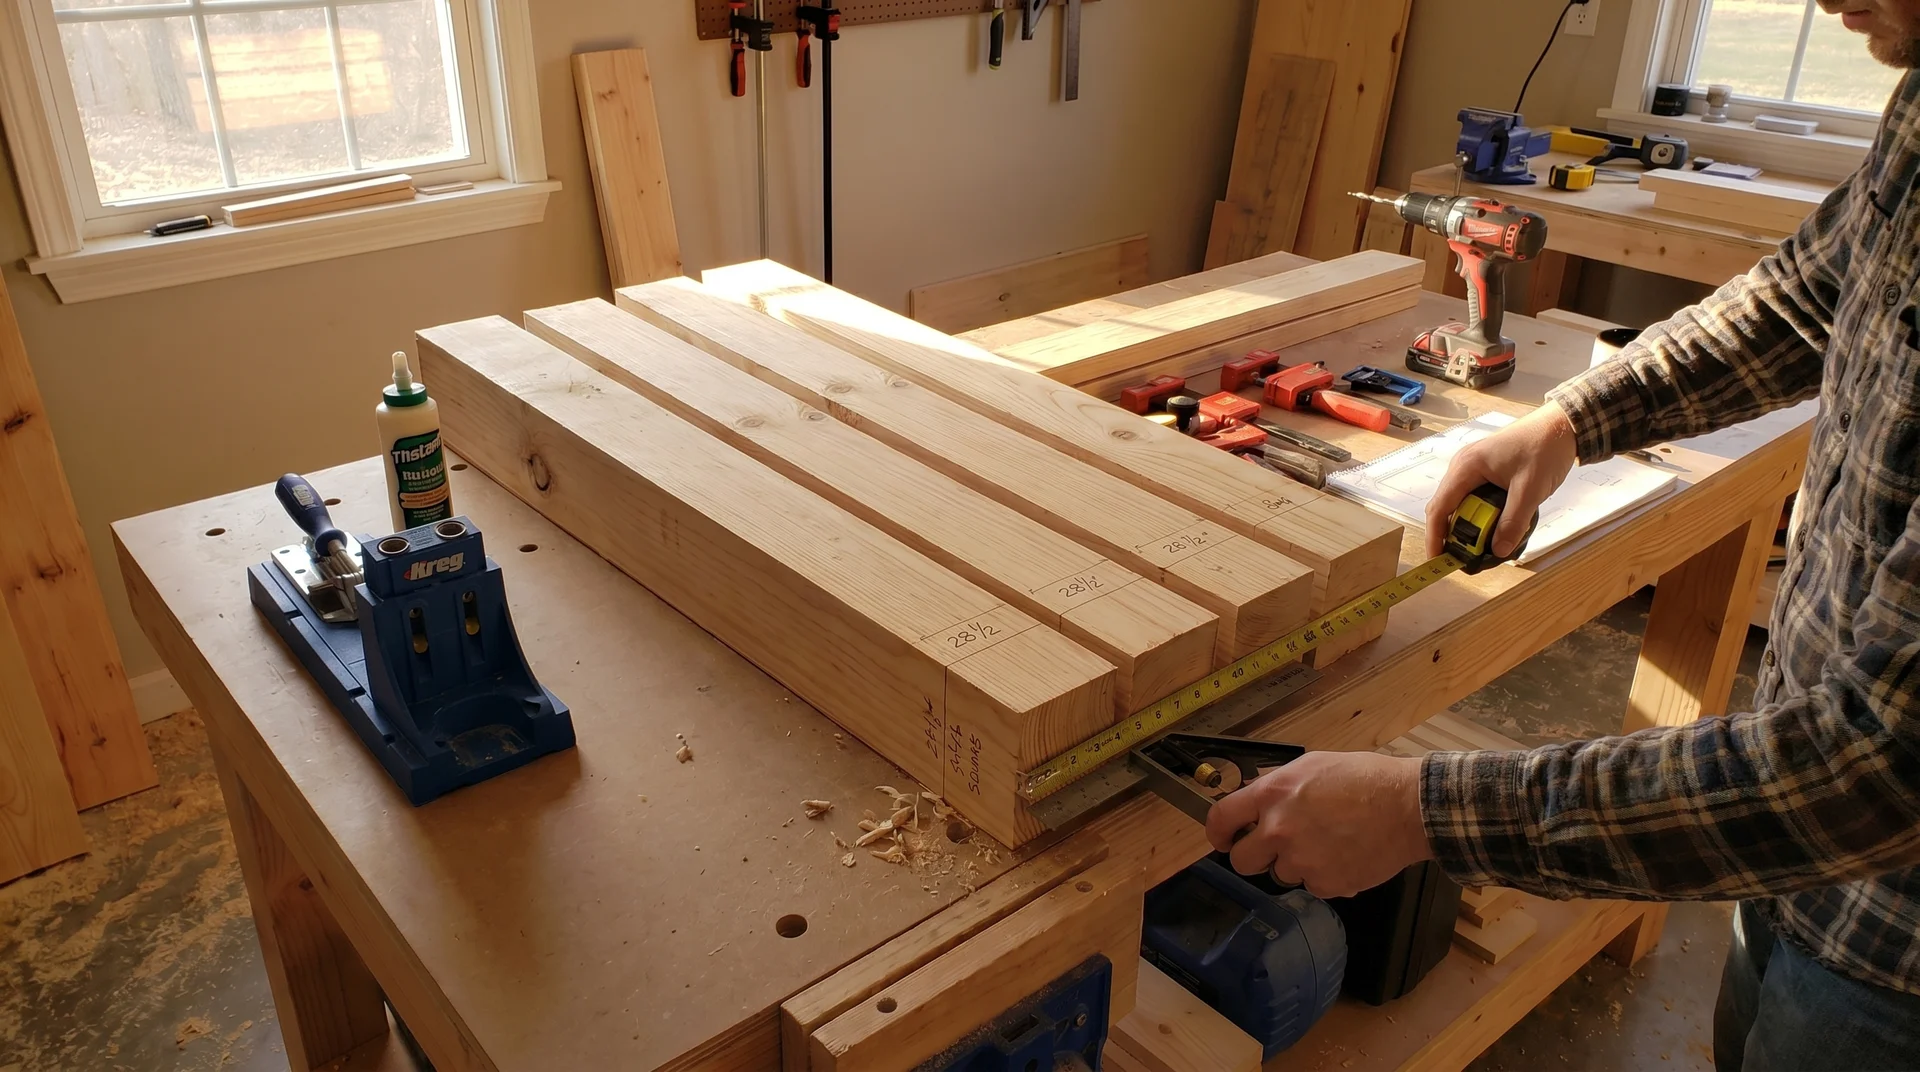
Cutting the Apron Pieces
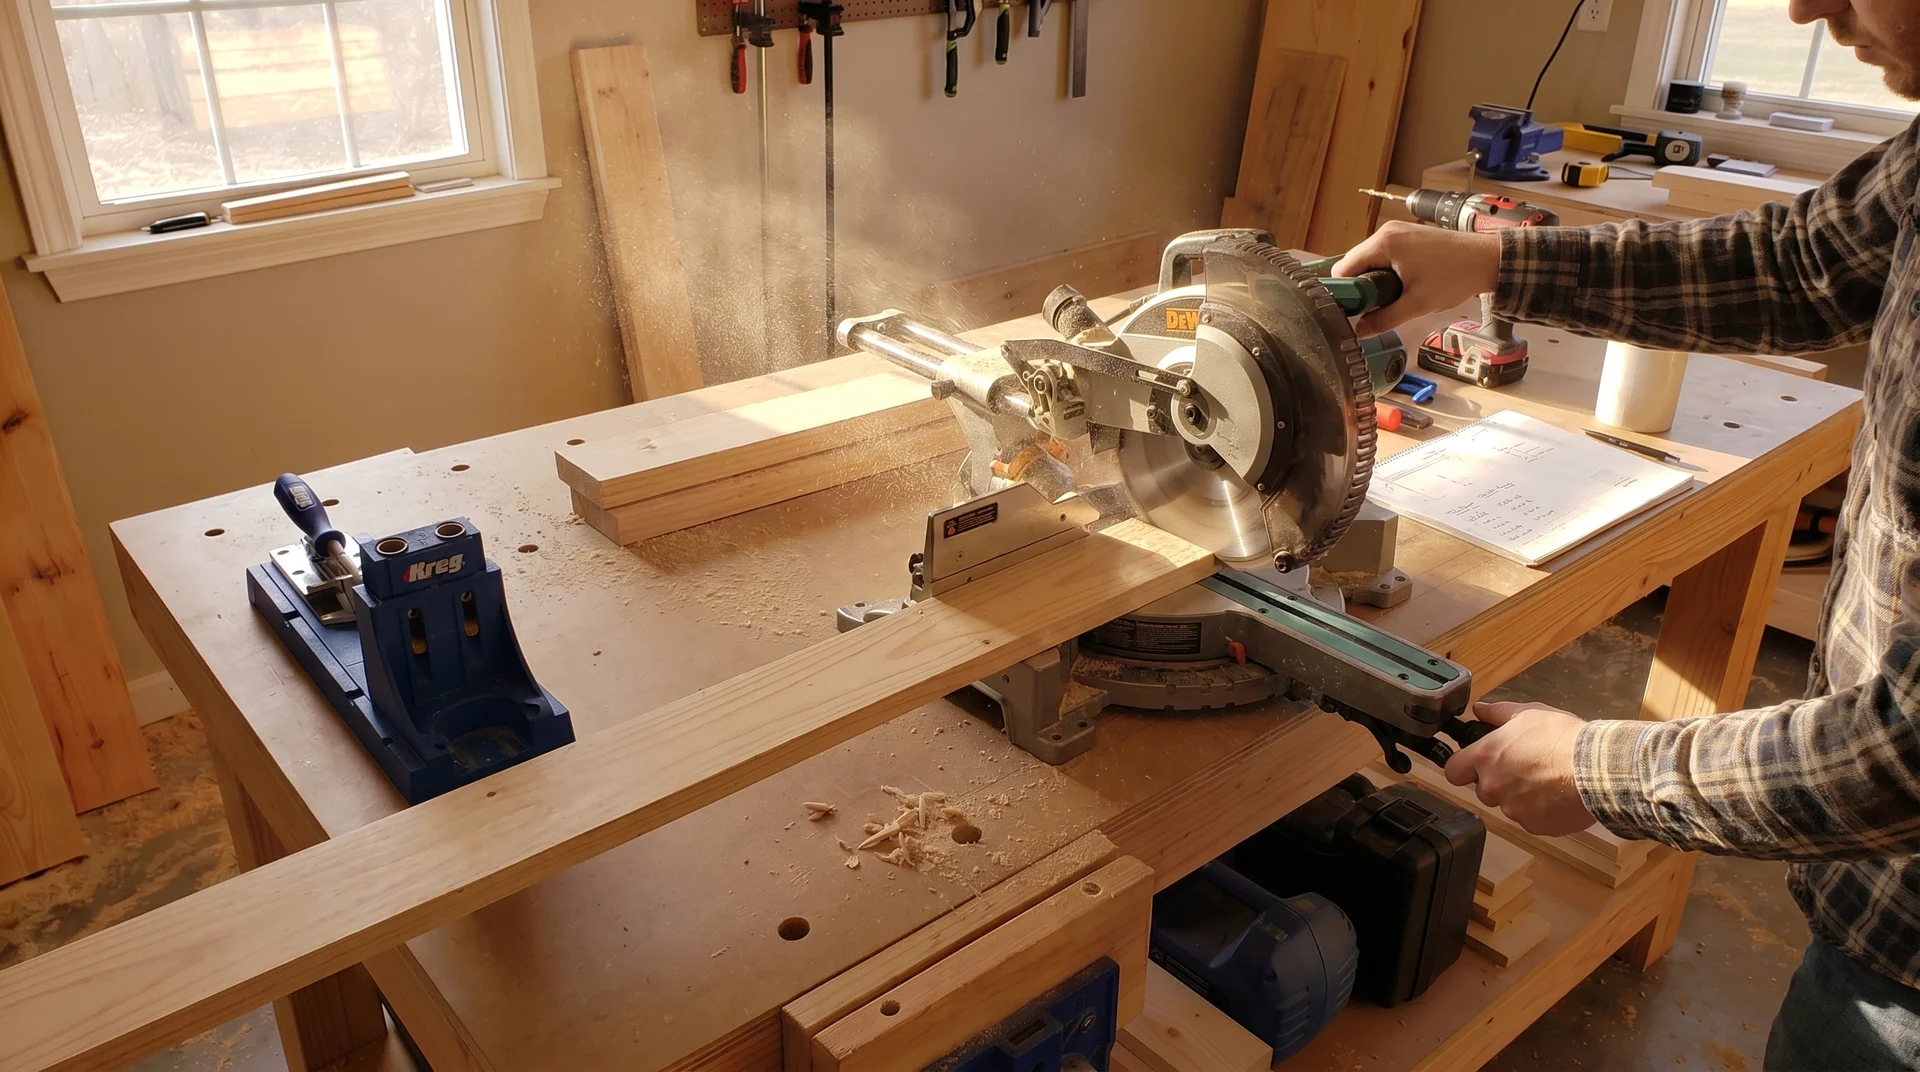
Every apron dimension follows from the tabletop dimensions and one visual decision: how much overhang you want at each corner.
The Correct Apron Length
The overhang is the distance the tabletop extends past the outer face of each leg. Most farmhouse tables use 1 to 1.5 inches of overhang at each corner. More overhang makes the top look like it’s floating above the base. Less overhang makes the table look like the base is too large for the top.
The apron length formula is:
Long apron piece: Table length minus (2 × leg width) minus (2 × overhang amount)
Short apron piece: Table width minus (2 × leg width) minus (2 × overhang amount)
For a 78-inch-long table with 3.5-inch square legs and 1.5-inch overhang: 78 minus 7 minus 3 equals 68 inches per long apron piece. Write this down and confirm it twice before cutting.
Cut both pieces of each length from the same board where possible. It keeps the color and grain consistent across matched pieces.
The difference between two boards from the same batch can be significant, and it shows on the finished base.
The Correct Apron Height
A 2×6 apron gives you 5.5 inches of visible depth below the tabletop, the most common dimension for farmhouse bases. It reads as substantial without making the base feel heavy.
A 2×4 apron is lighter and suits narrower tables where a deep apron would make the base look like it’s trying too hard.
Apron height also affects knee clearance. Standard dining chairs seat at 17 to 19 inches. The bottom of the apron needs to clear the seated thigh, which typically means the apron’s bottom edge should be at least 24 inches from the floor.
Check this against your leg length before you commit to an apron width.
Drilling Pocket Holes
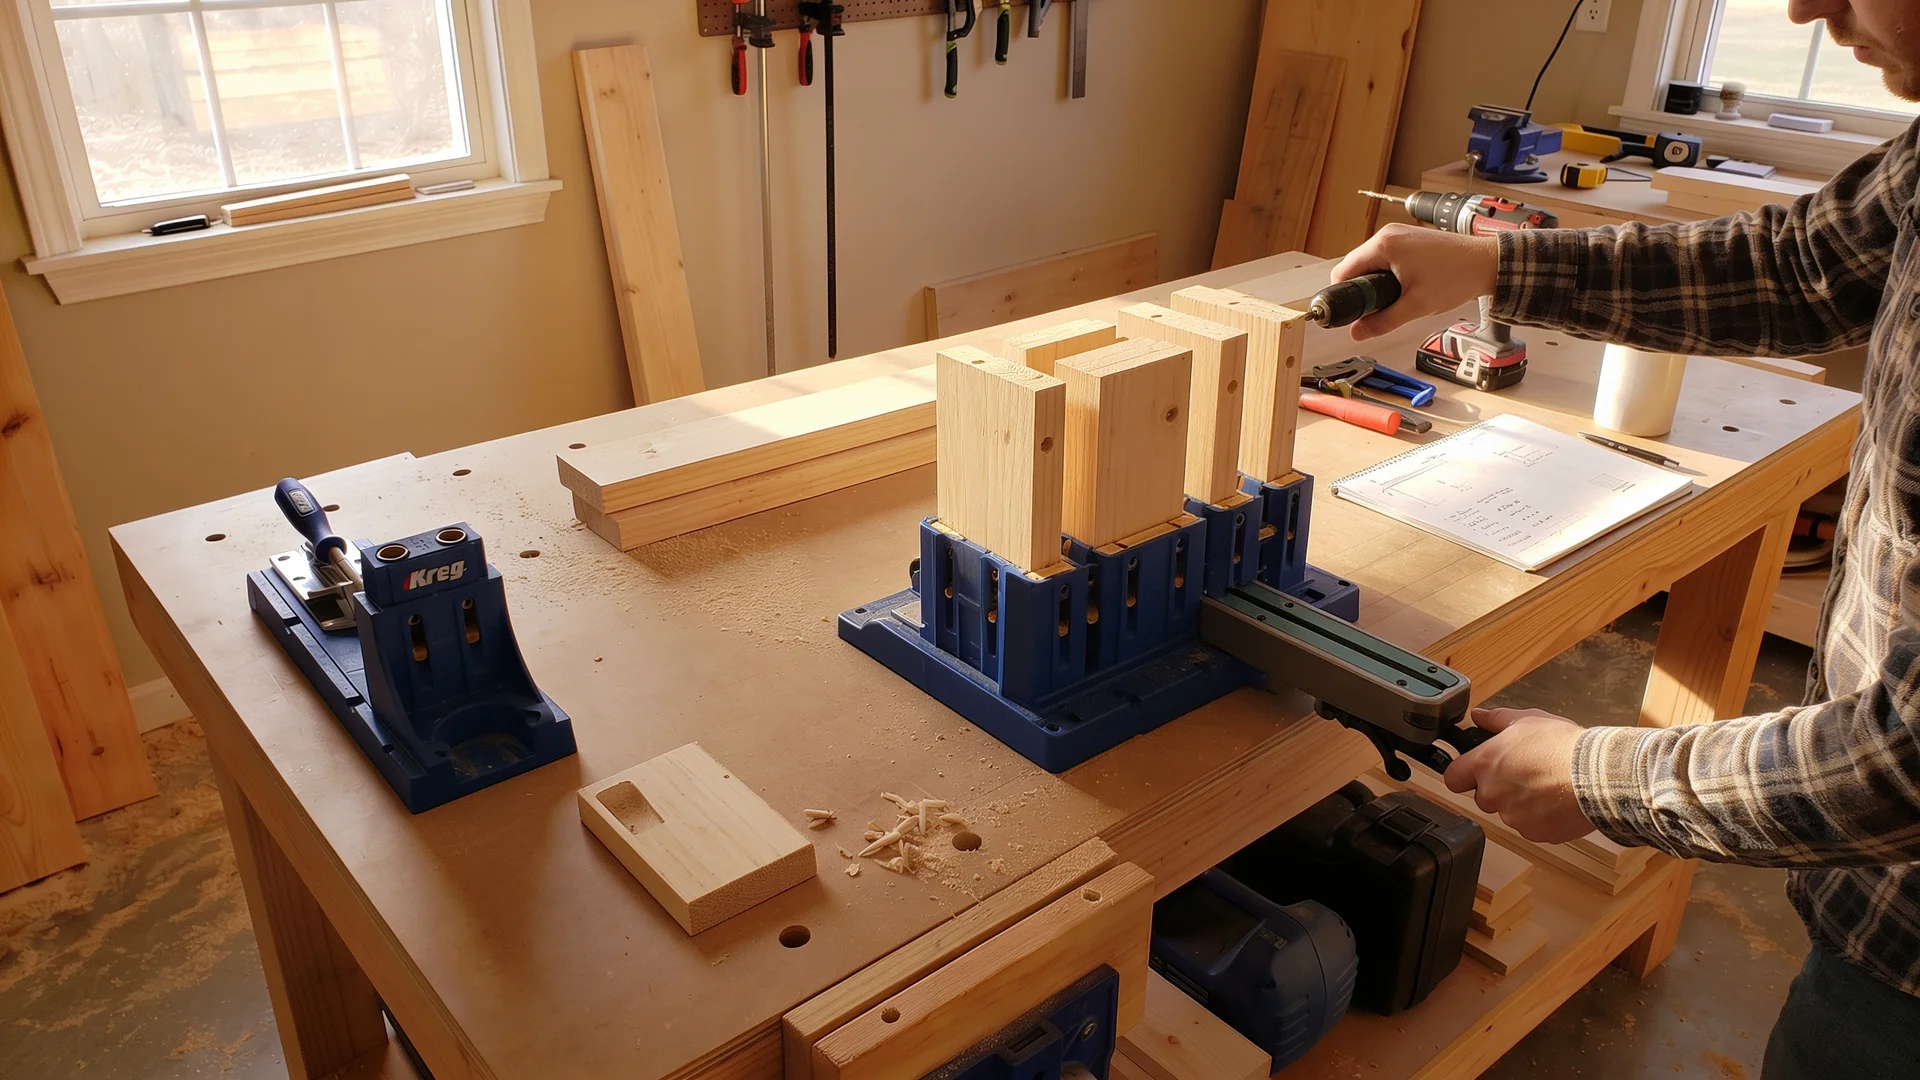
Pocket holes are the fasteners that hold the apron to the legs.
Set your pocket hole jig for 1.5-inch material, which is the actual thickness of a 2×6 or 2×4 board.
Drill two pocket holes into each end of every apron piece, positioned roughly an inch from the top and bottom edges of the board.
Drill all pocket holes before any glue goes on anything. It’s much easier to hold a board in the jig before it’s part of an assembly than after. Go through every board in one pass, and you won’t have to reset the jig mid-build.
Two holes per end is the minimum. Three holes per end on a wide 2×6 gives a stronger connection, especially on the long apron pieces that carry more of the top’s weight. If your jig can fit three, use three.
Assembling the Base
Assembly happens in a specific sequence. Short ends first, then long sides, then interior supports.
Skipping the sequence or reversing steps makes squaring harder and puts stress on joints that aren’t ready for it.
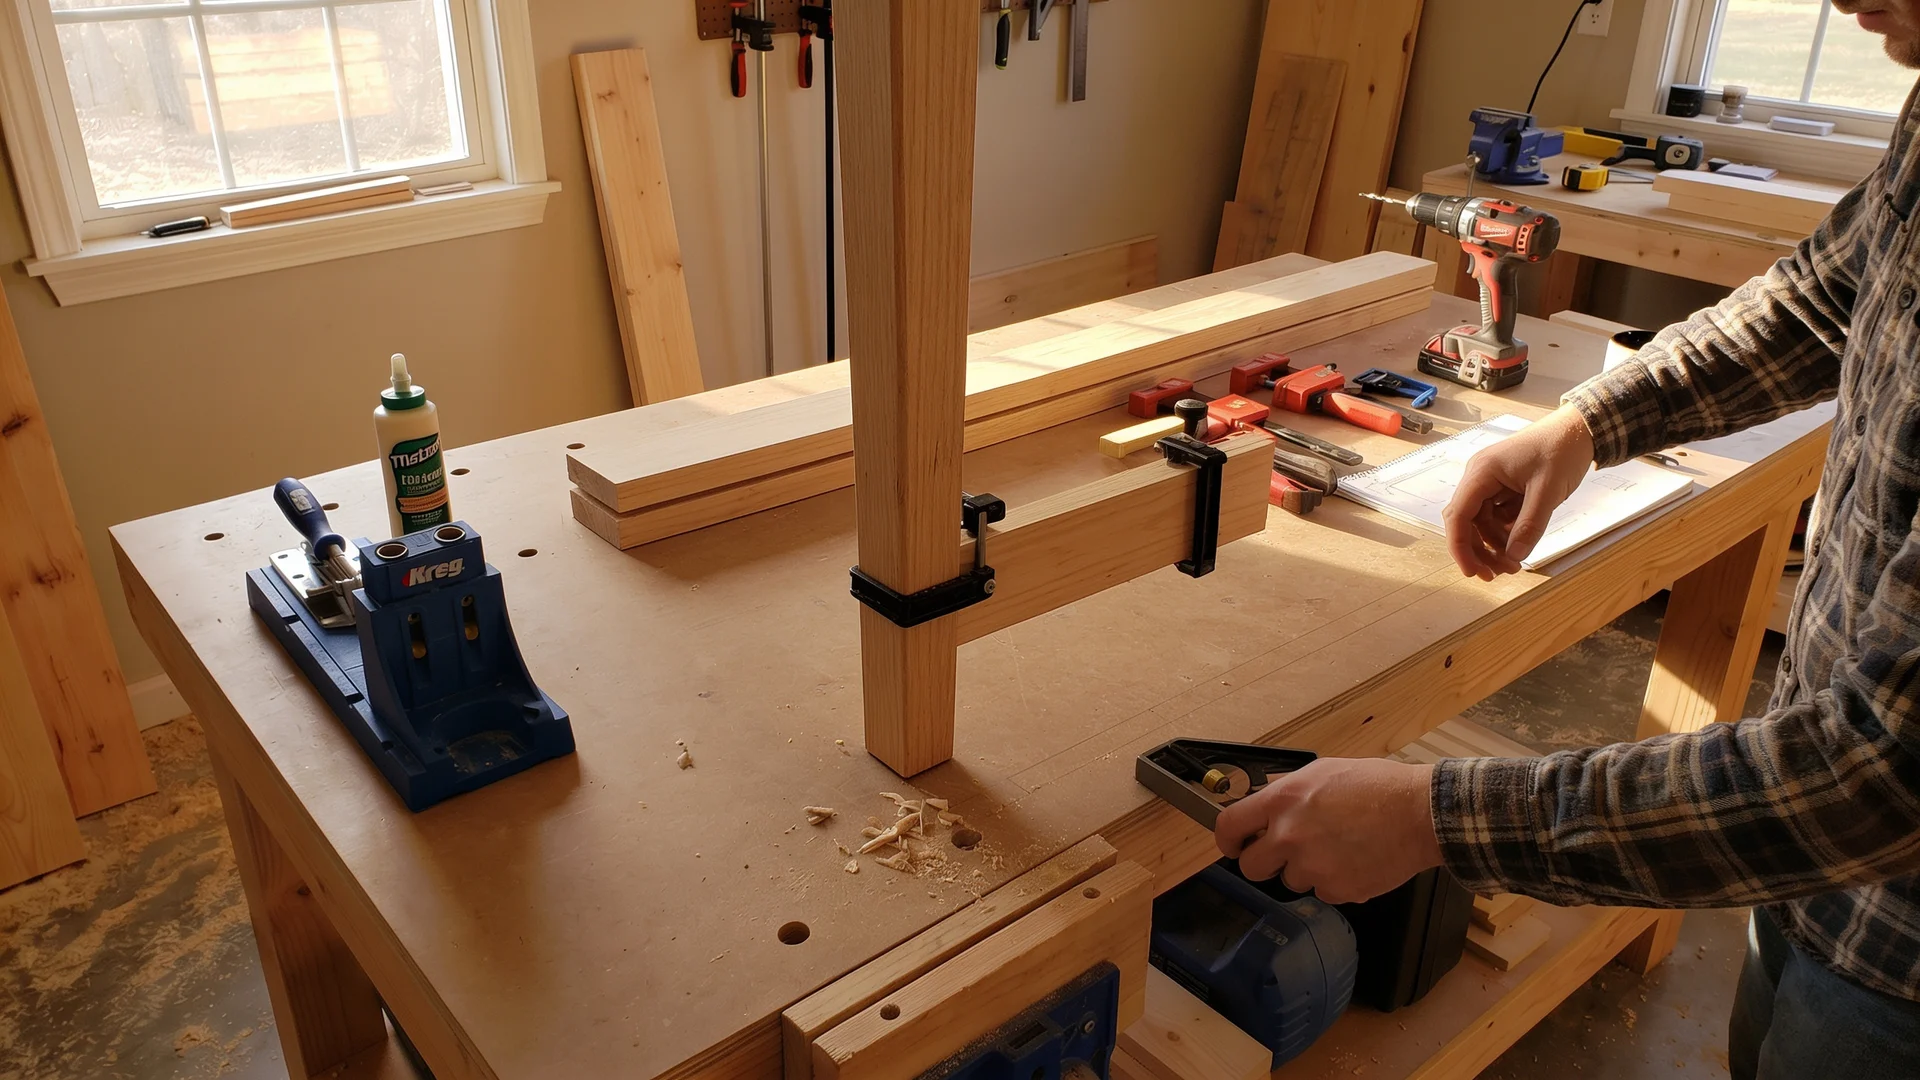
Short Ends First
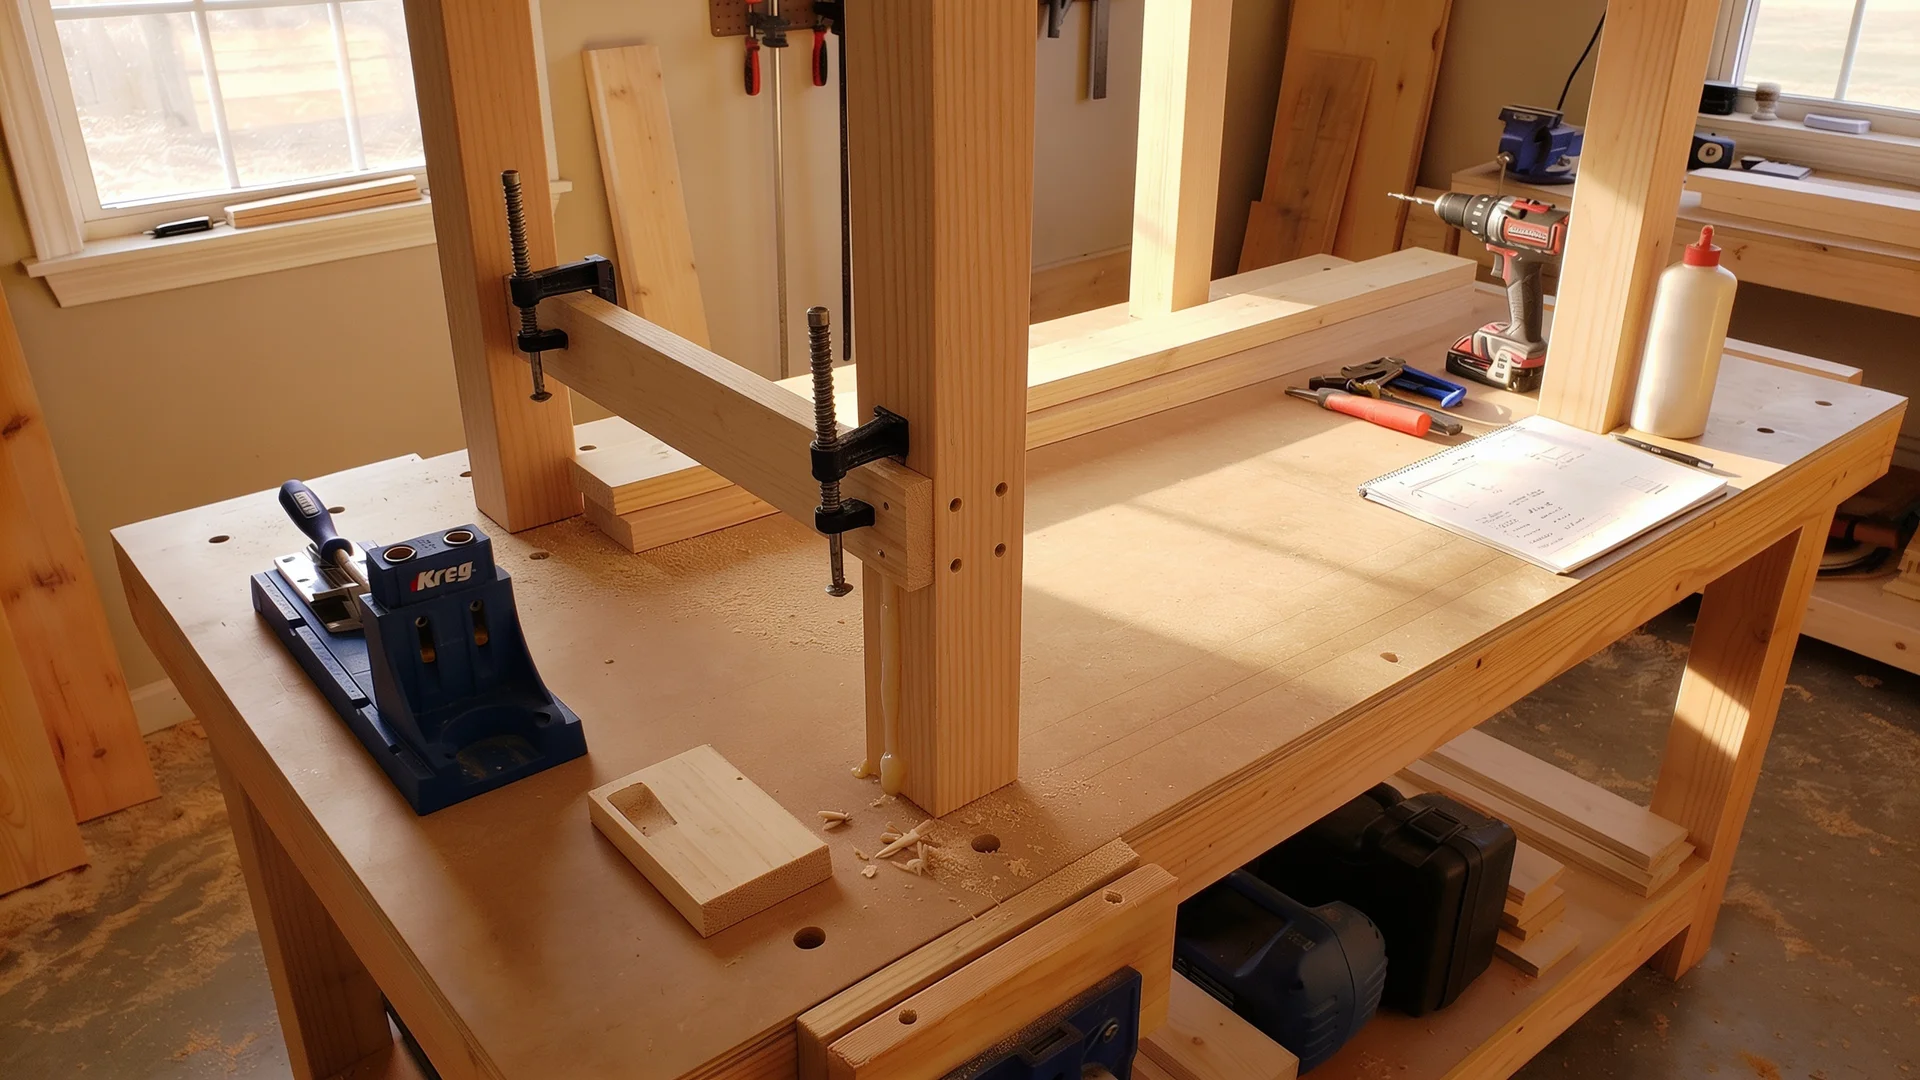
Build both short-end assemblies before connecting them with the long apron pieces. An end assembly is two legs with one short apron piece between them. Build both ends flat on the floor or workbench.
Apply wood glue to the leg face where the apron will contact it. Set the apron piece in position and clamp it, making sure the top face of the apron is flush with the top end of the leg. Drive the pocket screws. Don’t remove the clamp until the screws are fully seated.
The glue matters here as much as the screws. Pocket screws in end grain pull out under stress. The glue at the face of the joint is what holds this connection over years of use.
Check each end assembly with a framing square at the corner. The apron face should be at 90 degrees to the leg face. A joint that dries out of square is in the table permanently.
Connecting the Long Sides

Stand both end assemblies upright on a flat floor and connect them with the long apron pieces. Apply glue to each leg face, clamp the long apron into position flush at the top, and drive the pocket screws on both ends before removing any clamp.
Work on one long side at a time. Fully assemble one side and let the screws seat before moving to the other side.
Trying to assemble both long sides simultaneously puts the structure in motion before any joint has stabilized.
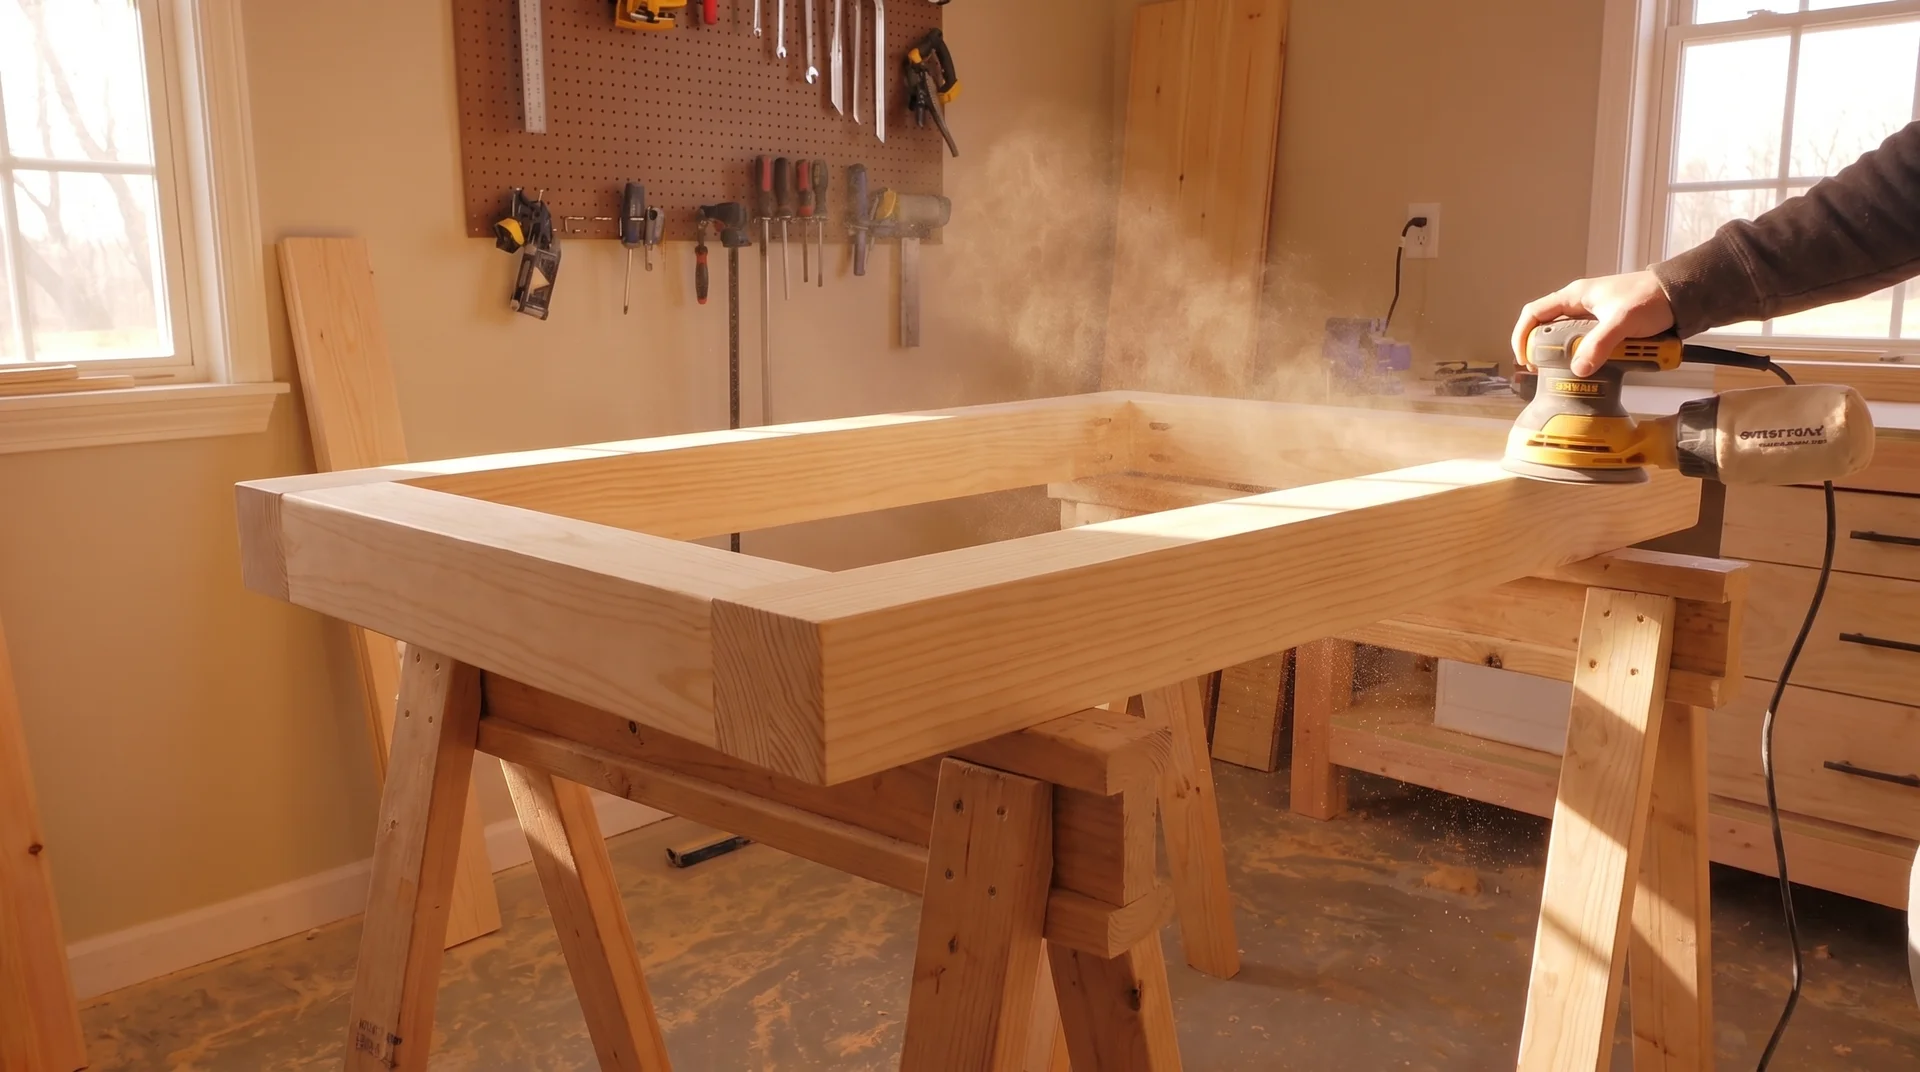
The Diagonal Check: Do Not Skip This Step
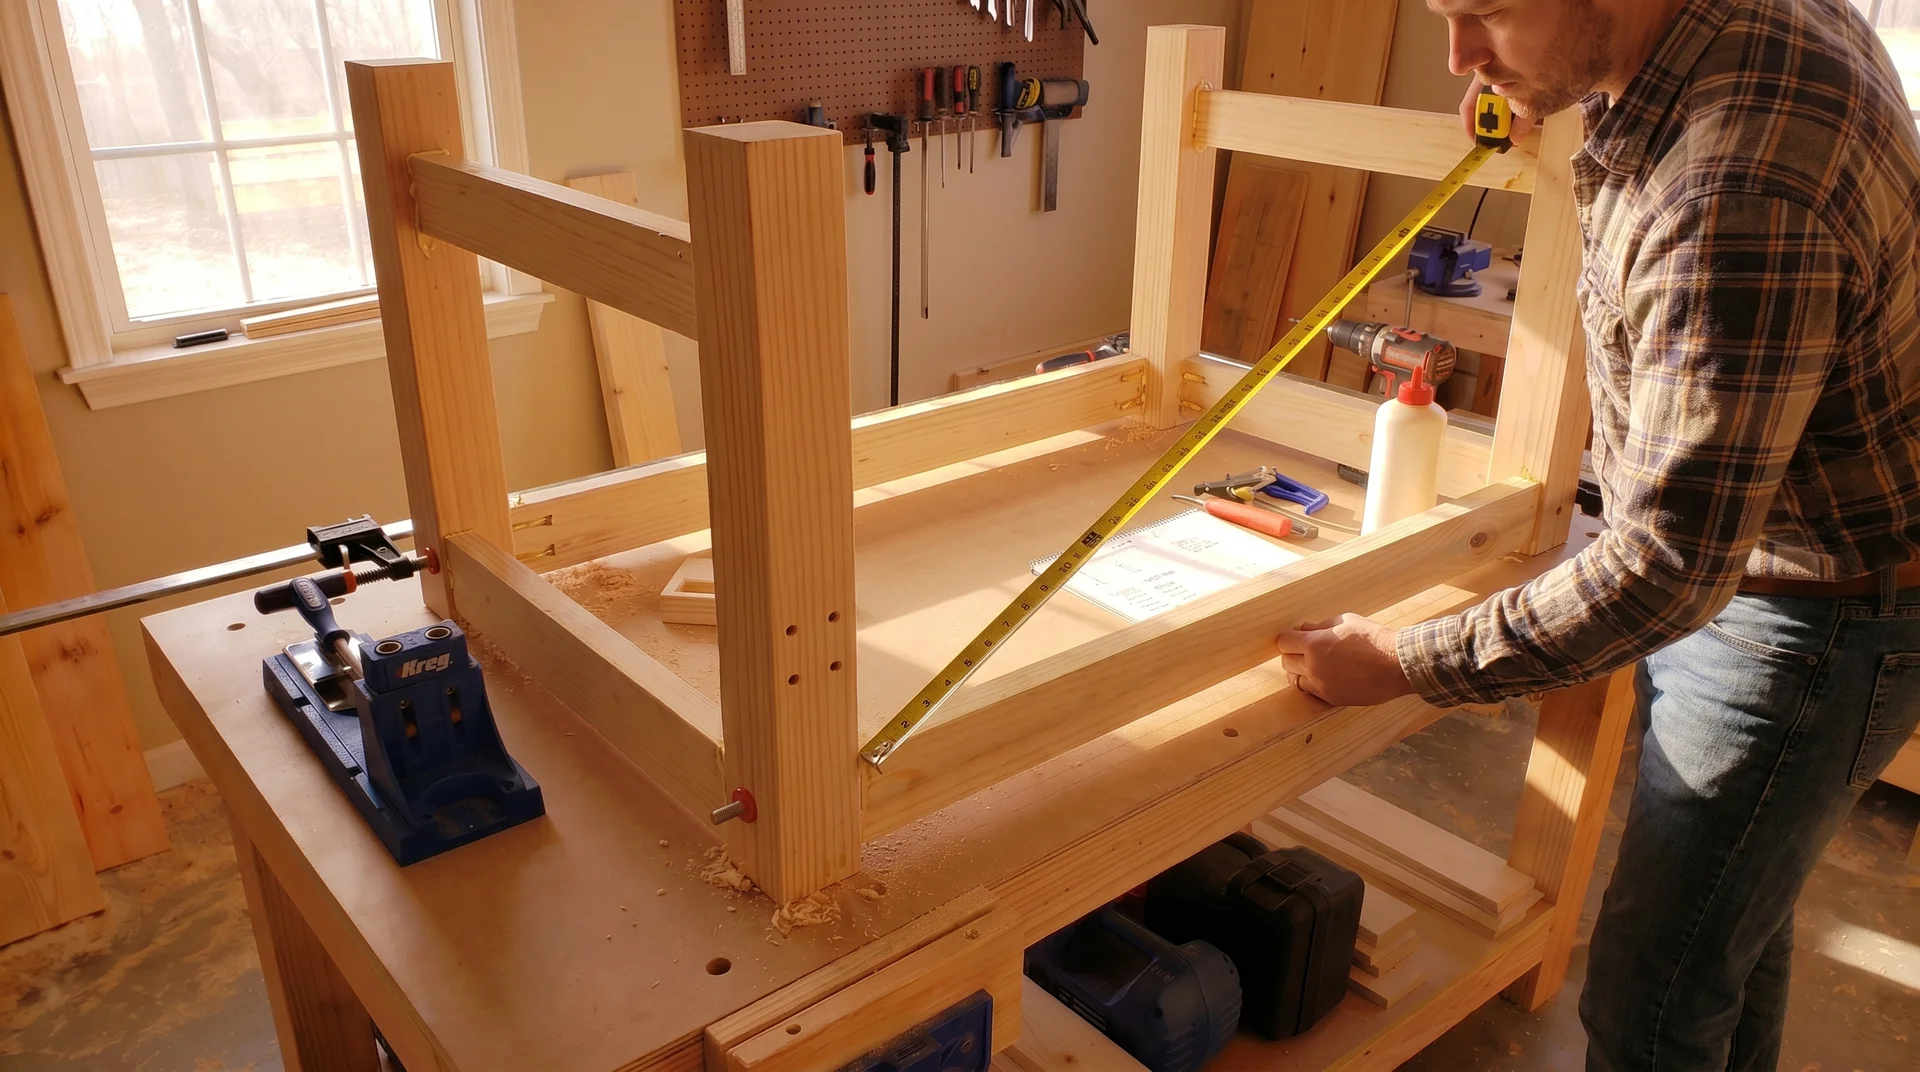
Measure both diagonals of the base frame before the glue cures. Measure from the outside corner of one leg to the outside corner of the opposite leg, then repeat for the other diagonal. If both measurements match within 1/8 inch, the base is square.
If they don’t match, the base is racked: one pair of opposite corners is farther apart than the other.
This shows as a twist in the finished table when you set it on the floor and look across it from a low angle. A racked base is visible from the doorway.
To correct it: apply pressure across the longer diagonal by hand or with a clamp until the measurements equalize. Hold it there until the glue sets. This is a two-person job on a large base.
Recheck after the glue has cured for 30 minutes. The base can drift slightly as the glue grabs. If it has moved, adjust and hold again.
Adding Interior Supports
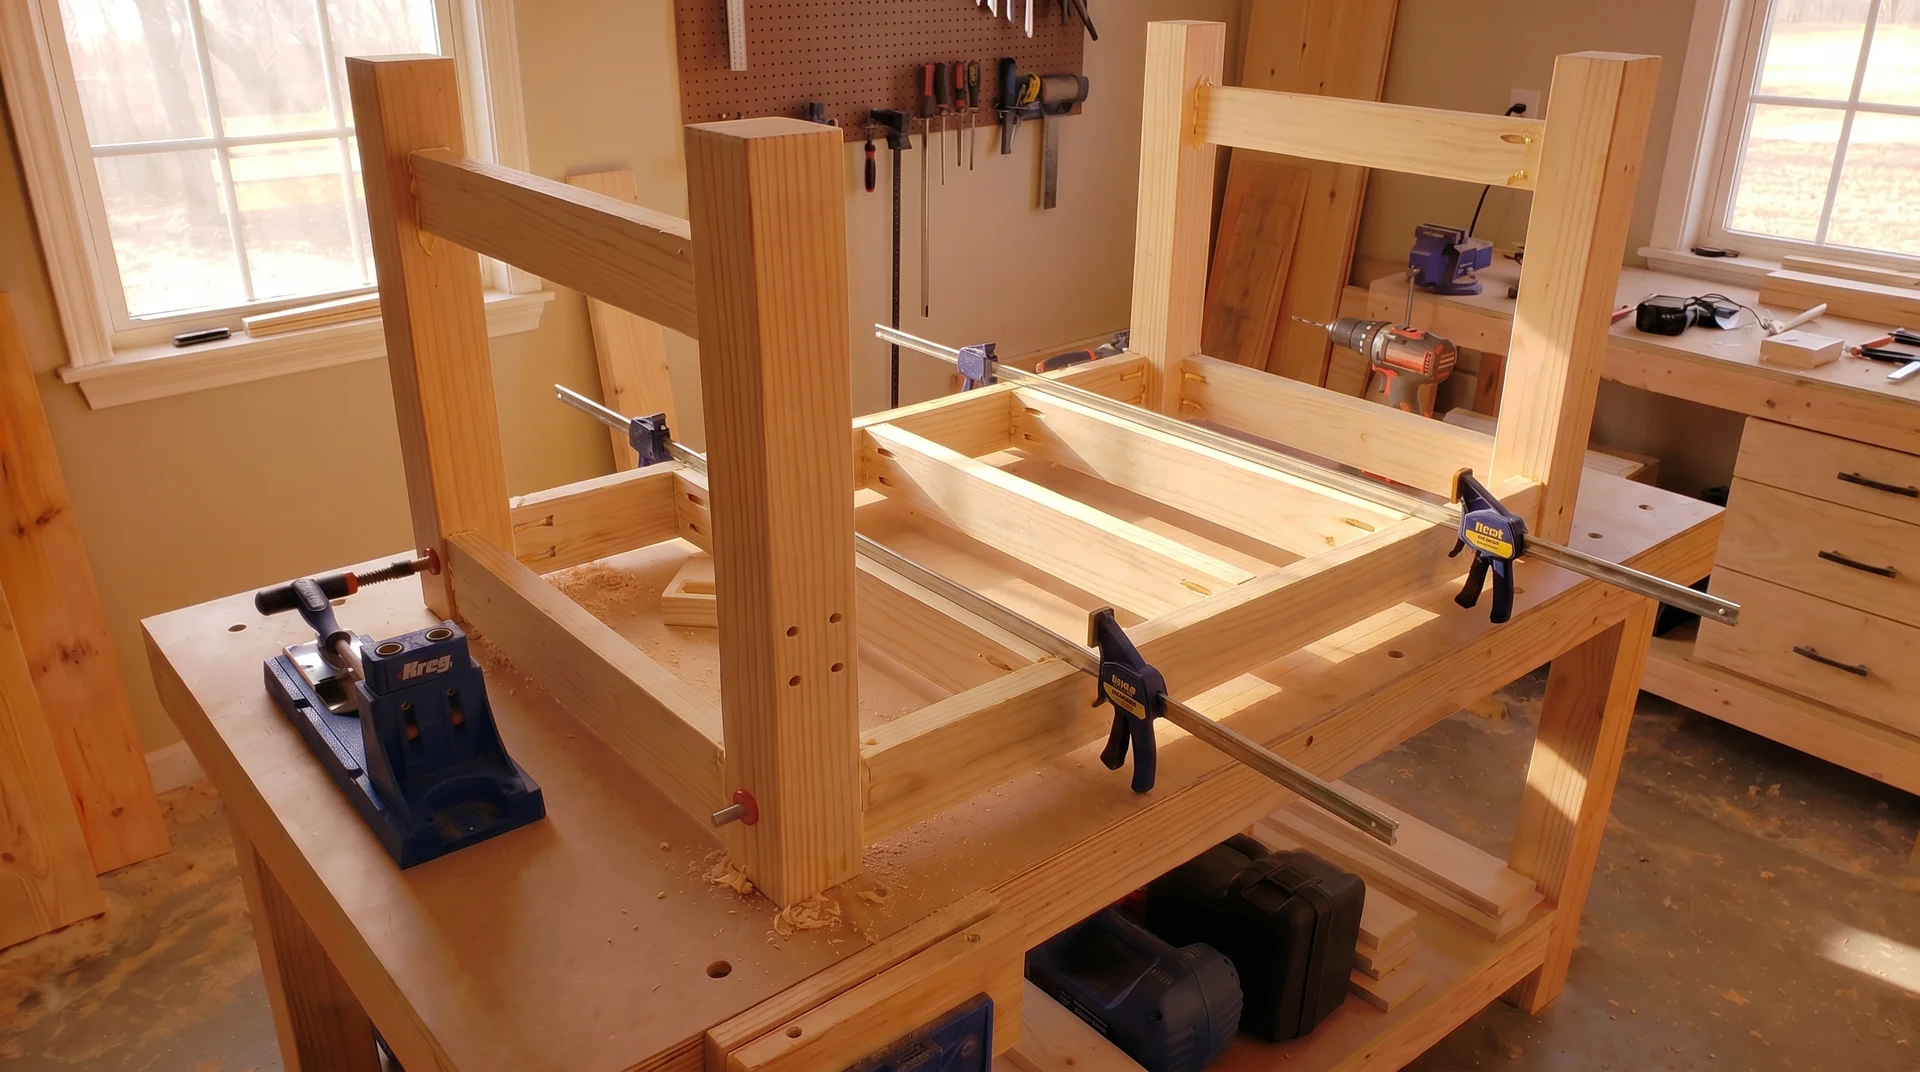
Interior supports are 2×4 pieces running between the long apron pieces, flush with the top edge of the apron. Install at least two, spaced evenly between the short apron pieces. They carry the tabletop’s weight and give you places to drive the top-attachment fasteners.
- Attach them with pocket holes driven from the interior of the base outward into the long apron pieces.
- Position them with the top face flush with the top face of the apron.
- Run a straightedge across the top of the whole assembly after installation.
Any support sitting even slightly proud will create a high point under the tabletop that you’ll feel every time someone presses down on that spot.
Before the base is turned upside down for top attachment, drill the attachment holes in the interior supports. Access from above is much easier than access from below.
If you’re using figure-8 fasteners, countersink the recess now while the supports are still accessible. If you’re using Z-clips, cut or rout the slot now.
Finishing the Base Before the Top Goes On
Paint or stain the base before attaching the top. Every woodworker who has tried to paint around a tabletop already in place knows this.
Sand the whole base to 150-grit before finishing. Pay attention to the apron corners and the junction between the apron face and the leg face.
These are the places that collect drips and brush marks when you try to finish after assembly.
Apply primer before painting on a base that will be painted. Two coats of paint after primer is the minimum on a surface that chairs will contact and hands will push against daily.
Let the finish cure fully before setting the tabletop on. Water-based finishes need at least 48 hours; oil-based finishes need longer.
