Mold in a dishwasher is common, identifiable, and fixable. The door seal is the reason most cleanings don’t hold is the step everyone skips
The five-step protocol below covers every accessible surface in the right order, with the right method for each one.
The second half covers why mold returns after a correctly executed cleaning, because that answer changes the long-term result more than the cleaning method does.
What to Look for in a Moldy Dishwasher
Dishwashers grow mold reliably.
The Fungus in Your Dishwasher Is Not Ordinary Mold
Using a dishwasher with visible mold is generally safe for healthy adults, but the mold warrants immediate cleaning. The specific fungi found in most dishwashers are opportunistic pathogens that pose an elevated risk mainly to people who are immunocompromised.
A 2016 study in PLOS ONEsampled 30 residential dishwashers across nine internal sites. It found 503 fungal strains from 84 separate species.
The most prevalent species on rubber seals was Exophiala dermatitidis, a black yeast.
It appeared in 47% of the machines tested. Colony counts on gasket surfaces reached up to one million per square centimeter. An earlier 2011 study sampled homes across 101 cities on six continents and found fungi on the door rubber in 62% of dishwashers.
E. dermatitidis is classified as an opportunistic pathogen. It causes serious problems mainly in people who are immunocompromised or who have cystic fibrosis. For otherwise healthy adults, the direct risk from routine dishwasher use is low.
I’ll put it plainly: clean the dishwasher because mold in a food-contact appliance warrants a proper response, not because this specific fungus is likely to make a healthy adult ill.
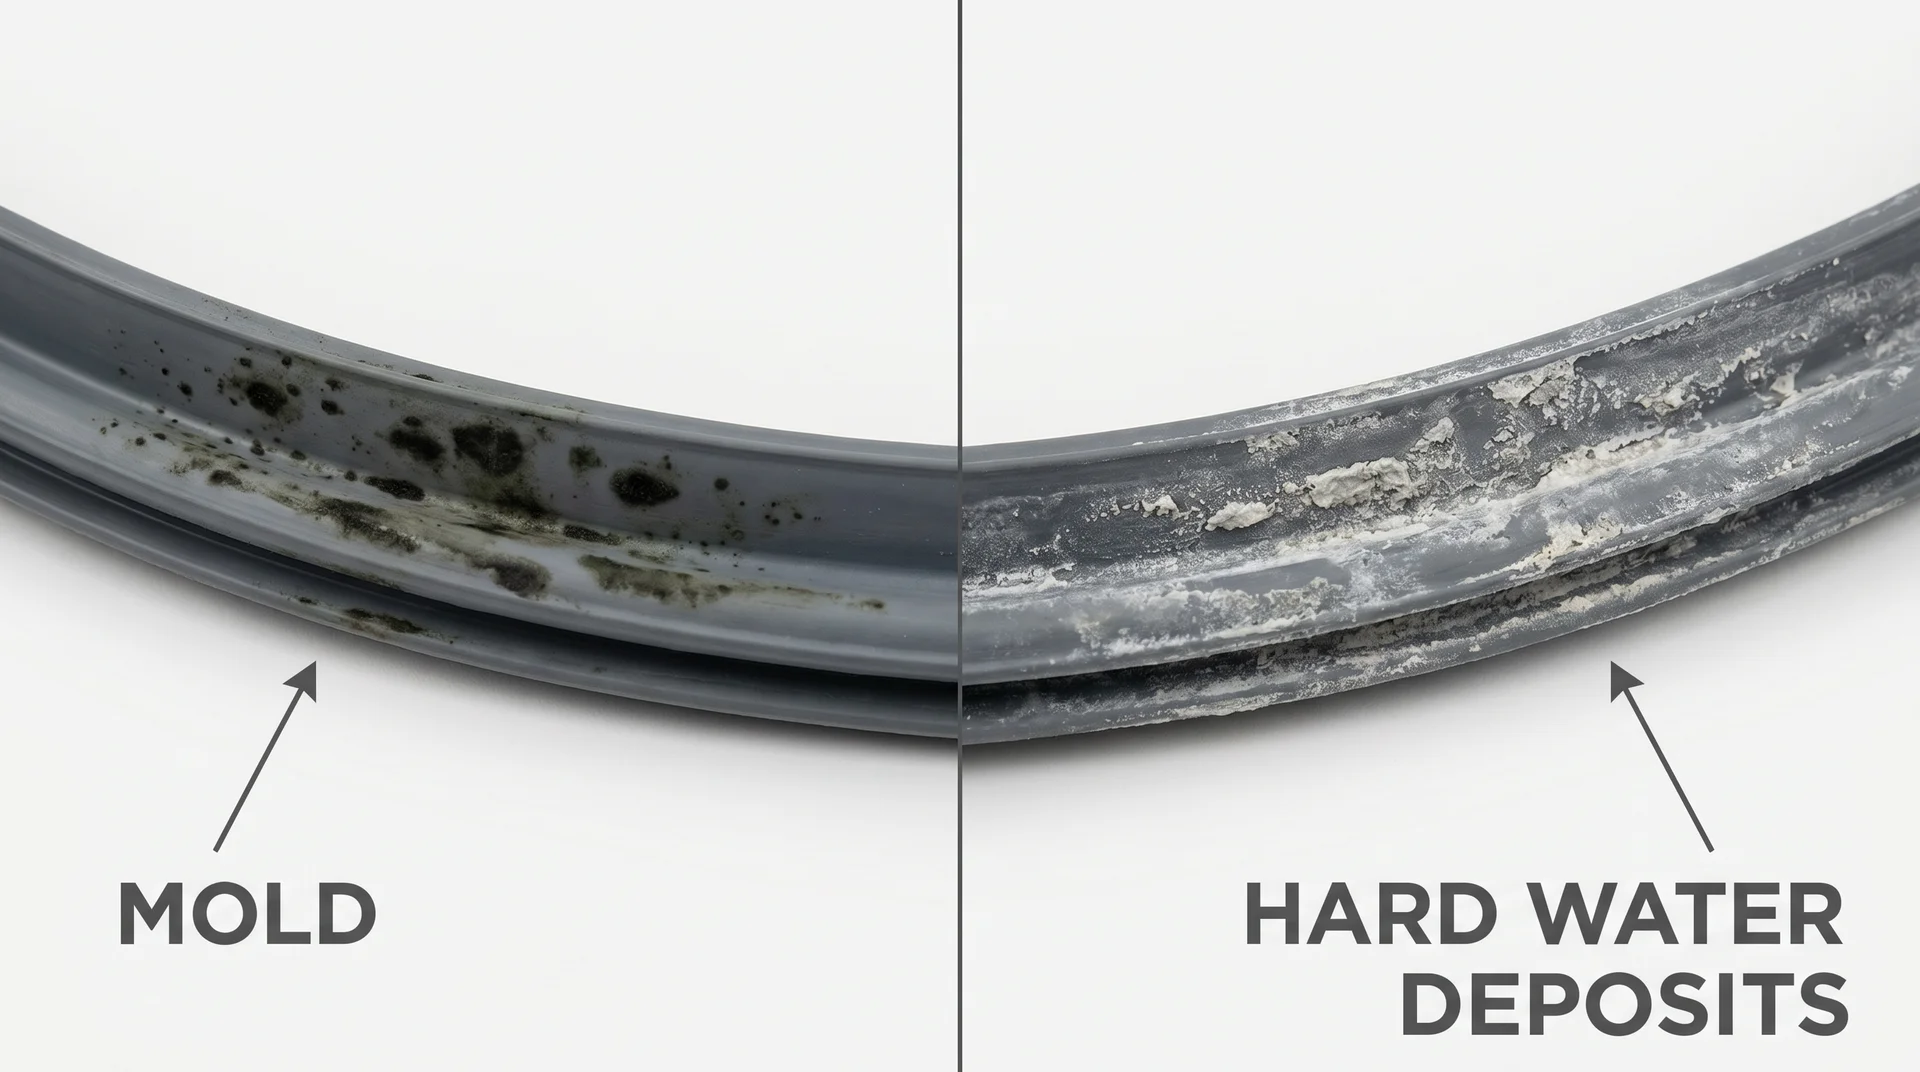
Is It Mold or Mineral Buildup?
Not every dark mark inside a dishwasher is mold, and identifying what you’re looking at changes how you treat it.
- Black or greenish spots that smear when wiped with a damp cloth are almost certainly mold or mildew.
- White or gray crusty residue that does not smear is mineral scale from hard water, which calls for a citric acid treatment rather than a mold protocol.
Gritty particulate settled at the bottom of the tub or around the drain is food debris, not fungal growth. A persistent musty smell when the door opens is the most reliable early signal that mold has established somewhere in the appliance, even if nothing is visible yet.
Where Mold Concentrates
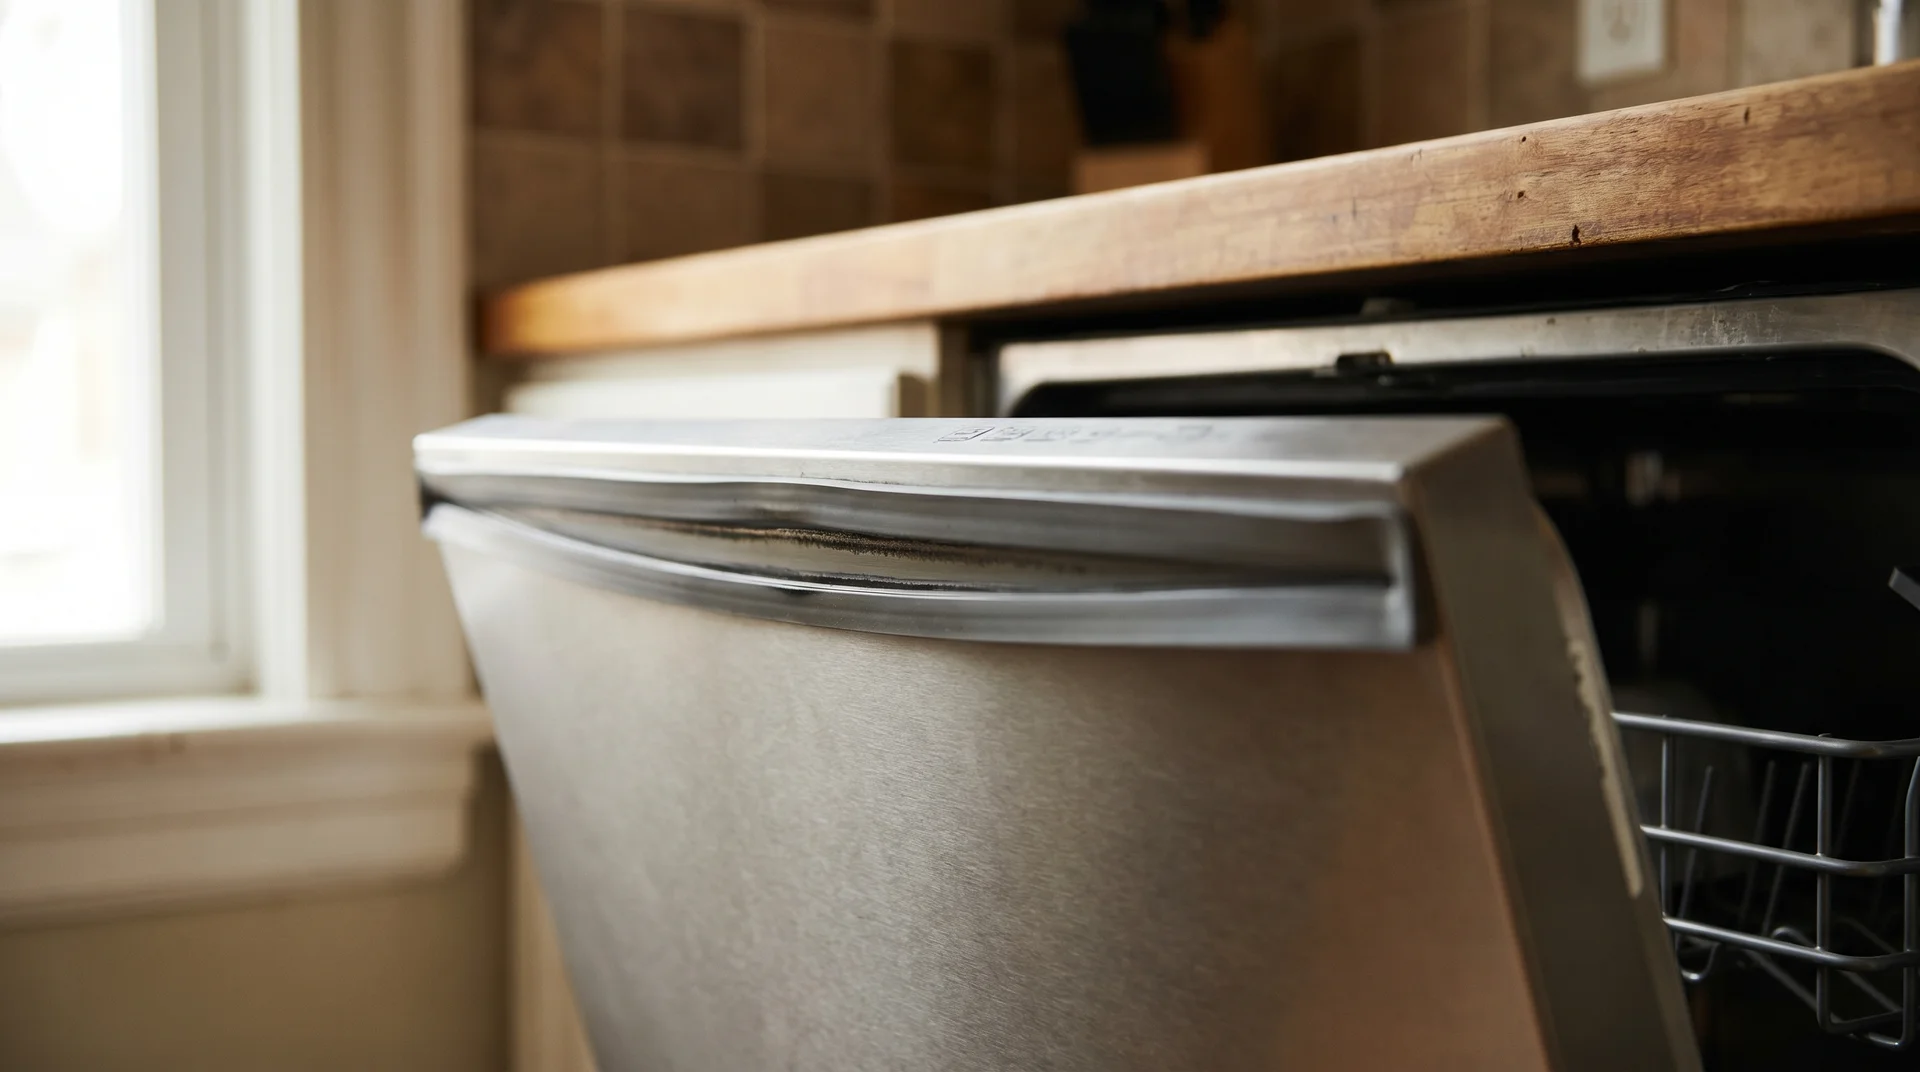
Mold establishes in predictable locations, and the door gasket leads every list. The gasket is the rubber seal running along the inside edge of the door. The 2016 PLOS ONE research found it was contaminated in 57% of machines tested, the highest rate of any site in the appliance.
Other contaminated sites, in order of frequency:
- Side spray arm nozzles were found to be contaminated in 50% of machines
- Door interior (47%)
- Drain area (43%)
- Interior walls (23%)
- Detergent and rinse-aid dispensers (10 to 13%)
The gasket is the hardest site to treat correctly because it is porous rubber. Every other interior surface is smooth steel or plastic. That distinction is the reason Step 2 looks different from every other step in this guide.
How to Clean a Moldy Dishwasher
Work through these five steps in sequence, on a completely empty machine.
What You Will Need:
- Rubber gloves
- Old toothbrush or stiff-bristle cleaning brush
- Bottle brush
- Soft cloth or microfiber cloth
- Distilled white vinegar
- Dish soap
- Baking soda (optional, for odor only)
A note on bleach before you start.
Bleach is an effective fungicide on non-porous plastic and porcelain surfaces. It is not appropriate for stainless steel interiors.
The chloride ions in sodium hypochlorite attack the passive oxide layer that gives stainless steel its corrosion resistance, which is the thin, invisible coating that prevents rusting. That damage accumulates over repeated use and cannot be reversed. If your dishwasher has a stainless steel interior, skip the bleach entirely.
Also: never mix bleach with vinegar or other cleaning products. The combination produces toxic chlorine fumes. The protocol below works for both stainless and non-stainless interiors without bleach.
If you prefer added caution before handling the drain area and door seal with wet cloths, switch off the circuit breaker to the dishwasher at your panel before starting. It is not required for a dry manual scrub, but it is a reasonable precaution around water and electrical components.
Step 1: Remove and Clean the Filter
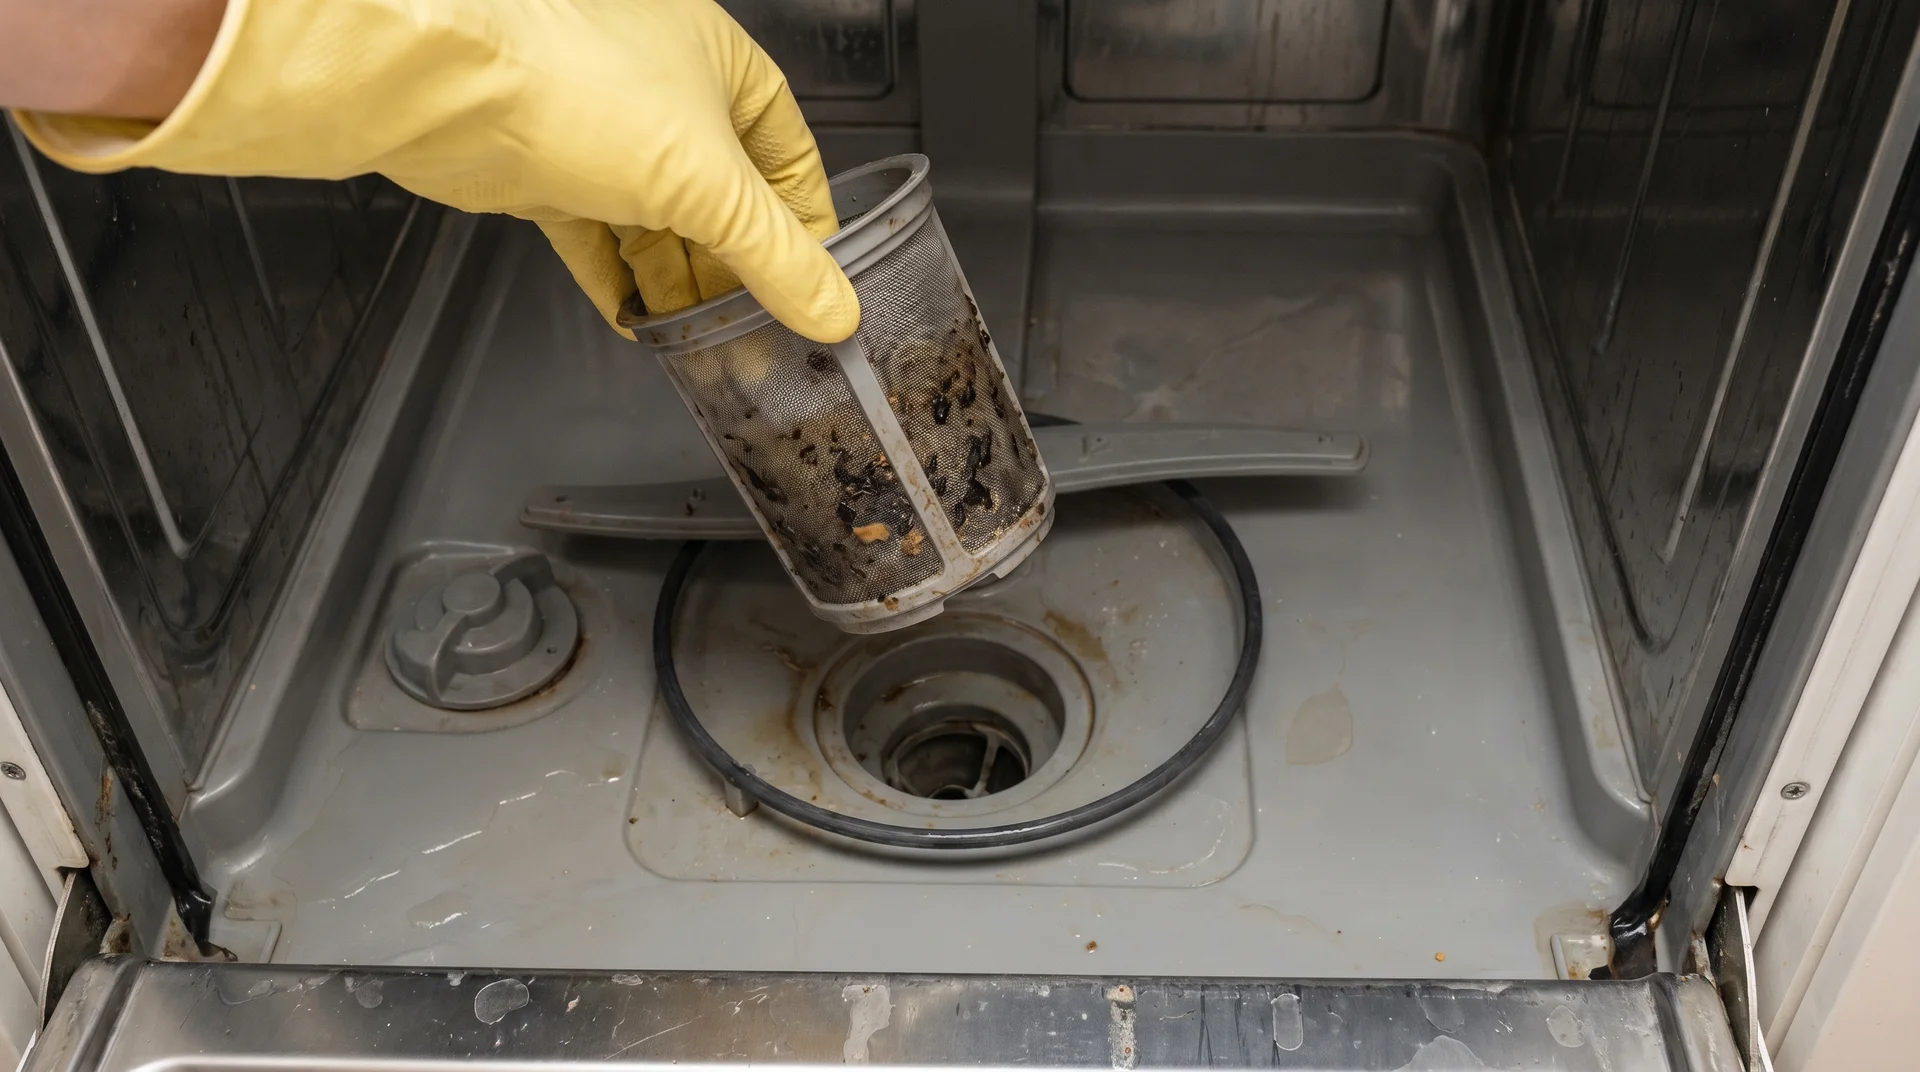
The filter is where mold and odor problems most often start, and cleaning it first makes every subsequent step more effective. Two filter types exist in residential dishwashers:
- Manual-clean filters trap food debris in a removable basket. These are common in modern quiet dishwashers and require regular rinsing. If your machine runs quietly, it almost certainly has this type.
- Self-cleaning filters use a grinder mechanism to pulverize debris and send it down the drain. Common in older, noisier models. These generally do not require manual removal.
To clean a manual-clean filter:
- Pull the bottom rack out and locate the filter in the tub floor.
- Rotate the filter cylinder counterclockwise to release it.
- Rinse under hot running water.
- Scrub the mesh with a toothbrush and a drop of dish soap. For compacted debris, soak in warm soapy water for ten minutes first.
- Reinstall the filter completely before moving to the next step.
Running any cleaning treatment through a clogged filter environment reduces its effectiveness. It also leaves the drain area as an active mold site throughout the rest of the process. The filter step is not optional.
Step 2: Address the Door Gasket Directly
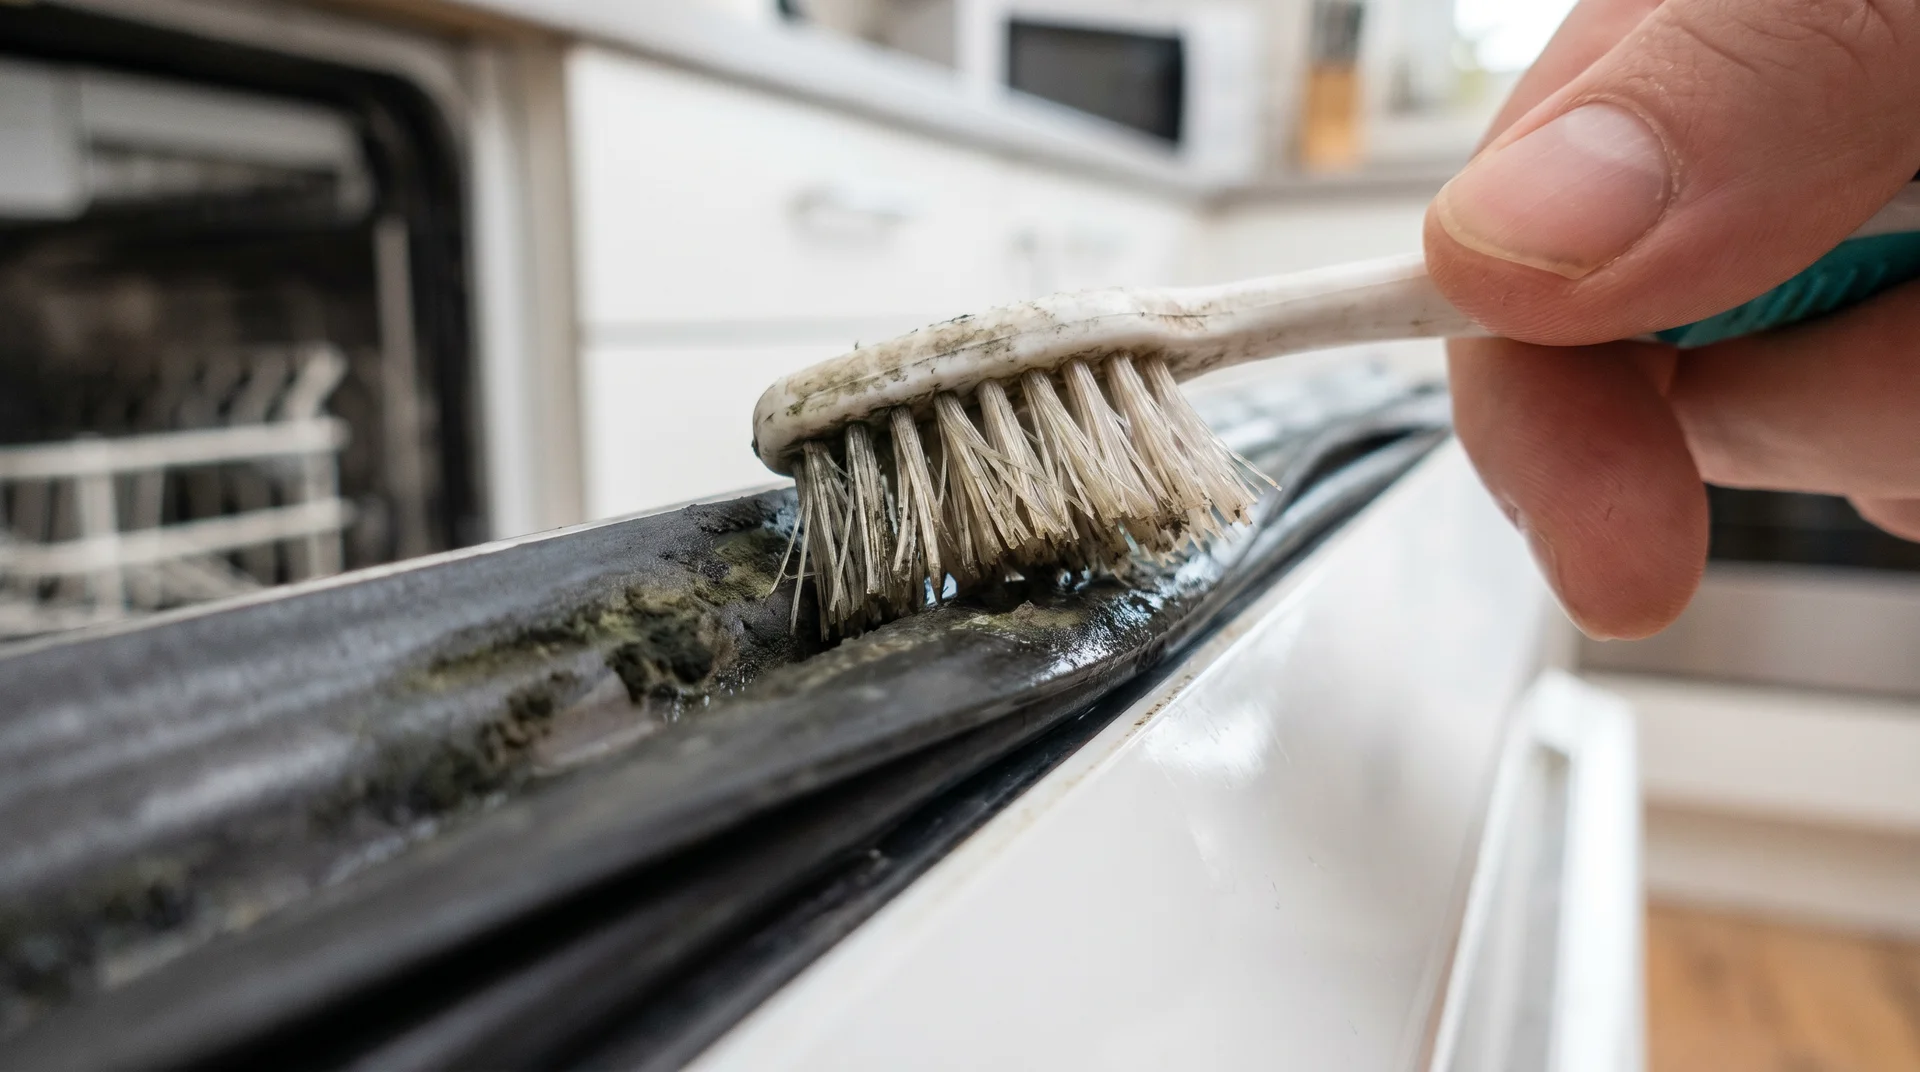 The gasket requires direct application and sustained contact time. A vinegar rinse cycle will not treat it.
This is the step most cleaning guides handle incorrectly. It is also why mold returns within two weeks of a cleaning that felt complete.
Surface type determines the method since the door gasket is porous rubber.
EPA guidance on surface disinfection distinguishes porous from non-porous materials because the mechanism works differently on each.
On porous surfaces, a cleaning agent that contacts the surface briefly and then drains away provides negligible functional contact time.
Many EPA-registered fungicides specify a contact time of ten minutes on porous surfaces, a threshold that a brief cycle rinse cannot meet.
A vinegar rinse cycle hits the gasket for seconds on its way through the machine and washes off. The fungal colonization embedded in the rubber material stays.
The correct sequence, surface type addressed first:
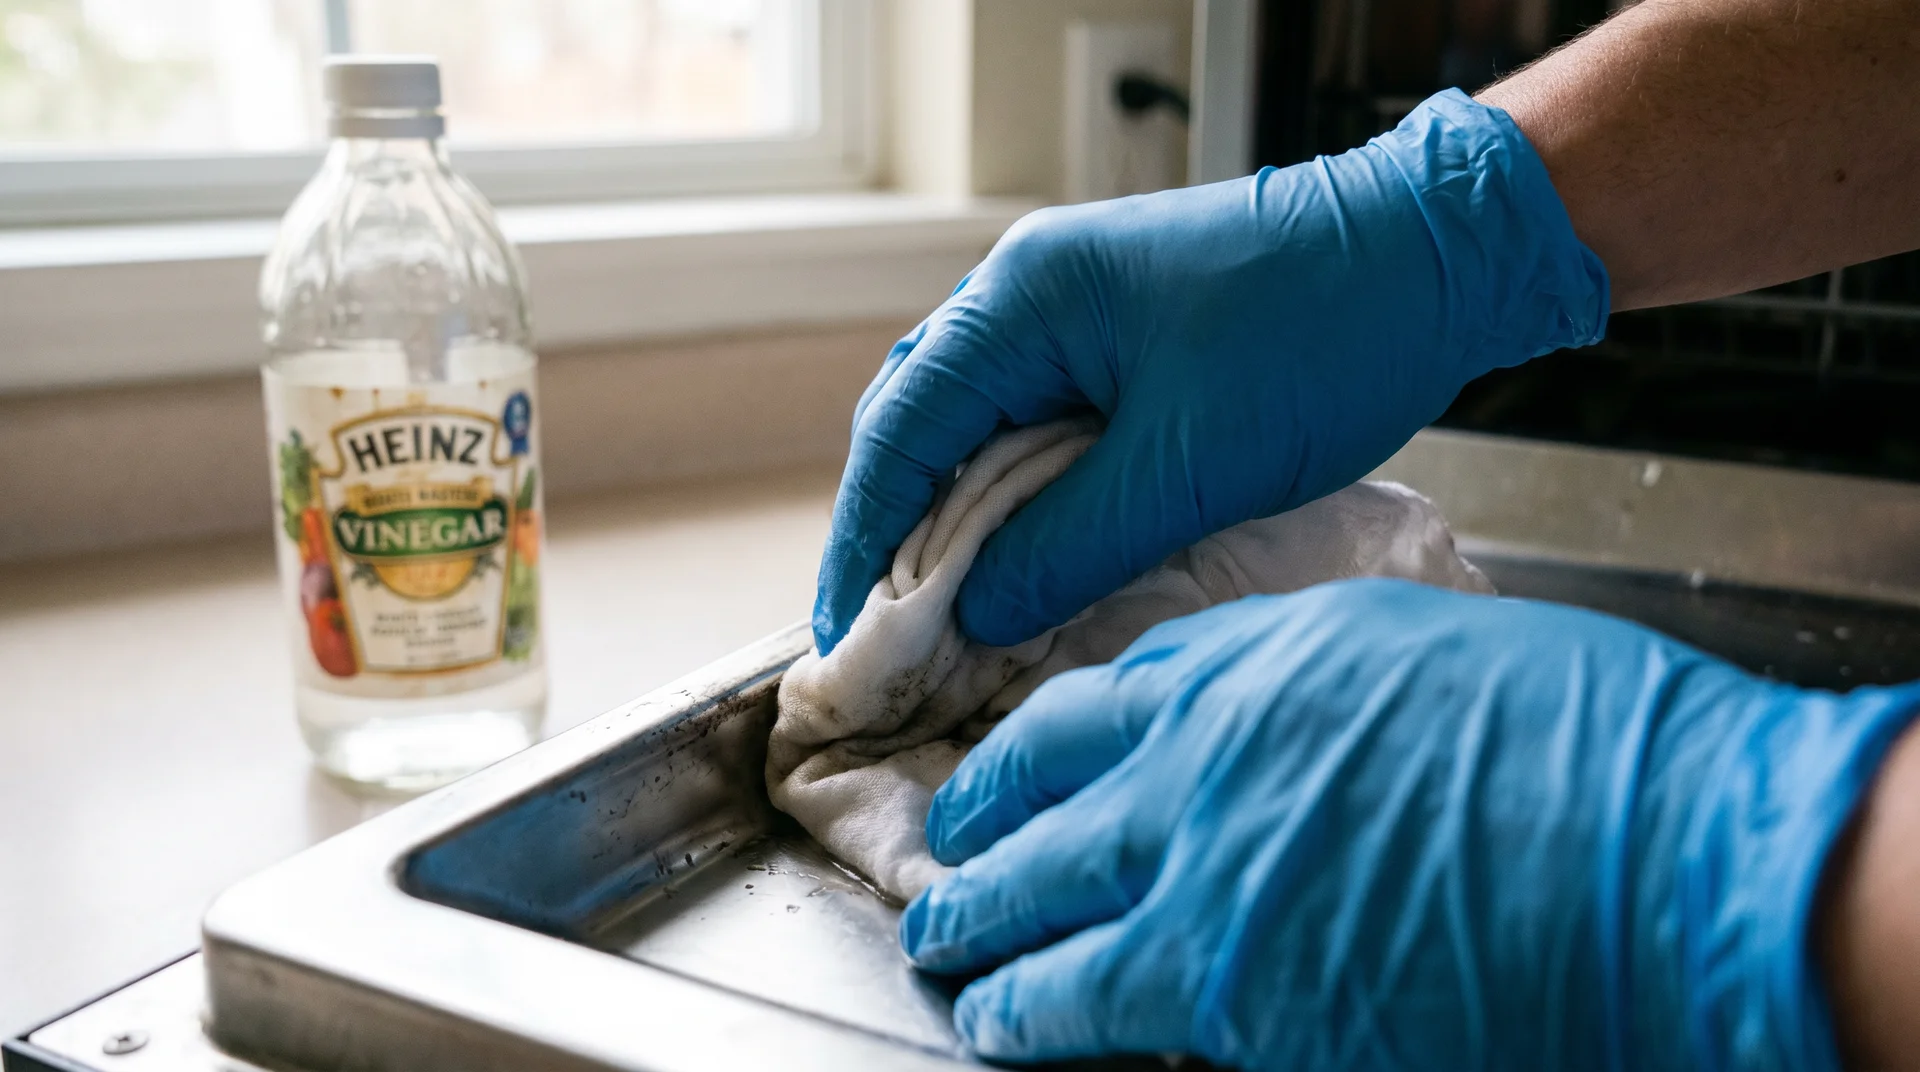
- Put on rubber gloves.
- Dampen a cloth with undiluted white vinegar.
- Work the cloth into every fold of the gasket along its full length.
- Allow the vinegar to remain on the gasket without wiping it away for at least ten minutes. Set a timer. This step is the one that matters.
- Use a toothbrush to scrub through every fold and crease, concentrating on the inner lip where water pools between cycles.
- Wipe the gasket clean with a damp cloth and inspect every fold. If visible mold growth remains, repeat steps 2 through 5.
Embedded black pigmentation in the rubber may not clear completely, even after multiple treatments. Some staining goes into the rubber matrix itself. That is a material limitation, not a failed cleaning. Reducing the live fungal load is the goal, and sustained contact time accomplishes that.
If the gasket has visible tears or cracks, or sections that cannot be reached manually, replace it. Replacement gaskets are standard parts for most major brands and are widely available. That is an appliance maintenance task, not an escalation of the cleaning protocol.
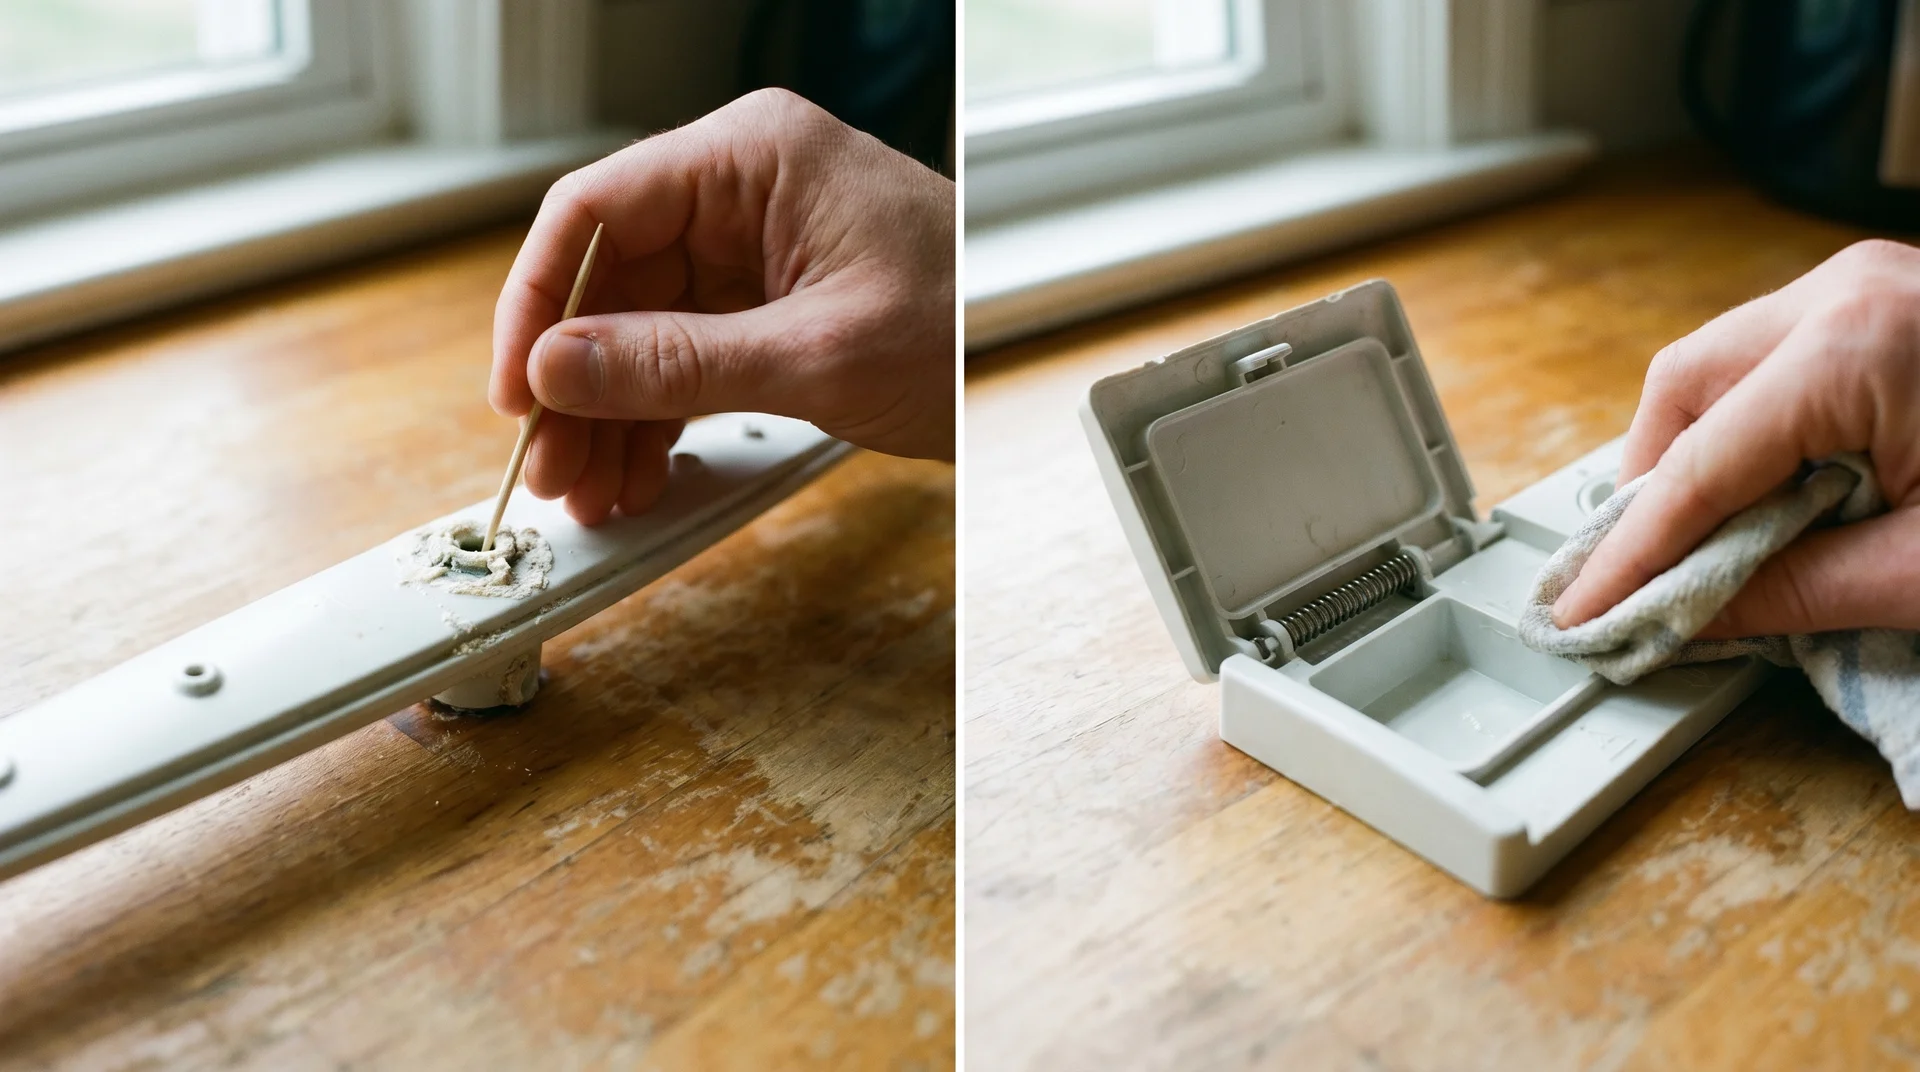
Step 3: Clean the Spray Arms and the Detergent Dispenser
Both of these sites collect the residue that feeds mold growth and are left untreated by most cleaning guides.
The spray arm holes trap food debris and mineral scale, creating pockets where moisture holds between cycles. Most lower spray arms lift free with a gentle upward pull or by turning a plastic retaining nut.
Rinse under hot running water. Use a toothpick to clear any blocked holes. For heavy scale, soak the arm in warm vinegar for fifteen minutes before rinsing, then repeat with the upper arm if your machine has one.
For the detergent dispenser: wipe the compartment and surrounding housing with a vinegar-dampened cloth, and work a toothbrush into the corners and the hinge mechanism. Leave it open to dry while you continue.
If you move past the dispenser without treating it, you’re leaving a site that stays damp and residue-covered through every subsequent cycle.
Step 4: Wipe Down the Interior Tub and Door
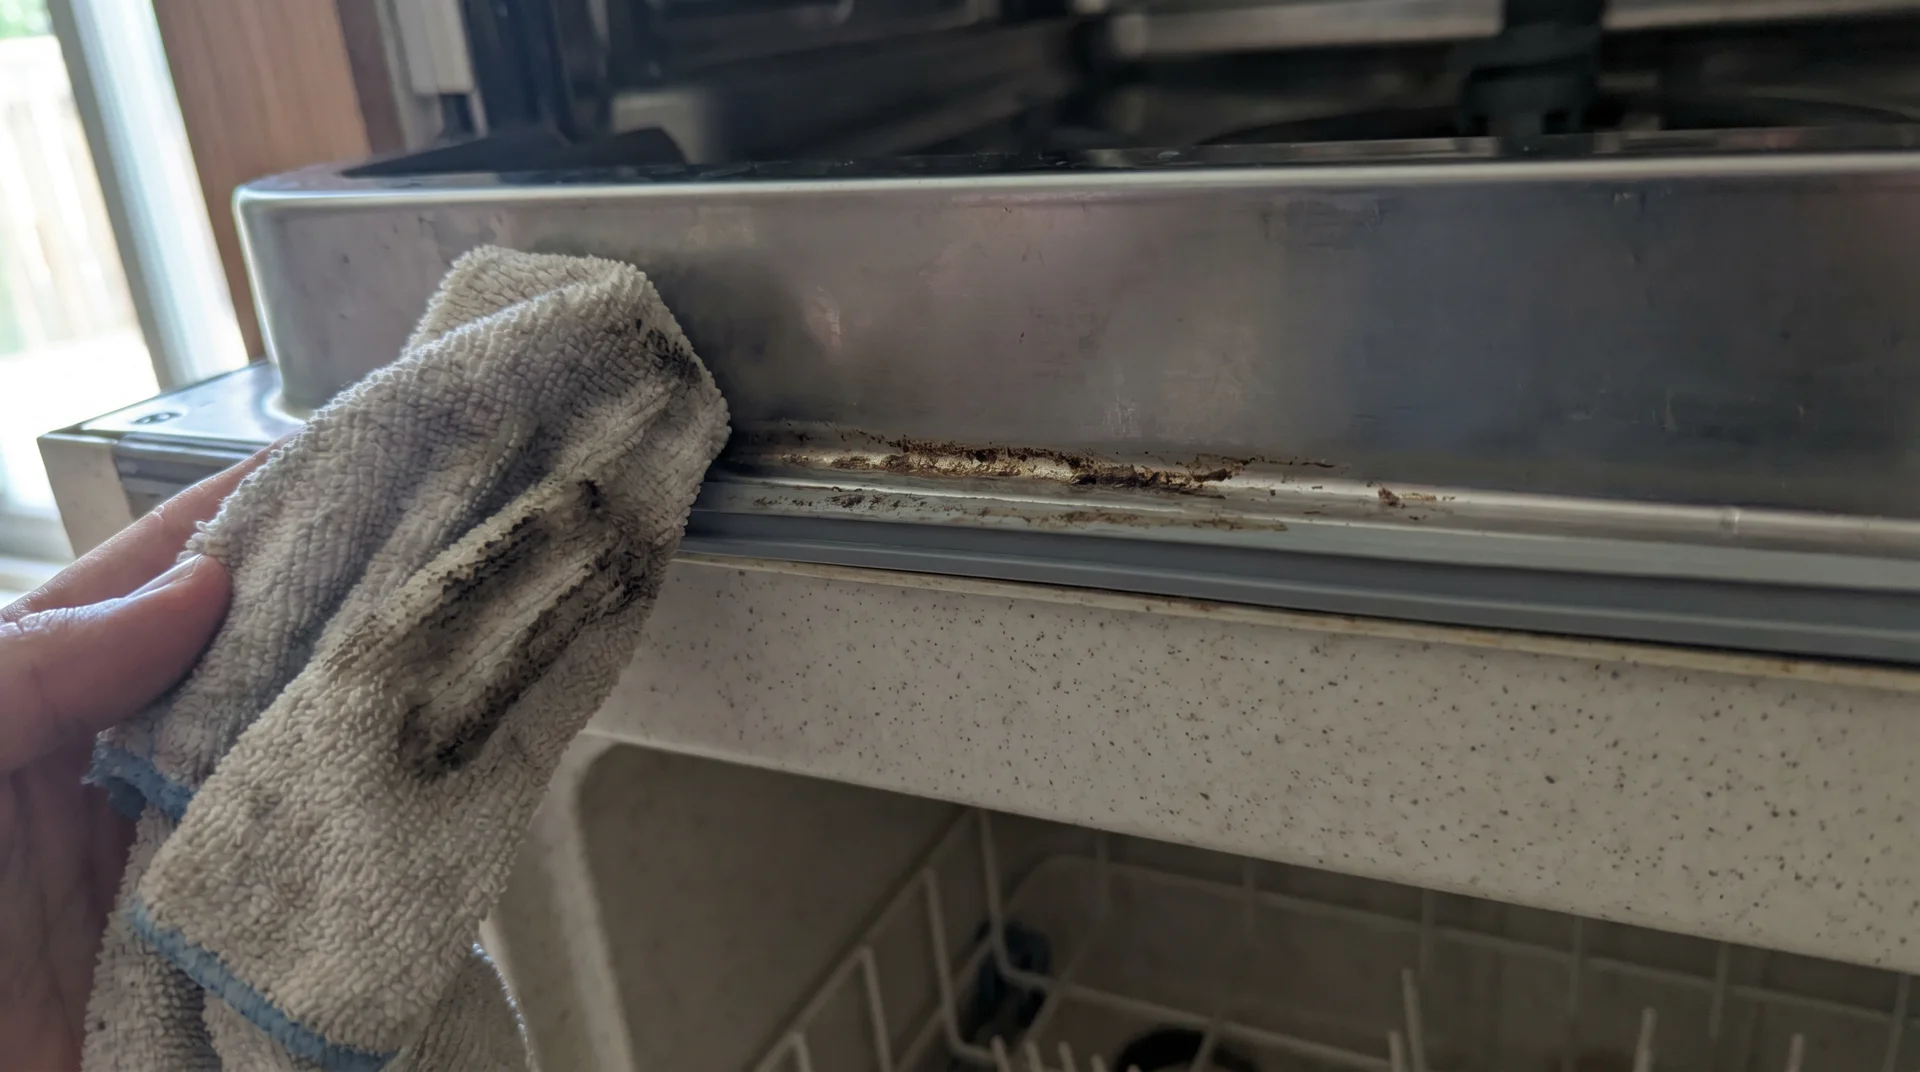
The steel and plastic interior surfaces are non-porous, so a thorough wipe-down is what they need. Work a vinegar-dampened cloth across the top, sides, and floor of the tub.
Follow with the full interior face of the door.
One area most people consistently miss: the bottom edge of the door interior. No wash cycle reaches this area with direct spray.
Debris collects there passively across dozens of cycles. It is a reliable odor source. Wipe it at every cleaning.
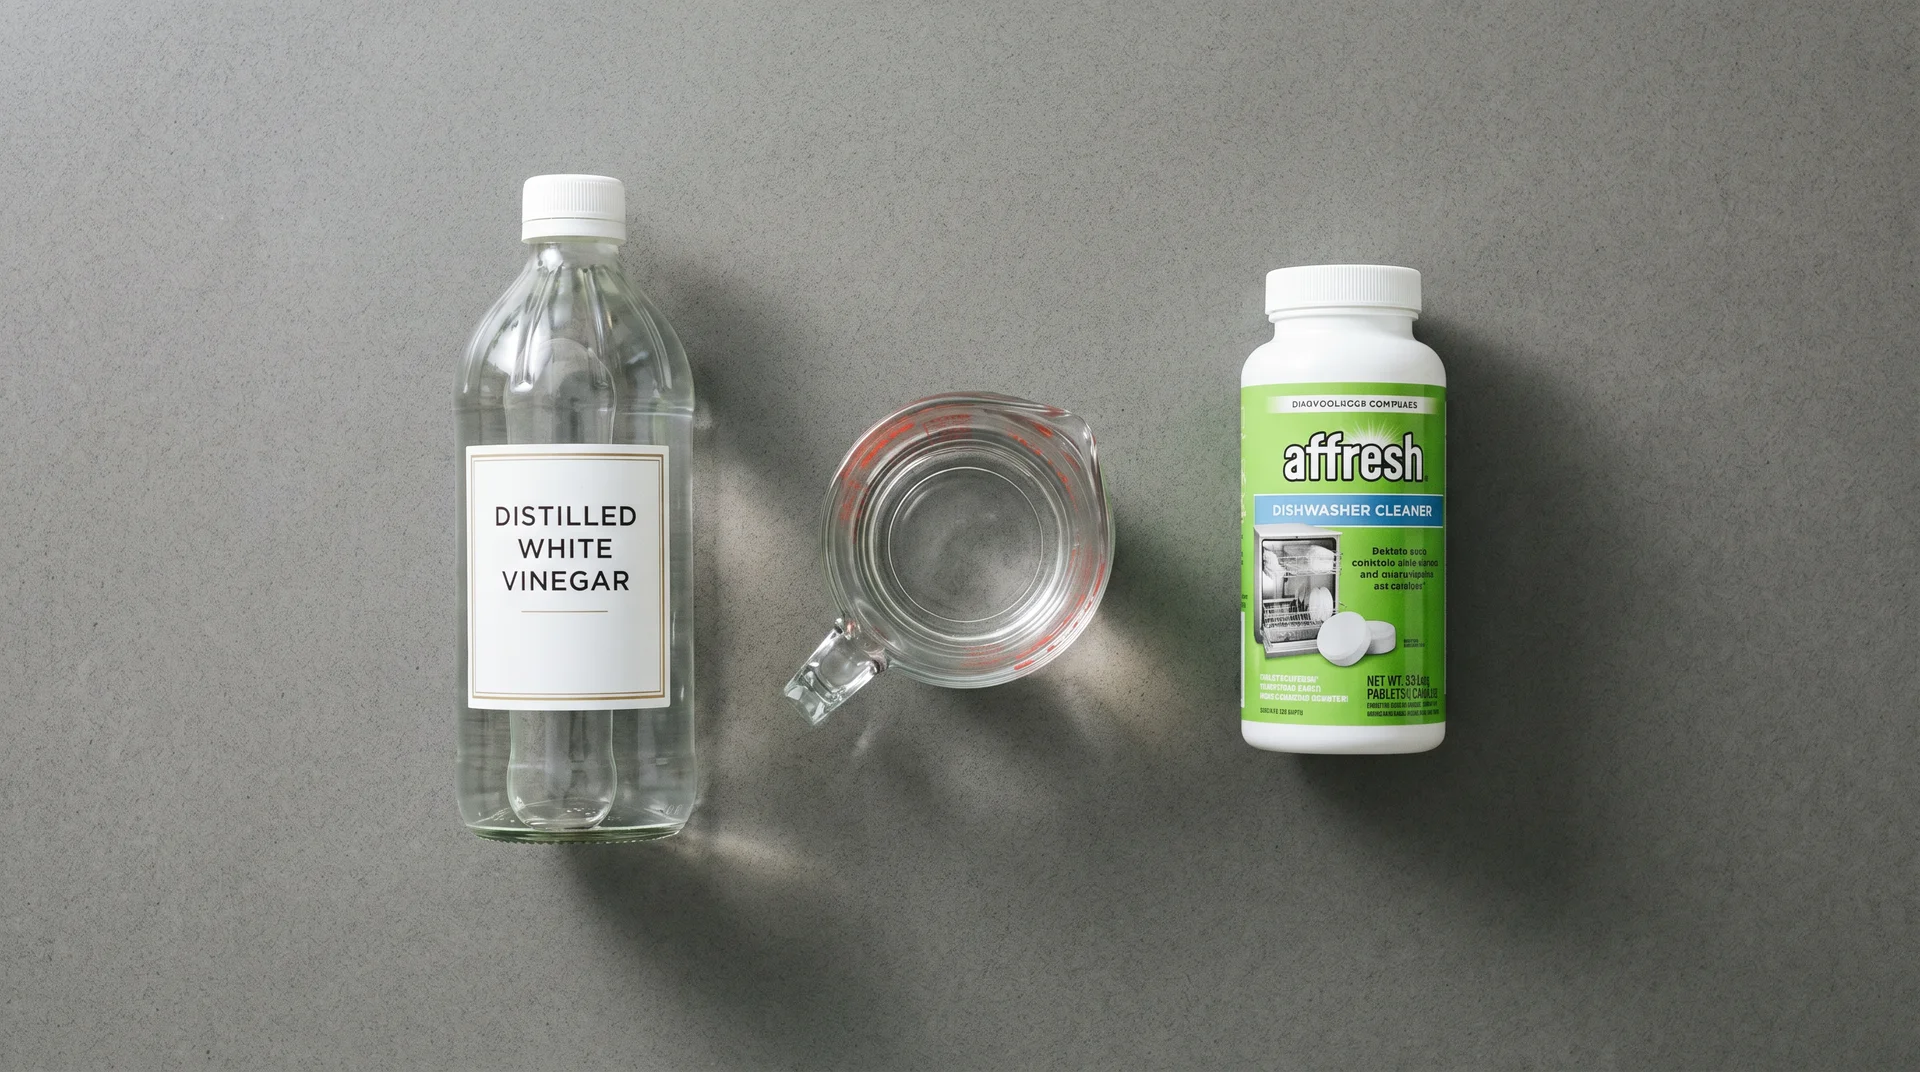
Step 5: Run the Sanitizing Cycle

The vinegar cycle is the last step in this protocol, not the primary one. It treats the non-porous interior surfaces you have already wiped manually.
Place one cup of distilled white vinegar in a dishwasher-safe container on the top rack and run a full empty cycle at the hottest setting available.
On what this step actually accomplishes: white vinegar contains 5 to 8 percent acetic acid.
Research published in the International Journal of Environmental Research and Public Health found that vinegar at 4 percent acetic acid inhibited the growth of Penicillium chrysogenum, a common household mold found in damp environments.
The same study found it less effective against Aspergillus fumigatus. The label on white vinegar does not specify its fungicidal range. The research data does. Use the cycle as a meaningful final treatment for the tub and plastic surfaces, not as a comprehensive mold solution.
Some guides recommend following the vinegar cycle with a baking soda cycle. Baking soda absorbs odors. It does not kill mold.
Why Mold Keeps Coming Back
If the mold returned after a thorough cleaning, the cleaning is probably not the problem.
The Door Is the Problem

Closing the dishwasher door immediately after every cycle is the most consistent driver of mold recurrence, and cleaning guides almost never address it.
After a hot wash, the interior is warm and fully saturated with humid air. When the door closes, that air stays trapped in a dark, enclosed space. The interior remains warm and humid for hours.
Those are exactly the conditions the 2016 PLOS ONE research identifies as the selective environment for Exophiala and related species. The dishwasher’s warmth and residual humidity between cycles specifically favor fungi that can tolerate heat and detergent. Both conditions come directly from closing the door.
Leaving the door open or ajar for one to two hours after every cycle allows the interior to dry to ambient humidity. Mold requires sustained moisture to establish. Without it, the interior is no longer selectively favorable for the species that have been colonizing your gasket. No product is involved.
I track what surfaces were cleaned and when on a whiteboard in my kitchen. The single change that produced the longest gap between mold appearances was not a different cleaning product or a more thorough scrub. The correlation is consistent enough that I’d stake the recommendation on it.
The door habit matters more than any cleaning schedule change.
For households with young children or pets: a fully open dishwasher door is a safety hazard. Propping the door one inch with a folded kitchen towel provides adequate ventilation while keeping the door controlled. I’ve used this approach for years without issue.
The Cleaning Cadence That Actually Works
Monthly cleaning is appropriate for a well-maintained dishwasher. A recovering one needs a different starting point. For a dishwasher coming off an active mold problem, start with direct gasket treatment every two weeks for the first two months.
Once active growth stops returning between cleanings, move to the monthly schedule. That is two additional ten-minute applications before reaching the maintenance phase.
What to Use in a Stainless Steel Dishwasher
Stainless steel interiors rule out bleach.
My father spent thirty years as a commercial kitchen inspector for Baltimore City. His answer to any mold problem is always bleach. He is not entirely wrong.
He is also not entirely right, and the distinction matters here. Bleach works as a fungicide on non-porous plastic and porcelain surfaces with adequate contact time.
On stainless steel, the chloride ions attack the protective oxide layer, and the damage accumulates. Beyond the material concern, bleach in a rinse cycle still doesn’t solve the gasket problem. Porous rubber requires sustained dwell time, and no cycle delivers that regardless of the product.
For stainless steel interiors, undiluted white vinegar with the direct application protocol from Step 2 is the correct approach for the gasket.
For the tub, run the standard vinegar cycle described in Step 5. The acetic acid research supports this as the appropriate treatment for this interior type. No additional product is needed.
Citric acid-based commercial cleaners like Affresh and Finish Dual Action work well for regular tub maintenance. They dissolve mineral scale and food film, which reduces the available substrate for mold growth.
A Maintenance Schedule That Prevents Recurrence
This schedule assumes the active mold has been cleared using the five-step protocol above. It is a prevention routine, not a cleaning one.
| Task | Frequency |
|---|---|
| Leave the door open or ajar after each cycle | Every use |
| Wipe the door gasket dry with a cloth | Weekly |
| Remove and rinse the filter under hot water | Every two weeks (manual-clean filters) |
| Direct gasket cleaning with vinegar and a ten-minute dwell time | Monthly |
| Full interior cycle with vinegar or citric acid cleaner | Monthly |
I cannot tell you that monthly is the right interval for every kitchen. Ambient humidity, water hardness, and how often the machine runs all affect how quickly mold re-establishes.
If mold returns within two weeks of a correctly executed cleaning, adjusting the cleaning interval is not the answer. Go back to the door habit first.
If mold is growing in areas you cannot reach without tools, behind the pump assembly, inside the drain hose, or in structural components requiring disassembly, this protocol does not cover that.
The EPA’s threshold for professional mold remediation is a 10-square-foot area. A dishwasher interior is far below that. But mold growing inside the mechanical structure of the appliance is a different category of problem, and a technician’s assessment is the right next step.