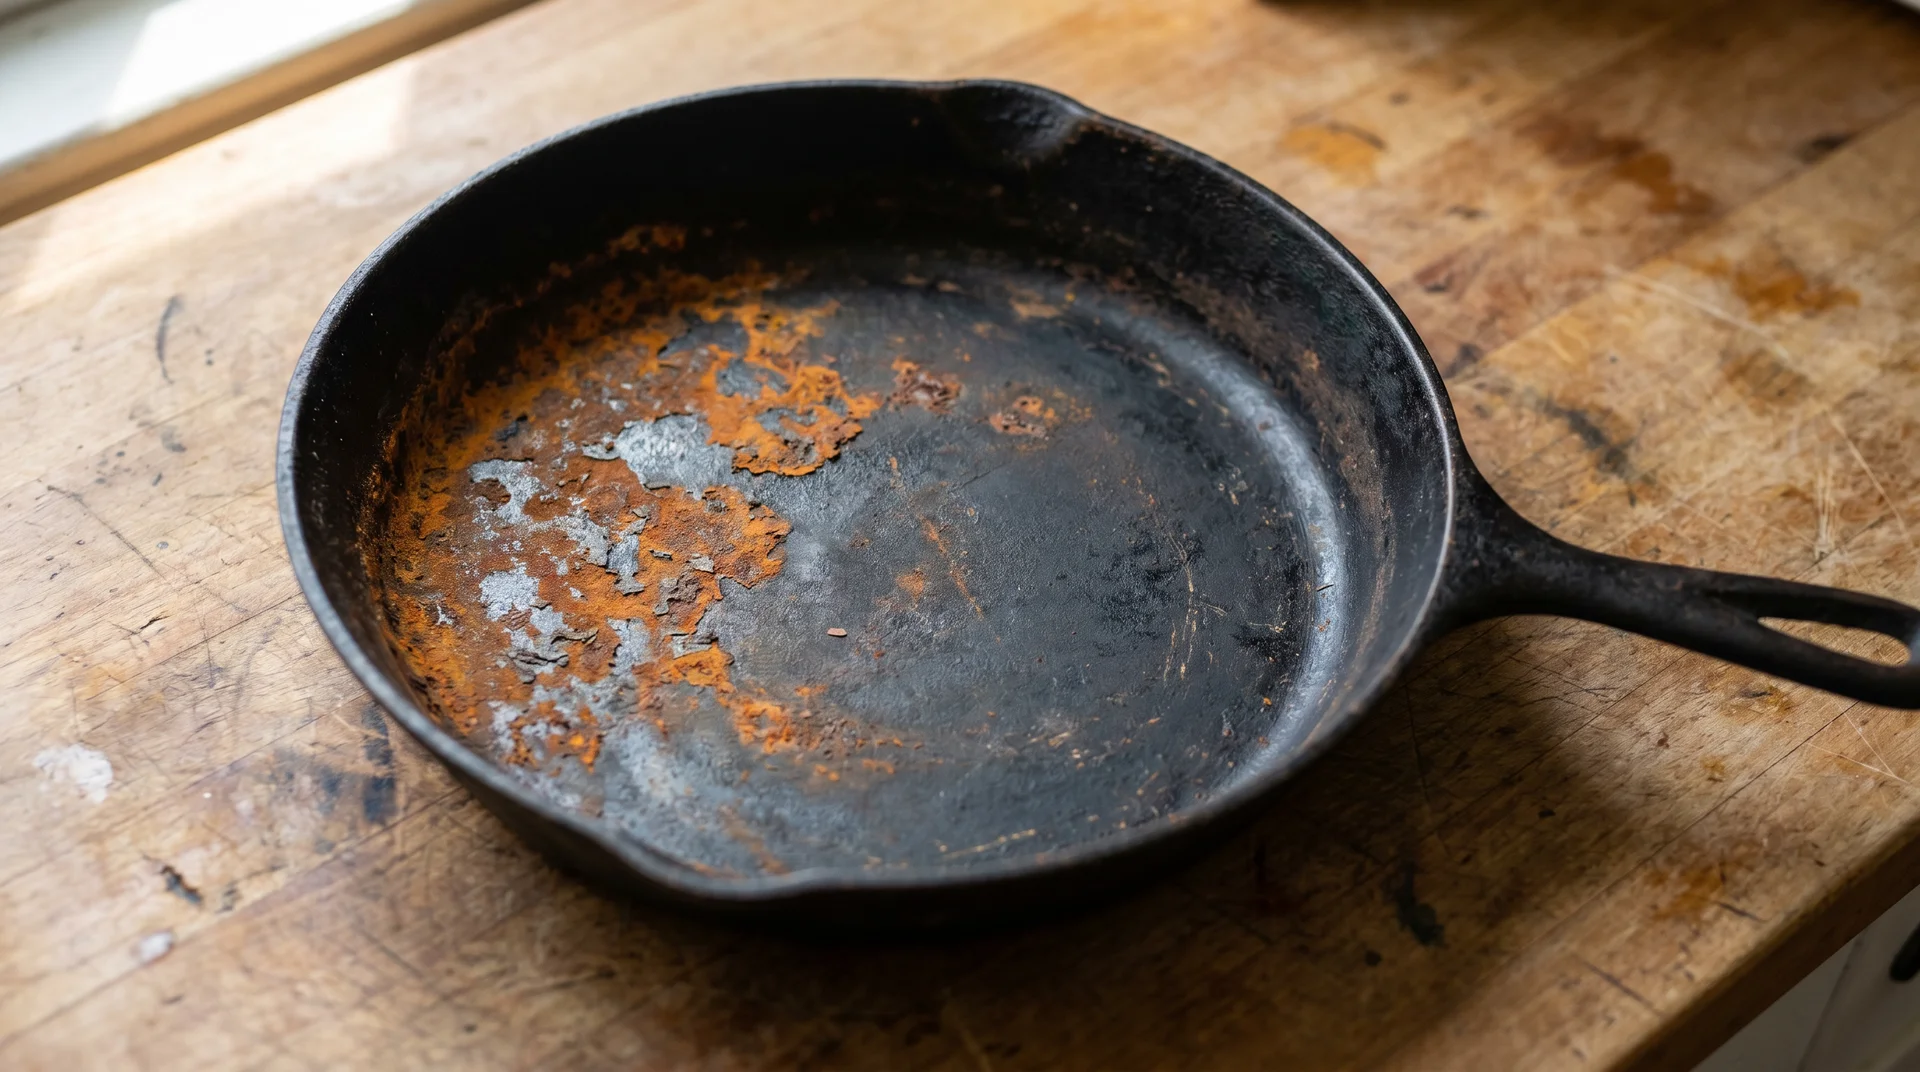
Rust on cast iron looks catastrophic the first time you see it. In most cases, it’s a surface problem with a straightforward fix.
This guide covers three situations: surface rust, heavier rust from months of neglect, and pitting. All three get honest answers, including when the right answer is to walk away.
Is It Safe to Cook on Rusty Cast Iron?
The USDA classifies rust as not food-safe and recommends removing it before cooking.
Without a functioning seasoning layer, food sticks badly and a metallic taste transfers to whatever you’re cooking. That’s the practical reason to fix this before your next cook.
The triage below tells you how much work you’re actually looking at.
How Bad Is the Rust: Assess Before You Do Anything
The method you use depends entirely on how bad the damage is.
Don’t reach for the scrubber yet. Look at the pan carefully first. What you see tells you whether you need ten minutes or three hours.
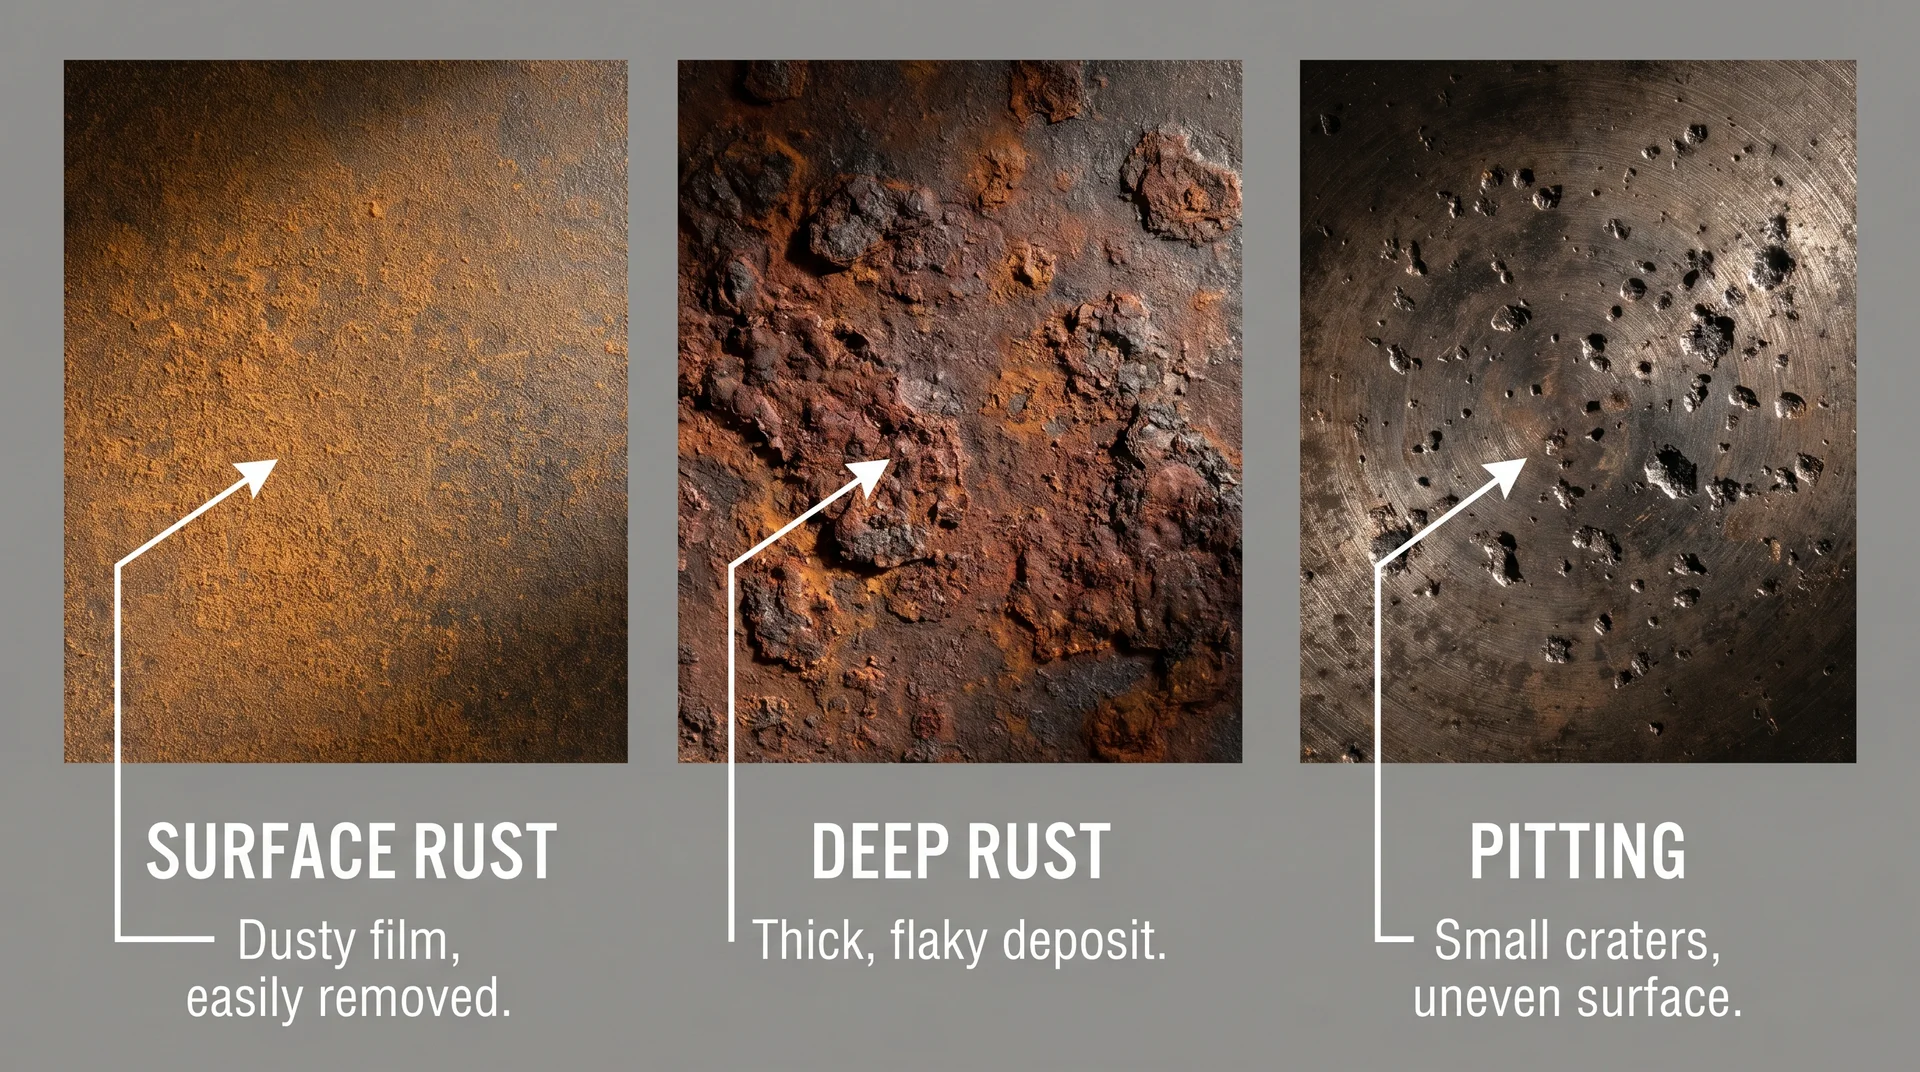
Surface Rust: The Common Case
Surface rust is the most common situation, and also the easiest to fix.
It looks like a dusty, orange-brown film sitting on the cooking surface. You’ll usually find it in patches where water pooled, where the pan sat against something damp, or where the seasoning was thin to begin with.
Before you do anything, run this test.
Rub the suspect area firmly with a dry, white paper towel.
- Orange or reddish residue on the towel means rust.
- Black or gray smudges mean polymerized seasoning, which is harmless.
Those two things look similar and get confused constantly. That’s how some people end up treating a pan that didn’t need treating in the first place.
Surface rust responds to scrubbing. You don’t need vinegar. A stiff nylon brush or chainmail scrubber with warm water is usually all it takes.
Deep Rust: Heavier Exposure
Deep rust forms a crust rather than a film, and the surface feels rough and uneven when you run your fingers across it.
This happens when a pan soaks in the sink, goes through the dishwasher, or sits in damp storage for months. The texture has a roughness that scrubbing alone doesn’t resolve. You’ll need steel wool and a vinegar soak.
The pan itself isn’t structurally compromised at this stage. Only the seasoning and the immediate surface layer have been affected. Full recovery is possible.
Pitting: When the Iron Itself Is Compromised
Pitting means rust has eaten into the iron surface, leaving craters that scrubbing and soaking won’t remove.
Run your finger across the cooking surface. If it feels like sandpaper rather than surface film, you’re looking at pitting. A paper towel test won’t show you this clearly. It’s a tactile diagnosis.
So, the pan can still cook, but it will never be perfectly smooth again.
Lodge is explicit on this point: do not grind the surface to smooth it out. Grinding closes the microscopic gaps in the iron that allow oil to polymerize. Those gaps are what make cast iron seasonable in the first place.
I’ve restored pitted pans from thrift stores, tested them in my own kitchen over 18 months, and several are in regular rotation today. The cooking surface feels different from a smooth pan. The first few cooks take some adjustment. Mild-to-moderate pitting doesn’t disqualify a pan from daily use.
A pan where pitting covers most of the cooking surface, or where the walls show structural thinning, is a different decision entirely. Some pans should become wall decoration.
Deciding that before spending an afternoon on restoration is the triage working correctly, not a failure.
How to Remove Rust from Cast Iron Step by Step
What you need depends on how bad the rust is.
- Surface rust needs a brush and effort.
- Deep rust needs steel wool and vinegar.
- Pitting follows the deep rust path, but with adjusted expectations for the result.
Match the method to what you found in the assessment above.
What You’ll Need
Gather everything before you start. Bare iron rusts quickly, and stopping mid-process creates new problems.
For light to moderate rust:
- Stiff nylon brush or chainmail scrubber
- Dish soap
- Paper towels or a clean cloth
- Neutral high-smoke-point oil (grapeseed, refined avocado, or Crisco)
For heavy rust:
- Steel wool, grade #0 or #00
- White distilled vinegar
- Water
- Dish soap
- Paper towels or a clean cloth
- Neutral high-smoke-point oil
Keep the oil within reach before you begin. You’ll need it the moment the pan is dry, and there’s no good time to go looking for it once the iron is bare.
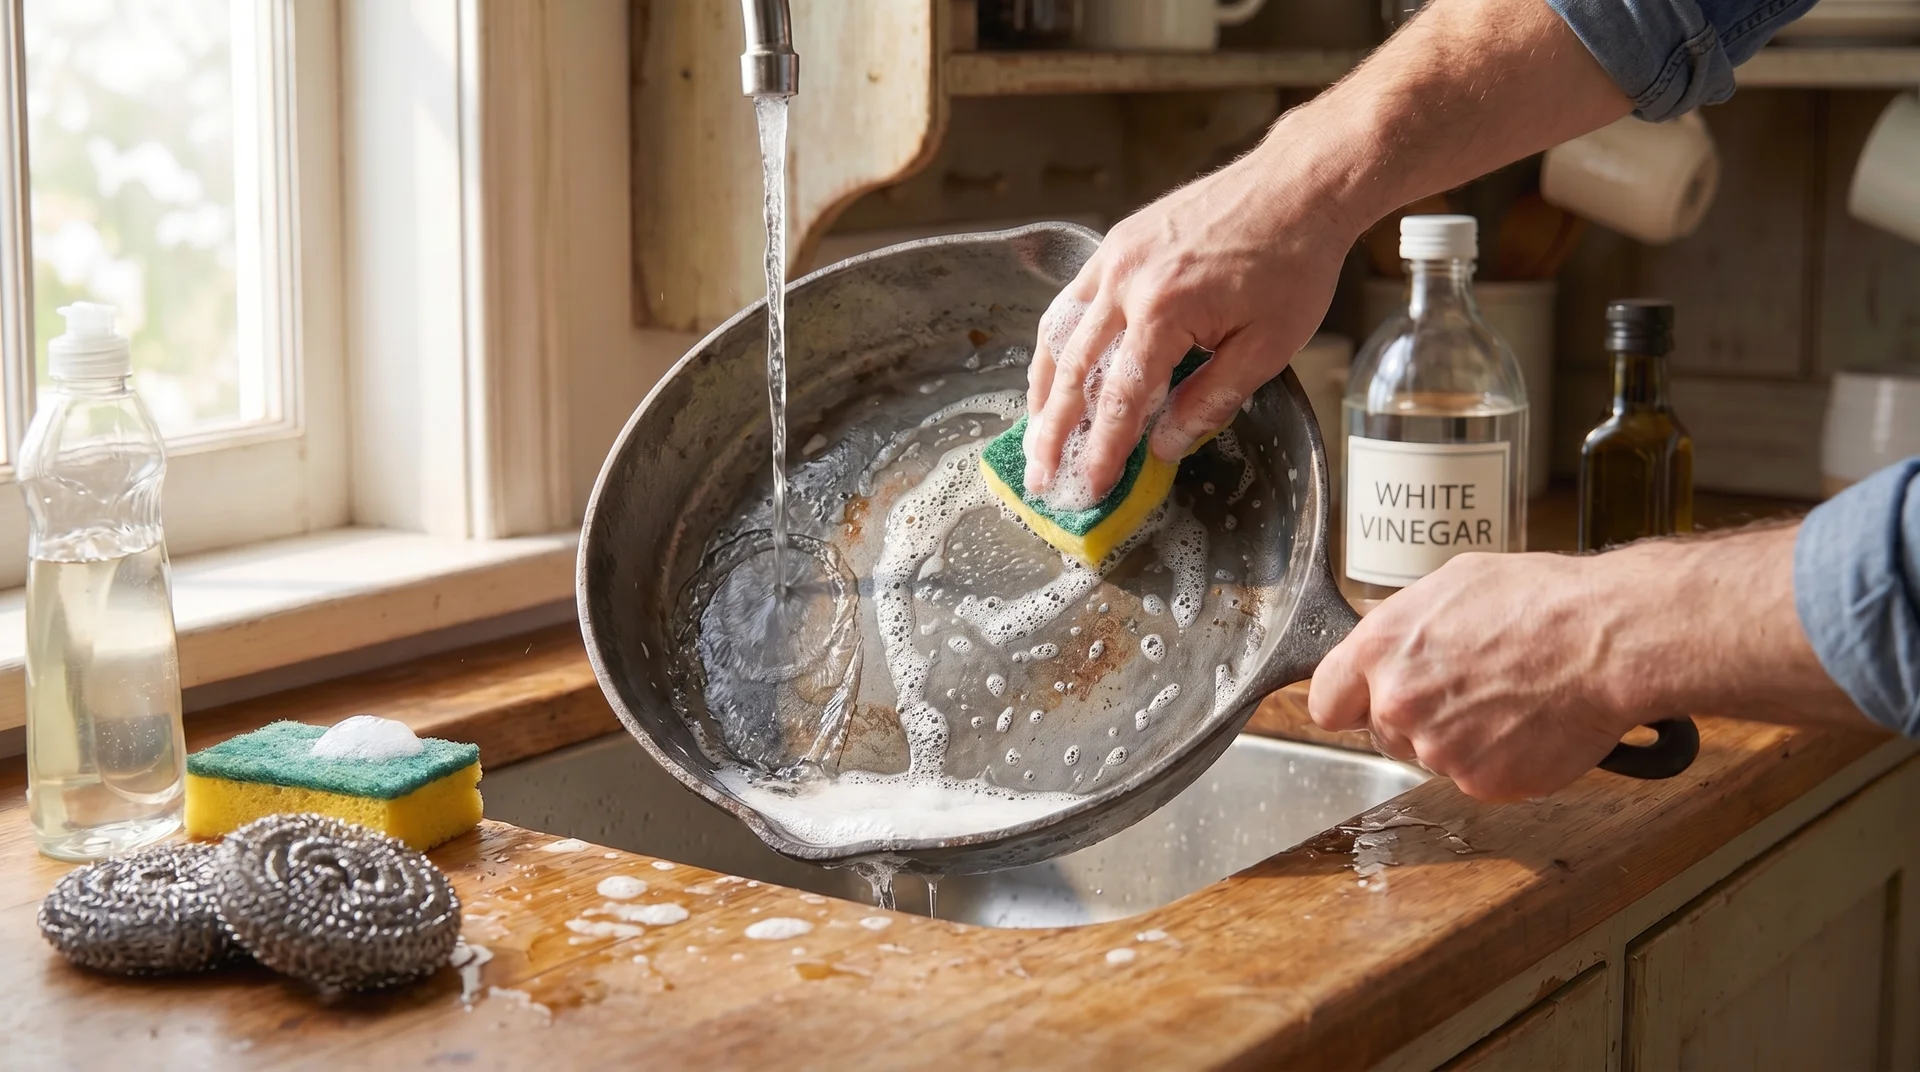
Step 1: Scrub First, Before Anything Else
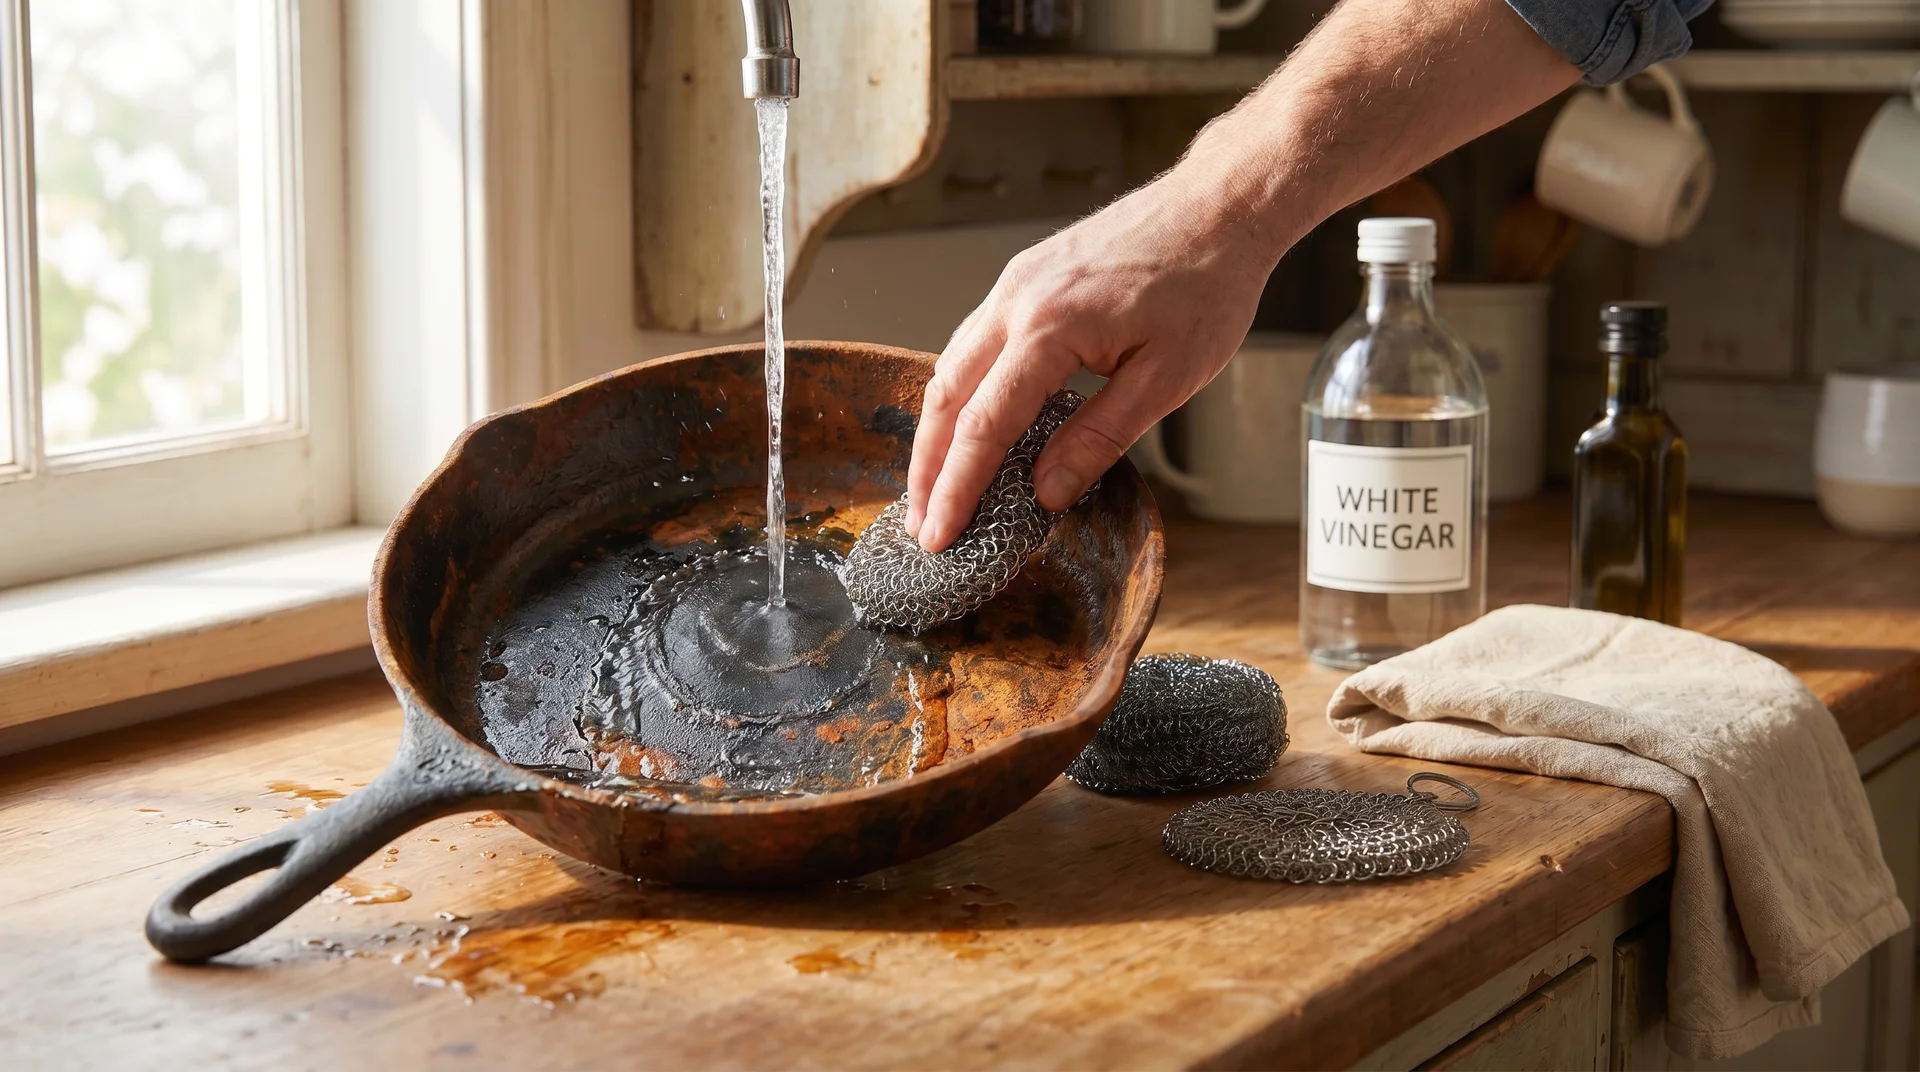
Start with the scrubber. Vinegar is not the starting point. It is the escalation for rust that won’t budge.
Most rust on a home cook’s pan will come off with a chainmail scrubber, some effort, and cold water. Cold water slows re-oxidation while you work on bare metal. Start there, and escalate only if you need to.
- Scrub the full pan with a stiff nylon brush, chainmail scrubber, or #0/#00 steel wool. Cover the cooking surface, sides, handle, and underside.
- If you’d rather skip steel wool, a coarse kosher salt scrub with a damp cloth works on light surface rust. Press firmly. Discard the salt as it turns brown.
- After scrubbing, assess the pan. If the rust is gone, move straight to washing. If patches remain, continue to the vinegar soak below.
When to Use a Vinegar Soak (and When to Skip It)
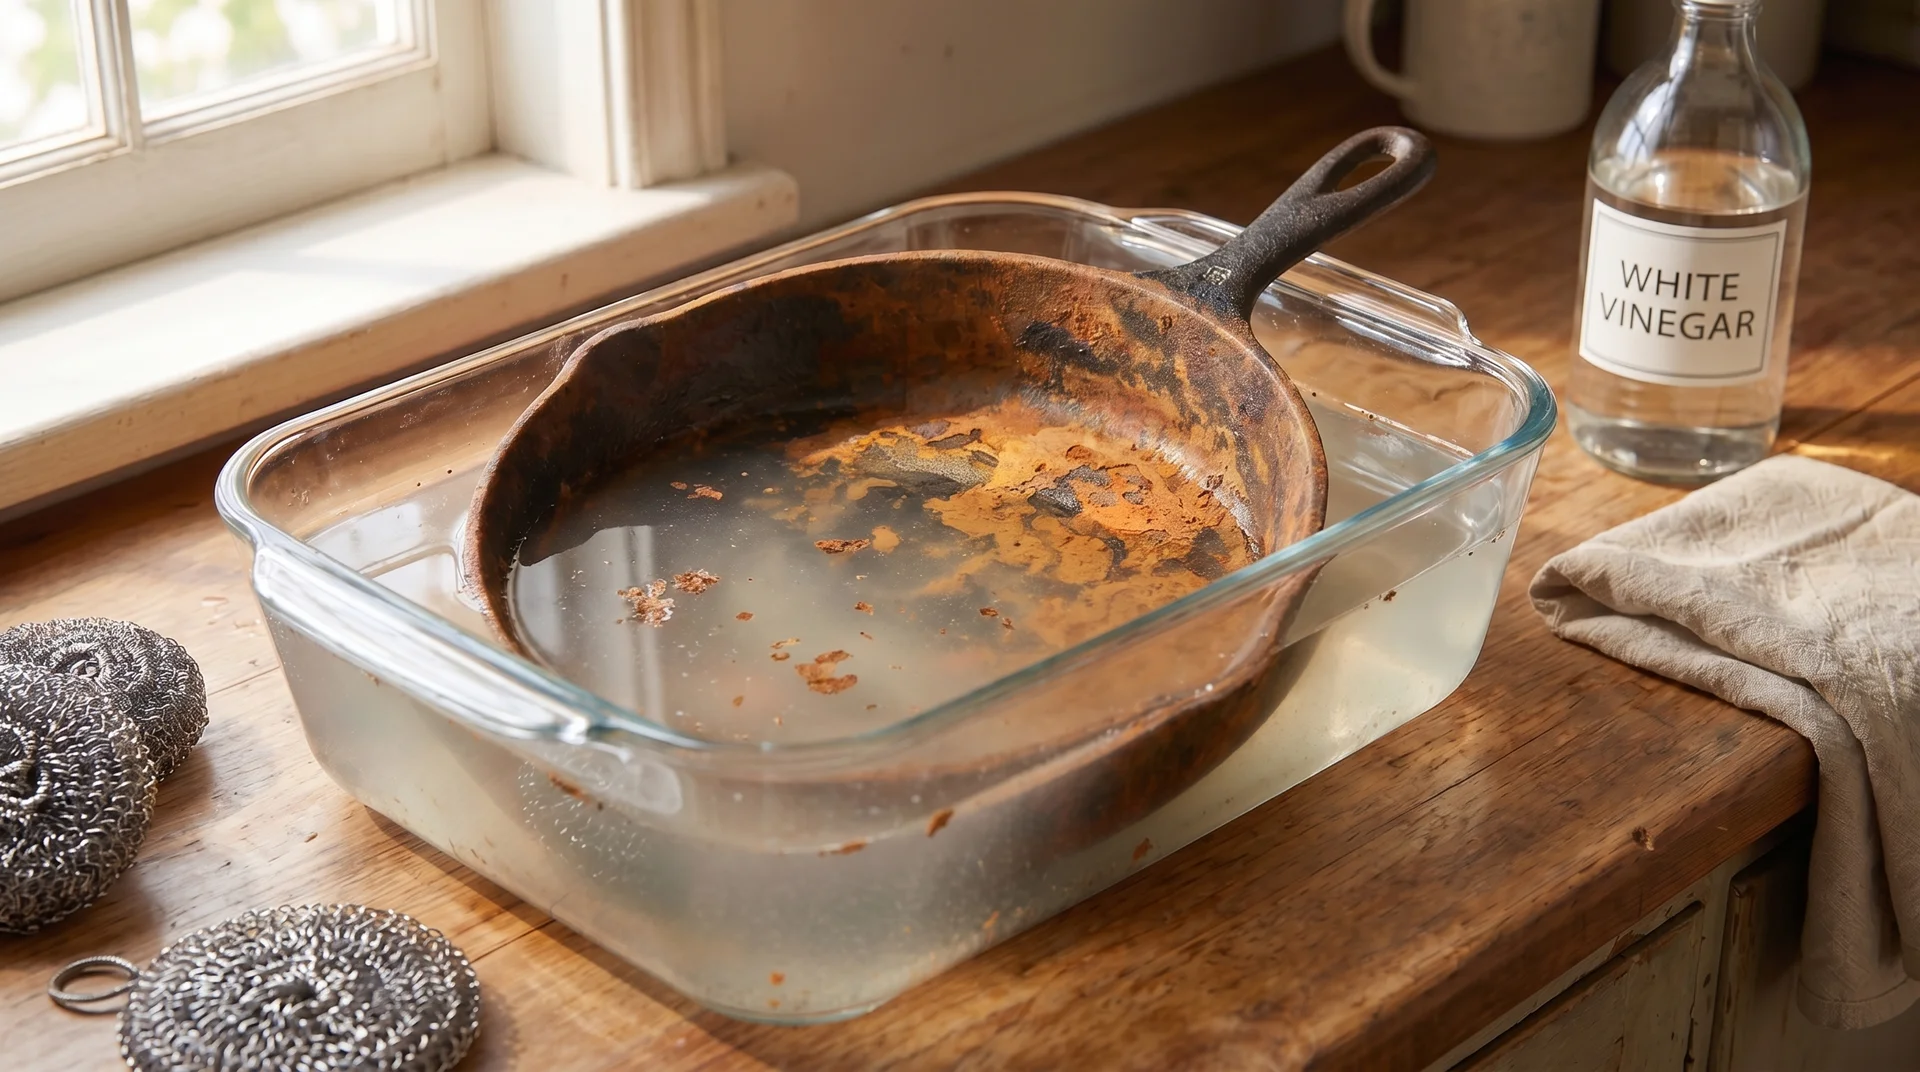
A vinegar soak is for rust that scrubbing won’t remove. If scrubbing cleared the pan, skip this entirely.
Mix equal parts white distilled vinegar and cold water. Submerge the pan completely. Work in a ventilated space — the vinegar-and-rust reaction has a noticeable smell that concentrates quickly in a closed kitchen.
The right soak time depends on how bad the rust is, not on a universal timer.
| Rust Severity | What It Looks Like | Soak Time |
|---|---|---|
| Surface rust that resisted scrubbing | Thin film, patchy, brush didn’t clear it | 20 to 30 minutes |
| Moderate rust | Harder deposits, some areas crusted | 30 to 45 minutes |
| Heavy rust | Thick crust, resists all scrubbing | 45 to 90 minutes |
Check the pan every 30 minutes. The moment the rust shows signs of releasing under gentle friction, pull it out.
Acetic acid dissolves iron oxide, but it doesn’t stop there. Once the rust lifts, the acid starts working on the bare metal underneath. I’ve seen pans come out of an overnight vinegar soak with new pitting that wasn’t there when they went in. That is a harder problem to fix than the rust you started with.
After the soak, scrub immediately with steel wool and dish soap. Rinse completely. Move quickly from this point.
Step 2: Wash the Pan Thoroughly
Soap belongs here. This is the one situation in cast iron care where a full soapy wash is the right call.
Wash the entire pan: cooking surface, sides, handle, and bottom. Rinse completely.
You’re removing vinegar residue, rust particles, and stripped seasoning before you start rebuilding. All of it needs to come off.
Step 3: Dry Completely and Immediately
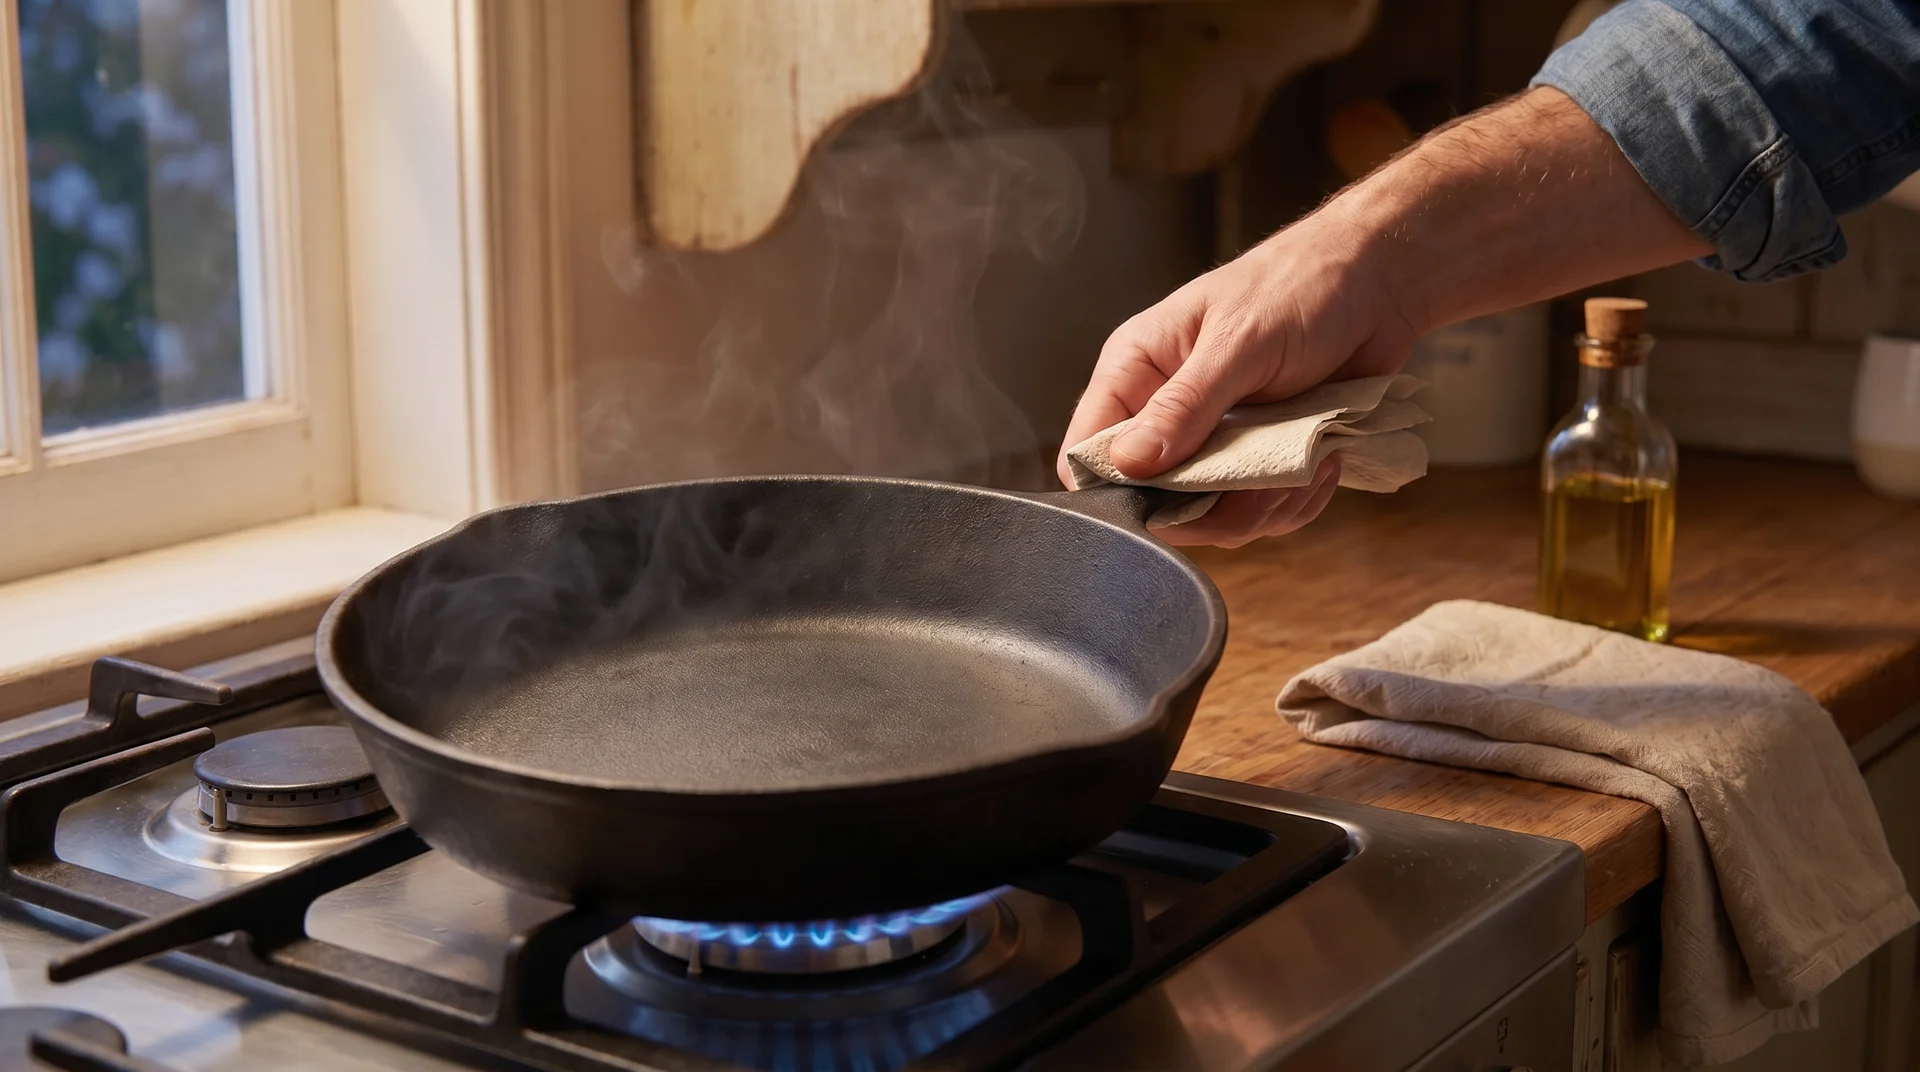
Bare iron rusts within minutes in humid air. Do not let the pan sit wet at any point after rinsing.
Towel dry immediately after rinsing. Then set the pan on the stovetop over medium-low heat for three to five minutes.
You’re evaporating moisture that the towel didn’t reach. When the steaming stops and the surface looks uniformly dull, the pan is dry.
Don’t let it cool before oiling. A warm surface bonds oil more effectively than a cold one. Apply oil while the pan is still warm from the stovetop.
How to Re-Season Cast Iron After Rust Removal
Seasoning after rust removal is not the same as routine maintenance seasoning.
You stripped the pan back to bare iron. The old seasoning layers are mostly or entirely gone. You’re starting over from the beginning, not adding to what was there.
Oil Selection: Why It Matters More Here Than Usual
The oil you choose matters more when you’re building seasoning from bare iron than it does for routine maintenance.
The most common mistake at this stage is olive oil. It has a relatively low smoke point and doesn’t polymerize as efficiently as other options. It works fine for cooking. It is not the right tool for building seasoning layers on bare iron.
| Oil | Approximate Smoke Point | Seasoning Performance | Notes |
|---|---|---|---|
| Grapeseed oil | 420°F | Reliable | Widely available; consistent results |
| Refined avocado oil | 500°F | Reliable | High smoke point; works well at 450–500°F |
| Crisco / vegetable shortening | 360°F | Excellent | Lodge’s traditional recommendation; easy to apply thinly |
| Flaxseed oil | 225°F | Fast, but brittle | Prone to flaking on restored or textured surfaces |
| Olive oil | ~375°F (varies) | Poor for seasoning | Fine for cooking; not suitable for building layers |
Flaxseed oil has a devoted following in cast-iron circles, and I understand why.
It polymerizes quickly and creates a hard initial surface. I’ve tested it across multiple restoration sessions in my own kitchen. In my experience, it’s prone to flaking on pans that aren’t perfectly smooth, which includes most restored pans.
America’s Test Kitchen’s testing arrives at the same conclusion: shortening and refined oils outperform flaxseed for long-term durability.
Grapeseed and refined avocado oil are what I reach for on restored pans. For everyday cooking oil choices, that’s a different question with different criteria.
The Oven Session
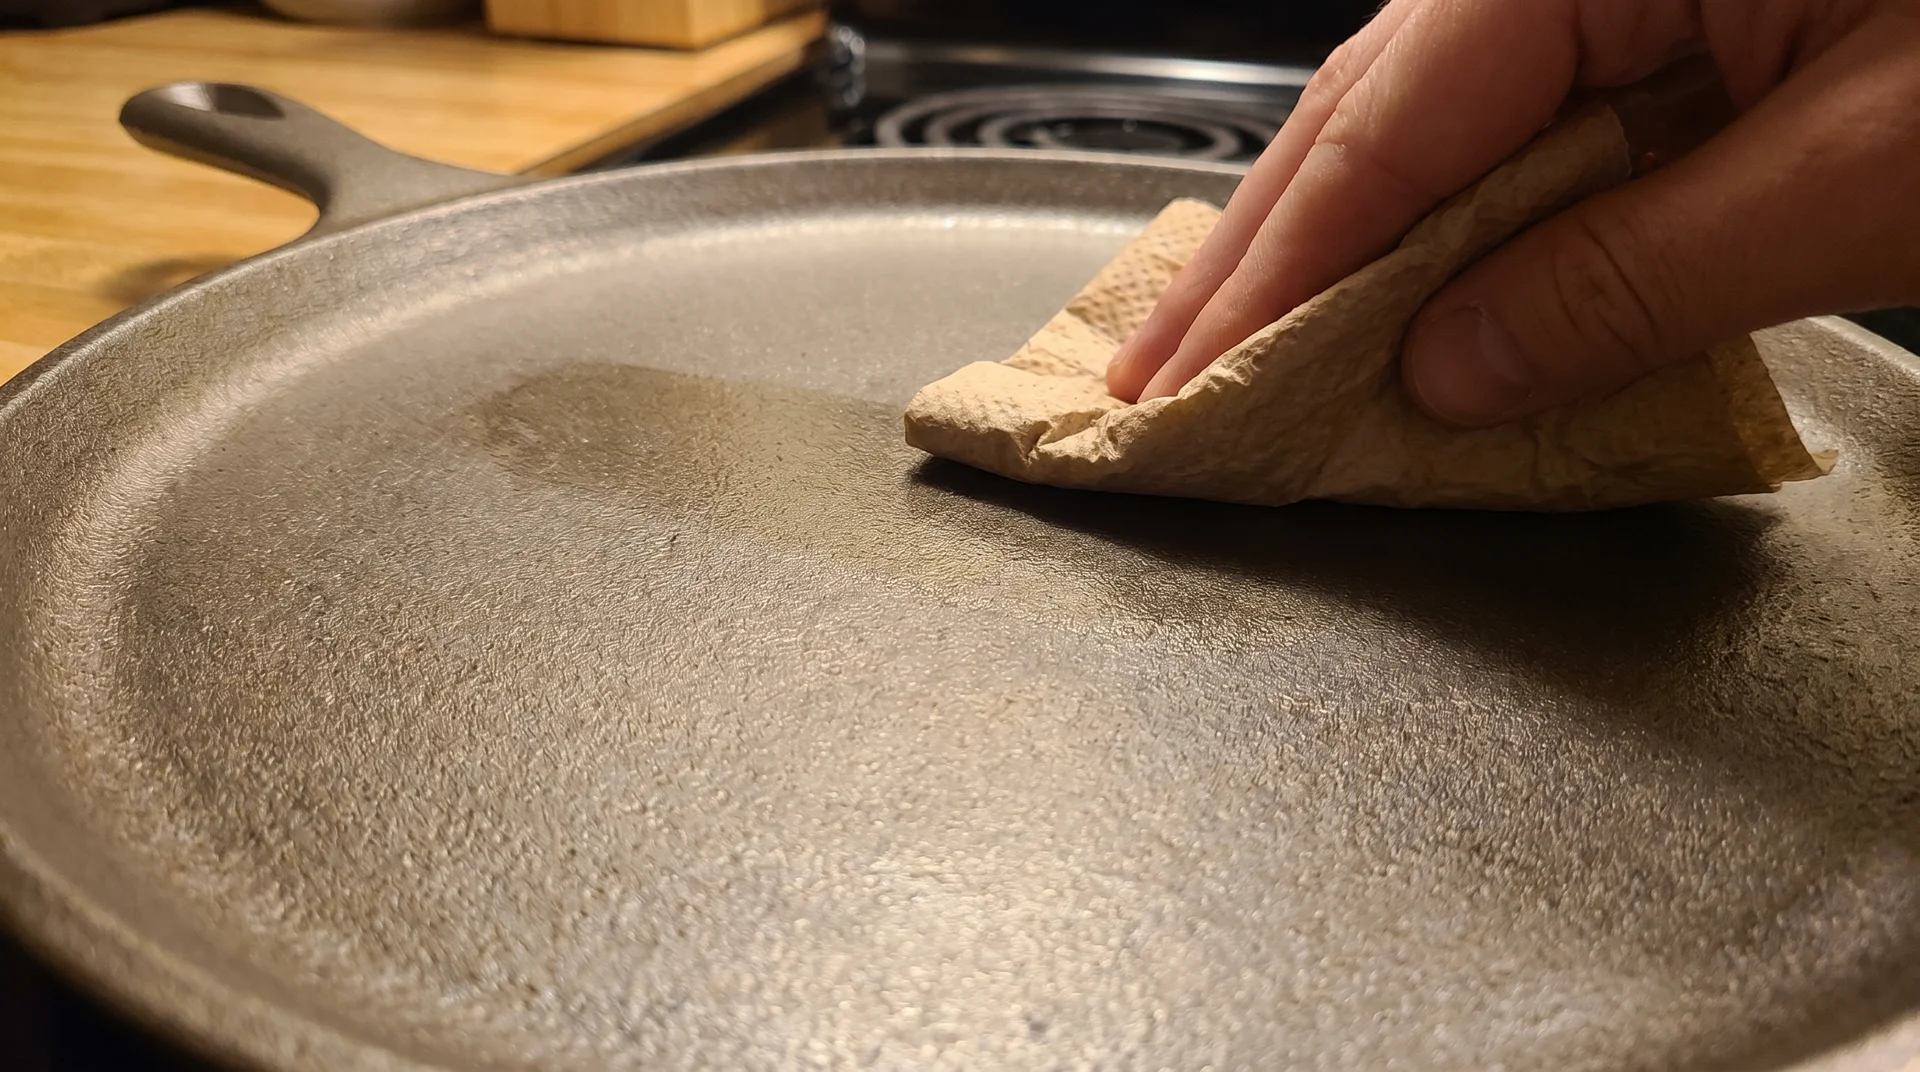
The thinner the oil coat, the better the result.
- Apply a small amount of oil to the entire pan: cooking surface, sides, handle, and bottom.
- Then take a fresh paper towel and buff most of it off.
If the pan looks oily before it goes in the oven, you’ve used too much. It should look nearly dry, with only a slight sheen under direct light.
- Place the pan upside down on the center oven rack at 450°F to 500°F.
- Bake for one hour. Put a sheet of foil on the rack below to catch any drips.
- When the hour ends, leave the pan in the oven to cool completely before removing it.
A sticky or gummy surface after the oven session means the coat was too thick. Strip it with steel wool and repeat the oil application.
This is more common than guides admit, and it’s a straightforward fix once you know the cause.
How Many Seasoning Sessions Does It Actually Take
In most cases, three to five sessions are needed before performance genuinely returns. Going back to the triage at the start of this piece: the number of sessions relates directly to how severe the rust was.
- A pan with surface rust may settle after two sessions.
- A pan with significant deep rust may take five or six before it stops being sticky.
The fastest way to rebuild is to cook in the pan. Cook bacon. Cook sausage. Cook anything with significant fat.
Each cook adds another layer of polymerized oil. The pan gets better through use, which is how cast iron is supposed to work.
How to Keep Cast Iron Rust-Free After Recovery
Everything you just did comes undone if the same conditions repeat.
The rust formed because of specific habits: inadequate drying, damp storage, or seasoning that wore thin without being maintained. Fixing the pan without changing those habits is just a reset.
- Dry the pan completely after every wash. Use stovetop heat, not just a towel. This single habit accounts for most cast-iron rust problems in home kitchens.
- Apply a thin oil coat after every wash. Not occasionally. After every wash. It takes thirty seconds and prevents the next rust cycle.
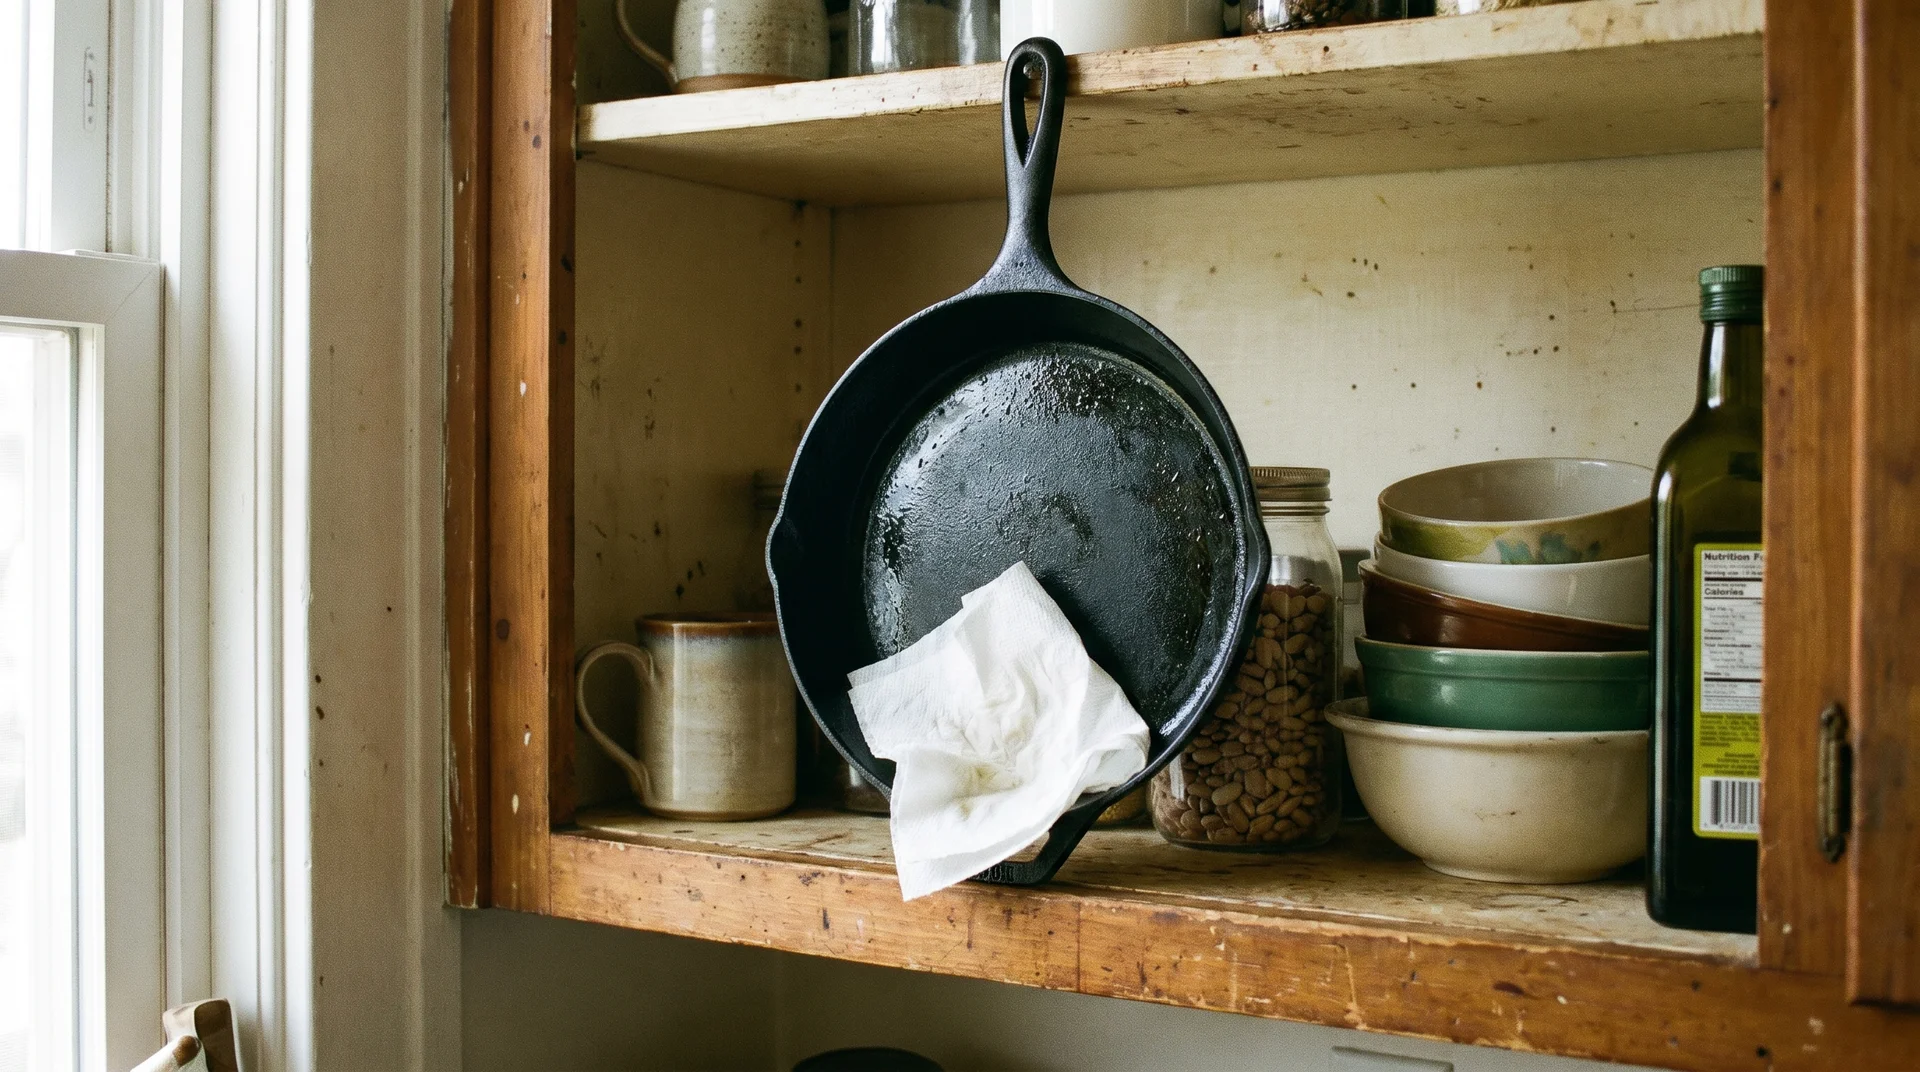
- Store in a dry location. Not under the sink. Not next to the dishwasher. An open shelf in a dry cabinet is ideal.
- Separate stacked pans. Place a paper towel between each pan if you stack them. It absorbs ambient moisture and prevents contact that can chip the seasoning.
- Never put cast iron in the dishwasher. Not even once. Not even when the seasoning looks thick and well-established.
One thing I genuinely can’t give you a firm rule on: storage in very high-humidity environments.
In coastal kitchens or spaces without climate control, well-maintained cast iron can develop light surface rust from ambient humidity alone. A paper towel inside the cooking surface during storage helps.
How often to re-oil for storage in those conditions varies by how humid the space actually is. That’s something you’ll learn from your own kitchen rather than from a general guide.
This Guide Is for Raw Cast Iron Only
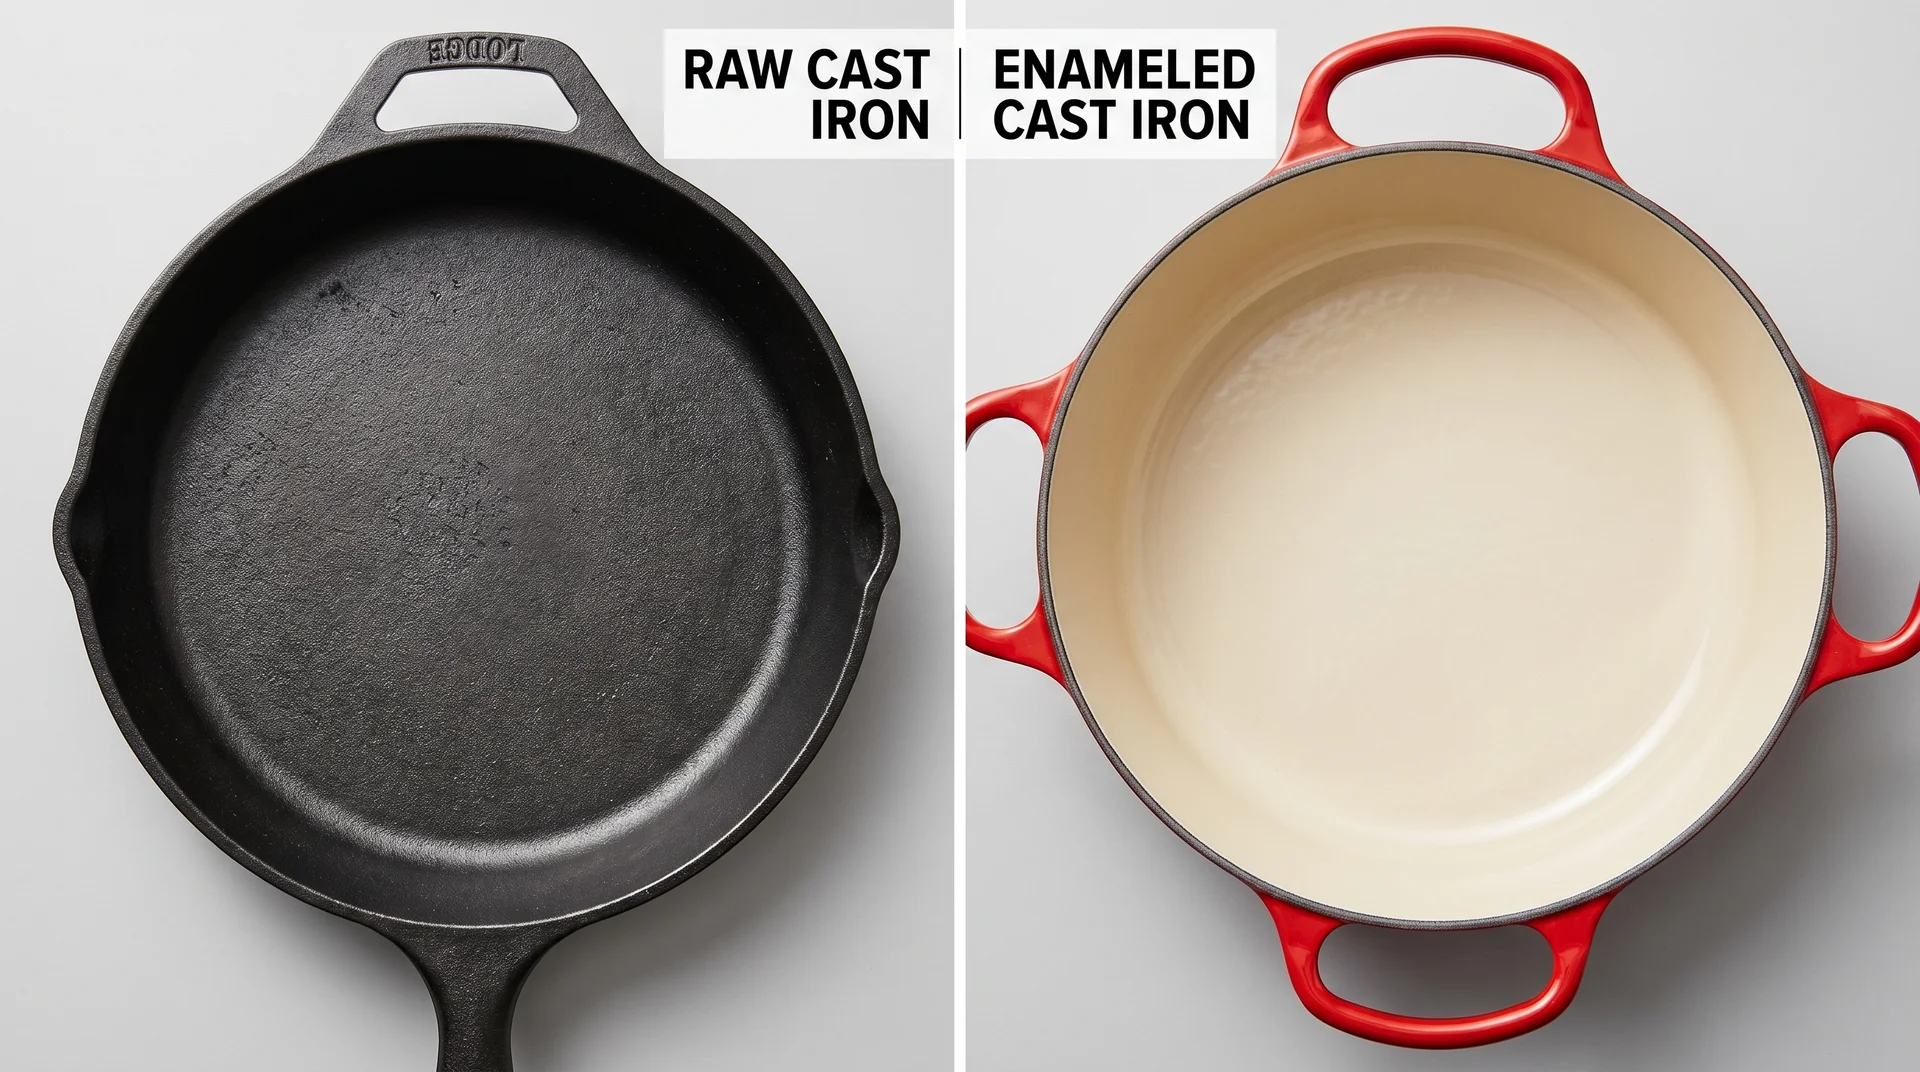
Not all cast iron works the same way. One type needs completely different care.
Everything above applies to raw, uncoated cast iron, the kind that requires seasoning to develop a non-stick surface. It does not apply to enameled cast iron, and using these methods on enameled cookware will damage it.
Enameled cast iron has a glass-based coating on the interior and exterior. Le Creuset and Staub are the most common examples. Enameled cast iron doesn’t need seasoning. It can’t be seasoned. Steel wool, vinegar soaks, and the stripping process above are wrong for it in every case.
If your pan has a colored exterior and a smooth, lighter interior that looks almost porcelain-like, it’s enameled. Stop here and check the manufacturer’s care guide.
That’s a different article, and it genuinely needs different criteria to do properly.