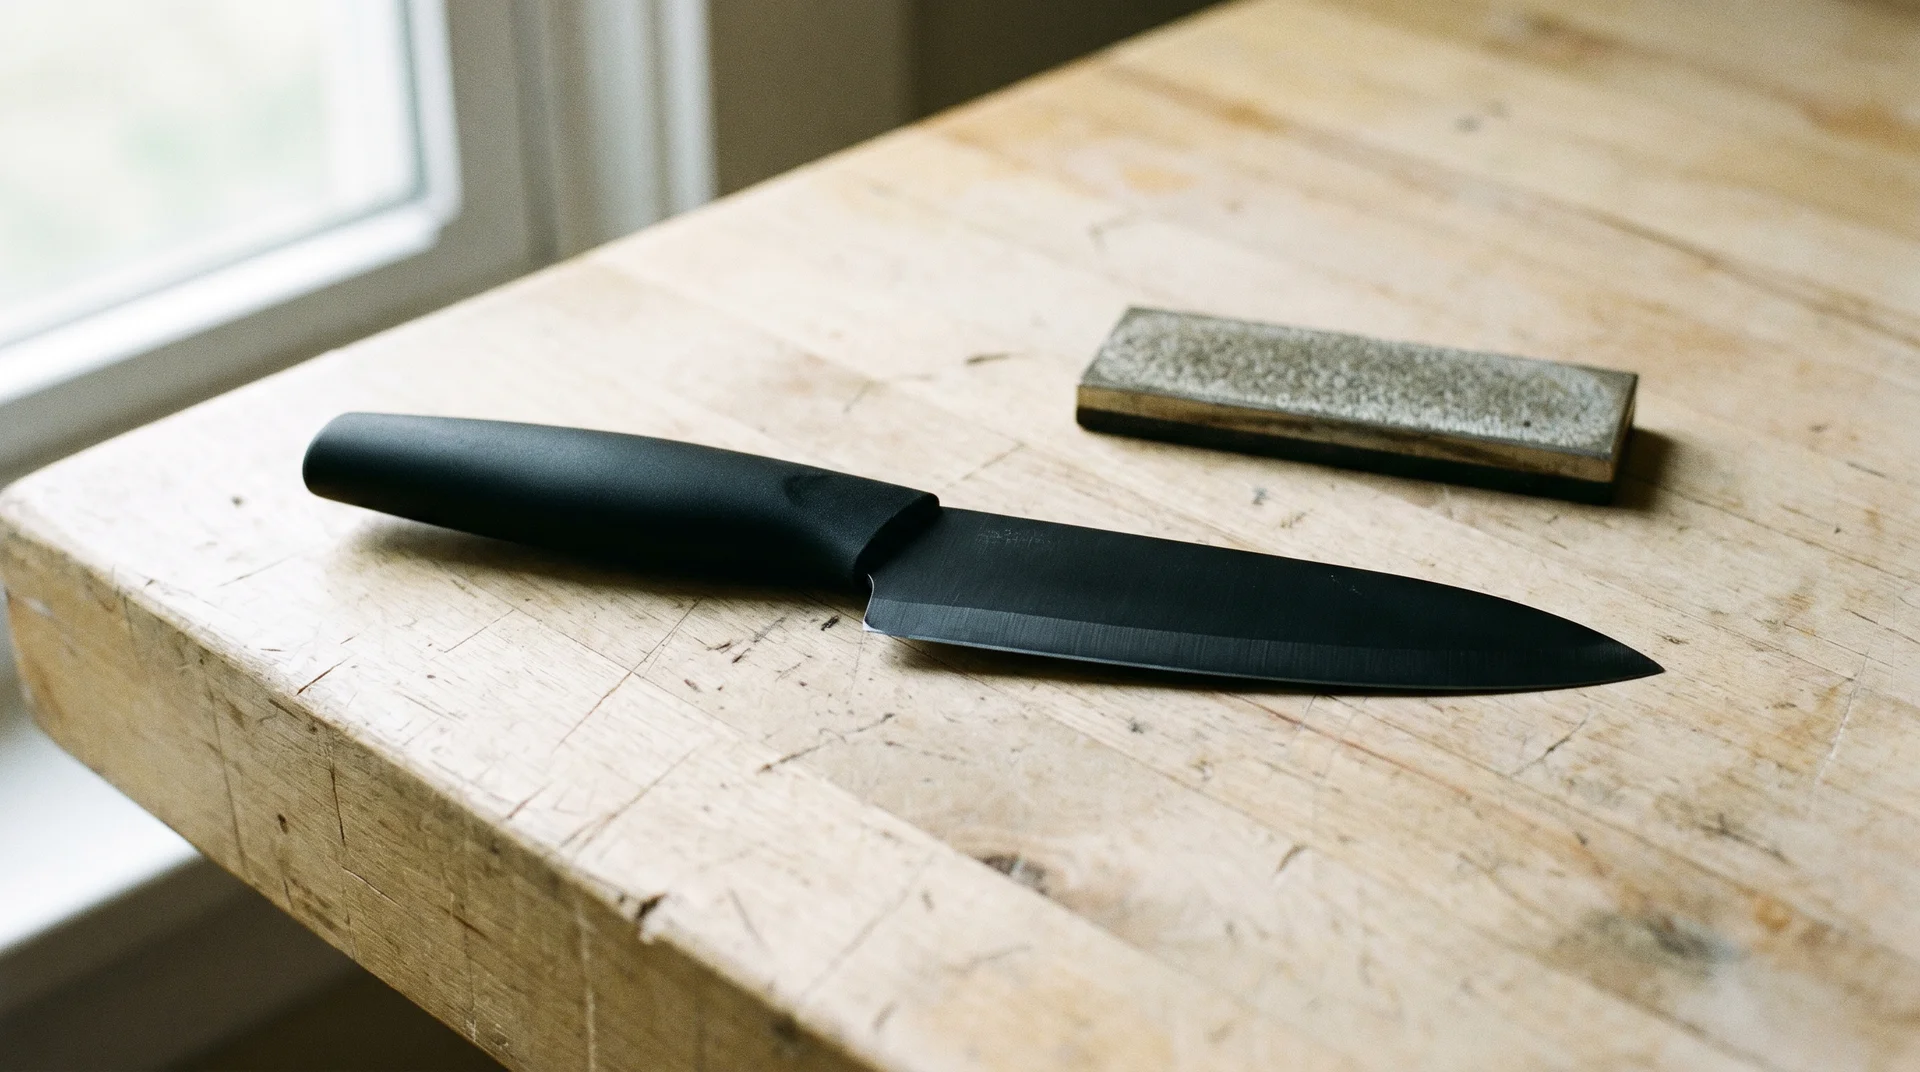
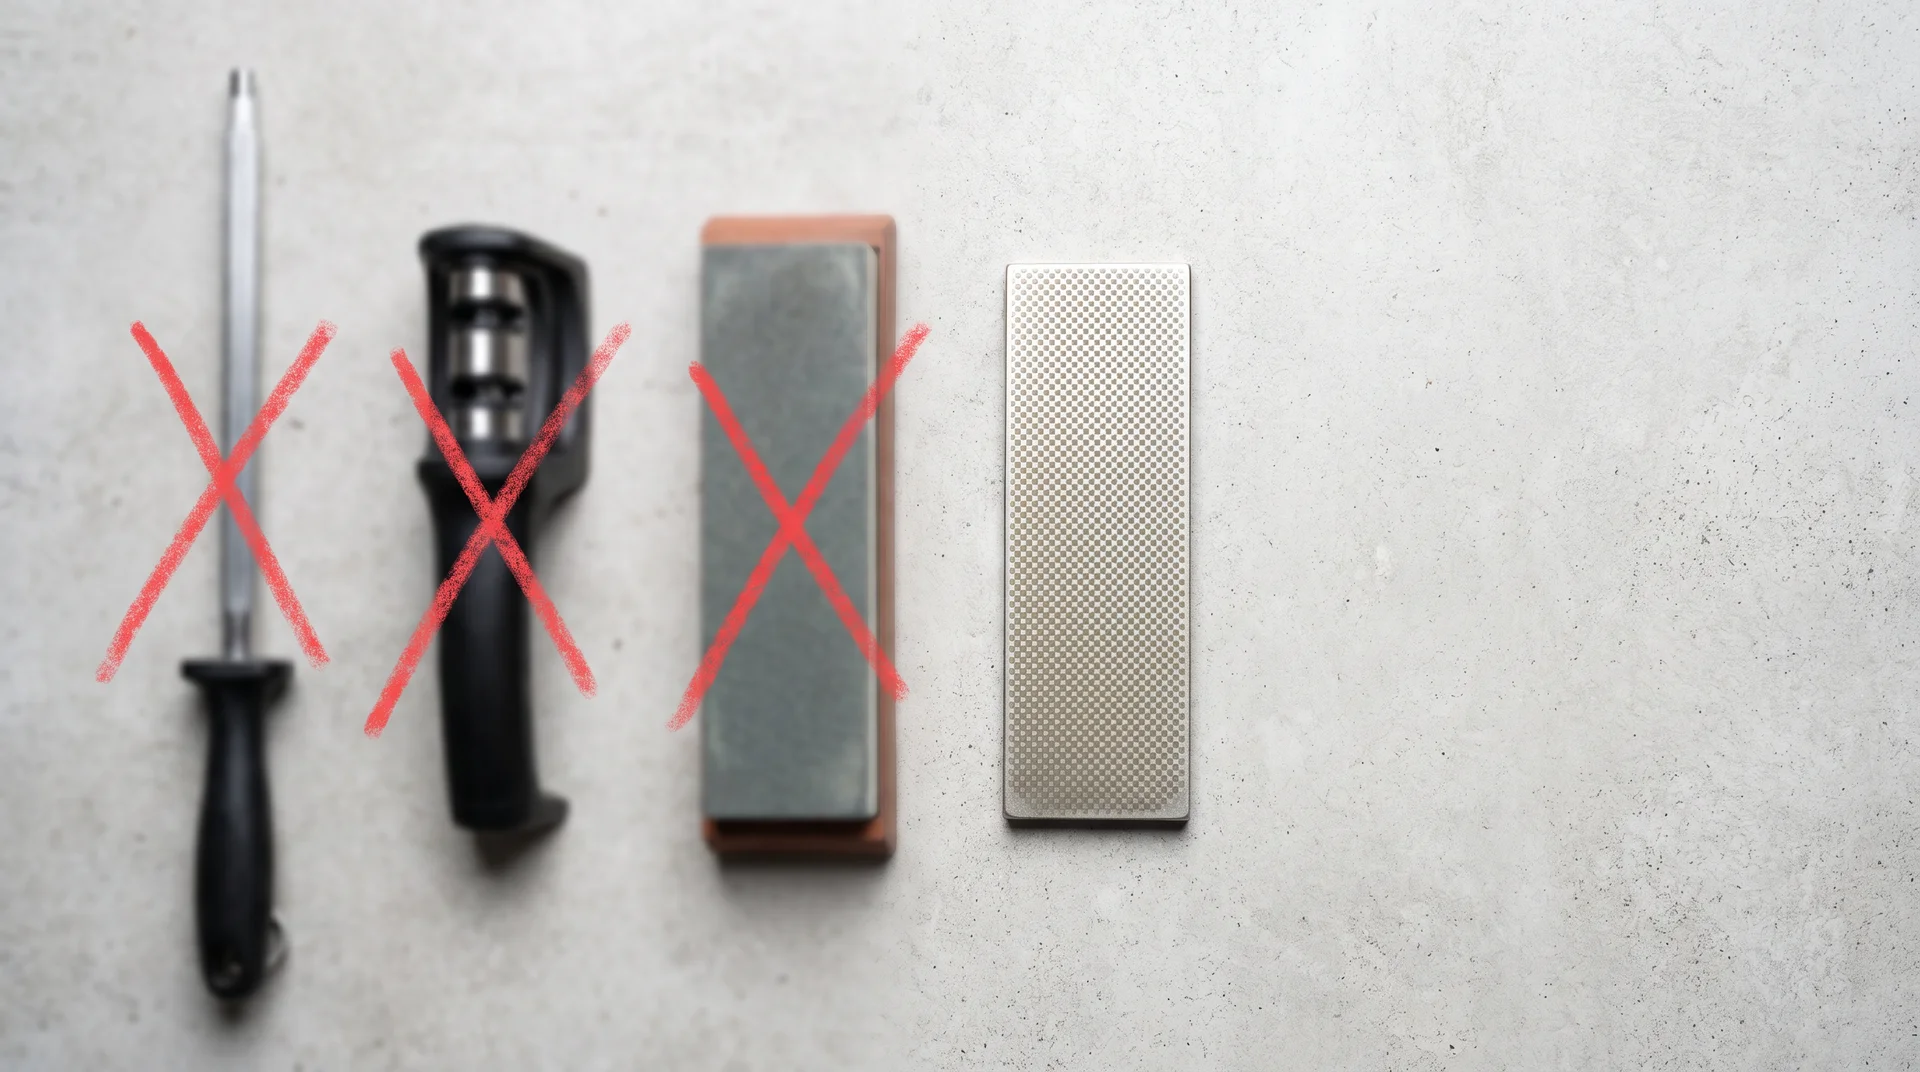
The tools already in your kitchen cannot sharpen a ceramic knife. Your honing rod, your pull-through carbide sharpener, and your whetstone won’t change the edge, and if you’ve already tried them, you already know this.
Diamond is the only abrasive hard enough to cut zirconia, the material ceramic knives are made from.
This article covers two at-home diamond methods and how to choose between them. It also covers when to send the knife out instead.
Can You Sharpen Ceramic Knives at Home?
Yes, but only with a diamond abrasive.
A pull-through sharpener with carbide or ceramic rod slots, a steel honing rod, and a standard whetstone will all fail at this task. The blade material, zirconium oxide, is harder than any of those tools.
For a blade that has simply lost its edge through normal use, a fine diamond sharpening stone or an electric sharpener with a diamond wheel stage will restore a working edge at home.
For a blade with significant chip damage, professional sharpening is the right first step before attempting anything yourself.
Why Your Existing Sharpening Tools Don’t Work on Ceramic
The failure starts with the blade material, not the technique.
How Ceramic Knife Edges Actually Dull
A ceramic knife edge dulls through chipping, not through rolling, and those two failure modes require completely different fixes.
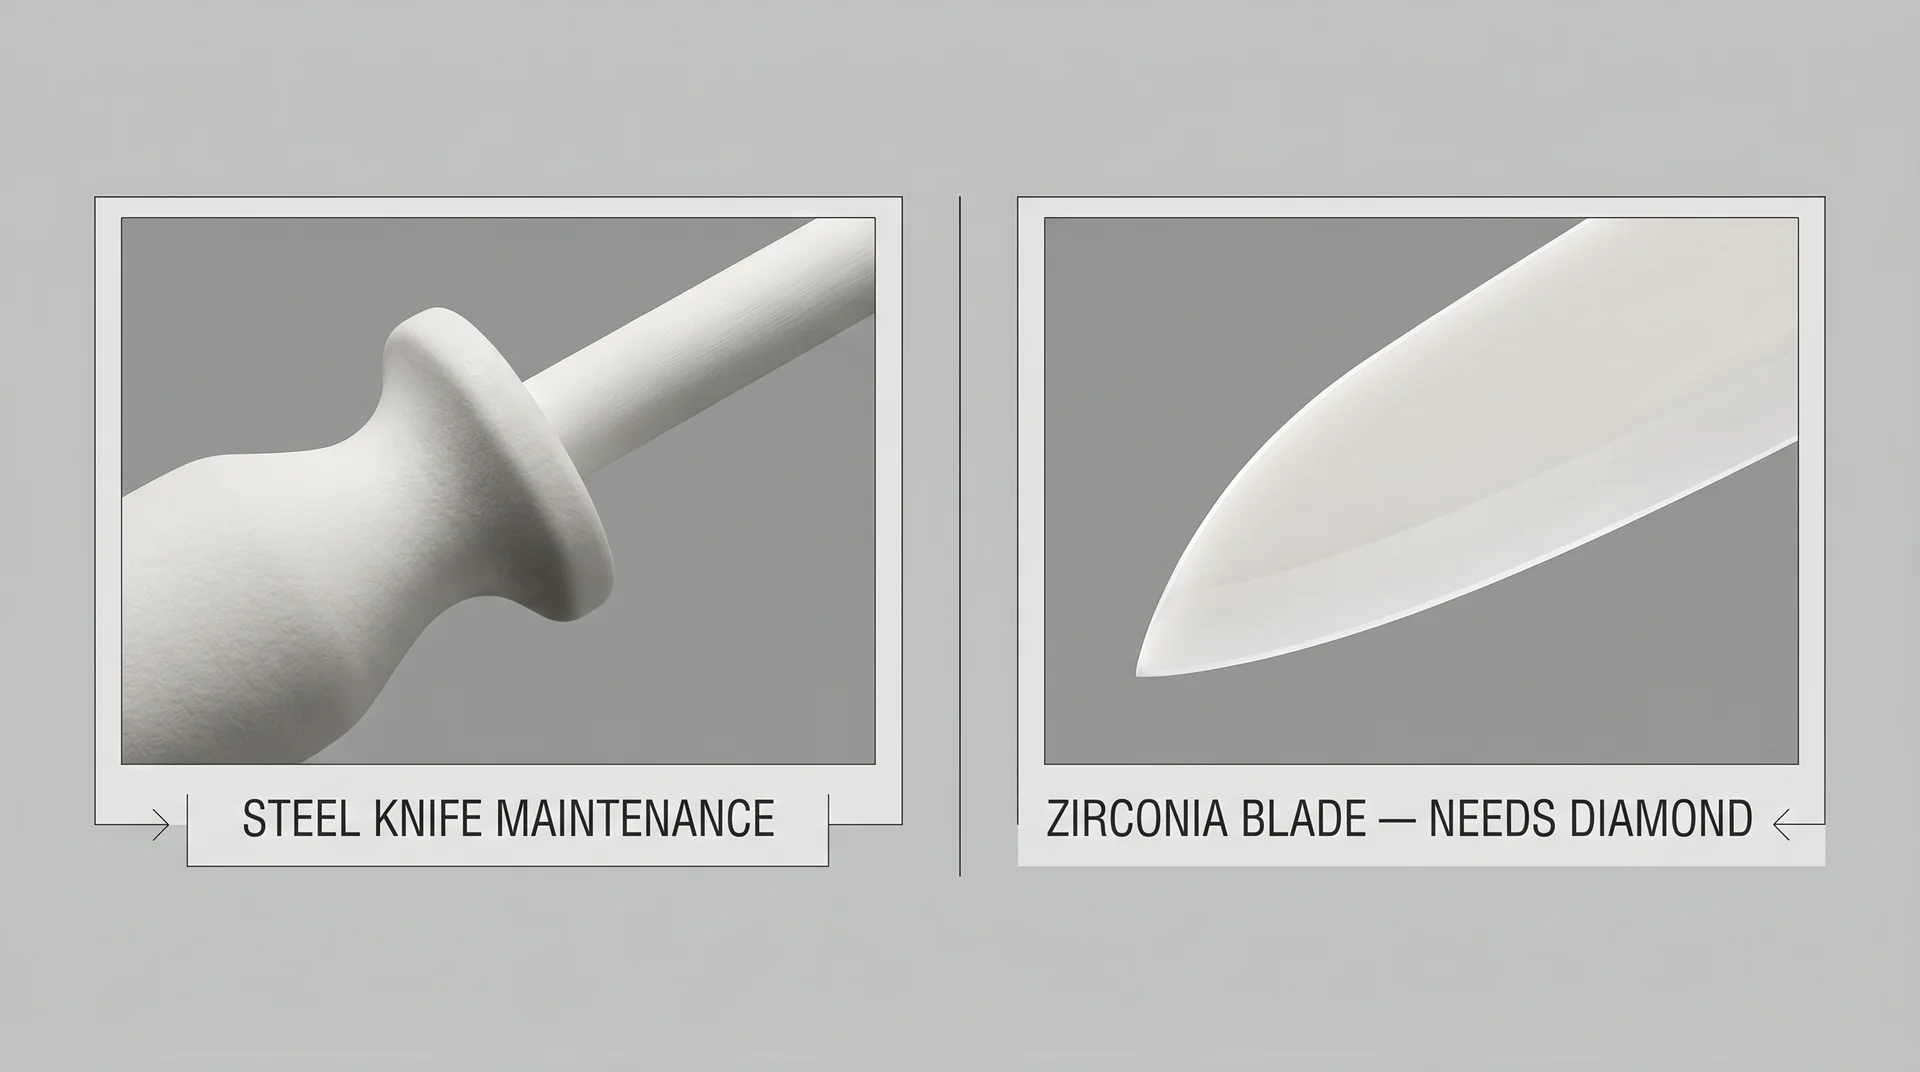
When a steel knife edge dulls, the thin metal at the very tip bends under use. It folds to one side. A honing rod pushes that folded metal back into alignment. You can restore a usable edge on a steel knife without removing any material at all.
Ceramic doesn’t fold under use. The material, zirconium oxide, is too hard and too brittle for that. Instead, the edge develops tiny fractures: contact with a glass cutting board, a frozen chicken breast, or a hard squash rind chips the edge a little further each time.
To restore a ceramic edge, you need an abrasive harder than the ceramic itself.
Zirconium oxide, the ceramic these knives are made from, ranks at approximately 8.5 on the Mohs hardness scale, a 10-point scale of material hardness where diamond sits at 10. That gap is why diamond is the only practical option.
Why Nothing Works Other than the Ceramic Honing Rod?
If you tried a ceramic honing rod on your ceramic knife and nothing happened, you used a steel knife maintenance tool on a ceramic blade. Those are not the same thing.
A ceramic honing rod is made from alumina, a type of ceramic material. It works by removing a microscopic layer of steel from a knife edge and realigning it.
The word “ceramic” in “ceramic honing rod” describes the rod’s material. It does not describe what the rod is meant to sharpen.
On a zirconia blade, the tool does not affect the edge whatsoever.
I’ve watched this confusion play out across retail settings more times than I want to count. I’ve never once seen a label that addresses it directly. That distinction is the piece most of us never get told.
The same practical limitation applies to whetstones, though for a different reason.
A steel honing rod sits at around 5.5 to 6.5 on the Mohs scale, which is definitely softer than zirconia and unable to affect the edge.
A quality aluminum oxide whetstone sits closer to 9 on the Mohs scale, slightly harder than zirconia. But efficiency matters as much as raw hardness.
Aluminum oxide removes ceramic material so slowly that the practical result is the same as using a steel rod.
Run a ceramic knife across a whetstone for an hour, and you’ll scratch the flat of the blade without changing the edge.
How to Sharpen a Ceramic Knife With a Diamond Stone
A diamond sharpening stone gives you the most control of any at-home method.
Ceramic knife blades are made from zirconium oxide, and only a diamond abrasive removes that material efficiently. I am assuming you have a diamond stone because a standard whetstone, or a honing rod, won’t work for the reasons covered above.
A diamond stone also carries the steepest failure risk of any home method. The two most common mistakes:
- Starting at the wrong grit and
- Applying too much pressure will chip the edge rather than restore it.
Both are avoidable once you understand why they cause problems on ceramic specifically.
The Grit for Ceramic Knives
For a ceramic knife, the correct starting grit is fine, around 600 to 1000. Beginning with a coarse-grit diamond stone will chip the brittle edge further rather than grind it cleanly.
This is the counterintuitive part of ceramic sharpening for anyone who already knows how to work with steel.
On a steel knife, starting coarser makes sense: a more aggressive grit removes material faster and sets a new bevel more efficiently. Applying that same logic to ceramic is a mistake.
Ceramic’s brittleness makes it vulnerable to the micro-fractures that coarse abrasives cause. I tested this in my own kitchen, not in controlled conditions.
The result was a chipped edge I had to send out for professional repair. The stone was too aggressive. I’d treated the ceramic blade exactly like a dull steel chef’s knife. I put the coarser stones away entirely before I work on ceramics now.
- Dull blade, no visible chips: Start at 600 grit. Finish at 1000. Skip coarser grits entirely.
- Dull blade with small chips: Start at 400 grit with very light pressure. Move to 600, then 1000 quickly. Don’t linger at the coarser grit.
- Significant chip damage: Skip home sharpening for now. Professional equipment is the right first step.
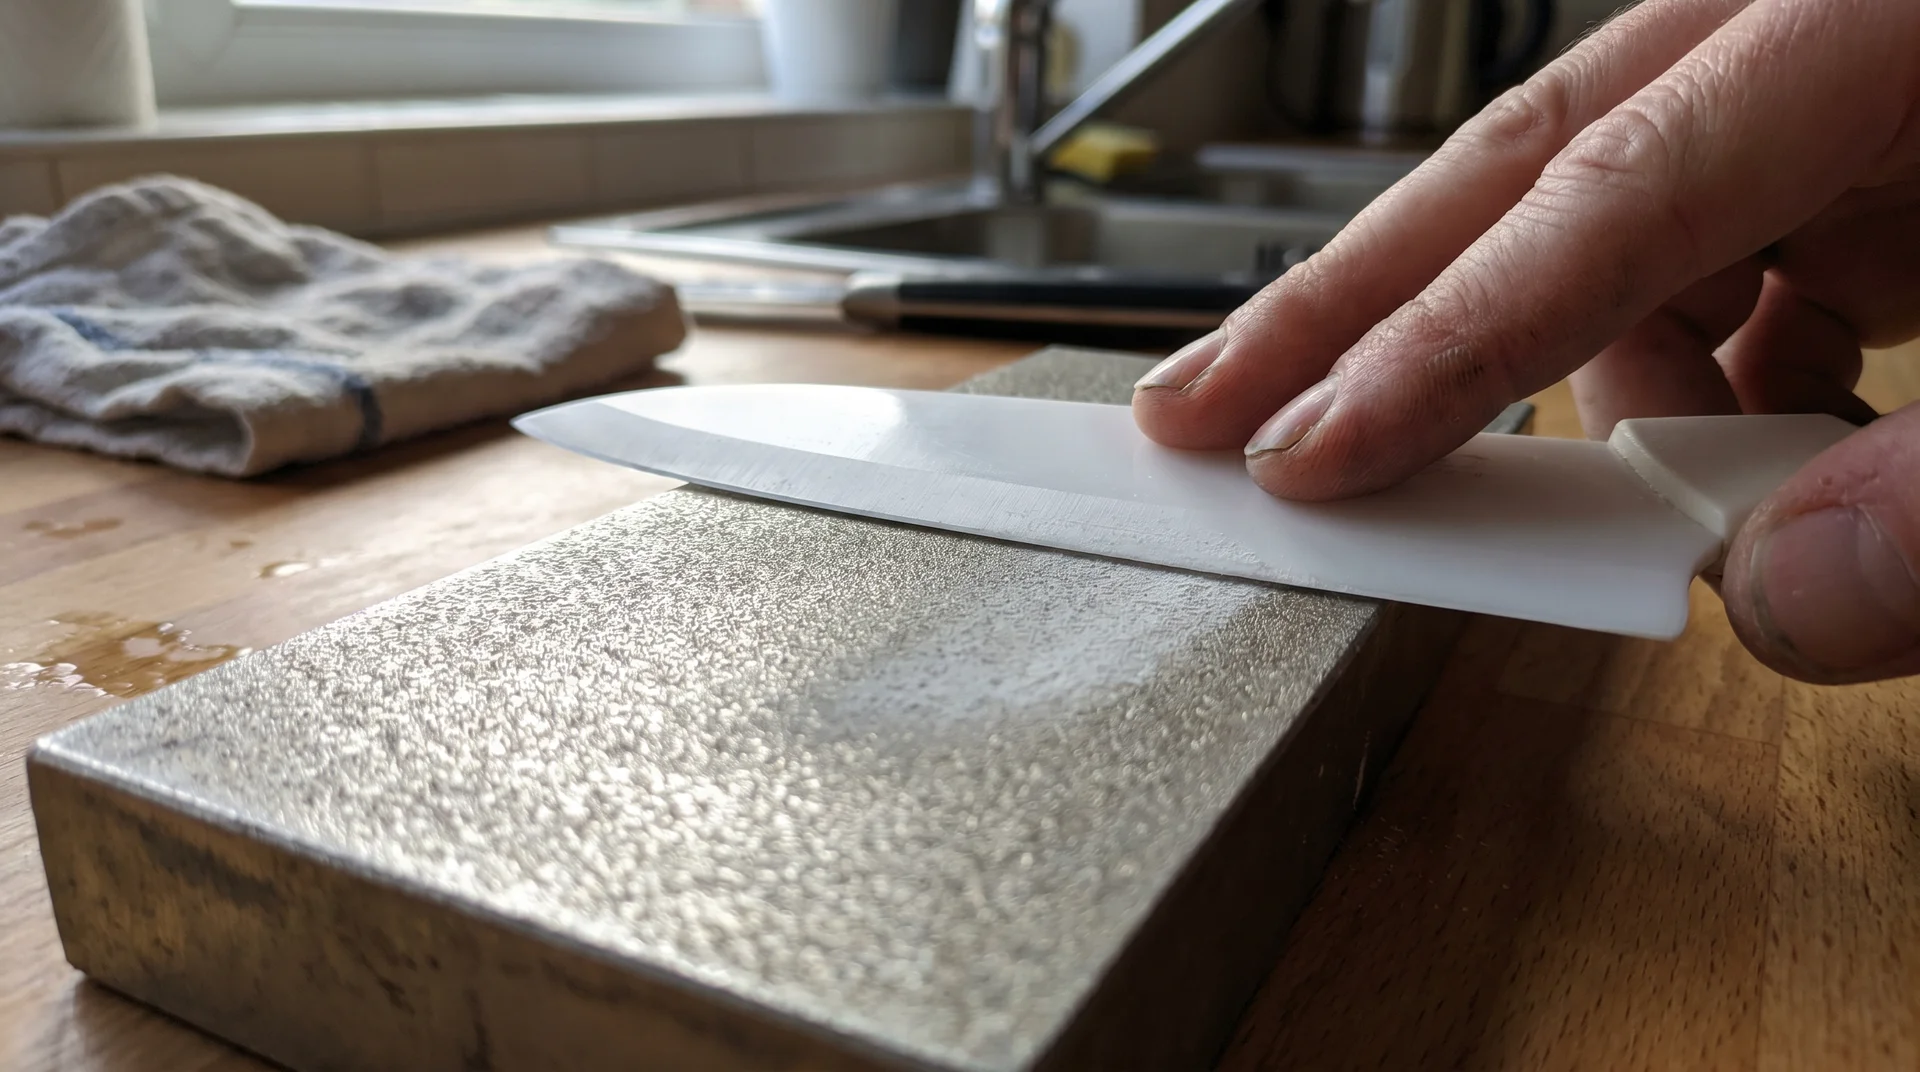
Angle, Pressure, and Stroke
Sharpen at 15 to 20 degrees. Use only the weight of the blade as your pressure. That single instruction matters more than the angle, the grit, or how many passes you take.
To picture 15 degrees: lay the blade flat on the stone, then raise the spine until there’s roughly the width of two stacked quarters between the spine and the stone surface. For thinner ceramic blades, stay closer to 15 degrees than 20.
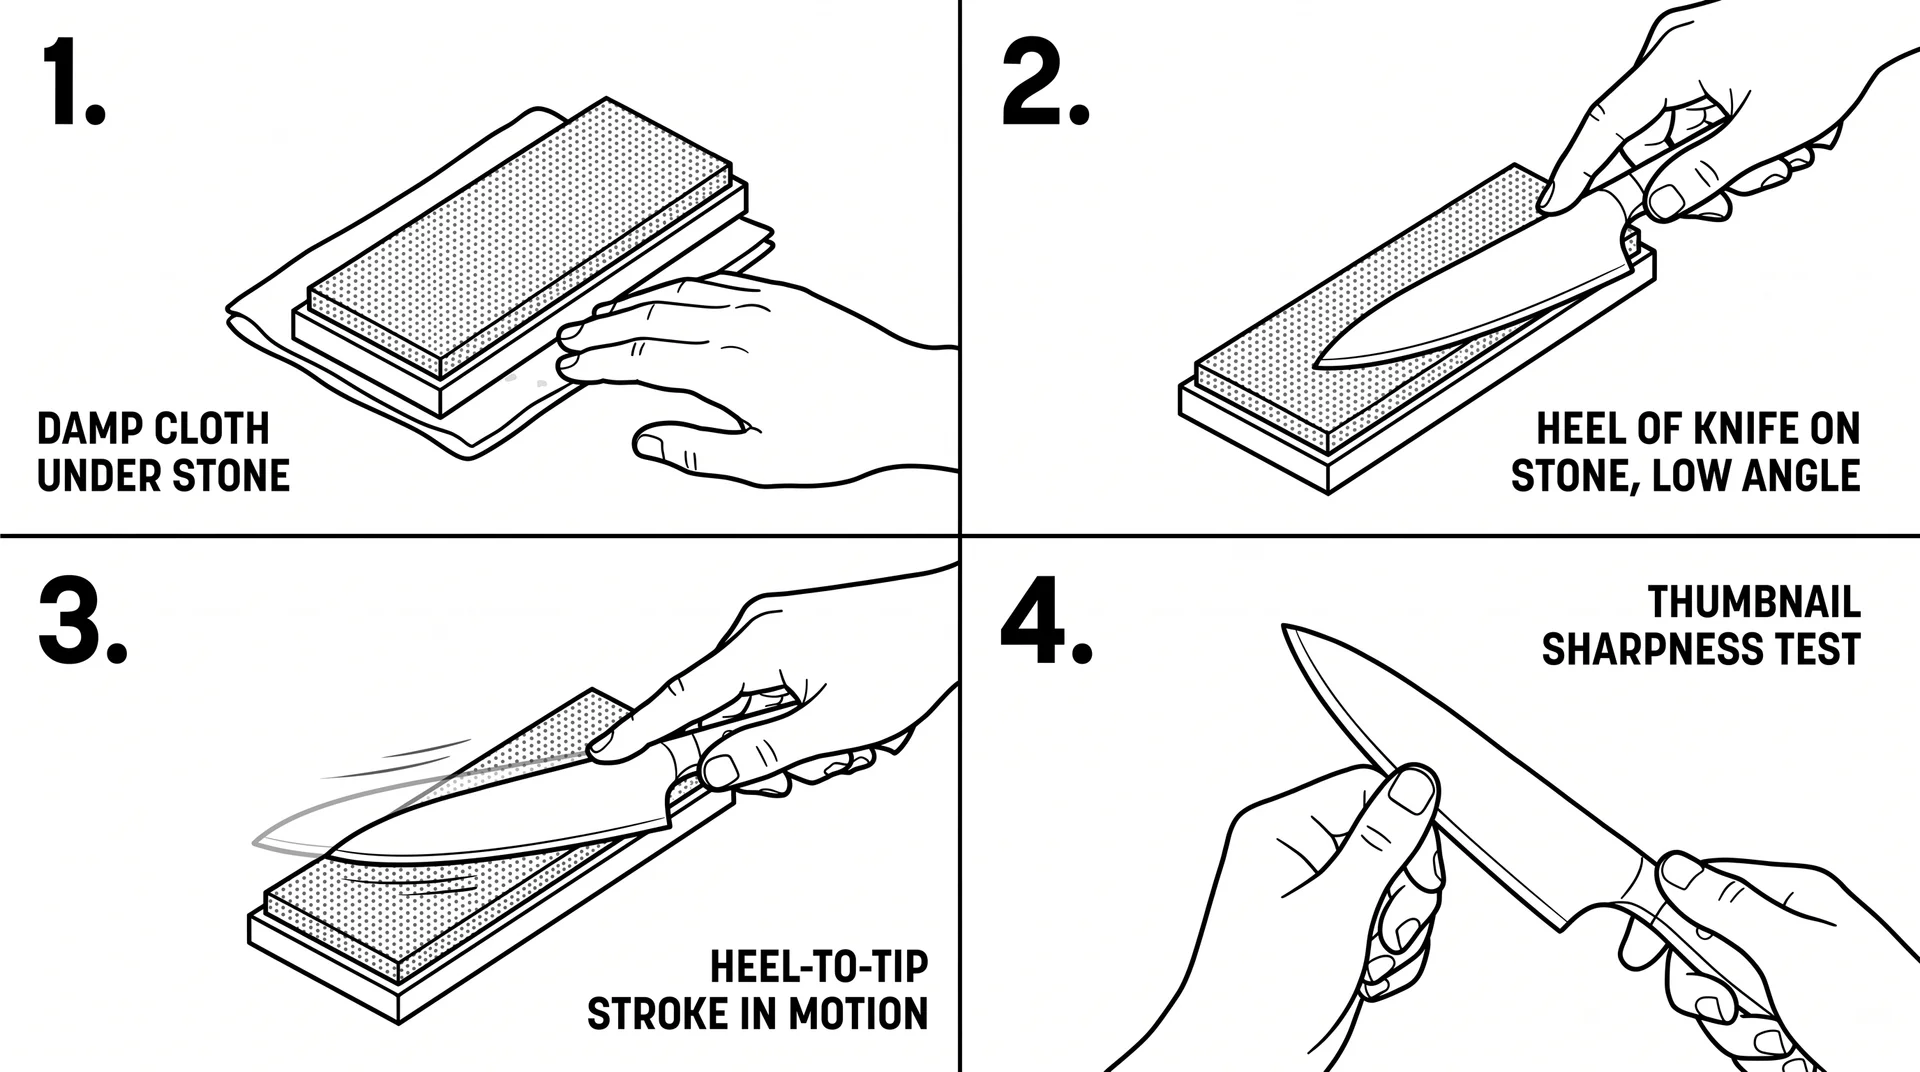
Before starting, consider wearing cut-resistant gloves. Ceramic blades are sharper than most people account for when they begin this kind of work.
- Place a damp cloth under the diamond stone so it won’t move.
- Hold the knife handle in your dominant hand. Rest the fingertips of your other hand lightly on the flat of the blade, well clear of the edge.
- Place the heel of the blade on the stone at your target angle.
- Draw the blade across the stone from heel to tip in one smooth stroke, as if you’re slicing a thin layer off the top of the stone.
- Apply no additional pressure beyond the weight of the knife itself.
- Complete 5 to 8 strokes on one side. Switch and repeat with the same count.
- Work through your full grit progression before testing sharpness.
- Test by holding the edge lightly against the flat of your thumbnail. A sharp edge catches gently. A dull edge slides. You can also draw the edge across a sheet of printer paper; it should slice cleanly, not tear.
- Rinse the blade with water before use to clear any ceramic particles left from sharpening.
Keep your stroke count equal on both sides. Uneven passes push the edge geometry off-center. If the blade starts tracking to one side during cuts, this is usually the reason.
What to Do If the Edge Gets Worse While You Work
Stop sharpening if you see new chips forming or the edge feels rougher than when you started.
New chipping during sharpening means the grit is too coarse, the pressure is too high, or both.
Try the next finer grit with no downward pressure for two or three strokes. If chipping continues, the damage is beyond what a home diamond stone can address cleanly.
More passes won’t fix a deteriorating edge; they will make it worse. Stopping is the right call.
Electric Diamond Sharpeners for Ceramic Knives
Most home cooks will get better results here than with a manual stone.
An electric sharpener manages the two variables that cause the most home sharpening failures: angle consistency and pressure control.
For someone who sharpens a ceramic knife once a year or less, having the machine handle both is a real advantage over freehand work on a stone.
What to Look For When Buying One
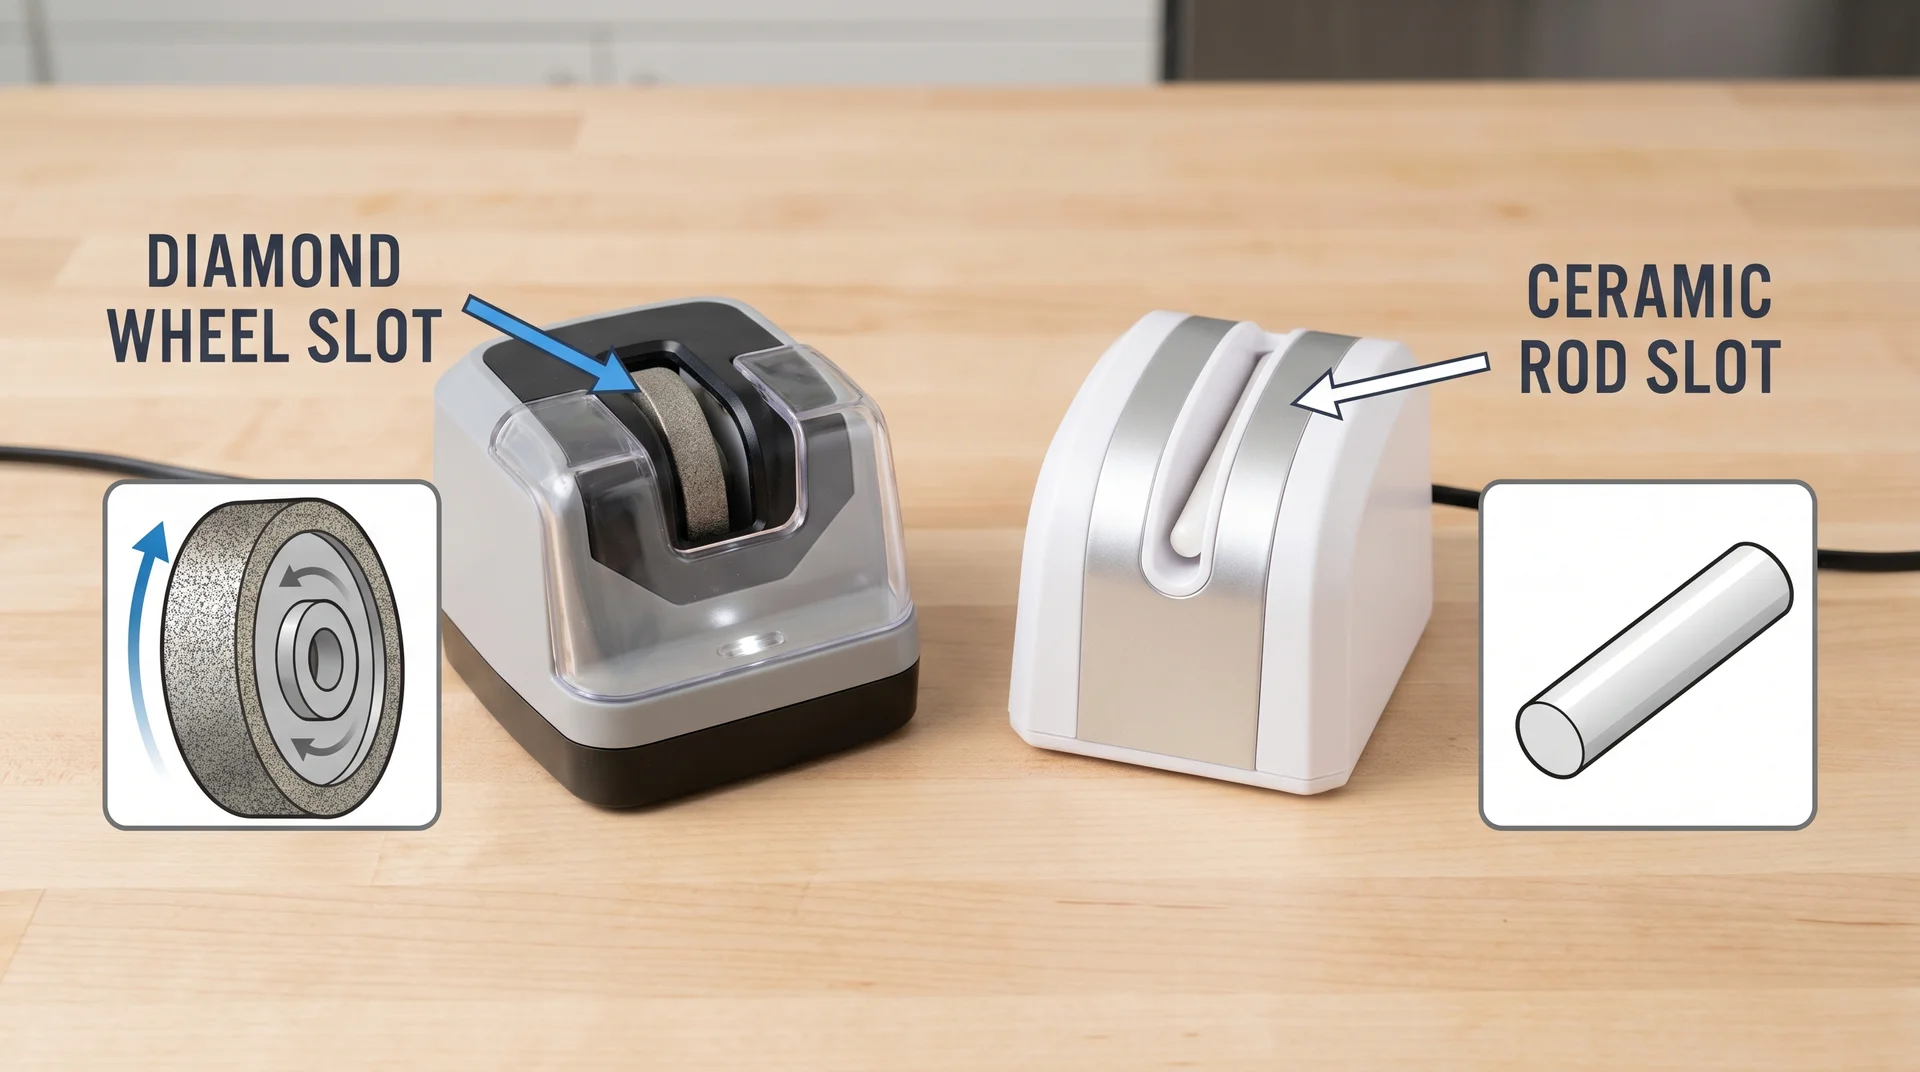
The sharpener must have a diamond wheel stage. A ceramic rod stage alone will not work on a ceramic knife blade.
This confusion shows up in electric sharpener marketing as often as it shows up in kitchen drawers.
A product labeled “ceramic knife sharpener” may have ceramic rod honing slots that work on steel edges, and no diamond wheel stage at all. Check the specifications before purchasing.
| Sharpener Type | Works on a ceramic blade? | Intended For |
|---|---|---|
| Electric, diamond wheel stage | Yes | Ceramic and steel knives |
| Electric, ceramic rod stage only | No | Steel knife maintenance only |
| Pull-through, carbide slots | No | Steel knives only |
|
Manual diamond stone |
Yes | Any knife requiring a diamond abrasive |
Kyocera’s electric diamond sharpener uses a #1000 grit diamond wheel designed specifically for their ceramic knife line. I’ve run it on two Kyocera blades over roughly 18 months, and it produces a reliable, repeatable edge each time.
It won’t restore factory sharpness. Kyocera’s own documentation says so plainly, but for blades with light to moderate dullness, it’s the most consistent at-home result I’ve found without freehand technique.
The Limit of Electric Home Sharpeners
An electric home sharpener restores a functional edge. It does not restore a factory edge on a blade with significant chip damage.
The 0.5mm chip depth limit on tools like Kyocera’s unit reflects a real mechanical constraint. Chips deeper than that require more material removal than a countertop machine can handle. Pushing past that limit produces an uneven result rather than a clean edge.
For a chipped blade beyond that threshold, professional sharpening with water-cooled diamond wheels is the correct next step.
How to Fix a Chipped Ceramic Knife
Chips are repairable if the damage falls within the range your tools can handle.
Small Chips: Can You Fix Them at Home?
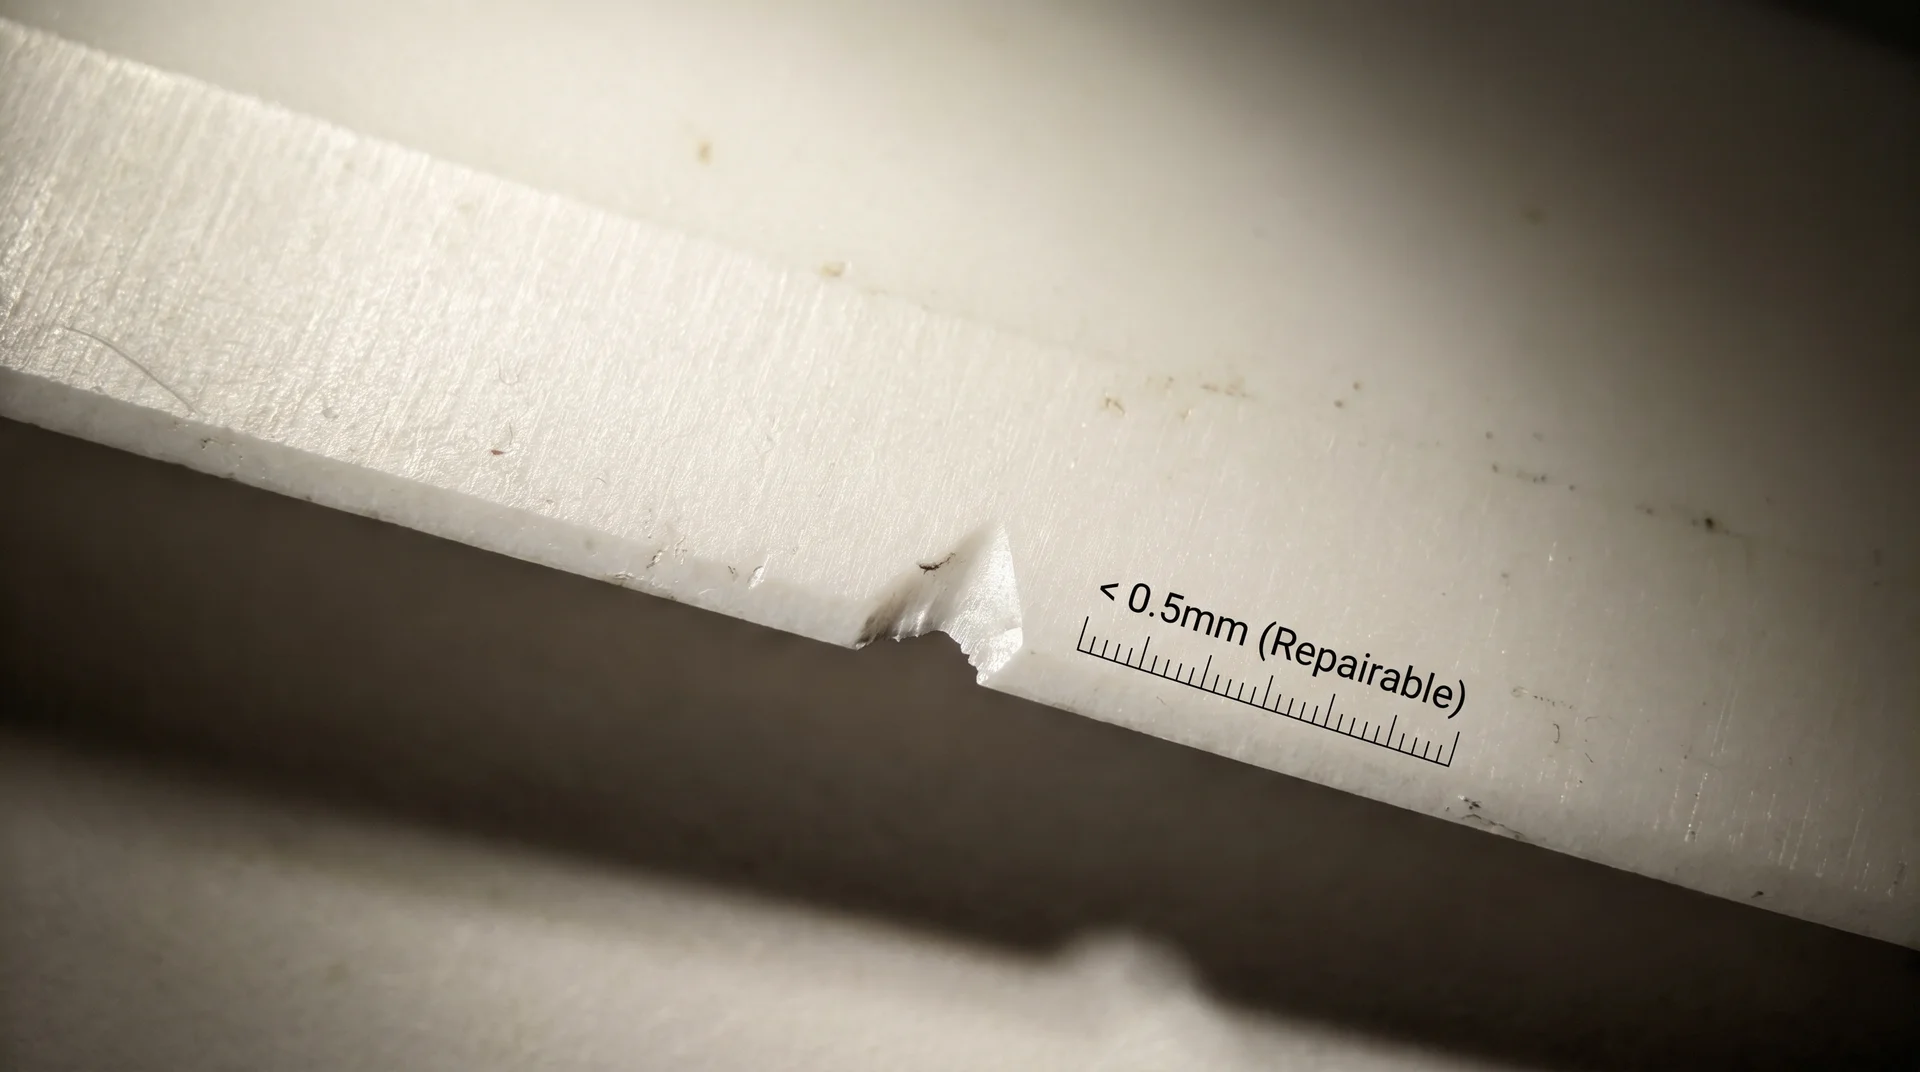
Yes, if the chip is under approximately 0.5mm deep and you’re working with a diamond abrasive at the right grit and pressure.
The process is the same diamond stone method described above, with one adjustment. Spend additional passes on the chipped section before working the full length of the blade.
Focus the first several strokes on the chipped area, working from the heel toward the chip location. Continue until the edge profile is consistent through that section. Then run standard heel-to-tip strokes for the full blade.
The repaired knife will have a slightly altered edge profile. Removing the ceramic to get behind the chip changes the geometry slightly. For a home kitchen knife used on soft vegetables and boneless proteins, that difference isn’t meaningful in practice.
If the damage is more significant, the repair calculus changes.
When the Damage Requires a Professional
Chips larger than 0.5mm, significant tip damage, or multiple chips spread across the blade are beyond what a home diamond stone or electric sharpener can address cleanly.
Professional sharpeners use water-cooled diamond wheels that remove ceramic material at the volume needed for serious repair.
Services like KnifeAid handle ceramic knives as a specific service at around $10 per knife.
For Kyocera knives, Eversharp is Kyocera’s authorized service provider for blade restoration.
One thing worth knowing before you contact the manufacturer: Kyocera’s free lifetime sharpening program has been discontinued. If you bought a Kyocera knife with that expectation, third-party services are the practical route forward.
It’s a different logistics step than it used to be, not a permanent dead end, just a different path.
Current published Kyocera repair thresholds: chips up to 3mm along the blade edge and up to 10mm at the tip may be professionally repairable. Beyond those dimensions, the blade is generally not restorable.
How Often Should You Sharpen a Ceramic Knife?
For most home cooks, once a year is a reasonable starting point.
The variable that matters most is what the knife cuts on and how it’s stored.
A ceramic knife used daily on soft vegetables and fruit, properly stored in a knife block, might go two years without sharpening. The same knife stored loose in a drawer and used occasionally on harder produce will need attention sooner.
No fixed interval applies to every kitchen. I’ve seen knives from the same brand vary by more than two years in how long their edge lasted.
The difference was almost always the cutting board surface, and I’d be making something up if I gave you a single number.
What Keeps a Ceramic Knife Sharp Longer
The biggest factor is what you cut on, not how you sharpen.
Ceramic knife edges chip through the same mechanism described above, tiny fractures from hard contact. Most of those fractures don’t come from cutting food. They come from the cutting board surface and the storage drawer.
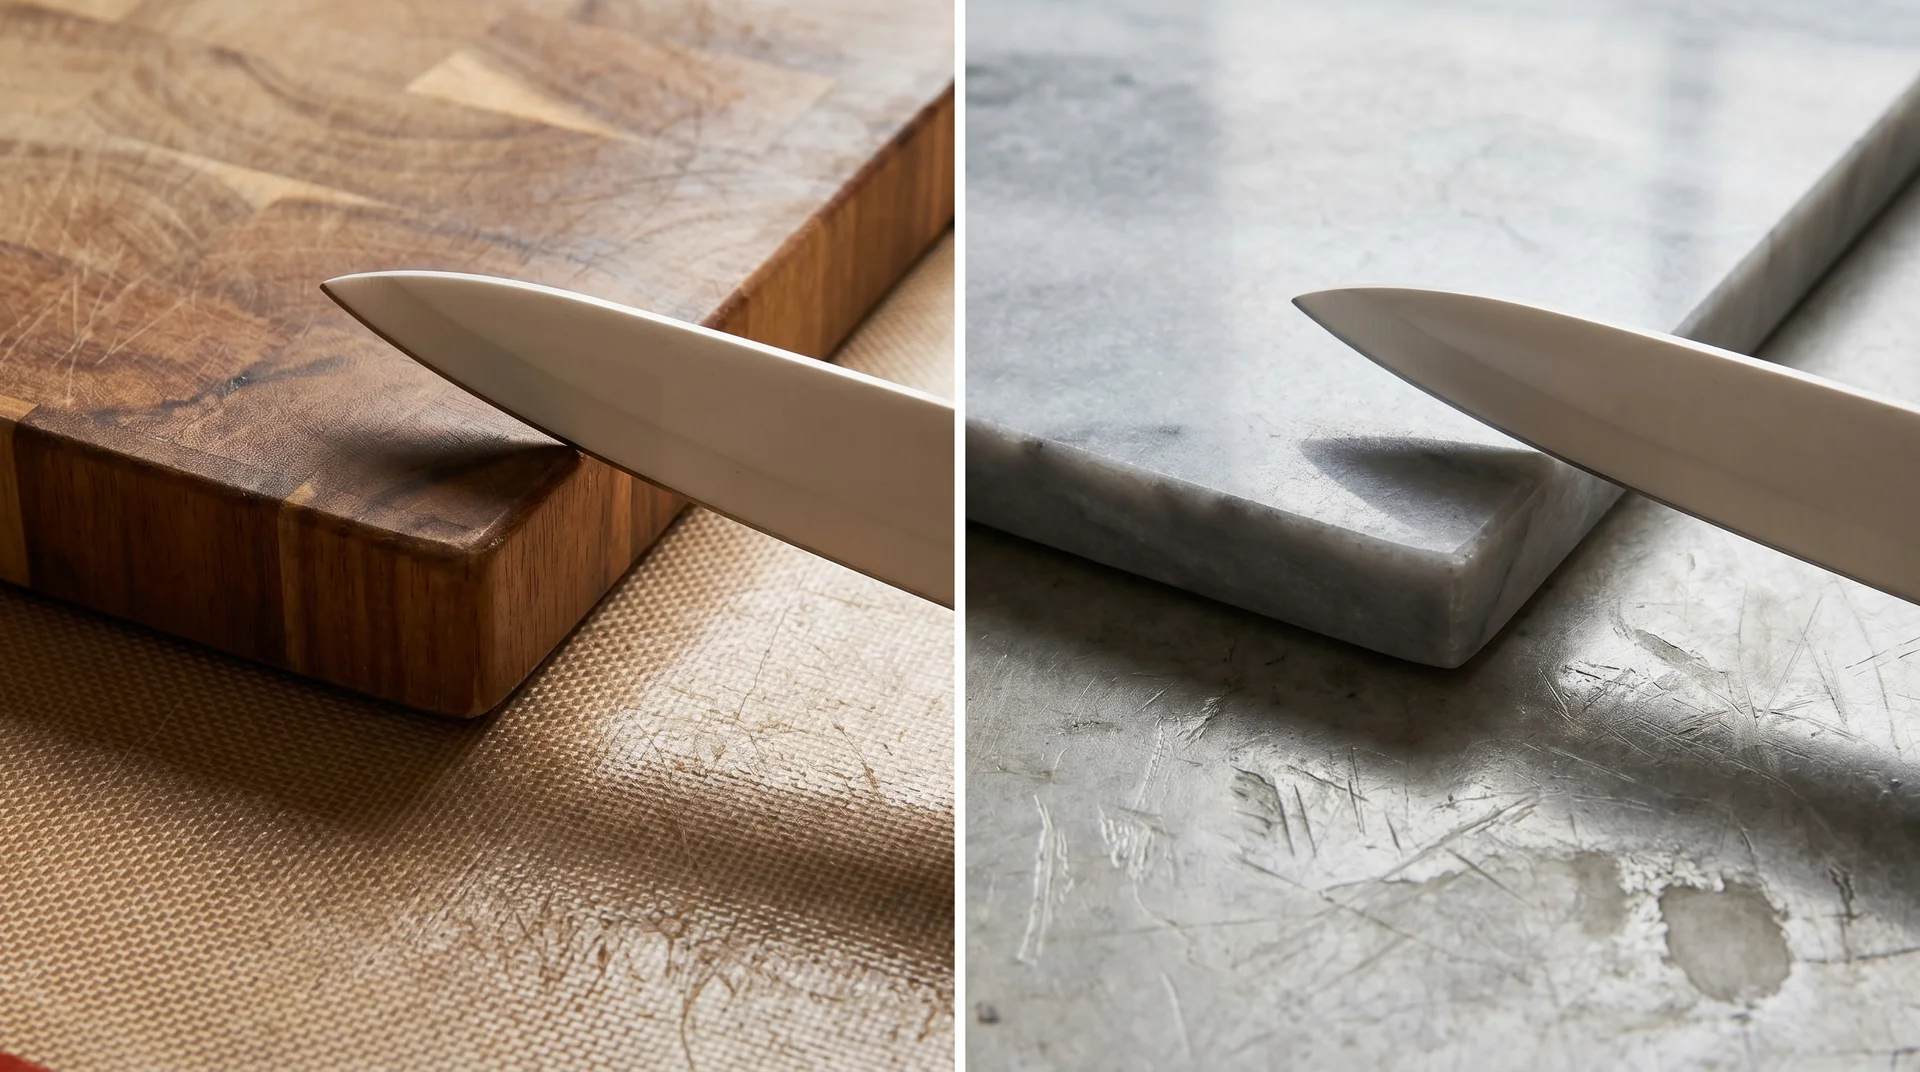
Glass, stone, marble, and ceramic cutting board surfaces chip the edge from below on every cut. It happens at a scale you can’t see, but it accumulates fast.
People put beautiful natural stone boards on their counters and then wonder why their ceramic knives dull constantly.
- Cutting surface: Use a wood or plastic cutting board exclusively. Glass, marble, stone, and ceramic boards accelerate chipping faster than actual cutting use does.
- Storage: Keep the knife in a block, a blade sheath, or on a magnetic strip with a protective cover. Never left loose in a drawer where it contacts other utensils on every reach.
- What to avoid cutting: Frozen food, bone-in cuts, hard-skinned squash, and anything requiring significant force. These uses chip ceramic edges faster than months of normal prep work.
- Cleaning: Hand wash and dry immediately. Other items knocking against the blade in a dishwasher cycle will chip the edge, even if the machine itself doesn’t dull it.
None of those are difficult habits. They tend to get skipped because they’re less visible than the knife itself. And then the knife gets blamed for dulling quickly when the real cause is something sitting two feet away on the counter.
Final Thoughts
Assess the edge before you choose a method. Dullness and chipping are not the same problem. A blade that’s gradually lost its sharpness responds well to a fine diamond stone at home.
A blade with chip damage needs more careful handling, the right grit, minimal pressure, and a willingness to stop if the edge gets worse. Past a certain point, send it out.
If you’ve already tried home sharpening and made things worse, a professional service can reset the edge from scratch, and the knife will hold up the way it’s supposed to.