


Your kitchen needs at least 42 inches of clear floor space around every side of the island. That’s the minimum the National Kitchen and Bath Association, known as the NKBA, sets for a single-cook kitchen. Miss that number and the island becomes an obstacle in a room that was already working fine.
Clearance is the starting point. Your kitchen’s layout, whether L-shaped, galley, U-shaped, or one-wall, determines whether a fixed island is workable at all.
Square footage alone won’t tell you that. Your floor plan will play a role.
Kitchen Island: The Clearance Rule 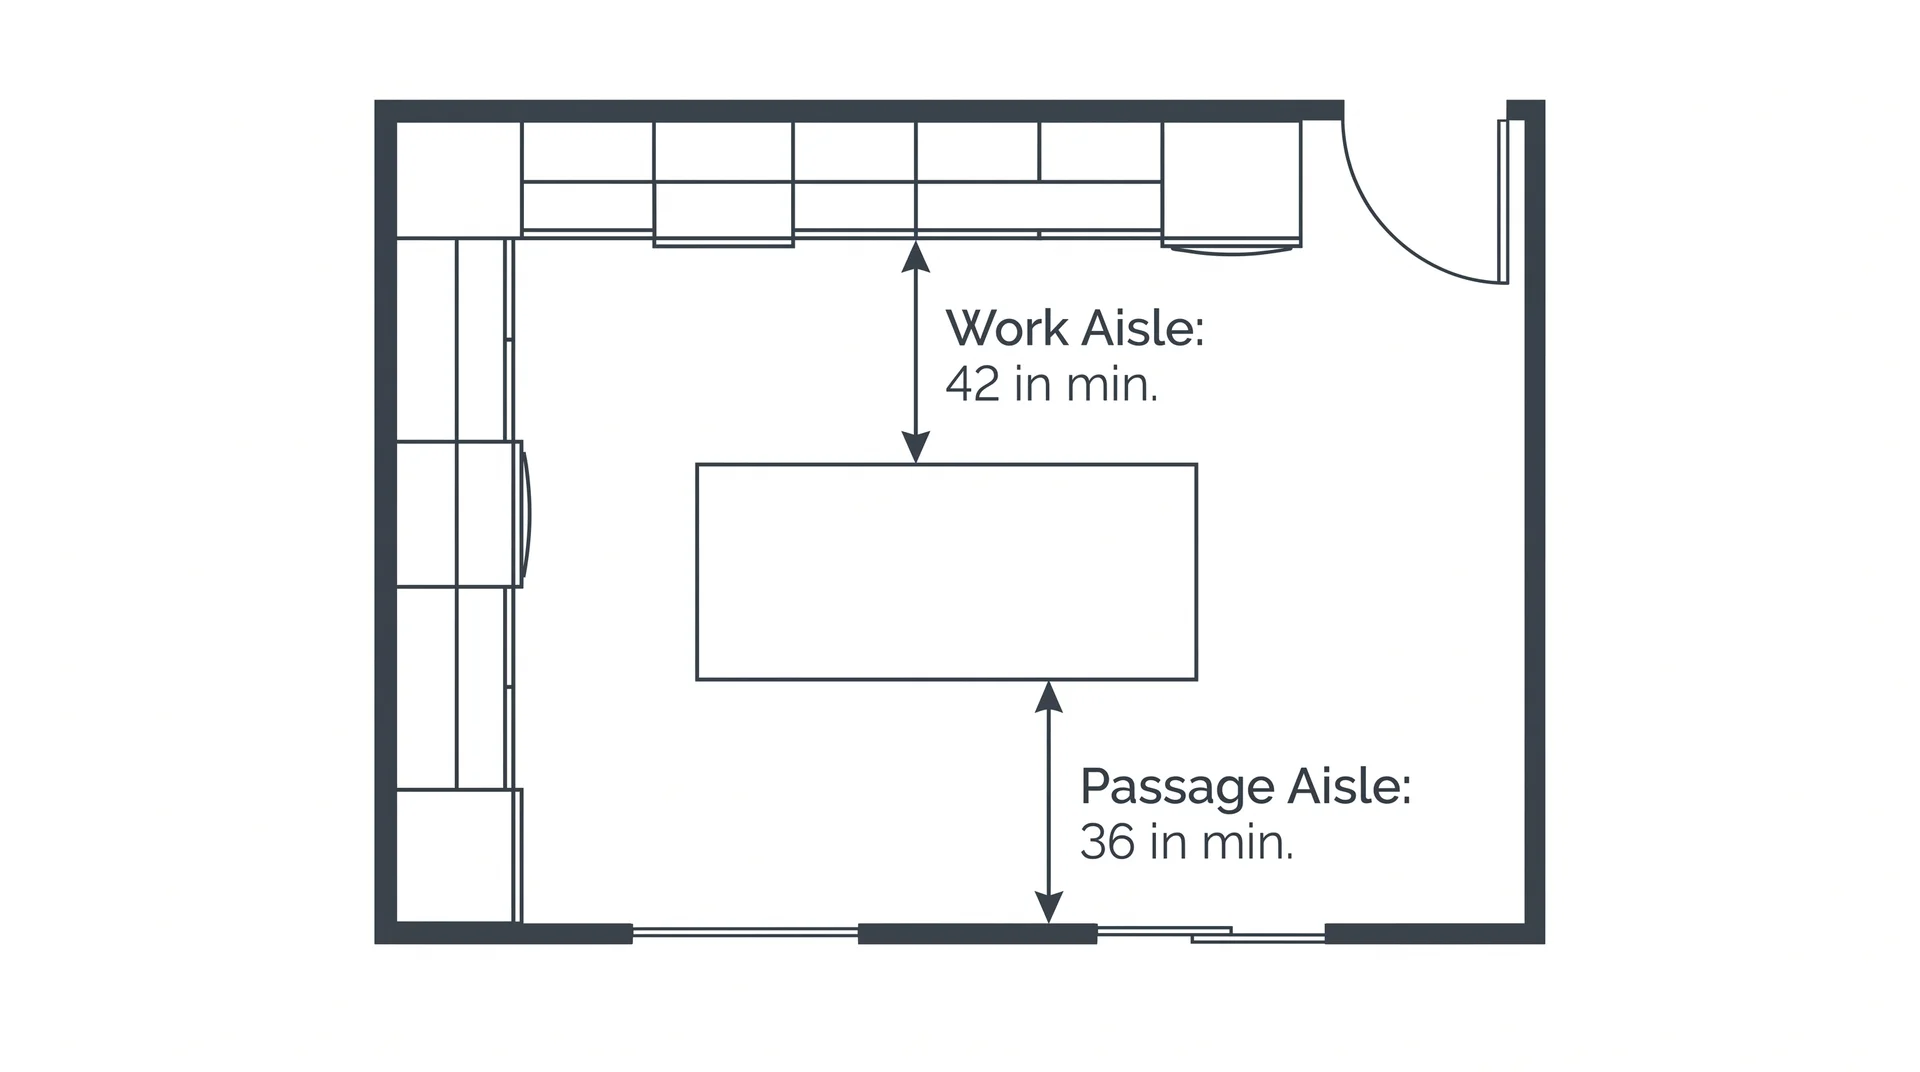
Clearance is the gap between your island and everything else in the room.
Most homeowners searching for this number find different answers on different sites: 36 inches here, 42 there, 48 somewhere else. All of those numbers can be correct. They’re answering different questions, and the NKBA kitchen planning guidelines make that distinction explicit.
Work Aisle vs. Passage Aisle
A work aisle is where you cook, prep, and open cabinets. A passage aisle is where people walk through. The NKBA sets different minimums for each, and most kitchen island guides skip that distinction completely.
A work aisle runs between your island and anything you cook from, prep at, or open.
- The NKBA minimum for a work aisle is 42 inches for a single cook.
- For kitchens where two people regularly cook at the same time, that minimum rises to 48 inches.
The 36-inch figure comes from passage aisle guidance. It’s a walkway standard, not a working clearance. Applying it to a side of the island where you load a dishwasher is how kitchens end up measuring correctly on paper and failing in daily use.
The ceiling matters too. If clearance on any side exceeds 60 inches, the island starts to feel disconnected from the rest of the kitchen. That creates a different workflow problem: too much distance between your prep surface and your appliances.
What Happens Below 36 Inches
Below 36 inches, two people cannot comfortably share the space around the island. Below 30 inches, there are safety concerns, not just comfort ones.
The International Residential Code, or IRC, sets a floor of 30 inches for any kitchen walkway. That’s a building code minimum. It’s not a design target. I’ve been in kitchens built to code minimums that still feel too tight the first time you try to load the dishwasher while someone else is at the stove.
Thirty-six inches sounds workable until you’re in the room with someone else. You can move through it, but passing someone standing at the island means turning sideways.
Cabinet doors and drawers extend into that zone. Plan for what the space does when it’s in use, not what it measures when it’s empty.
The Minimum Kitchen Size
Around 150 square feet is the figure most designers cite as a comfortable minimum for an island. It gets repeated so often that it has started to feel like a rule. It isn’t, and relying on it alone leads people into decisions they later regret.
Square footage measures the total room. It doesn’t tell you how much of that area is already occupied by perimeter cabinets, appliances, and walls. The number that actually determines whether an island fits is your open floor space after cabinetry is in place.
Here’s the calculation:
- Measure the open floor space between your cabinet runs, not the full room dimensions.
- Subtract 84 inches from each direction that requires clearance: 42 inches on each of two sides facing cabinet runs or appliances.
- The remaining dimension is your maximum island size in that direction.
If that calculation leaves less than 24 inches in either direction, a fixed island won’t function in the space.
Under 48 inches in length, and you’re looking at a cart, not a built-in island.
A fixed island that earns its footprint needs a minimum of roughly 24 inches deep by 48 inches long to provide a useful prep surface.
What Your Kitchen Layout Tells You Before You Measure
Your layout sets the constraints before any tape measure comes out.
Most kitchen island guides treat clearance as one universal rule applied to a generic room. Your room isn’t generic. Whether you have a galley, an L-shape, a U, or one open wall changes how the clearance math works. In some configurations, it changes whether a fixed island makes sense at all.
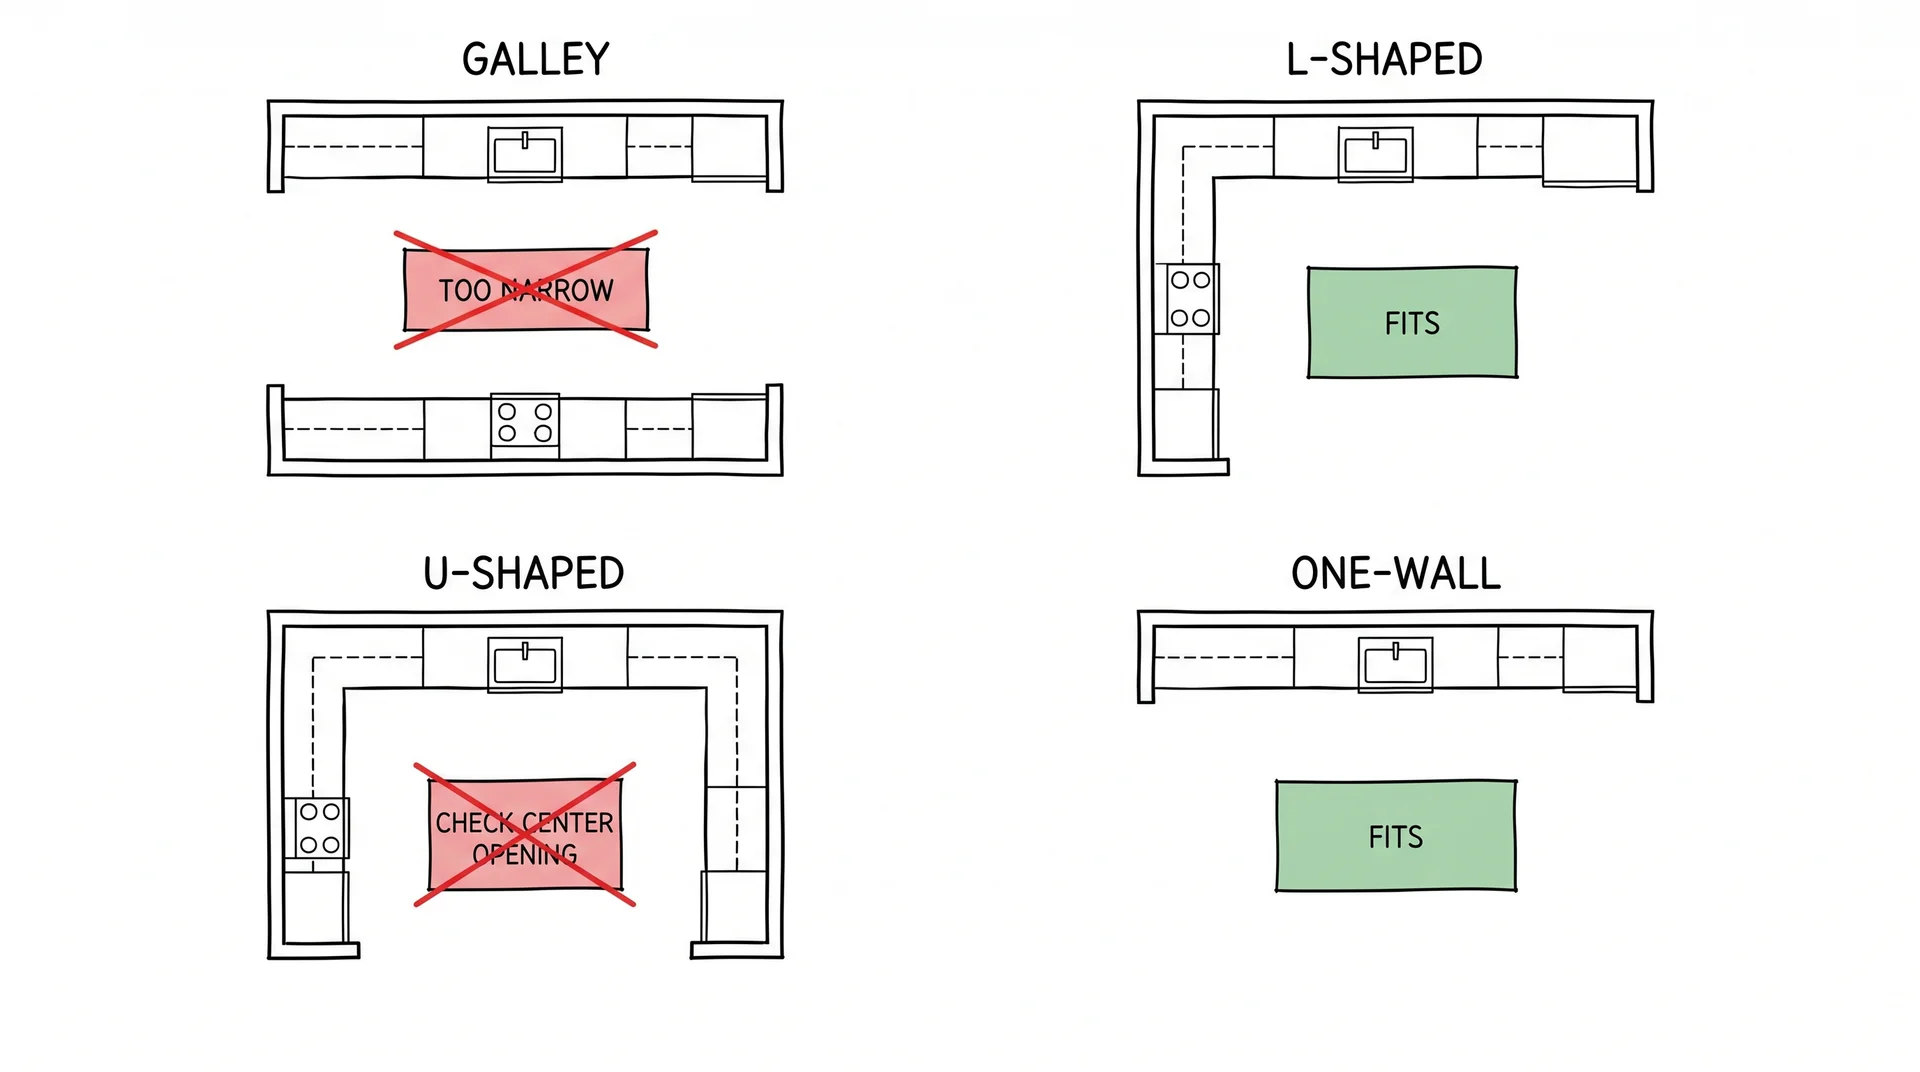
Galley Kitchens

A galley kitchen runs two parallel cabinet runs facing each other, and this layout is almost always too narrow for a fixed island.
A narrow island, 24 inches deep, needs 42 inches of clear floor on each side. Add those three dimensions, and the open floor space between your facing cabinet fronts needs to be at least 108 inches.
Most galleys in apartments, older homes, and urban construction fall well short of that.
The right answer for a galley kitchen is a rolling cart on locking casters. It gives you the prep surface. It stores against a wall when you need the floor clear.
A rolling cart, sized correctly, is the right tool for the layout you actually have.
L-Shaped Kitchens
An L-shaped kitchen is the most island-friendly layout because the open corner creates a natural island zone.
An L-shaped kitchen has two counter runs meeting at a corner, leaving a substantial open area of floor space where an island can sit without disrupting the work zone.
Walk into that open area and stand across from where the two counter runs meet. That’s where the island belongs. Maintain 42 inches between the island edge and the nearest section of the L-counter, and the clearance on the remaining sides is usually workable.
The placement mistake I see most often: the island ends up too close to the open end of the kitchen.
That’s where traffic enters from the dining or living area. Position the island closer to the cooking zone, and you preserve the natural flow of the room.
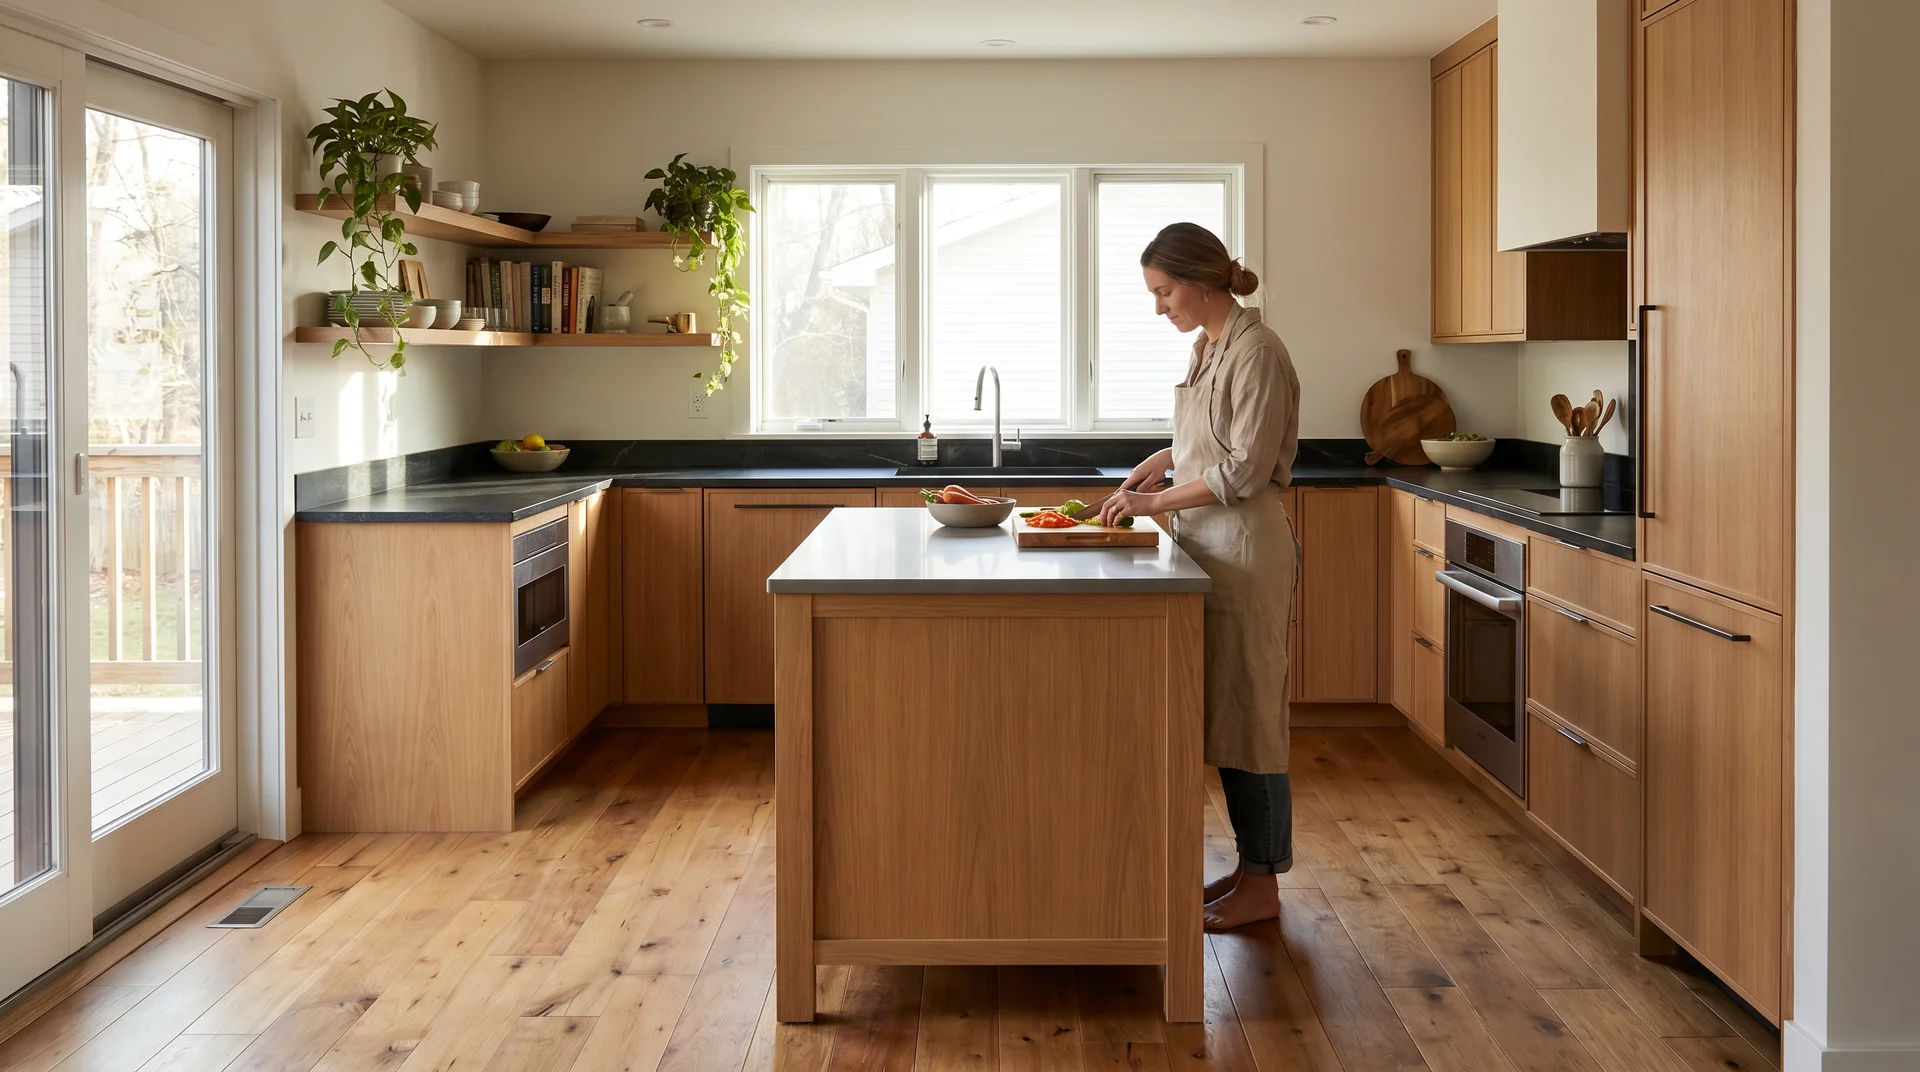
U-Shaped Kitchens
U-shaped kitchens look spacious until you account for what the third wall does to the center clearance.
In a U layout, an island sits between three cabinet runs. To fit a 36-inch-wide island, you need 42 inches of clearance on each side. That’s a minimum center opening of 120 inches, or 10 feet, between facing cabinet fronts.
Most U-shaped kitchens under 13 feet wide at that center opening don’t have room for a fixed island that functions well. This is where the 150-square-foot guideline misleads people the most.
A 12-by-12 U-shaped kitchen is 144 square feet, technically above the threshold. The center opening after cabinets are placed may be 8 feet or less.
If the center opening doesn’t clear 10 feet, a peninsula is almost always the better answer. That option gets its own section below, and it’s worth reading before writing off the U-shaped kitchen entirely.
One-Wall and Open-Plan Kitchens
A one-wall kitchen offers the most island flexibility because clearance only runs in one direction.
You’re managing the gap between one cabinet run and the island face. Maintain 42 inches between them, and the island’s length is constrained primarily by room width. This is the configuration where total square footage carries its most useful meaning as an upper ceiling.
Open-plan kitchens carry a different pressure. The island in a large open-plan space often serves as a visual anchor between the kitchen and living areas, and that role pushes people toward oversizing.
Scale the island to the kitchen, not to the room. An island that reads well from the sofa is often too wide to navigate when you’re carrying a full pot from the stove to the sink.
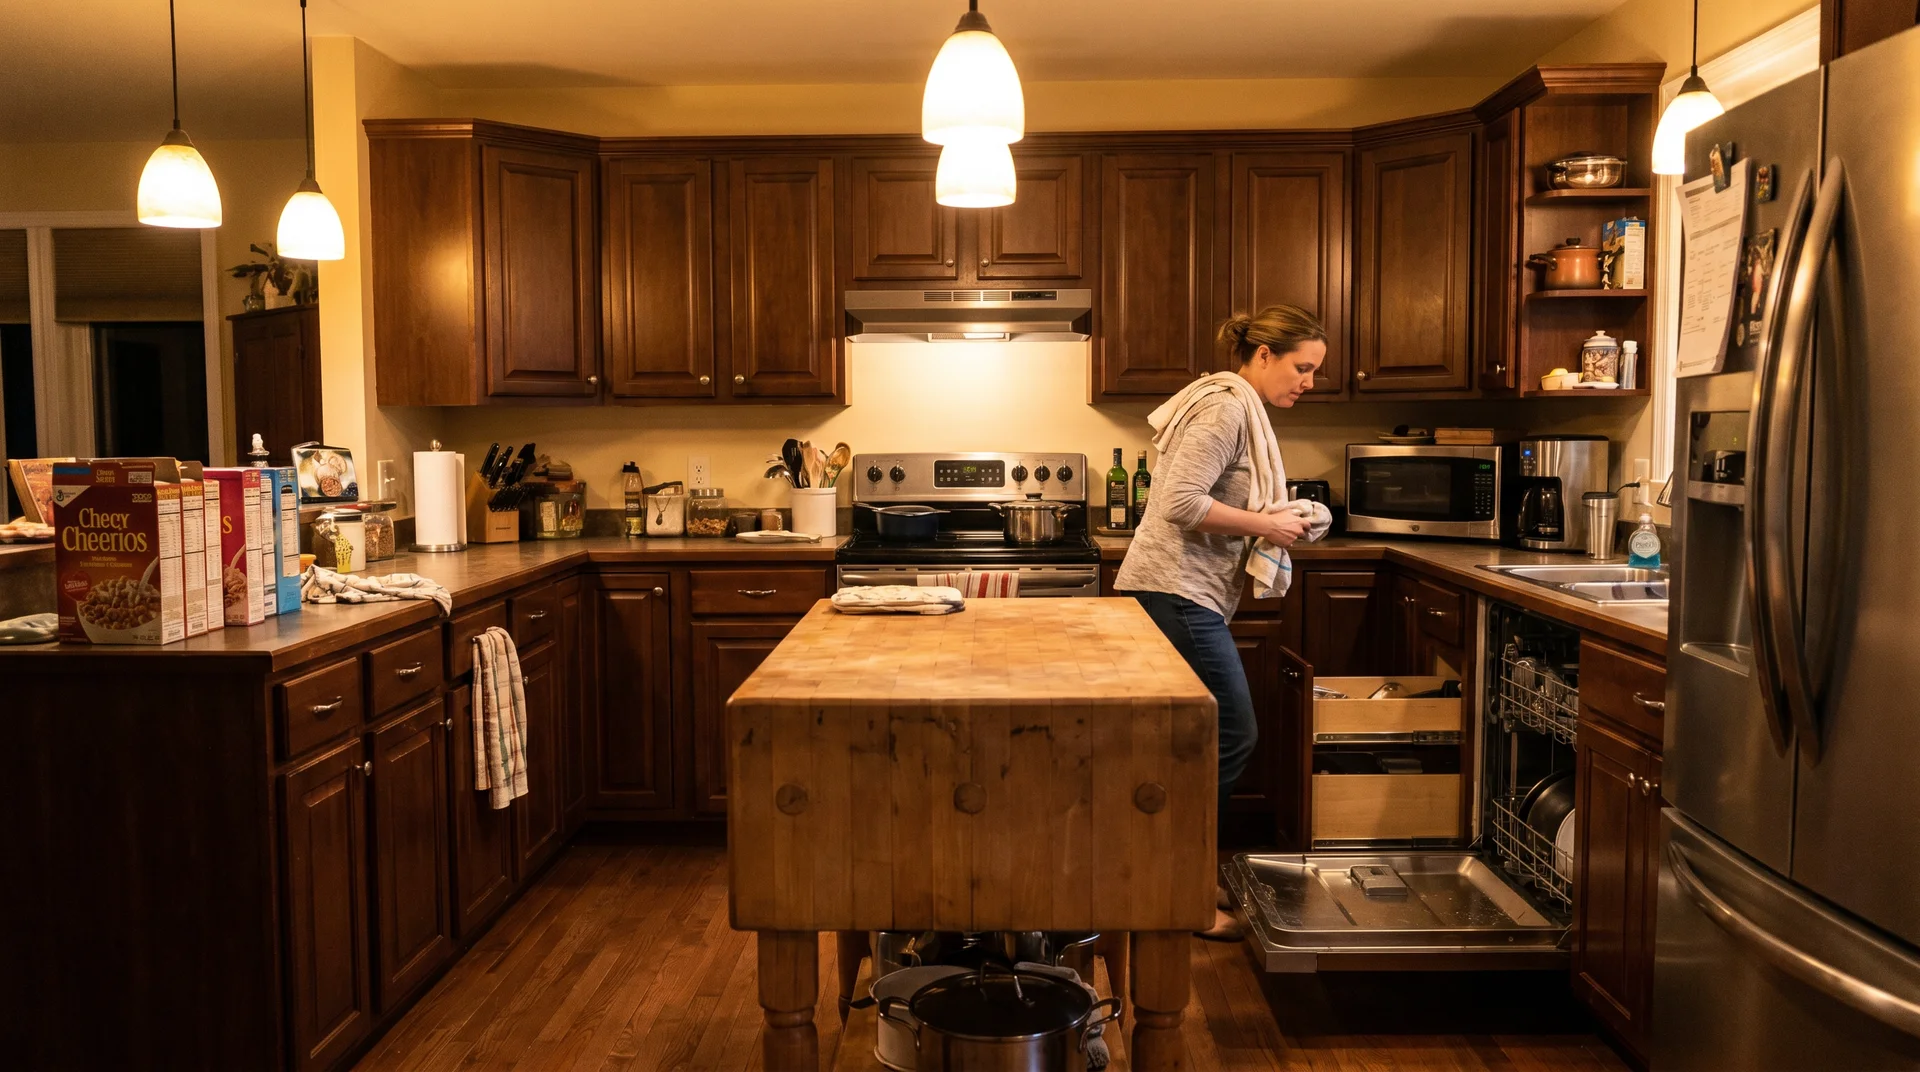
The Appliance Door Problem Nobody Mentions
The doors you forget about will cost you the most.
This is the most consistent renovation regret I encounter. The clearance measurements are correct on paper. The island fits dimensionally. Then someone opens the dishwasher door, and the aisle disappears.
I’ve been called into enough of these conversations after the fact to know this is not a rare edge case. The measurements were correct on paper. The kitchen wasn’t.
Dishwasher, Oven, and Refrigerator
Three appliances open into your clearance zone, and most kitchen planning tools ignore all three of them.
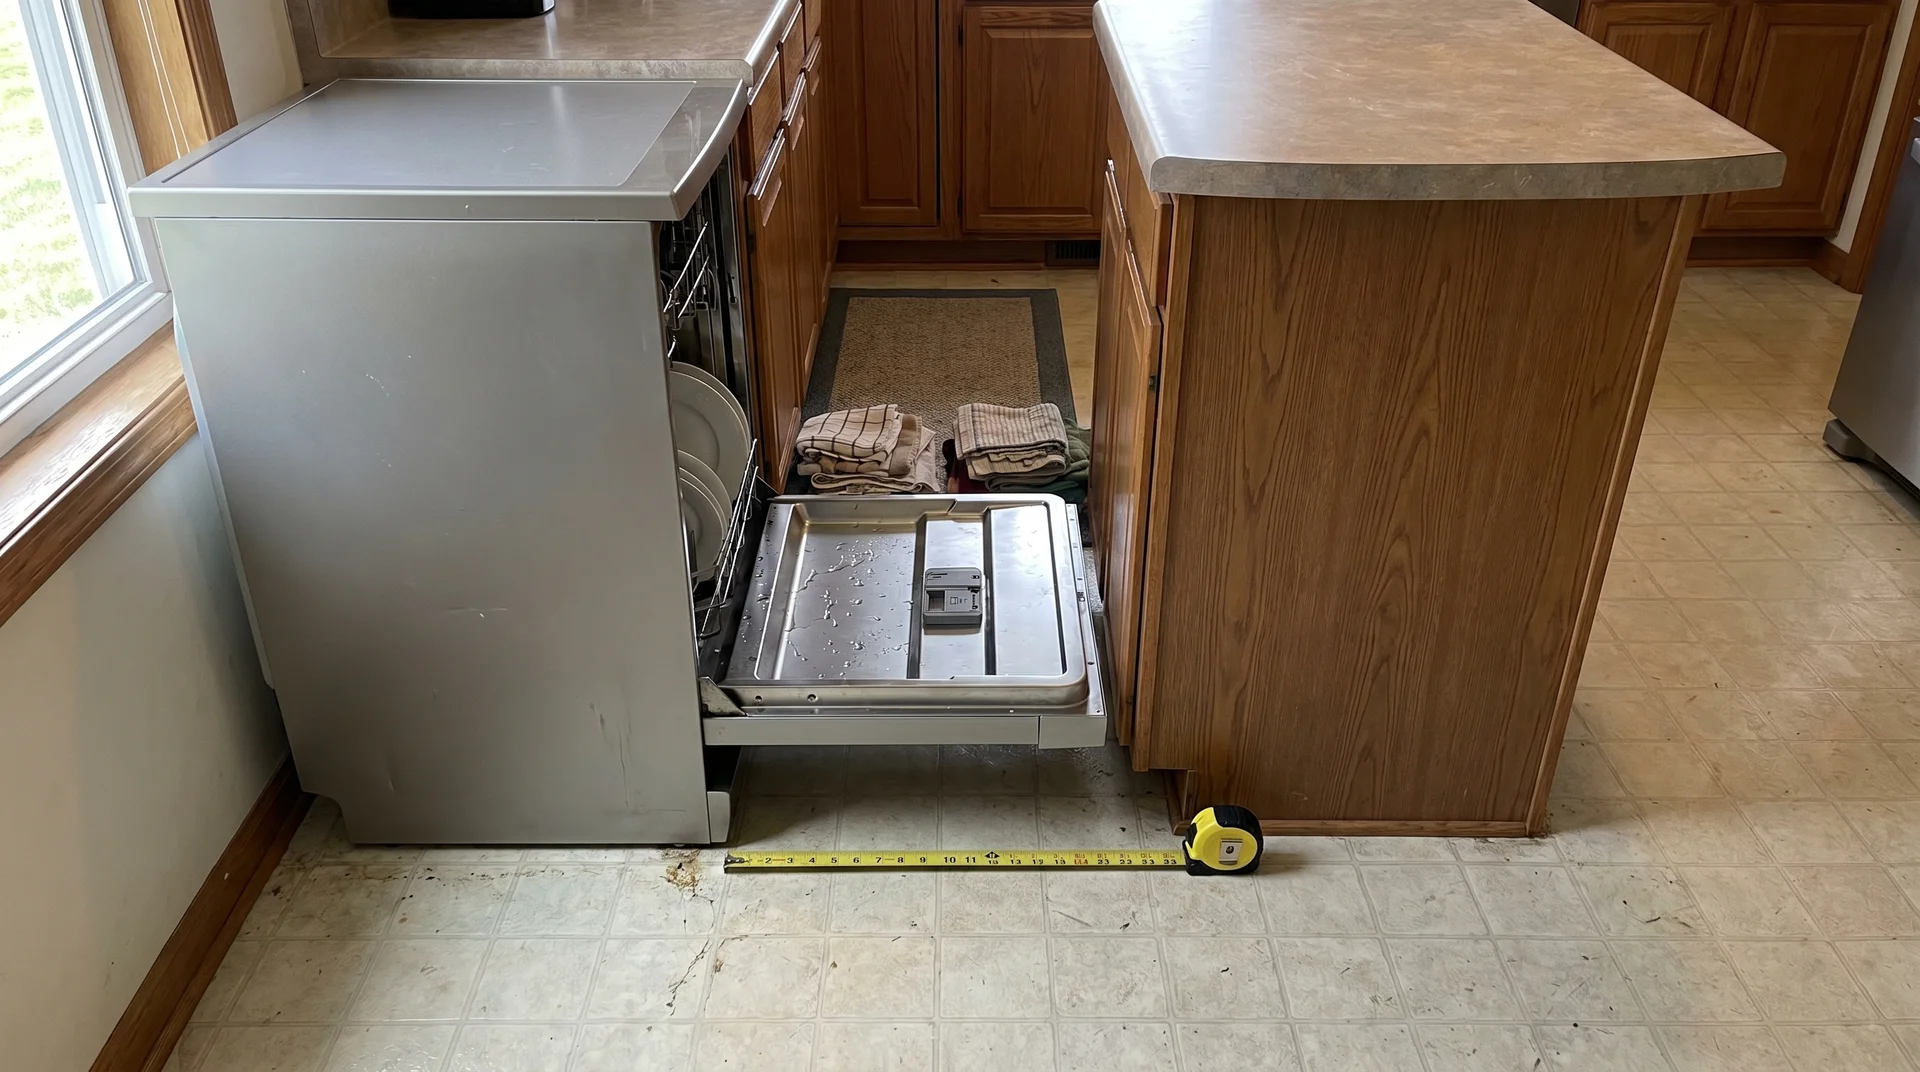
The dishwasher door opens downward and outward, projecting approximately 24 inches into the adjacent aisle when fully open. If the dishwasher faces the island and your clearance is at the 42-inch minimum, the open door leaves roughly 18 inches of working space.
Loading dishes in 18 inches, with the dishwasher door at your feet, is not a functional kitchen experience.
The oven door opens the same way: down and out, directly into the aisle in front of it.
The refrigerator swings 90 degrees to the side. Any of these appliances opening toward the island, at minimum clearance, turns a kitchen that measures correctly into one that doesn’t work.
Fixing this after installation is not straightforward. Moving a dishwasher means reopening plumbing. Moving a refrigerator means relocating an outlet or a dedicated circuit. The time to catch this is before installation. The next section describes a test that takes a week and costs nothing.
How to Check Before You Commit
Tape out the island footprint on your kitchen floor before any purchase or installation happens.
Use painter’s tape to mark the exact island dimensions on the floor.
Then open every appliance door fully: the dishwasher, the oven, the refrigerator. Stand in the remaining space.
Walk the path between the taped outline and the stove while holding something at chest height.
What you feel in that 20-minute exercise is what your kitchen will feel like every day the island is there.
The Cardboard Test: How to Know Before You Buy
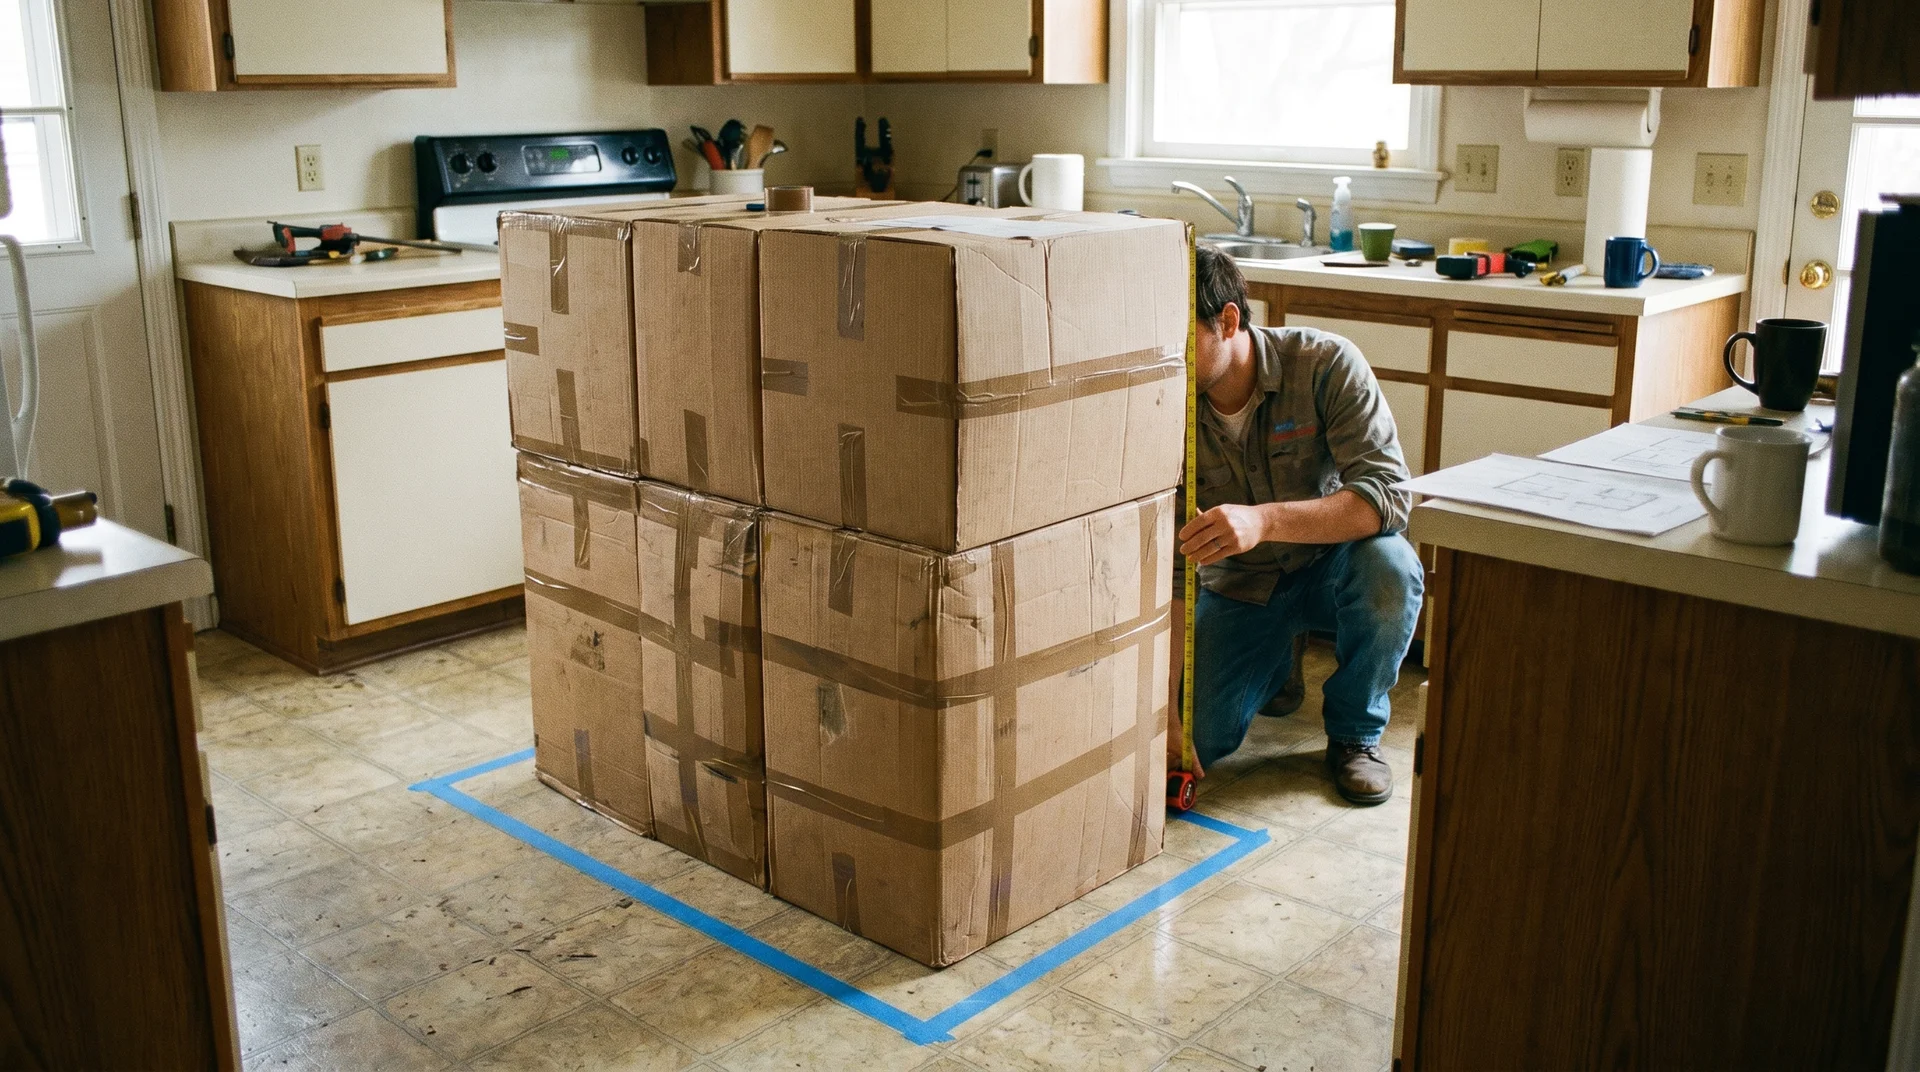
A cardboard test reveals what a tape measure cannot.
The tape measure checks whether the island fits on the floor. The cardboard test checks whether you can still cook with it there. I’ve stopped treating this as optional advice. The clients who skip it are consistently the ones who call me six months later.
What You Need and How to Set It Up
You need large cardboard boxes, packing tape, and a free Saturday morning.
- Collect grocery or appliance boxes that stack to roughly counter height, around 36 inches.
- Stack and tape them into a rectangle at your planned island dimensions.
- Position the mock-up exactly where the island would go, inside the painter’s tape footprint you marked during the appliance door check.
- Leave it in place for five to seven days. Don’t move it aside when you cook. That defeats the test.
What You’re Actually Testing During the Week
You’re not testing whether the island fits. You’re testing whether you can still cook with it there.
Walk through these scenarios during the week, deliberately:
- Unloading the dishwasher with the door fully open
- Pulling a roasting pan from the oven and turning while holding it
- Two people are preparing different things at the same time
- Someone walking through the kitchen while you’re at the stove
- Carrying a full pot of water from the sink to the stove
Check the corners of the boxes after a week. Crushed corners and pushed edges are the friction map of your actual movement patterns. Those are the spots where a permanent island would be in your way every single day.
This is also the right moment to name a scope boundary. Once you know the island fits, the next conversation is about what goes on it and in it: countertop materials, built-in appliances, seating configuration.
When the Island Doesn’t Fit: What Actually Works Instead
The alternatives to a fixed island solve real problems.
I’ll say this directly: the alternatives framing has led homeowners toward bad decisions more times than I can count.
These options get presented as lesser choices, and people read that as confirmation that they should try harder to force the island in.
The Peninsula: When It’s Actually Better
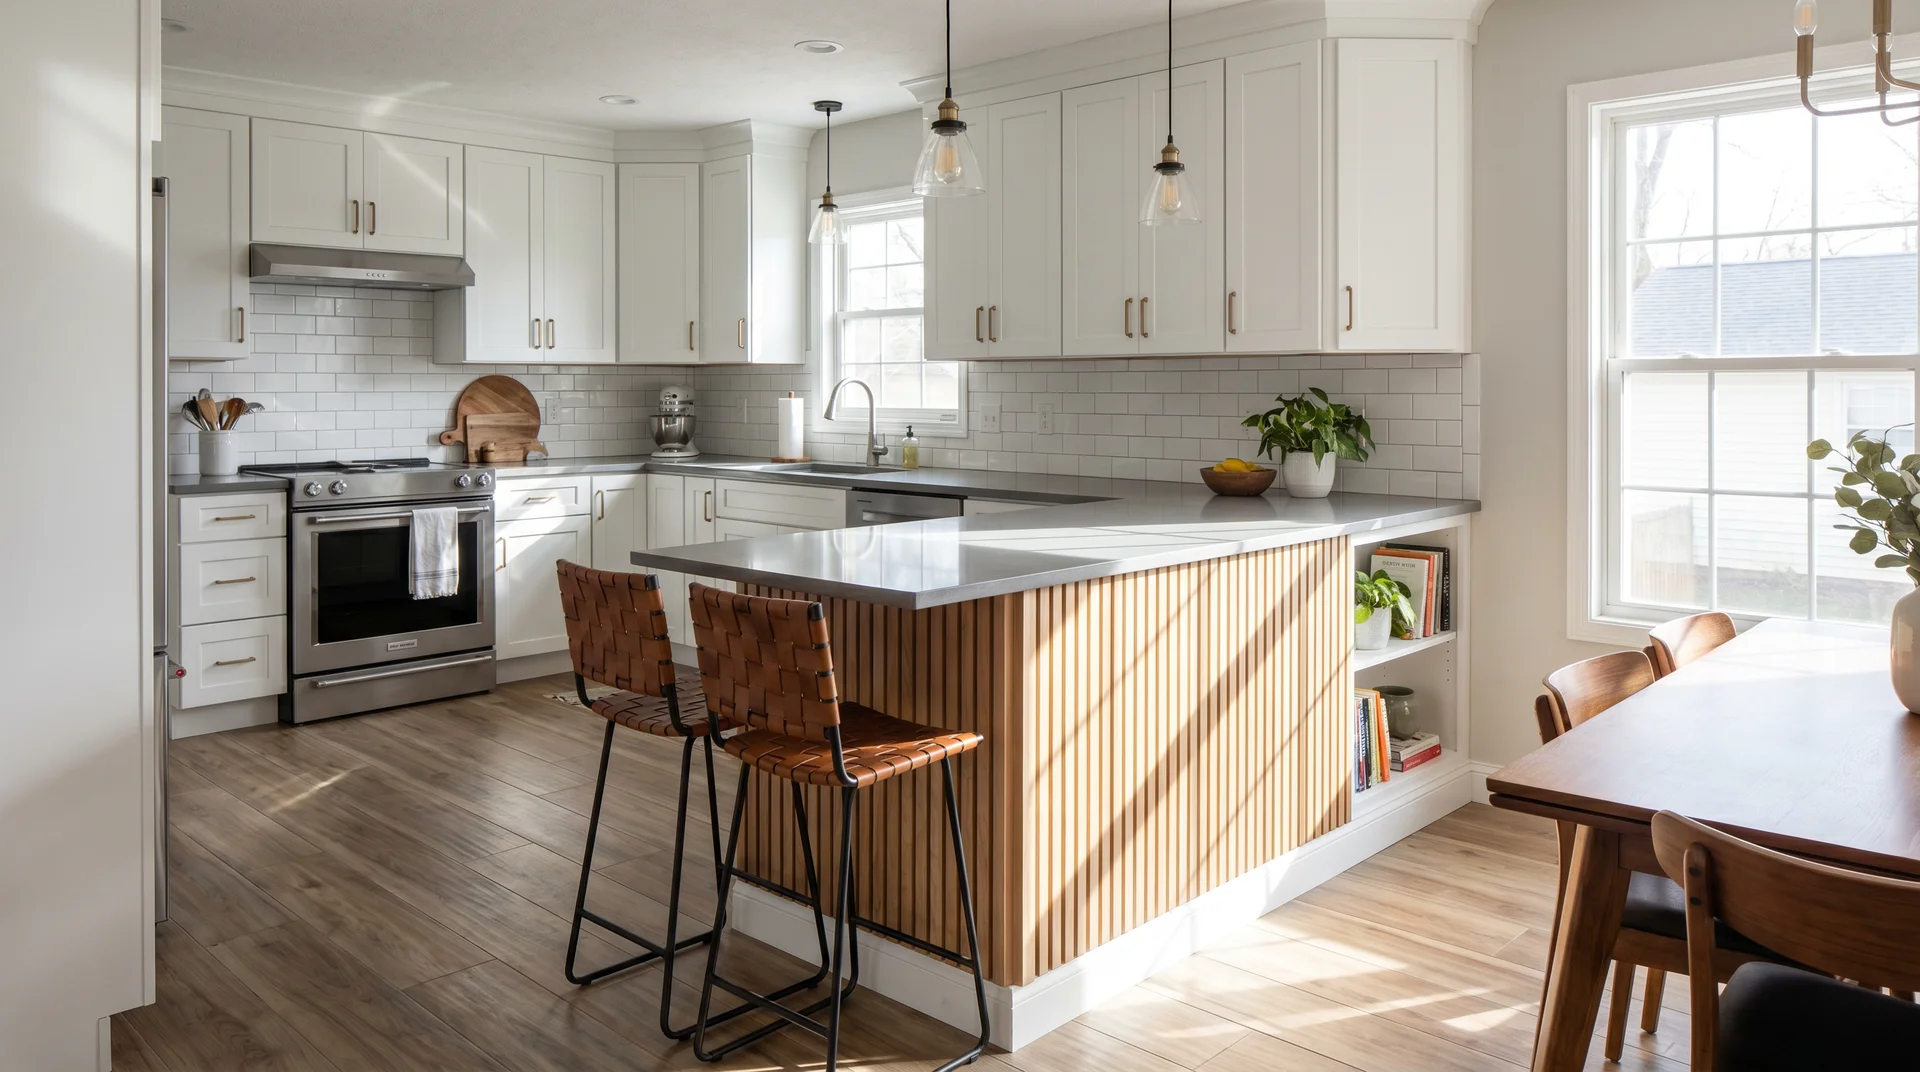
A peninsula is a counter extension attached to an existing cabinet run on one end, and it only requires clearance on three sides.
That one attached end is a genuine structural advantage. You’re not managing 42-inch clearance on four sides, only three. In an L-shaped kitchen where one edge of the island zone faces a wall, a peninsula often fits where a freestanding island wouldn’t.
In a U-shaped kitchen where the center opening falls short of 10 feet, a peninsula extending from one parallel run gives you most of the counter function at a fraction of the clearance cost.
The execution requirement: a peninsula is fixed cabinetry. It means a cabinet maker, countertop fabrication, and in most areas, a licensed electrician for the required outlet. Budget $3,000 to $8,000, depending on your market and materials.
The Rolling Cart: When Flexibility Is the Point

A rolling kitchen cart on locking casters gives you the prep surface without the clearance commitment.
Roll it to where you need it. Roll it against the wall when you need the floor clear. For galley kitchens, kitchens under 150 square feet, and layouts where a fixed structure compromises movement, a well-built rolling cart covers the functional need without permanently changing your clearance.
On sizing: aim for 24 to 36 inches wide. Deeper than 36 inches, and you’ve introduced a clearance problem with something that was supposed to avoid one. Locking casters matter more than most buyers expect. The non-locking kind introduces a daily friction that compounds quickly.
Extending the Counter Run Instead
Deepening one section of your existing counter run by six to twelve inches often delivers more usable prep surface than a small island would.
In L-shaped kitchens, especially, adding depth to part of the existing counter run provides continuous prep space without any clearance cost. You’re expanding the perimeter, not introducing a freestanding structure in the center of the room.
This option gets overlooked because it doesn’t photograph as well as an island. The counter looks wider. It doesn’t look like a renovation. But if what you actually need is more prep surface, a deeper counter run addresses the right problem.
It’s worth a brief conversation with a cabinet maker before committing to a floor-standing structure that permanently changes your clearance.
