Most articles on this topic give you a list of measurements. This one gives you the sequence to use them in.
Kitchen island dimensions for seating are three decisions made in a specific order: height, overhang, and clearance. Each one shapes the next.
What Kitchen Island Dimensions Actually Work for Seating
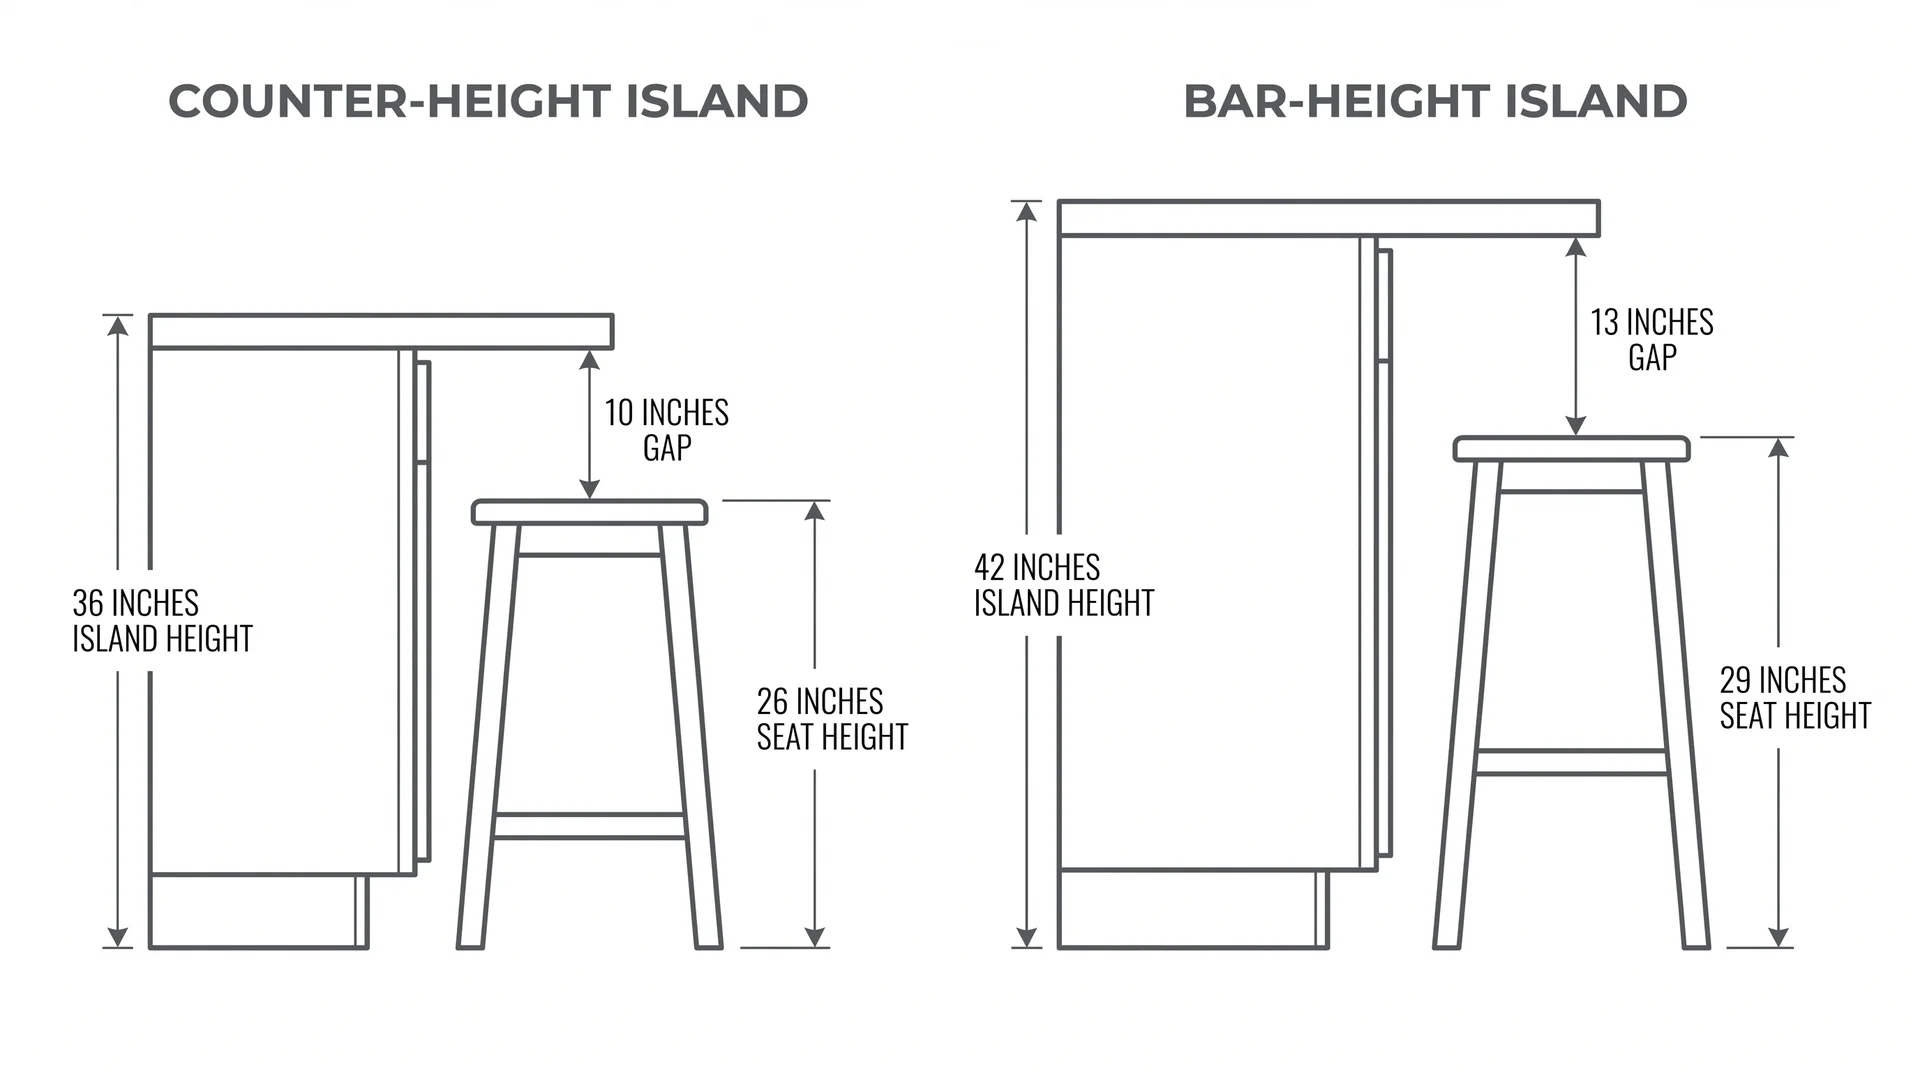
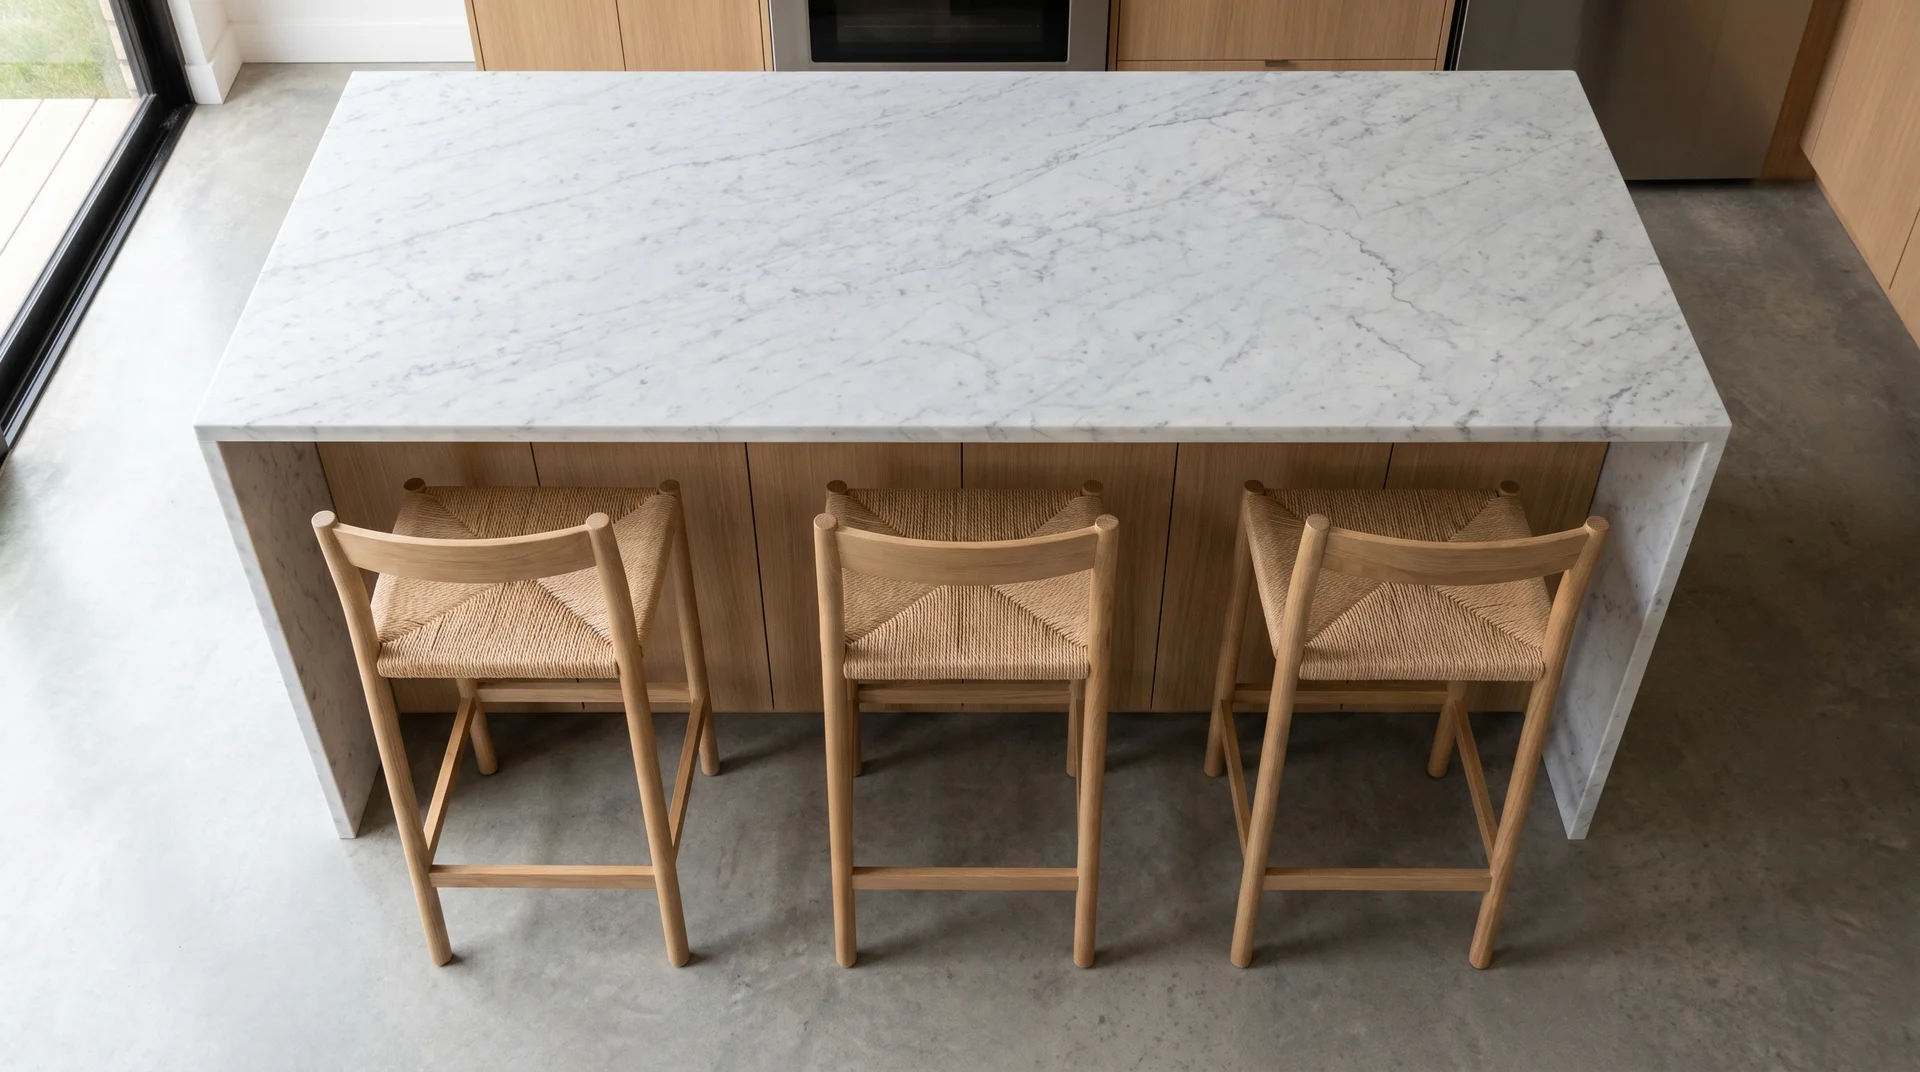
At a standard 36-inch counter-height island, allow 15 inches of overhang for comfortable knee clearance. The work aisle on the cooking side needs 42 to 48 inches of clear space. Allow 24 inches of island length per person seated.
These numbers come from the National Kitchen and Bath Association’s kitchen planning guidelines. Certified kitchen designers use them as their baseline.
If your kitchen has room for more, more is better.
The most common planning mistake is treating each dimension as an independent choice. They are not. The three decisions form a chain:
- Island height determines what stool type you need
- Stool type determines how much overhang delivers comfortable knee clearance
- Overhang depth determines how deep the island must be to retain usable cabinet storage behind the seating
I have worked through this in real residential kitchens, not in showrooms, and the pattern holds consistently. The islands that feel comfortable six months after installation were planned with all three decisions made together.
If you already know your island height, the overhang section is where to go next. If you are still choosing height, start there.
Kitchen Island Height for Seating
Island height is the first decision because everything else follows from it.
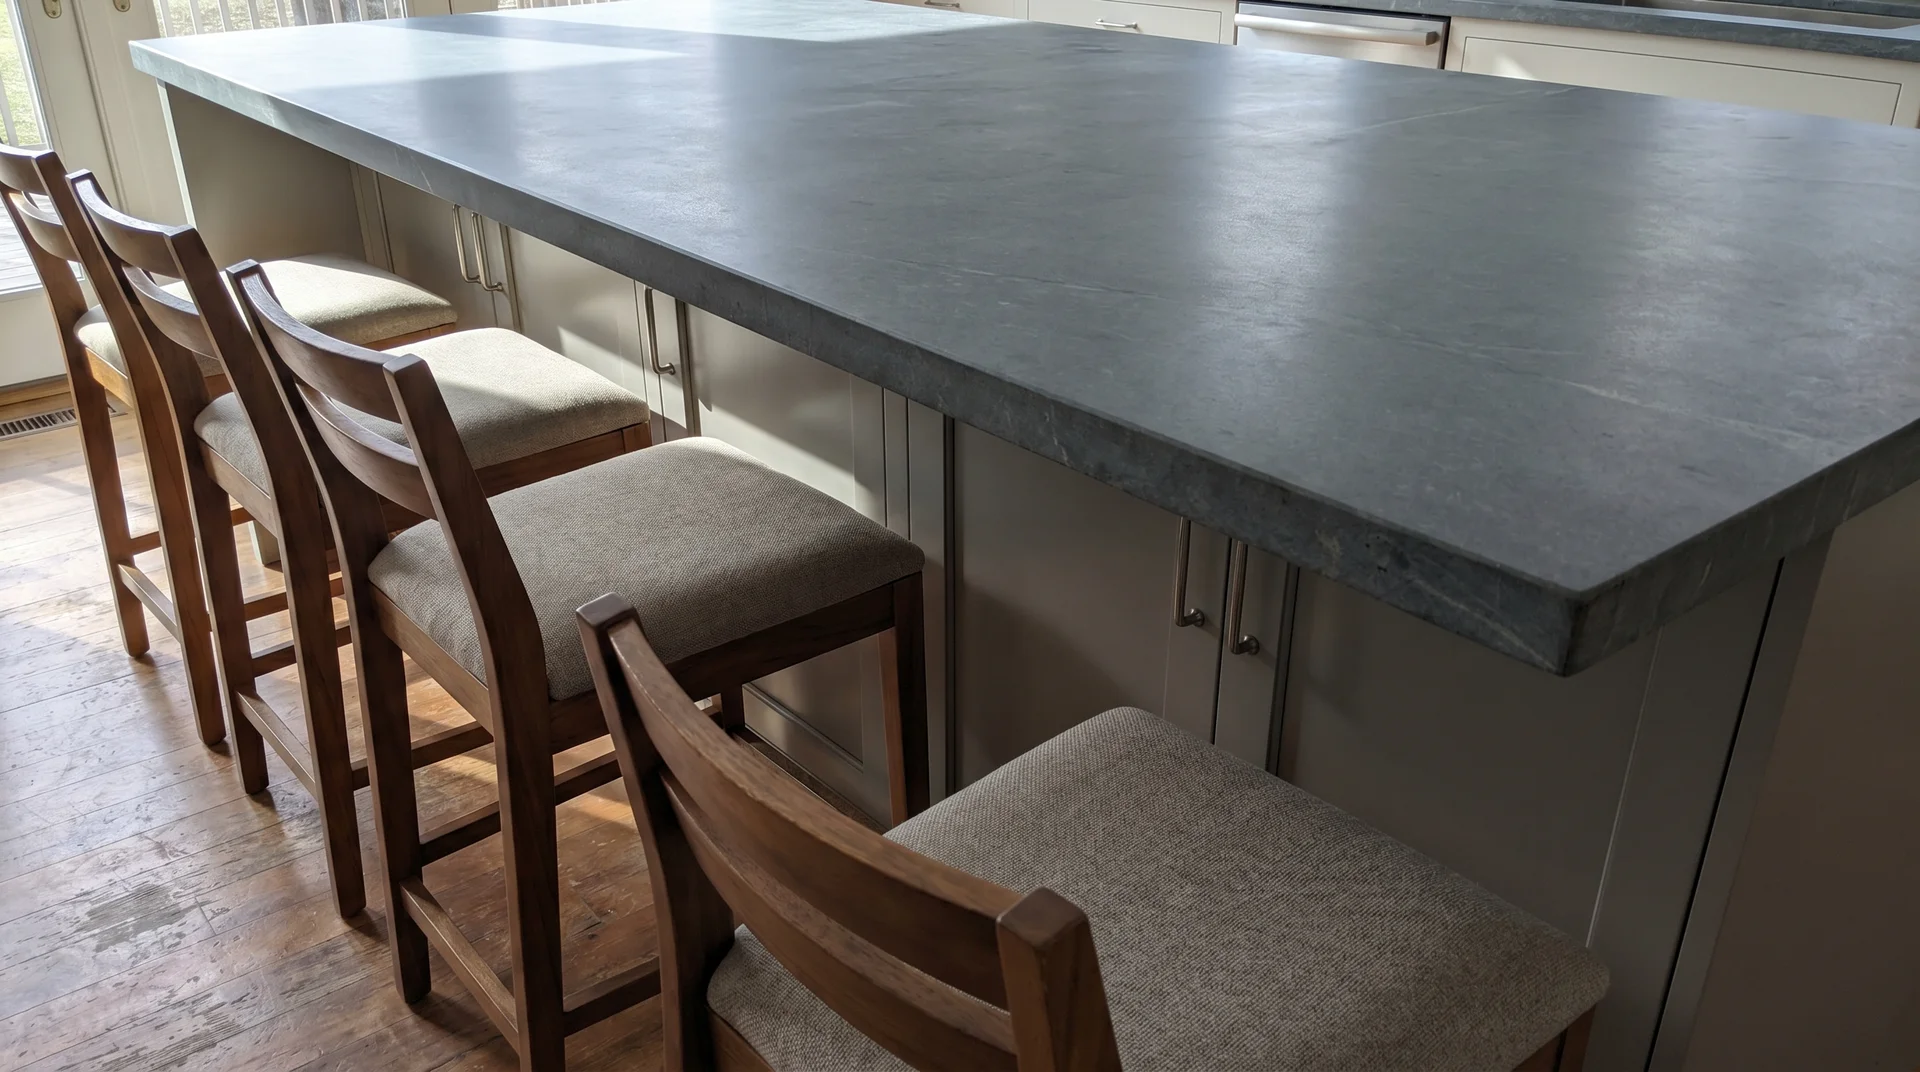
Counter Height Islands (36 Inches)
A 36-inch counter-height island is the right choice for most households. It matches standard base cabinet height and integrates naturally into the kitchen workspace, whether you are standing or seated.
Counter height pairs with counter stools that have a seat height between 24 and 27 inches. The gap between the seat top and the countertop underside should be between 9 and 11 inches.
That gap is what comfortable seating actually feels like in real life.
Bar Height Islands (42 Inches)
A 42-inch bar-height island creates visual separation in open-concept layouts. It suits kitchens where the island functions more as a gathering surface than a prep center, and it works well for casual entertaining.
Bar height pairs with bar stools that have a seat height between 28 and 30 inches. The higher seated position naturally accommodates 12 inches of overhang without knee discomfort.
That is why 12 inches appears as the standard since it is calibrated to bar height, which is not the most common island height in residential kitchens.
Table Height Islands (30 Inches)
A 30-inch table-height island accepts standard dining chairs. It suits households with young children or specific accessibility needs, and it is the least common option in residential kitchens.
The tradeoff is the overhang. Table height requires 18 inches by NKBA standards. That depth has countertop support implications worth understanding before you commit.
The Wrong Reason to Choose Bar Height
Most people who choose bar height choose it for the look.
When someone is cooking at the island, and another person is seated on the seating side, bar height puts the seated guest six inches higher than at a counter-height island.
The standing person looks down. The seated person looks up.
In a kitchen where cooking and conversation happen simultaneously, this dynamic matters more than it looks like it will in a showroom.
The right reason to choose bar height is visual separation in an open-concept layout, or a genuine entertaining-first use case. The aesthetic alone is not a functional argument.
Once the countertops are installed, you live with the choice regardless.
Kitchen Island Overhang Dimensions for Seating
Overhang is where the most expensive mistakes get made.
The NKBA Overhang Standards by Island Height
The NKBA publishes specific overhang requirements for each island height. They are not all 12 inches.
| Island Height | NKBA Minimum Overhang | Paired Seat Height |
|---|---|---|
| 30 inches (table height) | 18 inches | Standard dining chair (17 to 19 inches) |
| 36 inches (counter height) | 15 inches | Counter stool (24 to 27 inches) |
| 42 inches (bar height) | 12 inches | Bar stool (28 to 30 inches) |
These figures come from research into what supports comfortable knee clearance at each seated position. They represent the minimum, not the ideal.
Why 12 Inches Is the Wrong Number for Most Islands
12 inches is the bar-height minimum, not a universal standard. At counter height, a 12-inch kitchen island overhang puts most adults’ knees against the cabinet face below during normal seated posture.
This problem is well-documented across more than a decade of Houzz planning forums.
Homeowners who built counter-height islands with a 12-inch overhang consistently report that anyone over 5’10” either sits sideways or stops sitting there.
The threads keep appearing because articles keep calling 12 inches “standard” without specifying which island height that number actually applies to.
When Your Countertop Material Sets the Limit
Your countertop material may have already set your maximum overhang. This is not a decorating decision. It is a structural one that directly limits your seating options.
- Granite and marble carry significant weight per square foot. An unsupported overhang beyond 10 to 12 inches on heavy stone typically requires corbels, meaning metal support brackets, to prevent cracking at the back edge.
- Quartz and engineered stone can often extend further without support.
- Laminate and butcher block follow different rules depending on thickness and slab dimensions.
Before finalizing any overhang, ask your countertop fabricator directly for the maximum unsupported span on your specific material and thickness. That number may be less than the NKBA comfort guideline.
If the fabricator’s maximum is less than what seating comfort requires, you need brackets. Those brackets need to be part of the island structure before it is built. Finding this out after the countertop is installed is expensive. It is sometimes impossible to correct without starting over.
Test Your Kitchen Island Overhang

Mock up your island on the kitchen floor before anything is templated or ordered.
- Stack cardboard boxes to your intended island height and mark the footprint with painter’s tape.
- Pull a stool to your planned seat height.
- Sit there for ten minutes doing something normal: eating, looking at your phone, talking to someone across the island.
You will know within five minutes whether the overhang is working. This takes thirty minutes and costs nothing.
Clearance Around a Kitchen Island with Seating
Work Aisle Clearance (The Cooking Side)
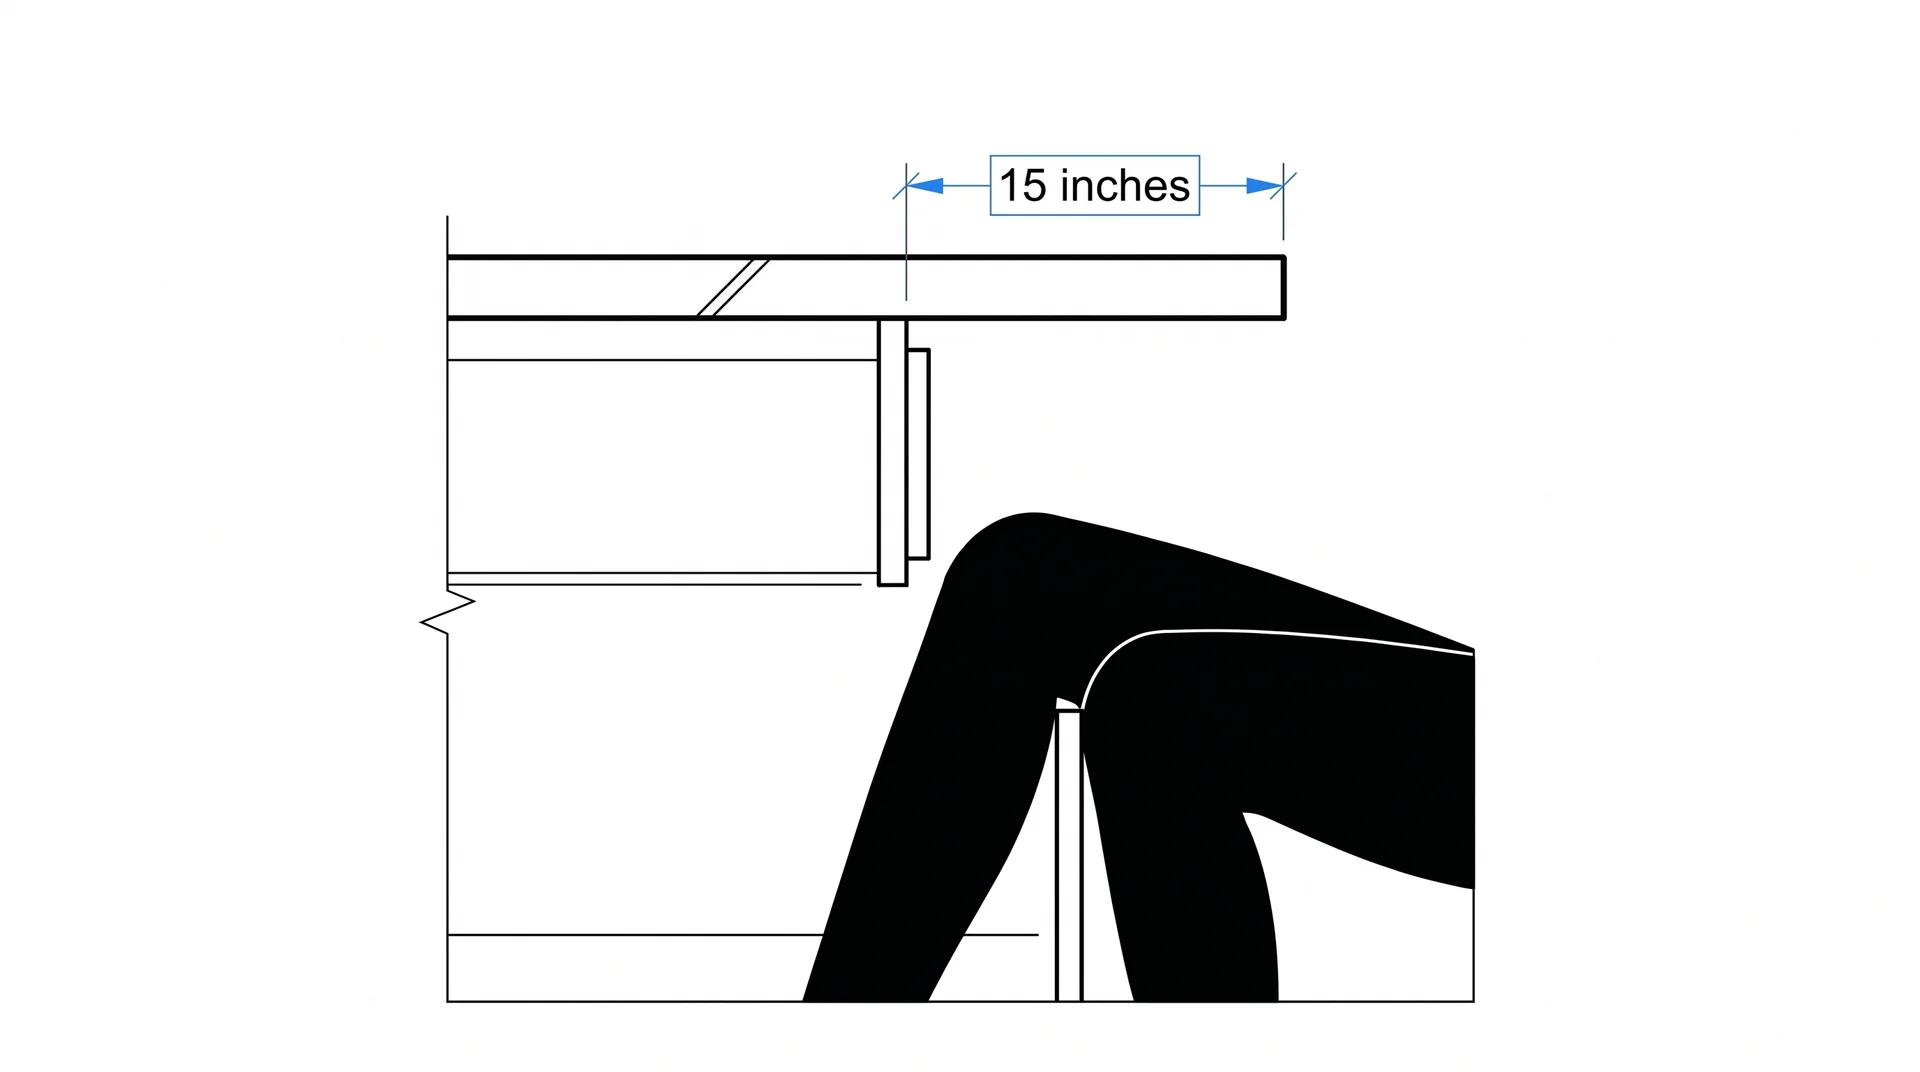
On the work aisle side of the island, the NKBA recommends 42 inches of clear space for a single cook. That rises to 48 inches when two people regularly work in the kitchen at the same time.
The work aisle is the space between the island and any opposing counter, appliance, or wall where someone stands to work. Opening an oven door, pulling out a drawer, and turning while carrying something hot: these movements set the minimum that works safely.
36 inches is workable in a low-traffic zone. It is not comfortable as a primary work aisle. If your kitchen puts the island 36 inches from the range wall, you will feel that constraint every time you cook.
Seating Side Clearance: This Is Different

The seating side follows a different clearance rule than the work side. Conflating the two produces layouts that look right on paper and fail in daily use.
NKBA guidelines specify 32 inches from the counter edge to any obstruction when no traffic passes behind seated diners.
When people walk behind seated guests, that number rises to 44 inches. These are not interchangeable, and they do not apply to the same side of the island.
The seating side is the clearance that gets compromised first in a tight floor plan. It is also the one that gets noticed every day after the island is built.
If your island has seating that faces outward toward a dining area, a living space, or a doorway, plan 44 inches between the counter edge and whatever sits behind the stools.
The Minimum Kitchen Size for an Island with Seating
A kitchen needs at least 12 to 13 feet of width to support both clearances without compromising either.
Here is the math: a 24-inch-deep island, with 42 inches of work aisle clearance on one side and 44 inches of seating clearance on the other, requires just over 9 feet of clear floor space. Add base cabinets flanking both sides, and you need 12 to 13 feet of total kitchen width before the layout works without squeezing something.
You may have seen the rule of thumb that an island should take up no more than 10 percent of your kitchen’s square footage. That figure is a useful proportional check.
It does not replace the clearance calculation, and it tells you nothing about whether the seating side will actually function. Run the clearance numbers first.
In a kitchen under 12 feet wide, seating usually means compromising one clearance. That is sometimes the right call. It should be a deliberate decision, not something discovered after the island is framed in.
How Many Seats Fit at a Kitchen Island
The calculation is simple, but the input is often wrong.
The 24-Inch Per Seat Rule and How to Apply It
Allow 24 inches of island length per seat. This is the NKBA standard for comfortable elbow clearance at an island. Below 24 inches per person, seated guests bump into each other at any meal longer than a quick breakfast.
To find your seat count, divide the seating-side length by 24 inches and round down. Do not round up.
- 60-inch island: 2 seats
- 72-inch island: 3 seats
- 84-inch island: 3 seats (not 3.5)
- 96-inch island: 4 seats
Do not try to recover a lost seat by buying narrower stools. A 20-inch stool in a 20-inch allotment works mathematically and fails in daily use. Narrower stools are also less stable on hard floors.
The seat count is the seat count.
What Size Island Do You Need to Seat 4 People
To seat four people comfortably on one side of an island, you need a seating edge of at least 96 inches, or 8 feet.
That is a substantial piece of furniture in most residential kitchens.
Before committing to an 8-foot island, mock up the full footprint with painter’s tape and walk through your normal cooking routine around it.
An 8-foot island may be exactly right. It may also be more island than the kitchen actually needs.
Seating on One Side vs. Two Sides
Two-sided seating requires a deeper island and changes the clearance math on both sides.
Seating on both long sides means the island needs at least 54 inches of depth at counter height: 15 inches of overhang on each side plus a 24-inch working surface down the center.
Most residential kitchens do not have the floor space for this without squeezing a work aisle below the NKBA minimum.
Two-sided seating also reduces the island’s prep function to its two short ends, or eliminates it. That is a valid tradeoff in the right kitchen.
Some homeowners find that corner seating, placing two stools at a right angle on adjacent sides of the island rather than straight across from each other, delivers conversational seating for two without the depth requirements of full two-sided seating.
It is worth considering for smaller islands where flexible gathering space still matters. In most kitchens, seating on one side is the better call.
Choosing the Right Stool Height for Your Island
This is the section most people reach after the countertops are already in.
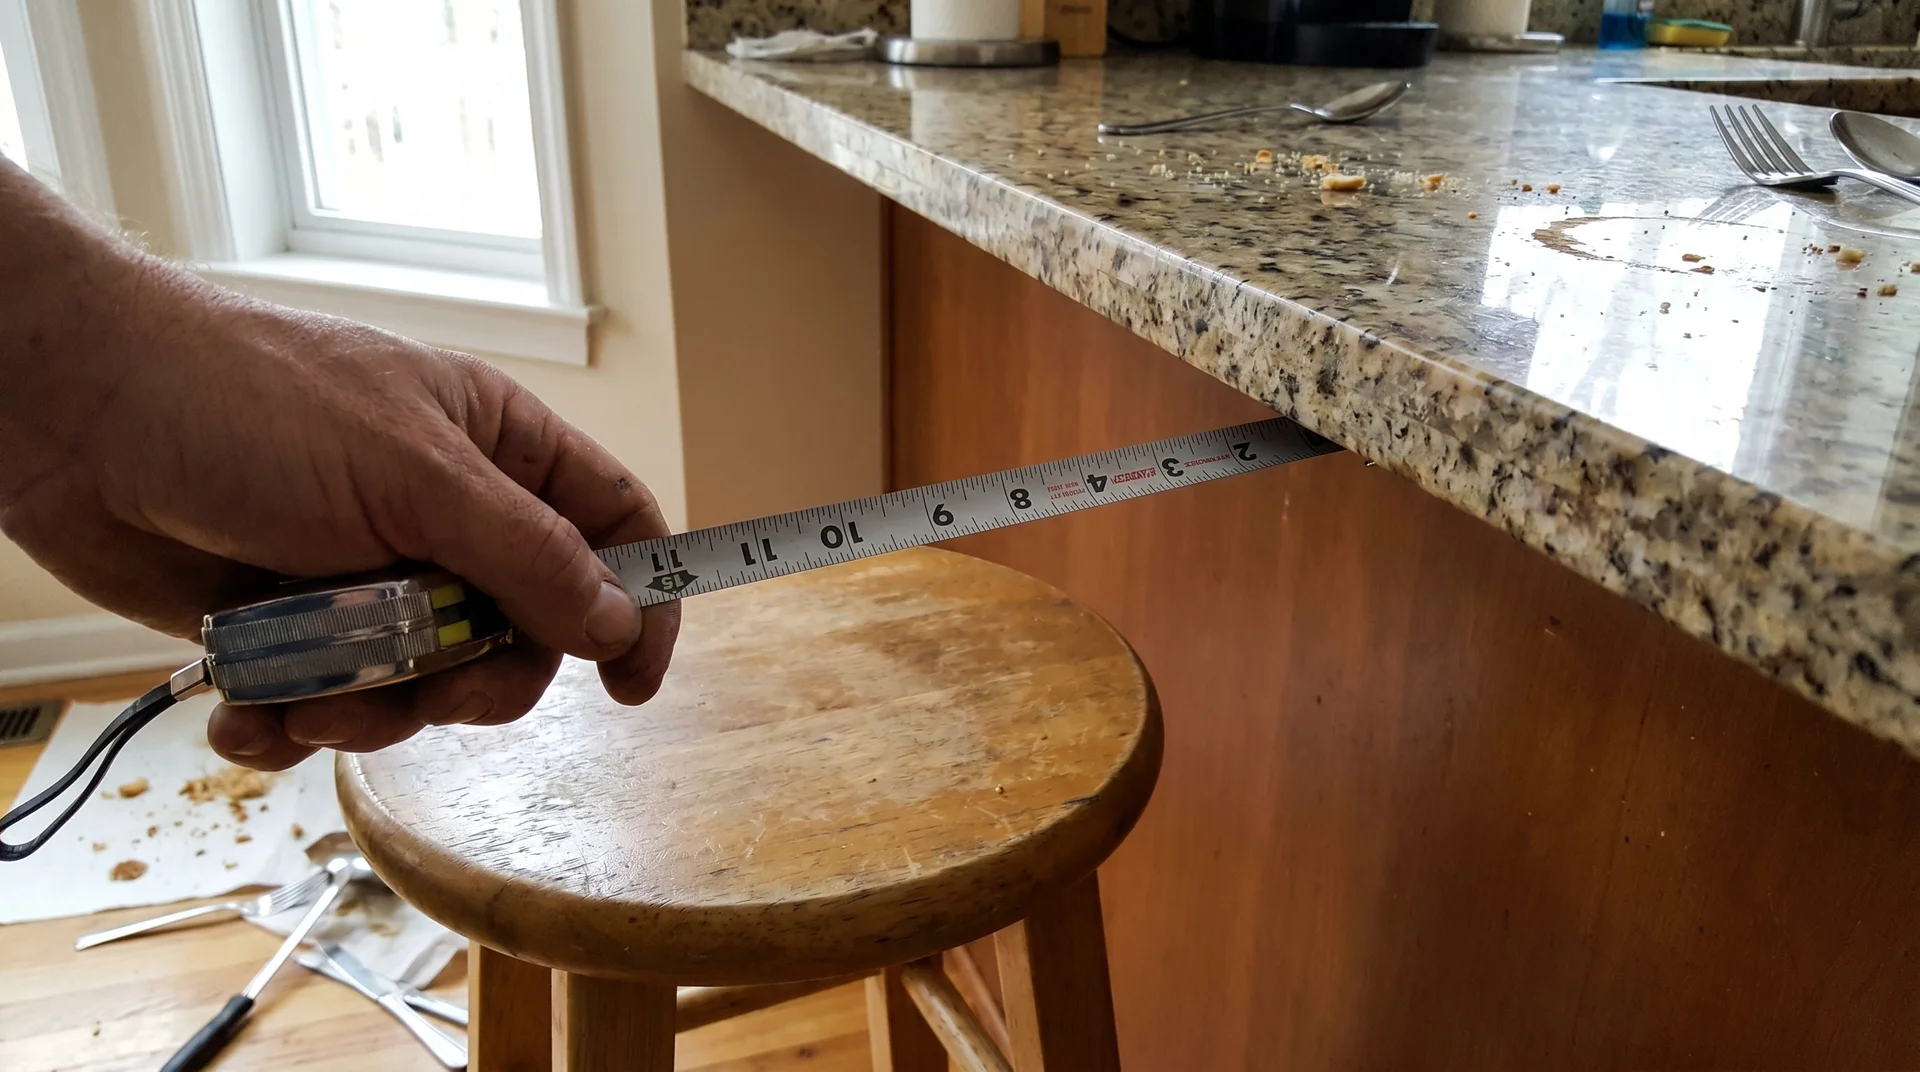
The Seat-to-Underside Gap
The measurement that determines whether island seating is comfortable is the gap between the stool seat top and the underside of your countertop. That gap should be between 9 and 11 inches.
Island height alone does not give you this number. The seat-to-underside gap is island height minus stool seat height.
- A 36-inch island with a 27-inch stool delivers a 9-inch gap: tight but workable.
- The same island with a 24-inch stool delivers 12 inches: comfortable for legs, but the counter surface will feel high for extended meals.
The 15-inch counter-height overhang covered earlier in this piece also applies here. The gap only functions as intended if the overhang is deep enough for the seated position to clear the cabinet face below.
A stool delivering 10 inches of gap behind a 12-inch overhang still produces knee contact at counter height.
I have checked this in real kitchens I have consulted on, not against a showroom display, and the 9-to-11-inch range is where most people find the seated position natural.
- Below 9 inches, the counter feels oppressive.
- Above 12 inches, the surface sits too high for comfortable meals at any length.
Counter Height Stools vs. Bar Stools
- Counter stools seat at 24 to 27 inches and pair with 36-inch counter-height islands.
- Bar stools seat at 28 to 30 inches and pair with 42-inch bar-height islands.
Product listings do not always use these labels consistently. Some manufacturers call anything under 30 inches a counter stool.
When shopping for stool height for a kitchen island, find the specific seat height number in the product specifications. Subtract it from your island height. If the result falls between 9 and 11 inches, the stool works for your island.
Stool style, material, and back height are real decisions and worth taking seriously. That is a different article, and it needs different criteria.
Cushion Compression
A cushioned stool’s listed seat height is not the height at which you actually sit.
Cushioned seats compress under a person’s weight. How much it depends on foam density, cover material, and the person sitting. Some cushioned stools drop by half an inch to a full inch under normal use. That compression closes the seat-to-underside gap you calculated.
If you are buying cushioned stools and you are already at the tighter end of the 9-to-11-inch range, buy one stool first.
Sit on it fully for five minutes, then measure the compressed gap before ordering the rest.
Nobody has solved this cleanly. Buy one stool before you buy four.
Putting the Dimensions Together: How to Check Before You Commit

Everything above leads to one action: verify it before you build it.
The Cardboard Floor Test
Before finalizing any dimensions, mock up the full island footprint on your kitchen floor.
Stack cardboard boxes to island height. Mark the edges with painter’s tape. Sit at a stool of your intended seat height while someone walks the normal traffic paths around the kitchen.
Check three things: whether the work aisle feels right, whether the seating side has enough room, and whether the island blocks anything in your normal cooking movement.
The mock-up costs nothing. The fabricator appointment costs everything, because it commits the numbers.
The Sequence to Work Through Before Finalizing Island Dimensions
Work through these in order, not simultaneously. Each decision narrows the range for the next one.
- Choose the island height. Counter height (36 inches) for most households. Bar height (42 inches) when an open-concept layout or an entertaining-first use case genuinely justifies the tradeoffs.
- Set overhang depth. Use the NKBA minimum for your chosen height: 15 inches for counter height, 12 inches for bar height, 18 inches for table height. Confirm with your countertop fabricator that your material supports that span without brackets. If it does not, add brackets at the planning stage, before the island is built.
- Check clearances. 42 to 48 inches on the work aisle side. 44 inches on the seating side when people walk behind seated guests. 32 to 36 inches when that seating side is closed.
- Calculate seat count. Divide the seating-side length by 24 inches. Round down. That is your number.
- Select stools by the seat-to-underside gap. Subtract the stool’s listed seat height from your island height. Aim for 9 to 11 inches. For cushioned stools, buy one first and measure the compressed gap before ordering the set.
- Run the cardboard test. Walk the full layout on your kitchen floor before anything is templated or built.
Work through the sequence once, in order, and most of the decisions that trip people up mid-renovation are already resolved before the contractor asks.
An island that works for the way your household actually moves through the kitchen is more useful than one that looks right in a photo. Working well is the prerequisite for looking good.