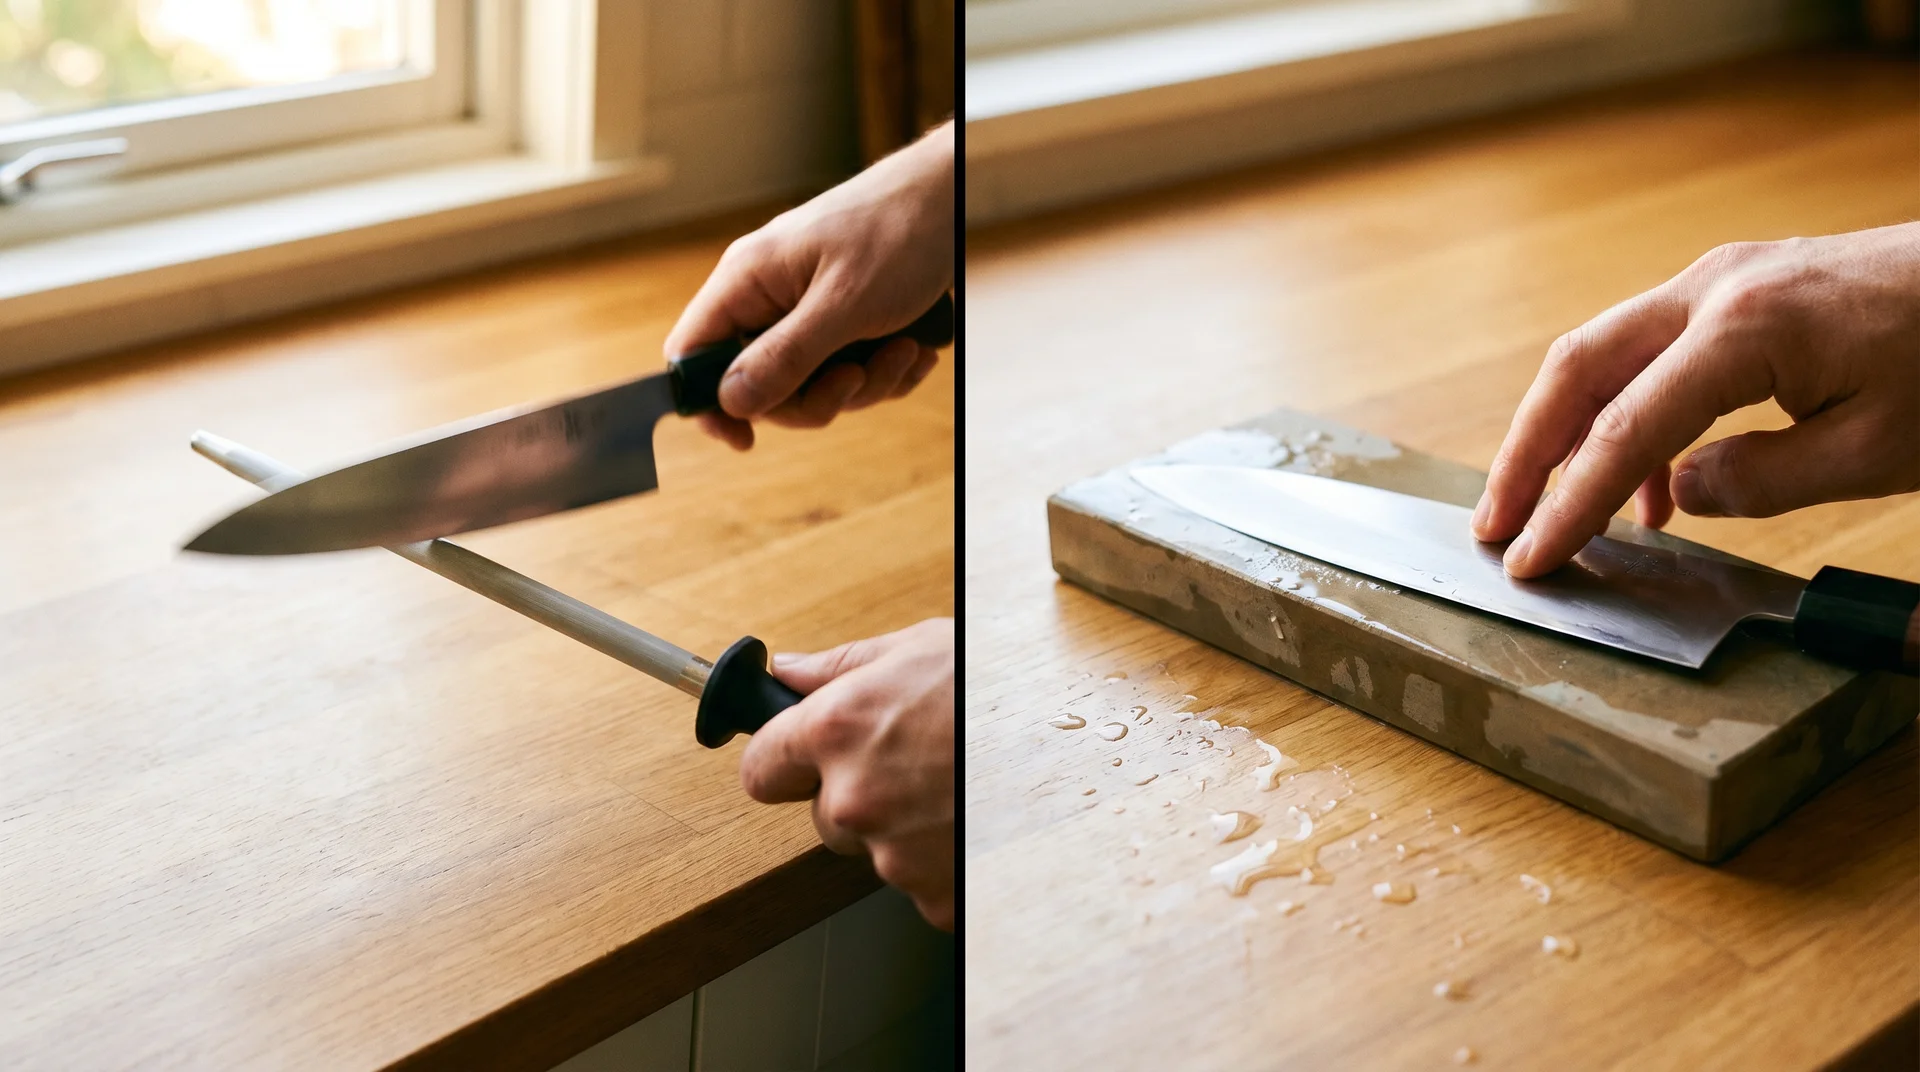
Most home cooks reach for a sharpener when a knife starts to struggle. The right response, most of the time, is a honing rod.
Honing and sharpening solve different problems. Getting that distinction right is the most useful knife-sharpening tip in this piece.
Honing and Sharpening Are Not the Same Thing
These two words get used as if they mean the same thing. They don’t.
What Sharpening Does to Your Knife
Sharpening removes metal from the blade to create a new cutting edge.
You’re grinding away material at the bevel, the angled face that forms the cutting edge, to rebuild its geometry. Done well, sharpening a genuinely dull knife produces a blade that feels new.
Every session removes metal. That shortens the knife’s working life over time. Most home cooks in moderate daily use need true sharpening every six to twelve months.
What Honing Does to Your Knife
Honing realigns the existing edge without removing material.
When you use a knife, the edge doesn’t simply wear down. It rolls and bends microscopically with every contact against a surface.
A honing rod pushes those bent teeth back into alignment. The knife feels sharp again because the edge is straight again, not because anything was removed.
Hone regularly. A few passes before a significant prep session, two to three times a week in a busy kitchen, makes a measurable difference in how every knife performs.
Does Your Knife Need Honing or Sharpening?
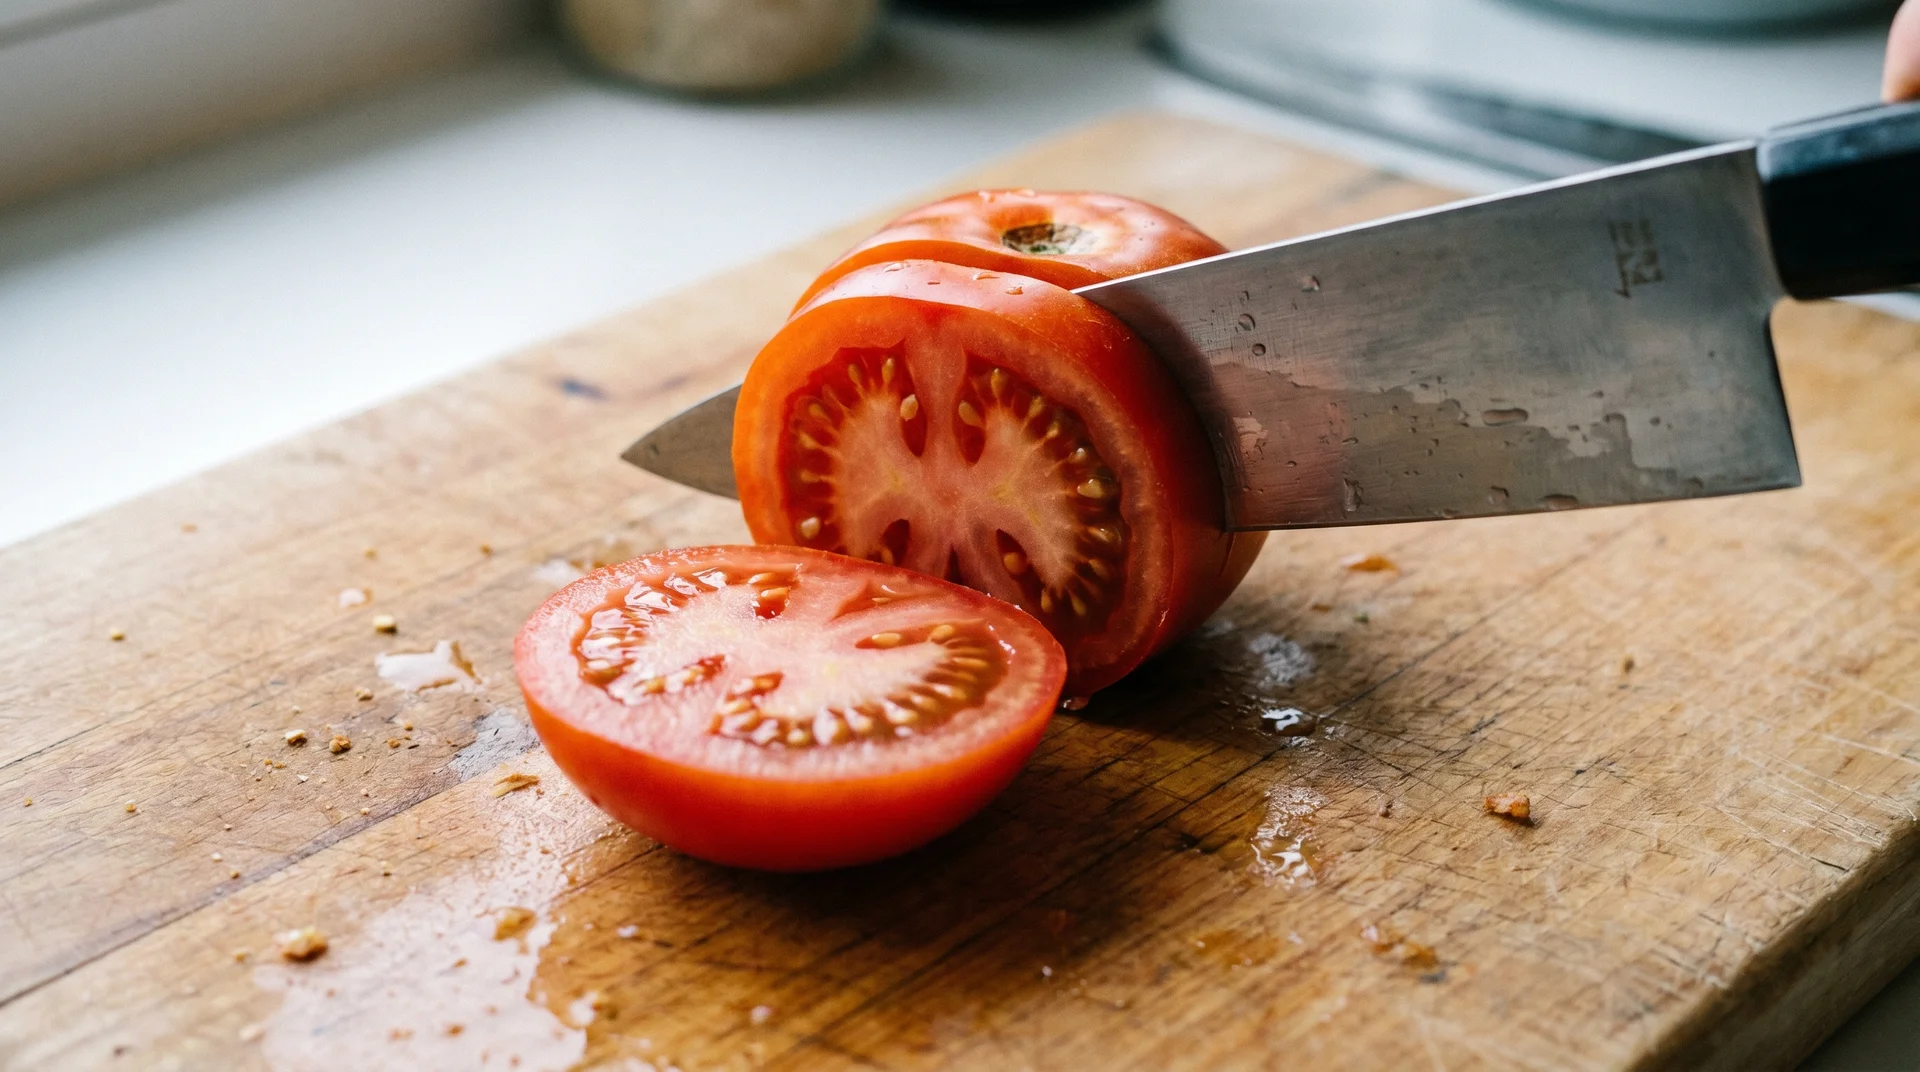
The tomato test is the most reliable sharpness check in a kitchen context.
Bring a sharp knife down onto a ripe tomato with almost no pressure. It should drop through the skin.
If you’re applying any force or if the skin resists before giving way, try honing first. If the knife still struggles after honing, it needs sharpening.
The paper test is a useful secondary check. Draw the blade down a sheet of standard printer paper, holding the paper upright. A sharp edge slices cleanly. Tearing or skipping signals the edge needs attention.
Hone first. Sharpen only when honing stops working.
The Angle Is Everything
Angle matters more than any other sharpening variable.
Stroke count, grit, and pressure are all secondary to holding a consistent bevel.
An edge sharpened unevenly at 15 degrees performs worse than one held at a steady 18.
The correct angle depends on the knife type. Getting this right from the start prevents you from grinding the wrong geometry into the blade over time.
Correct Angles by Knife Type
Different knives are designed for different sharpening angles. Matching the angle to the knife protects the steel and the edge you’re building.
| Knife Type | Angle Per Side |
|---|---|
| Western or European knives (German chef’s knife, most standard kitchen sets) | 20° |
| Japanese knives (gyuto, santoku, nakiri) | 15° |
| Heavy-use knives (cleavers, beaters, anything working against bone) | 25° |
These angles reflect the geometry that manufacturers set into the blade. Sharpening at a significantly different angle doesn’t improve the knife. It creates an edge that’s fighting the steel’s original design.
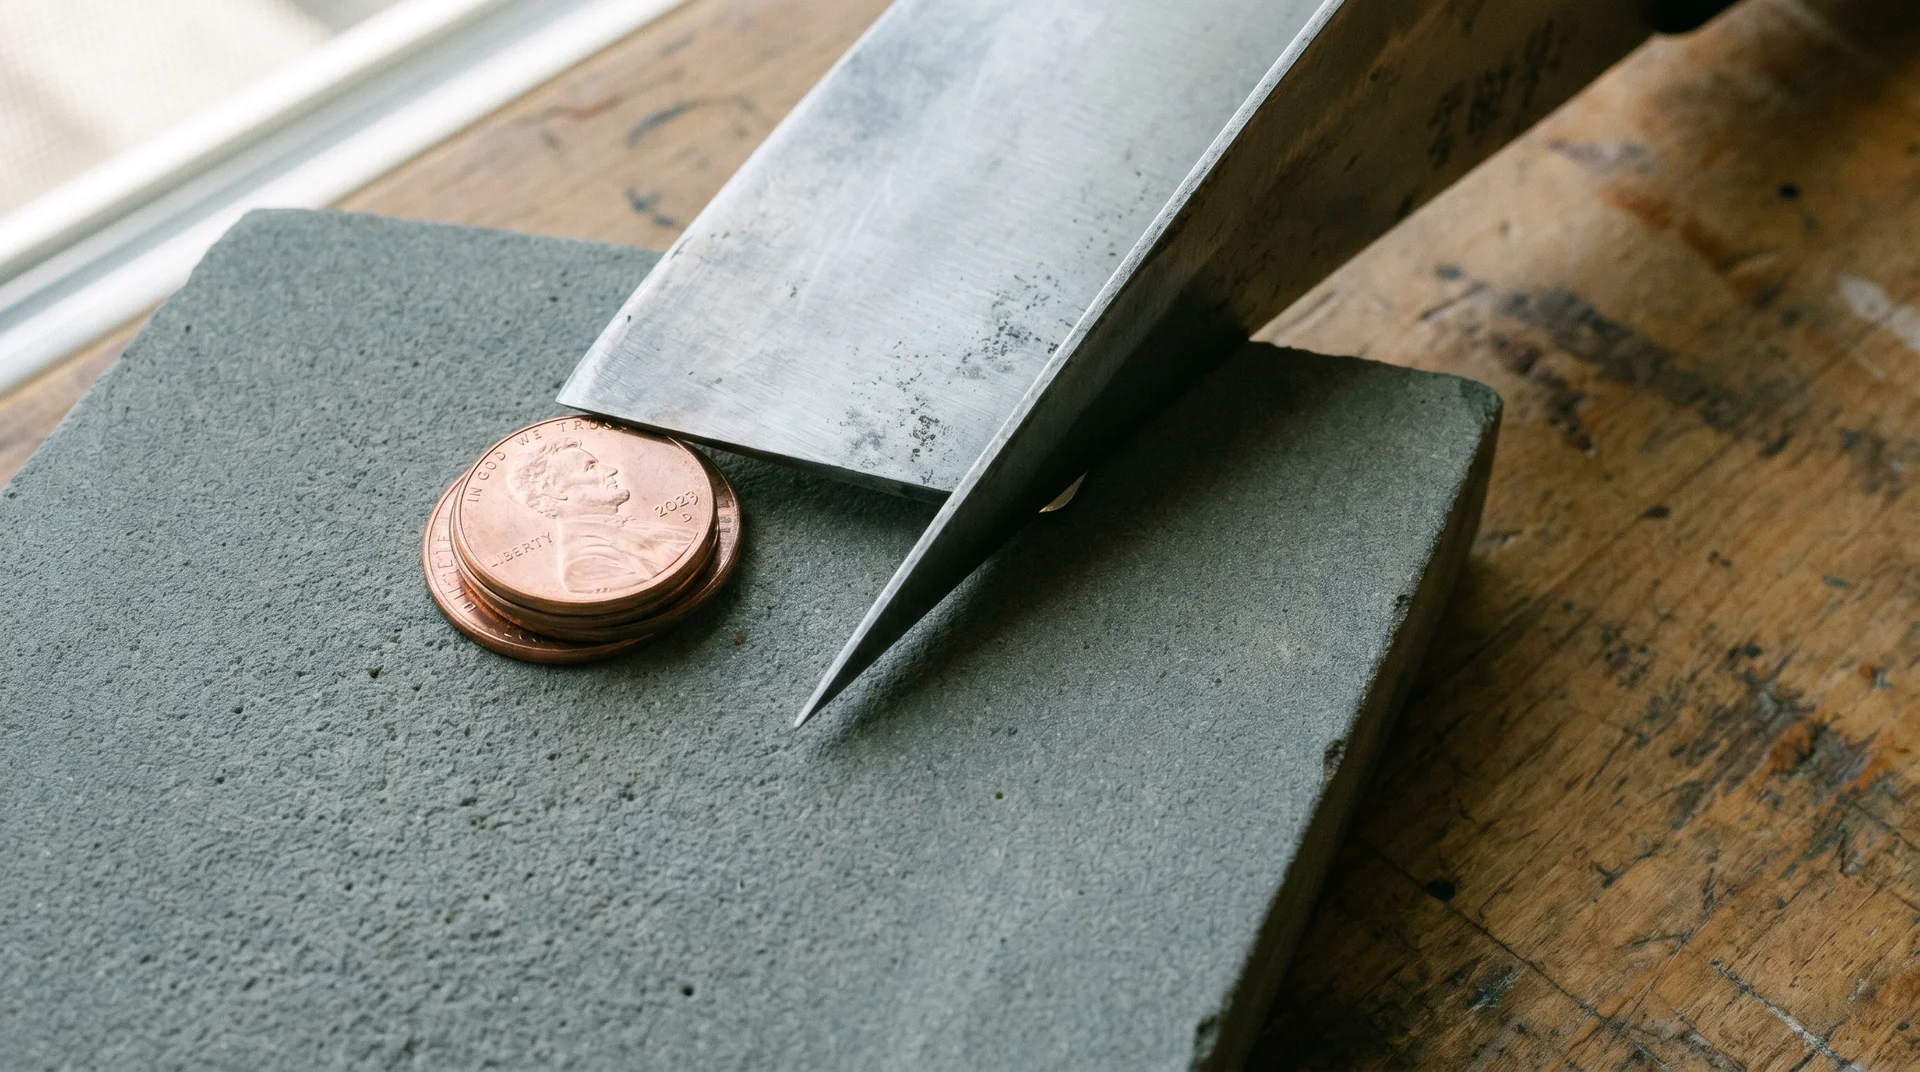
How to Find Your Angle Without Any Tools
The coin method gives you a reliable sharpening angle without measuring equipment.
Place the blade flat on the stone with the edge touching. Stack two or three pennies under the spine. That lifts the spine to approximately 15–17 degrees per side for most kitchen knives.
Three quarters under the spine bring you closer to 20 degrees.
I’ve recommended this to people who’ve sharpened incorrectly for years. The change in their results is immediate.
How to Confirm Your Angle Is Right
The marker trick gives you real-time feedback on exactly where the stone is making contact.
Color the entire bevel with a black Sharpie before you start. Make a few passes on the stone, then check where the marker has been removed.
- Even removal across the full bevel: your angle is correct
- Marker removed only near the edge: you’re sharpening too shallow
- Marker removed near the spine: you’re holding too steep
Adjust until removal is even across the full bevel. Commit to that angle for the entire session.
Consistency matters more than precision. A knife sharpened at a steady 18 degrees outperforms one sharpened unevenly at 15.
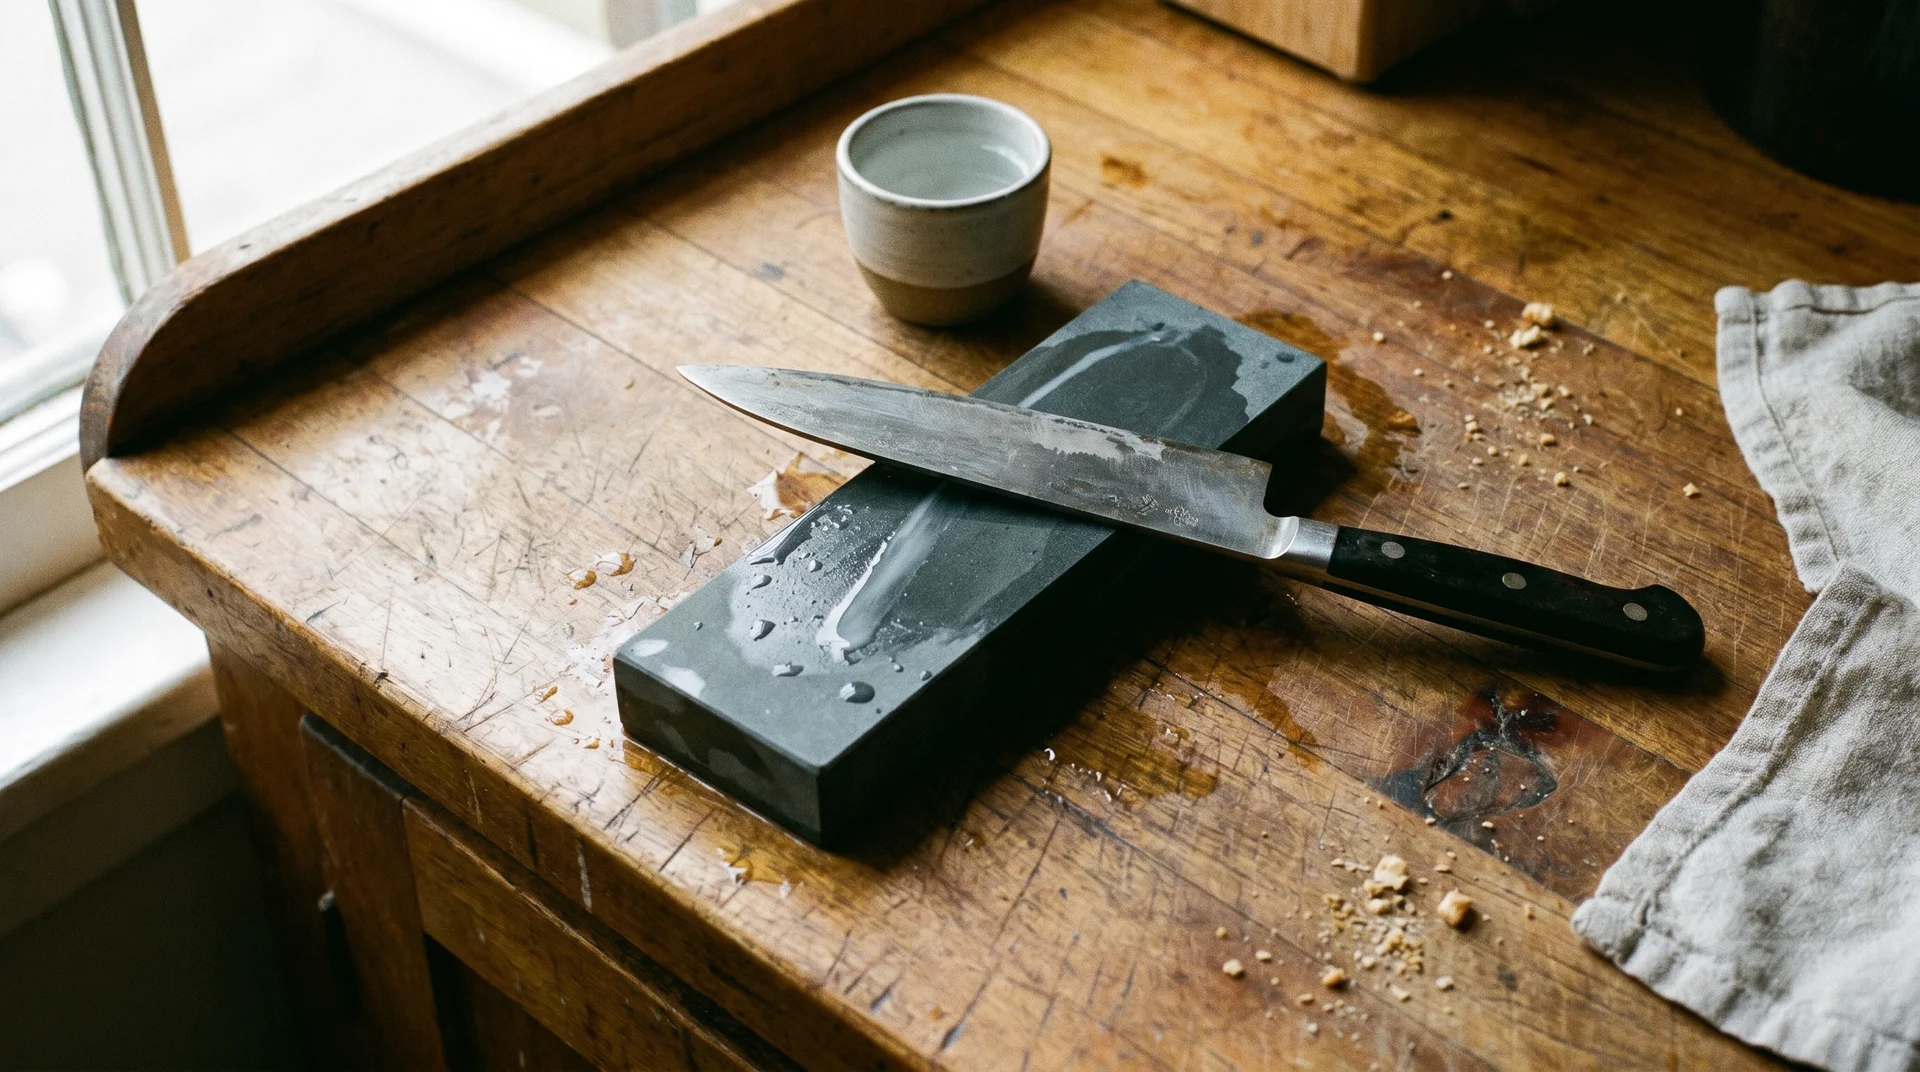
Whetstone Basics: The Method Worth Learning
A whetstone gives you more control than any other sharpening tool.
Pull-through and electric sharpeners trade that control for speed. On a knife worth caring about, the trade isn’t worth making.
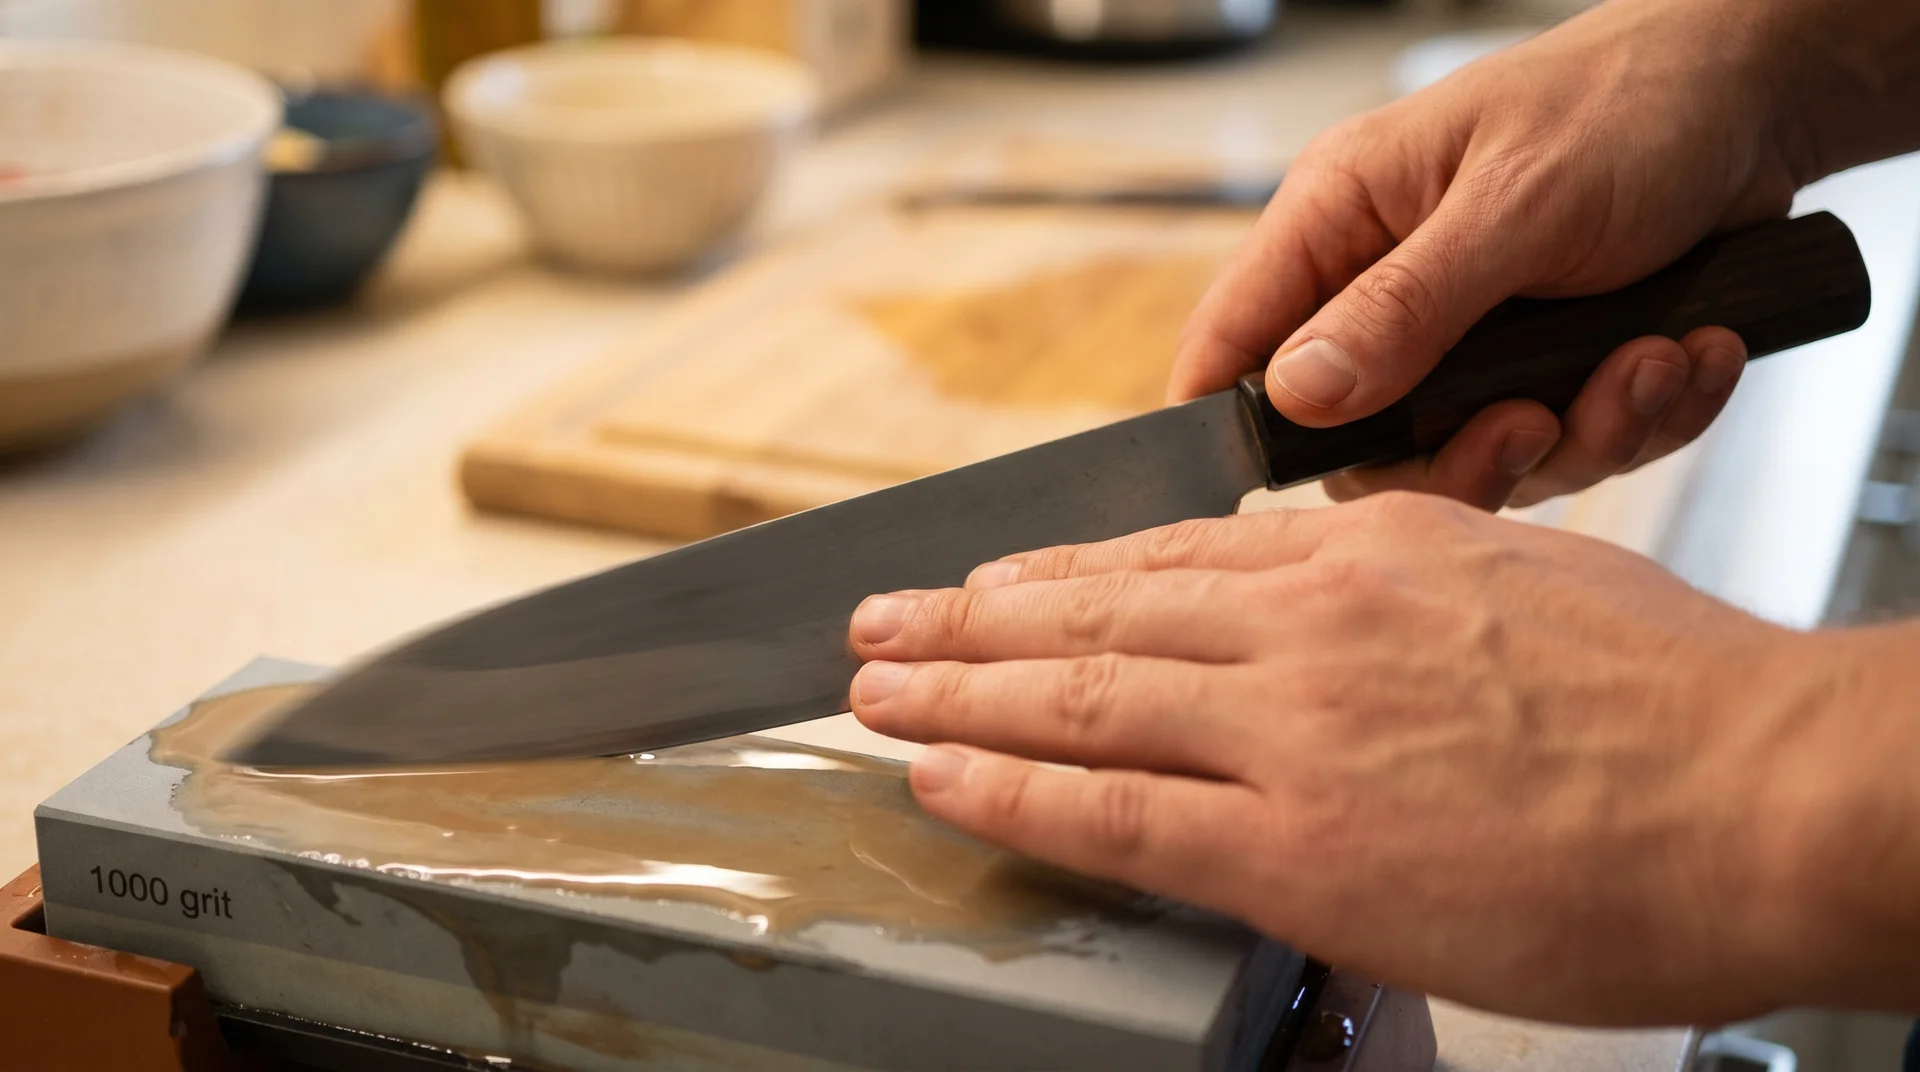
Choosing the Right Grit
Grit determines how aggressively the stone removes metal. Match it to your knife’s actual condition, not your patience level.
| Grit Level | Use For |
|---|---|
| Below 400 (coarse) | Chipped edges, badly damaged blades, knives not sharpened in years |
| 1000 (medium) | Standard sharpening: dull but undamaged blades |
| 3000–6000 (fine) | Refining and polishing after sharpening, light maintenance touch-ups |
A 1000/6000 combination stone covers 90% of home’s kitchen needs. I’ve used one for years across everything from a workhorse chef’s knife to a Japanese gyuto that needs careful handling.
Setting Up Your Stone
A flat stone produces a consistent angle. A dished stone makes that consistency nearly impossible.
Most water stones need 10–15 minutes of soaking before use. A dry stone glazes over and stops cutting cleanly. Place the soaked stone on a damp folded towel and keep a cup of water nearby.
Frequent use in the same central section creates a concave surface in the stone over time. Check the stone’s surface by running a straight edge across it.
When dishing becomes visible, flatten the stone against a lapping plate or a sheet of wet/dry sandpaper on a flat surface. A dished stone tilts your knife angle without your knowing it, which means every session after that is working against you.
How to Sharpen Your Knife?
Work edge-first, heel to tip, in a single arc away from you.
Before you start: keep your guiding fingers on the flat of the blade, not wrapped around the spine. They should ride the flat face above the edge, not across the edge itself. This is the finger placement that matters for safety during the stroke.
- Set your angle using the coin method or by feel, confirmed with the marker trick.
- Place two or three fingers on the flat of the blade near the edge. This controls pressure without redirecting the angle.
- Push the knife away from you, edge-first, sweeping from heel to tip in one smooth arc. Think of it as slicing a thin layer off the top of the stone.
- Do five to ten passes per side before checking progress. Work one side fully before switching.
- Stop when you feel a burr, a thin lip of raised metal along the opposite side of the edge. This confirms you’ve reached the apex, the point where both bevels meet.
- Flip and repeat on the other side until the burr transfers back.
- Switch to the fine-grit side. Use lighter pressure and alternating strokes until the burr is gone and the edge feels polished.
The slurry that builds up is fine stone particles mixed with water. Don’t rinse it off mid-session.
The first few sessions feel uncertain. Give it three or four sharpenings. The motion becomes natural faster than most people expect, and the edge quality difference compared to any pull-through is significant.
The Cutting Board and Dullness of Knives
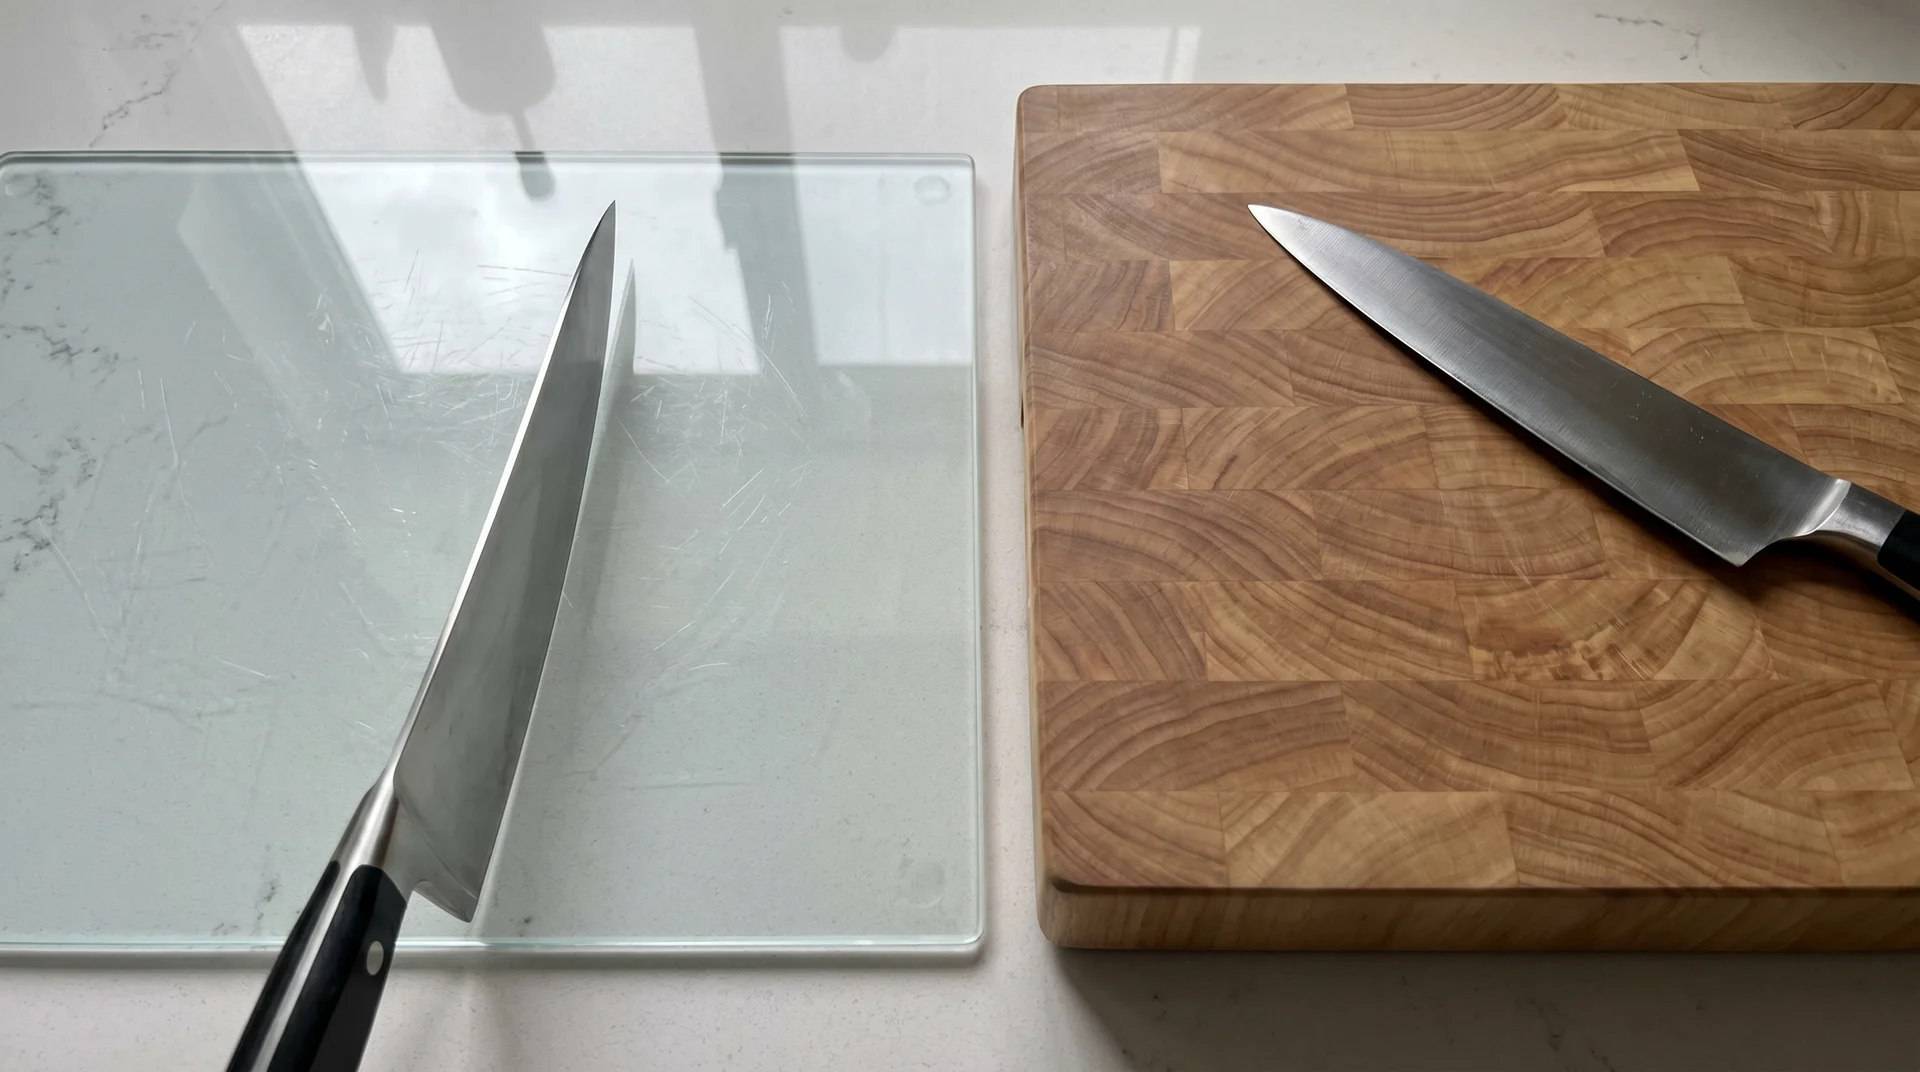
Your cutting board may be dulling your knife faster than your technique is.
Glass and ceramic boards are the most common cause of rapid edge degradation in home kitchens. If a knife dulls faster than it should, check the board before you question your sharpening.
| Board Material | Effect on Edge | Verdict |
|---|---|---|
| Glass or ceramic | Bends and chips the edge aggressively with every stroke | Avoid working in a kitchen |
| Plastic | Acceptable wear; much better than glass | Fine for sanitation; replace when deeply grooved |
| Wood or end-grain wood | Gentlest surface for a kitchen edge | Best choice for maintaining sharpness |
I tracked this across a range of knives in my own testing, not in controlled conditions. The board makes more of a difference than most people expect.
A well-sharpened knife used daily on a glass board will underperform a mediocre knife maintained on a good wood board. These two conversations belong together.
Tool-by-Tool: What to Actually Use
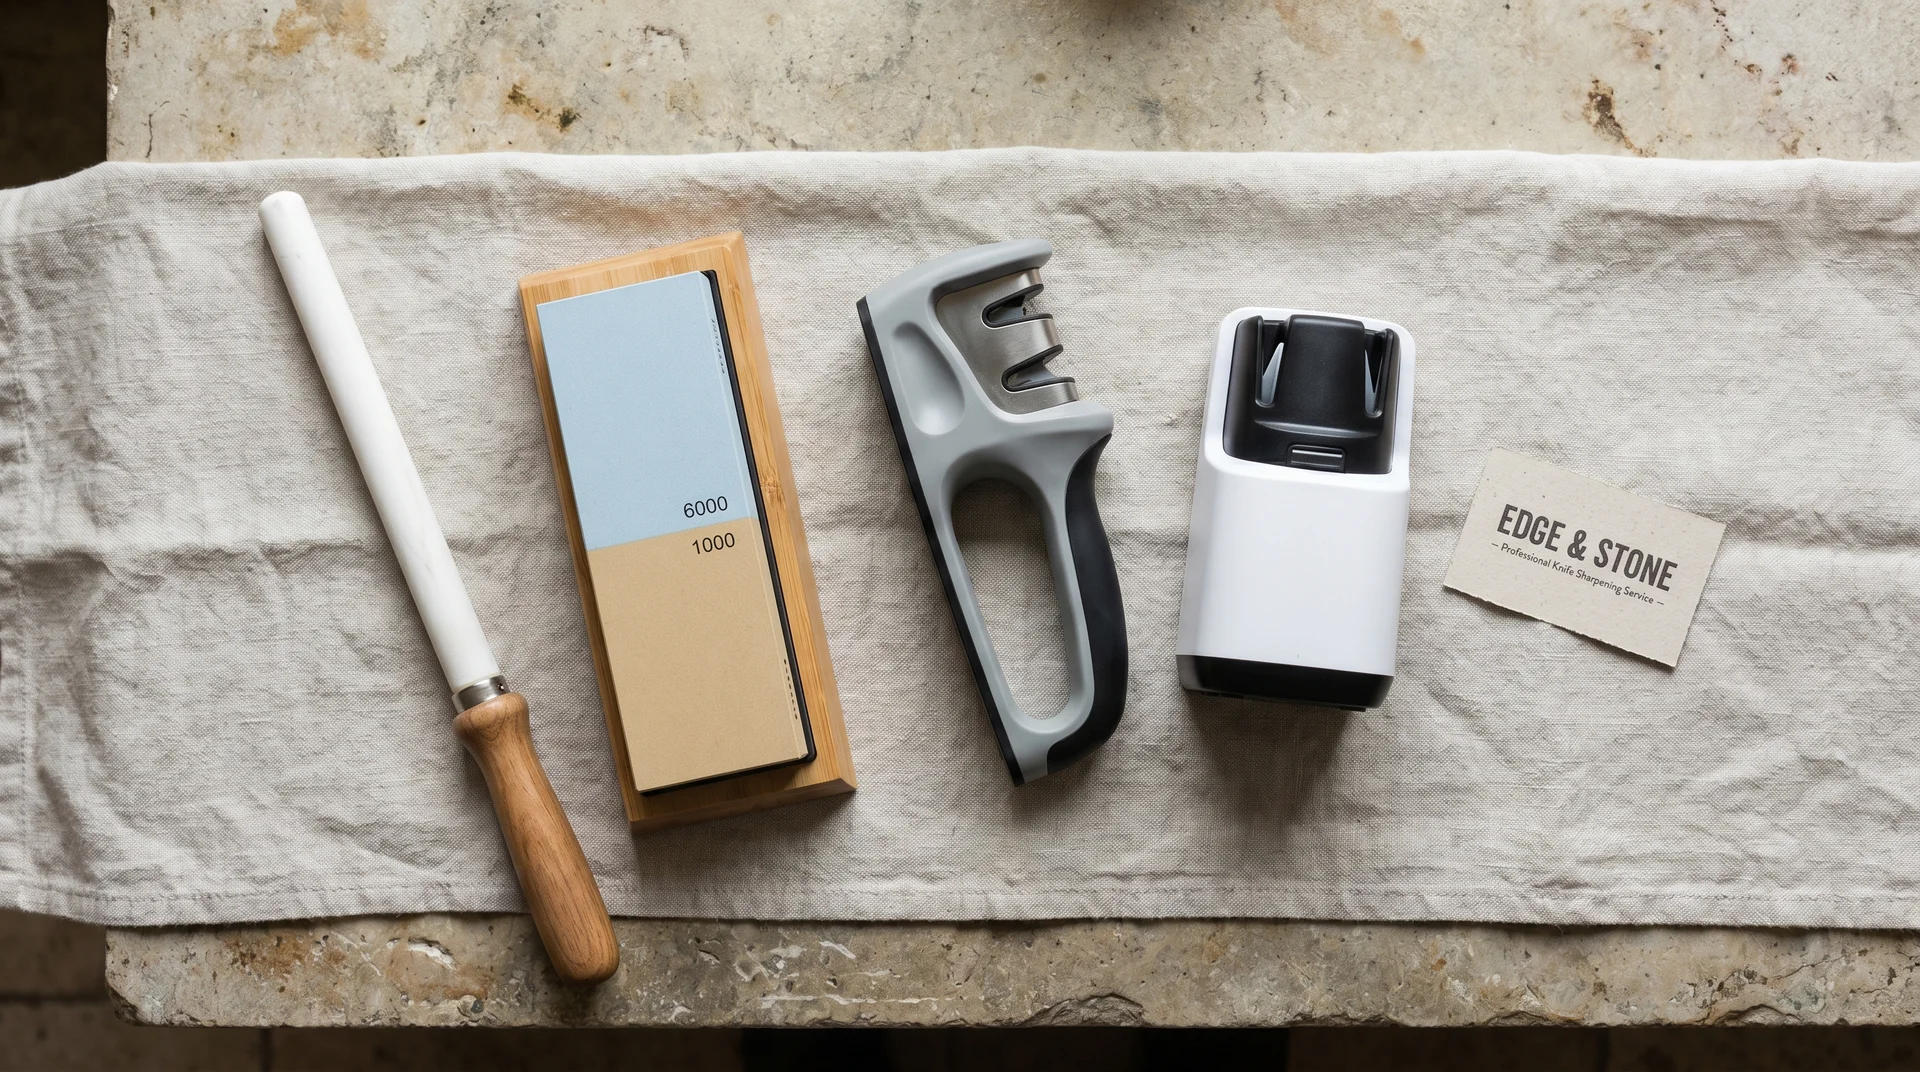
Not every sharpening tool belongs in every kitchen.
Each tool solves a different problem. Using the wrong one at the wrong time wears down your knives faster than necessary and gives you worse results than doing nothing at all.
| Tool | Best For | Main Limitation |
|---|---|---|
| Honing rod | Daily and weekly edge maintenance | Does not replace sharpening |
| Whetstone | Full edge restoration, maximum control | Takes practice to do well |
| Pull-through sharpener | Fast, accessible sharpening | Removes excess material, no angle control |
| Electric sharpener | Utility knives, fast turnaround | Too aggressive for fine Japanese steel |
| Professional service | Chips, geometry repair, annual reset | Cost and turnaround time |
Knife Sharpening Routine to Follow
Sharpening is reactive in most kitchens. It shouldn’t be.
A proactive routine keeps knives from reaching the point where they need rescue. The difference shows up every time you cook.
Here’s a routine that works for a home kitchen in regular use. Run the tomato test mentioned at the top of this piece whenever you’re unsure whether honing is enough.
- Before any significant cooking session: Two or three passes per side on the honing rod.
- Weekly check: Run the tomato test. If the blade passes, hone and continue. If it fails after honing, it’s time to sharpen.
- Every six to twelve months: Full whetstone sharpening for knives in daily rotation.
- Once a year: Consider a professional service for your primary knife, to reset a clean baseline to maintain from.
Protecting the edge after sharpening matters as much as the sharpening itself. A freshly sharpened blade dropped into a knife block slot against other blades loses its new edge quickly.
A magnetic strip, edge guards, or individual sheaths are the right storage options. They cost almost nothing and extend the gap between sessions significantly.
How often you actually need to sharpen depends on your board material, how hard you press, and how often you cook. No fixed schedule gets this exactly right for every kitchen.
Sharp knives don’t stay sharp on their own. A routine keeps them from getting bad.
Which Kitchen Knives Actually Need Sharpening
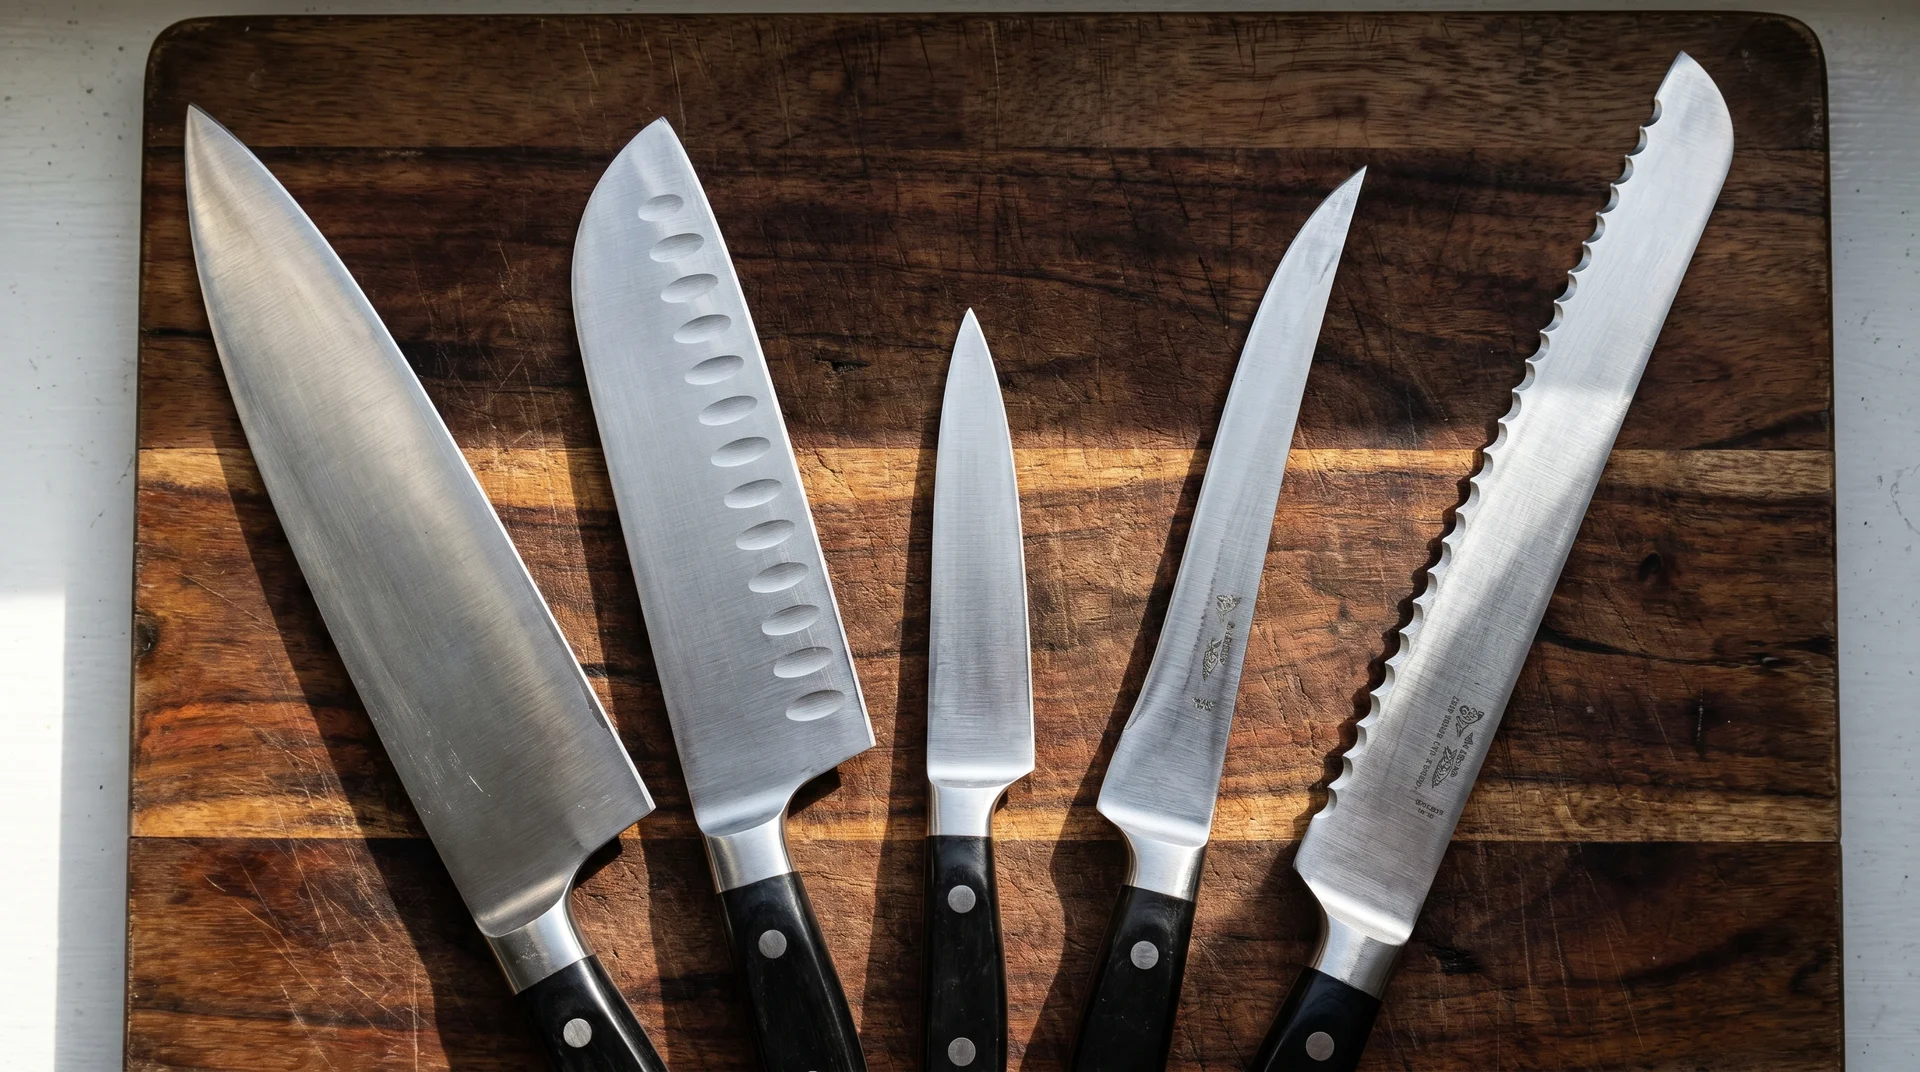
Not every knife in your drawer needs the same attention.
Your daily drivers take priority. Some knife types need a completely different approach, and one category is best left to a professional altogether.
| Knife Type | Sharpening Approach | Target Angle |
|---|---|---|
| Chef’s knife, santoku, paring knife | Regular honing and whetstone sharpening | 15–20°, based on steel origin |
| Boning and fillet knives | Regular honing and whetstone sharpening | ~25° |
| Serrated bread knives | Tapered rod or professional only | Not applicable for whetstone |
| Cheap stamped knives | Worth maintaining; results vary by steel | 20° |
The chef’s knife, santoku, and paring knife are the most commonly used in most home kitchens. Start here. Hone them consistently and sharpen every six to twelve months.
Boning and fillet knives work better at around 25 degrees per side. That angle holds up against bone and cartilage without the edge folding under pressure.
Serrated bread knives are a different conversation, and that’s a deliberate decision here. Standard whetstone sharpening doesn’t apply to serrated blades.
They need a tapered ceramic or diamond rod matched to the serration size, and most home cooks are better off sending a worn blade to a professional.
Some low-carbon steel is genuinely hard to sharpen well. If a knife refuses to hold an edge after a proper session, it may not be your technique.
A Dull Knife Is the Most Dangerous Knife in Your Kitchen
Dull knives cause more kitchen injuries than sharp ones.
A dull knife requires force to cut. Force in a kitchen is where accidents happen.
A sharp knife needs almost no pressure. The edge does the work, and you guide it. Pushing a dull blade through an onion takes exactly the kind of effort that sends knives sideways.
Sharpening is basic kitchen maintenance. Sharp knives are the baseline.