The ingredient is not the problem. The time is.
A baking soda paste with dish soap cleans a dirty oven without fumes or harsh chemicals. This piece covers the method and what makes it fail.
Self-cleaning cycle safety and a full commercial product comparison each need their own piece with different criteria.
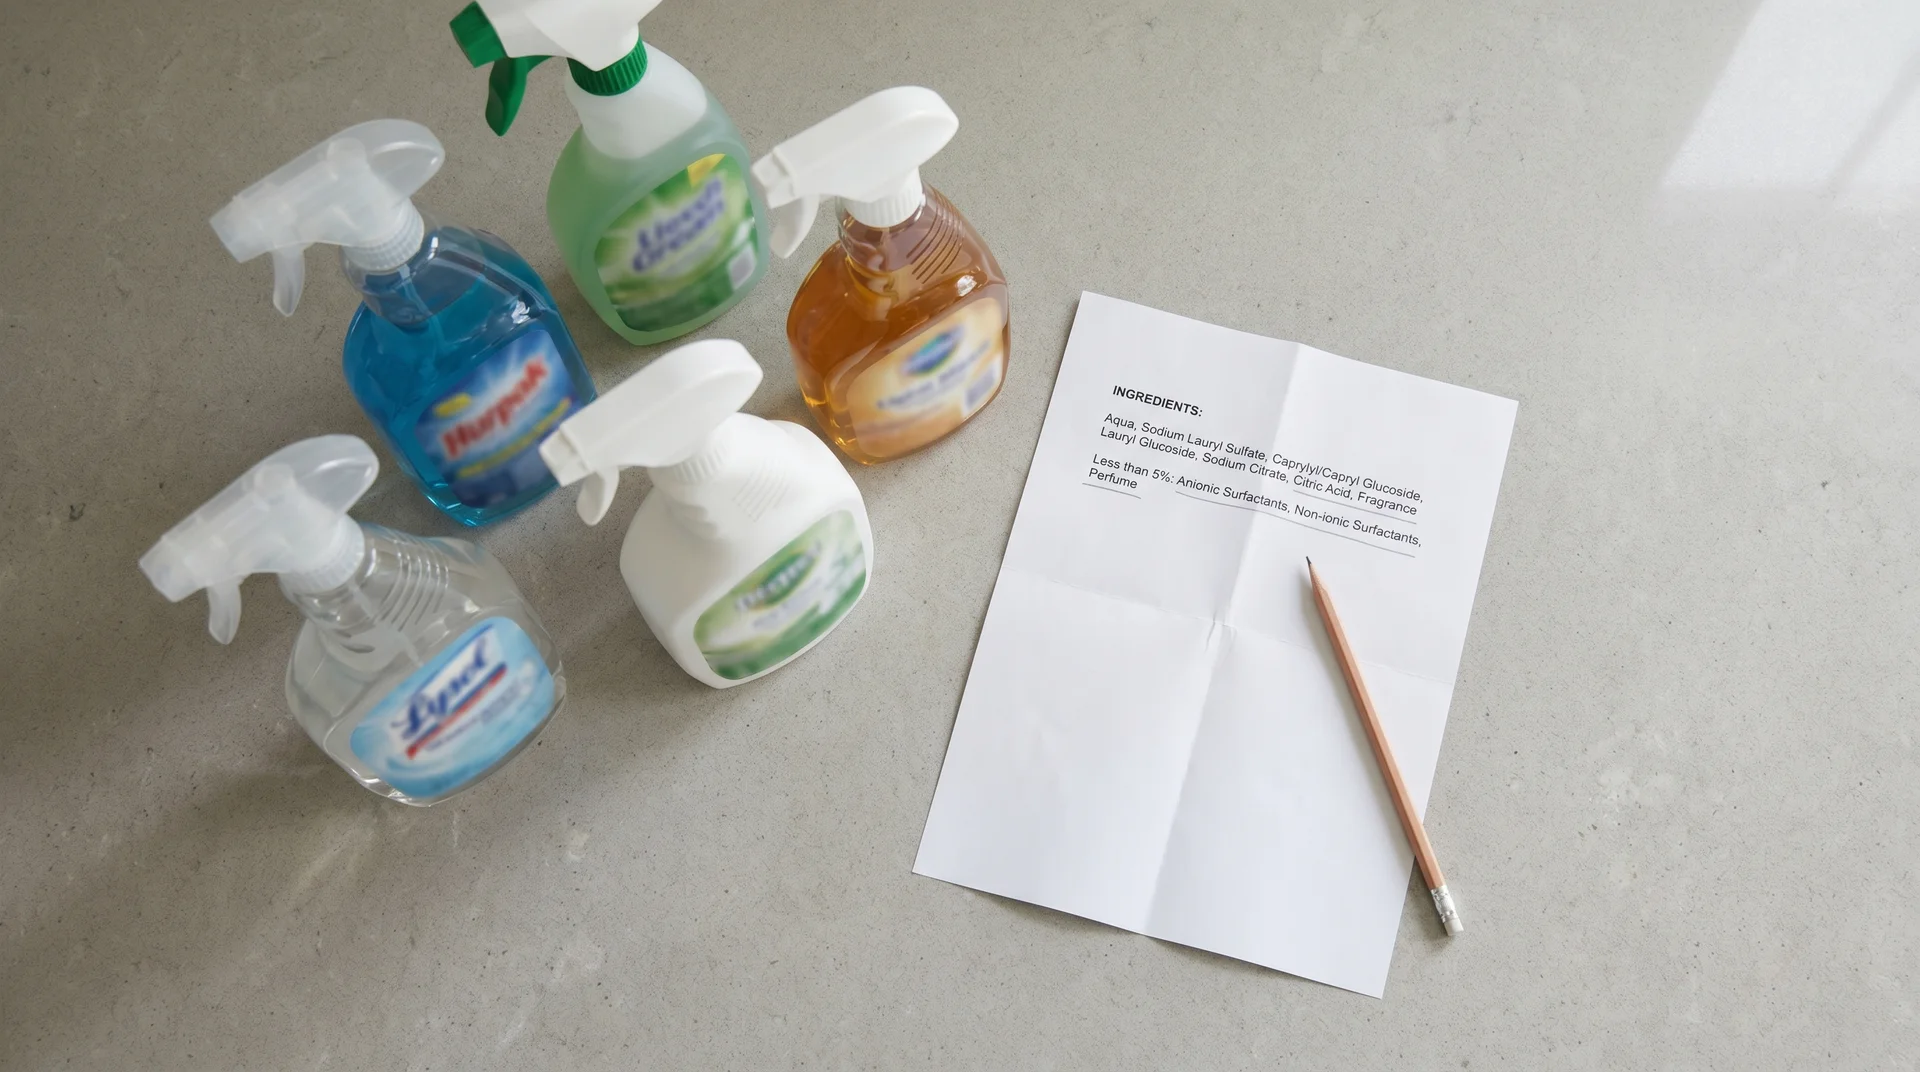
What “Non-Toxic” Means on an Oven Cleaner Label
Non-toxic on an oven cleaner label has no regulatory definition.
No federal agency requires a manufacturer to verify that claim before it goes on packaging. The front panel says “non-toxic.”
Whether the EPA registration data for that product actually supports the claim is a separate question. Those two things are not connected by any law.
What “Non-Toxic” and “Fume-Free” Actually Guarantee
Neither term is independently verified before it appears on the front panel. Both are marketing claims, not regulatory categories.
“Fume-free” carries a narrower meaning than most people assume. It means the formula produces lower vapor pressure than lye-based conventional cleaners.
In a small kitchen with a closed window, fume-free air still needs ventilation.
The Certification That Carries Real Weight
EPA Safer Choice certification requires a documented ingredient-level review before a product can use the label. The front-panel “non-toxic” claim requires none.
Under the EPA Safer Choice Program, each ingredient gets assessed for human health and environmental impact before the product qualifies. That is not the same standard as printing “non-toxic” in large type on the front of the bottle.
Front-panel copy and back-panel data are not the same document. Read accordingly.
Why Baking Soda Works, and Why Vinegar Cancels It Out
When you add vinegar to the baking soda paste, the cleaning power drops.
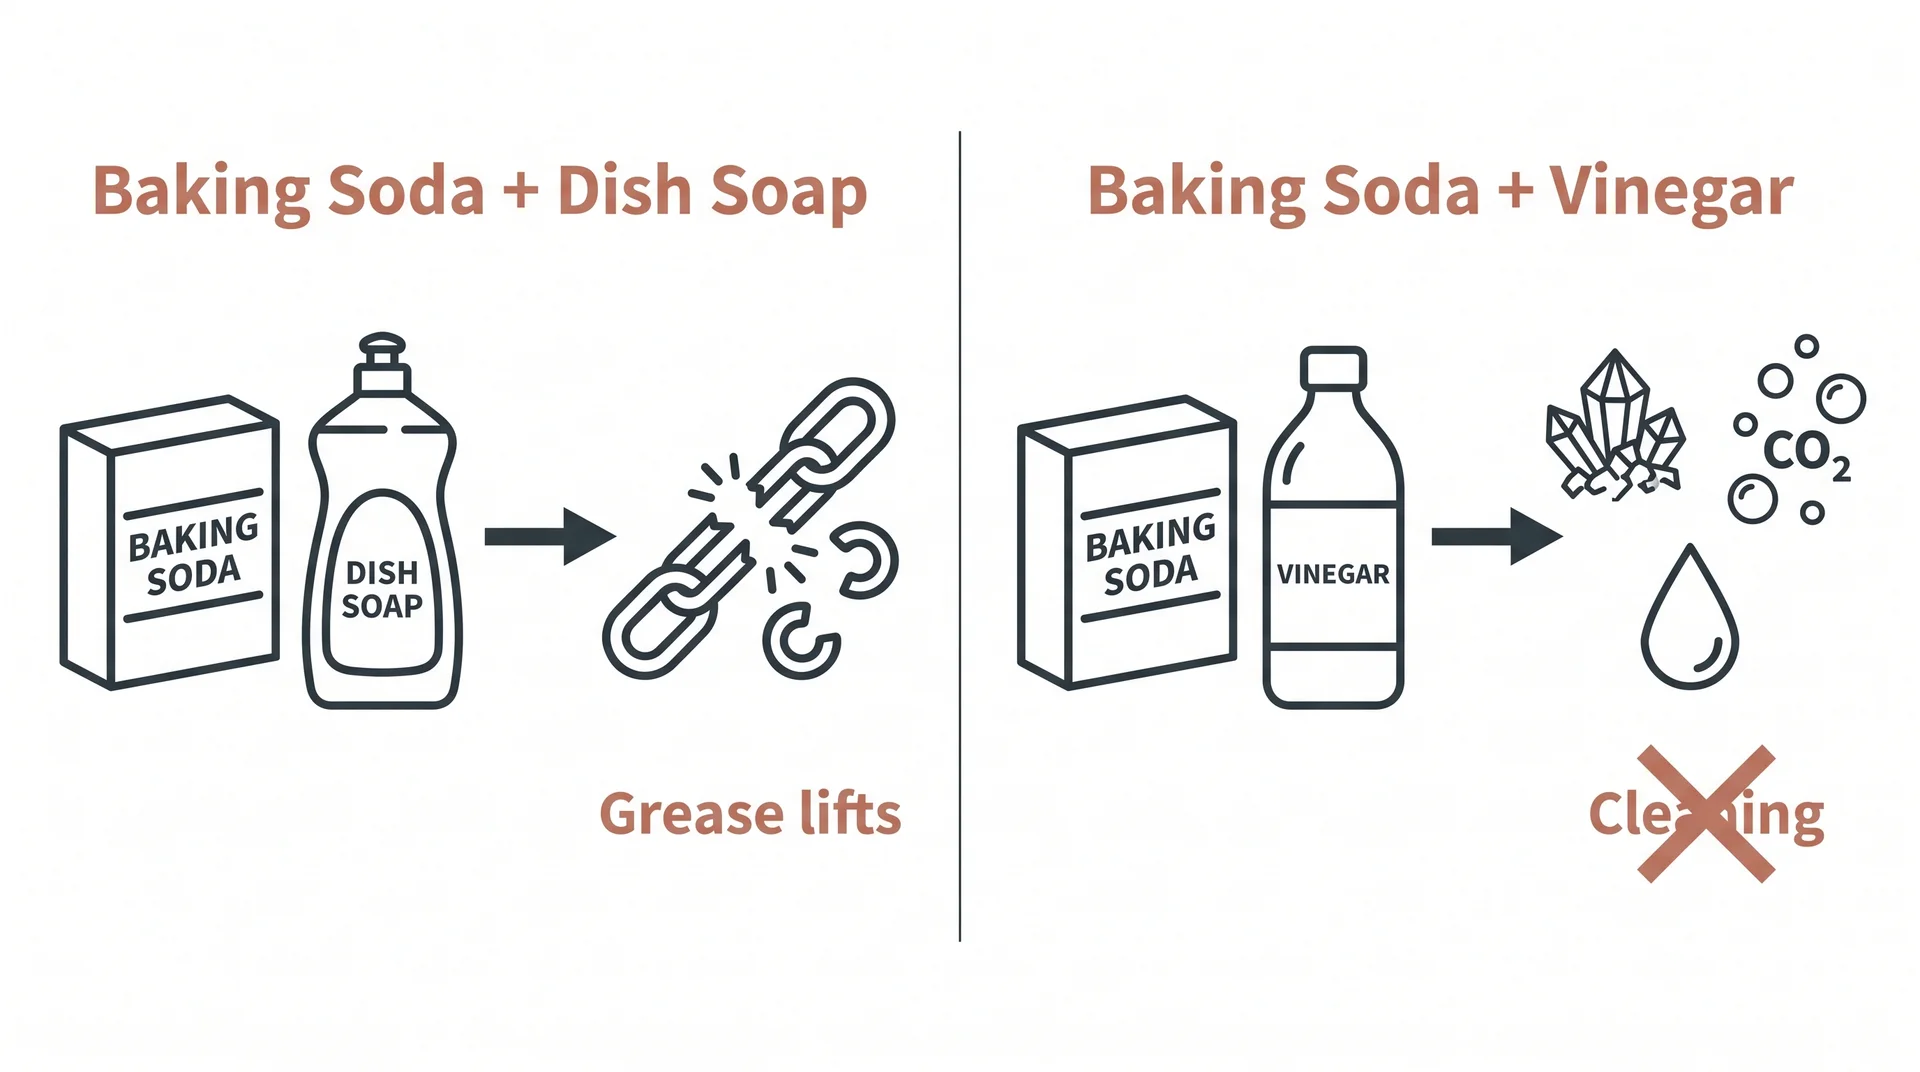
Baking soda sits at around pH 8.3. Baked-on oven grease contains fatty acids. The alkaline paste reacts with those fatty acids and breaks the bond holding the residue to the oven surface. That reaction works.
The problem is what vinegar does to it.
Why the Baking Soda and Vinegar Combination Fails
Vinegar is acetic acid. When it meets sodium bicarbonate, the reaction produces salt, water, and carbon dioxide. The alkaline cleaning power is gone.
The fizzing is just cosmetic. It is not cleaning anything.
The correct companion for baking soda is dish soap. Dish soap contains surfactants, compounds that lift and suspend grease rather than reacting with the alkaline agent. Add dish soap, and the cleaning chemistry stays intact. Add vinegar, and you are washing your oven walls with salty water.
Why Contact Time Is the Variable Everyone Ignores
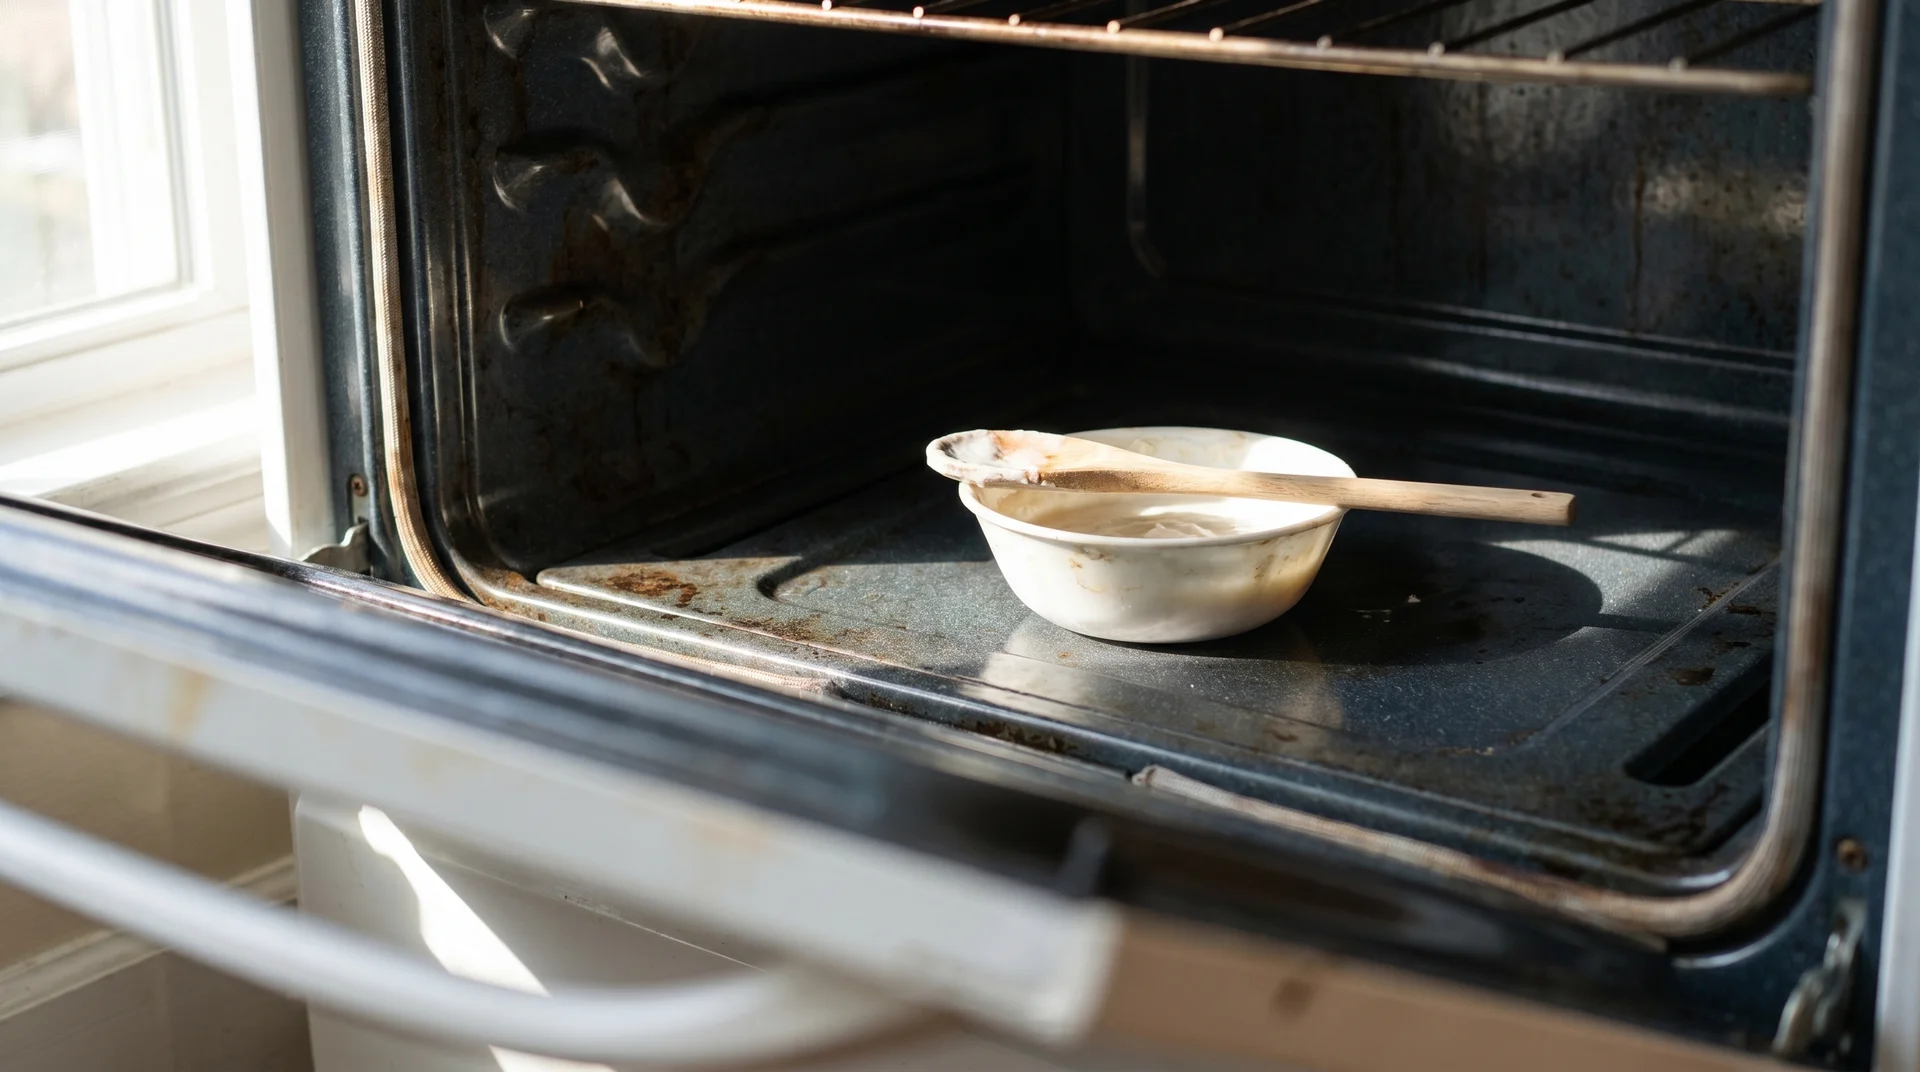
The paste stops working when it dries. Less than two hours of contact time is rarely enough for anything beyond a very recent light spill.
Contact time scales with how deeply the grease has built up. Here is how to match them:
- Recent light spills (cleaned within a week or two): Two hours is adequate. The grease bond hasn’t hardened yet, and the paste breaks it quickly with full coverage.
- Moderate buildup (monthly cleaning or less): Four to six hours minimum. Apply in the evening and wipe in the morning.
- Carbonized residue (black, hardened, multi-layer grime): Overnight is the starting point, not the target. A second application is not unusual even after a full overnight dwell.
Rushing the timing and the wipe spreads the grease rather than lifting it. That is how an oven looks worse after a quick application than before it.
The DIY Non-Toxic Oven Cleaner: Step by Step
This method works when you run it in the right sequence.
The steps below are ordered for a reason. Sequence and surface type both affect how well the paste holds contact through the full dwell period.
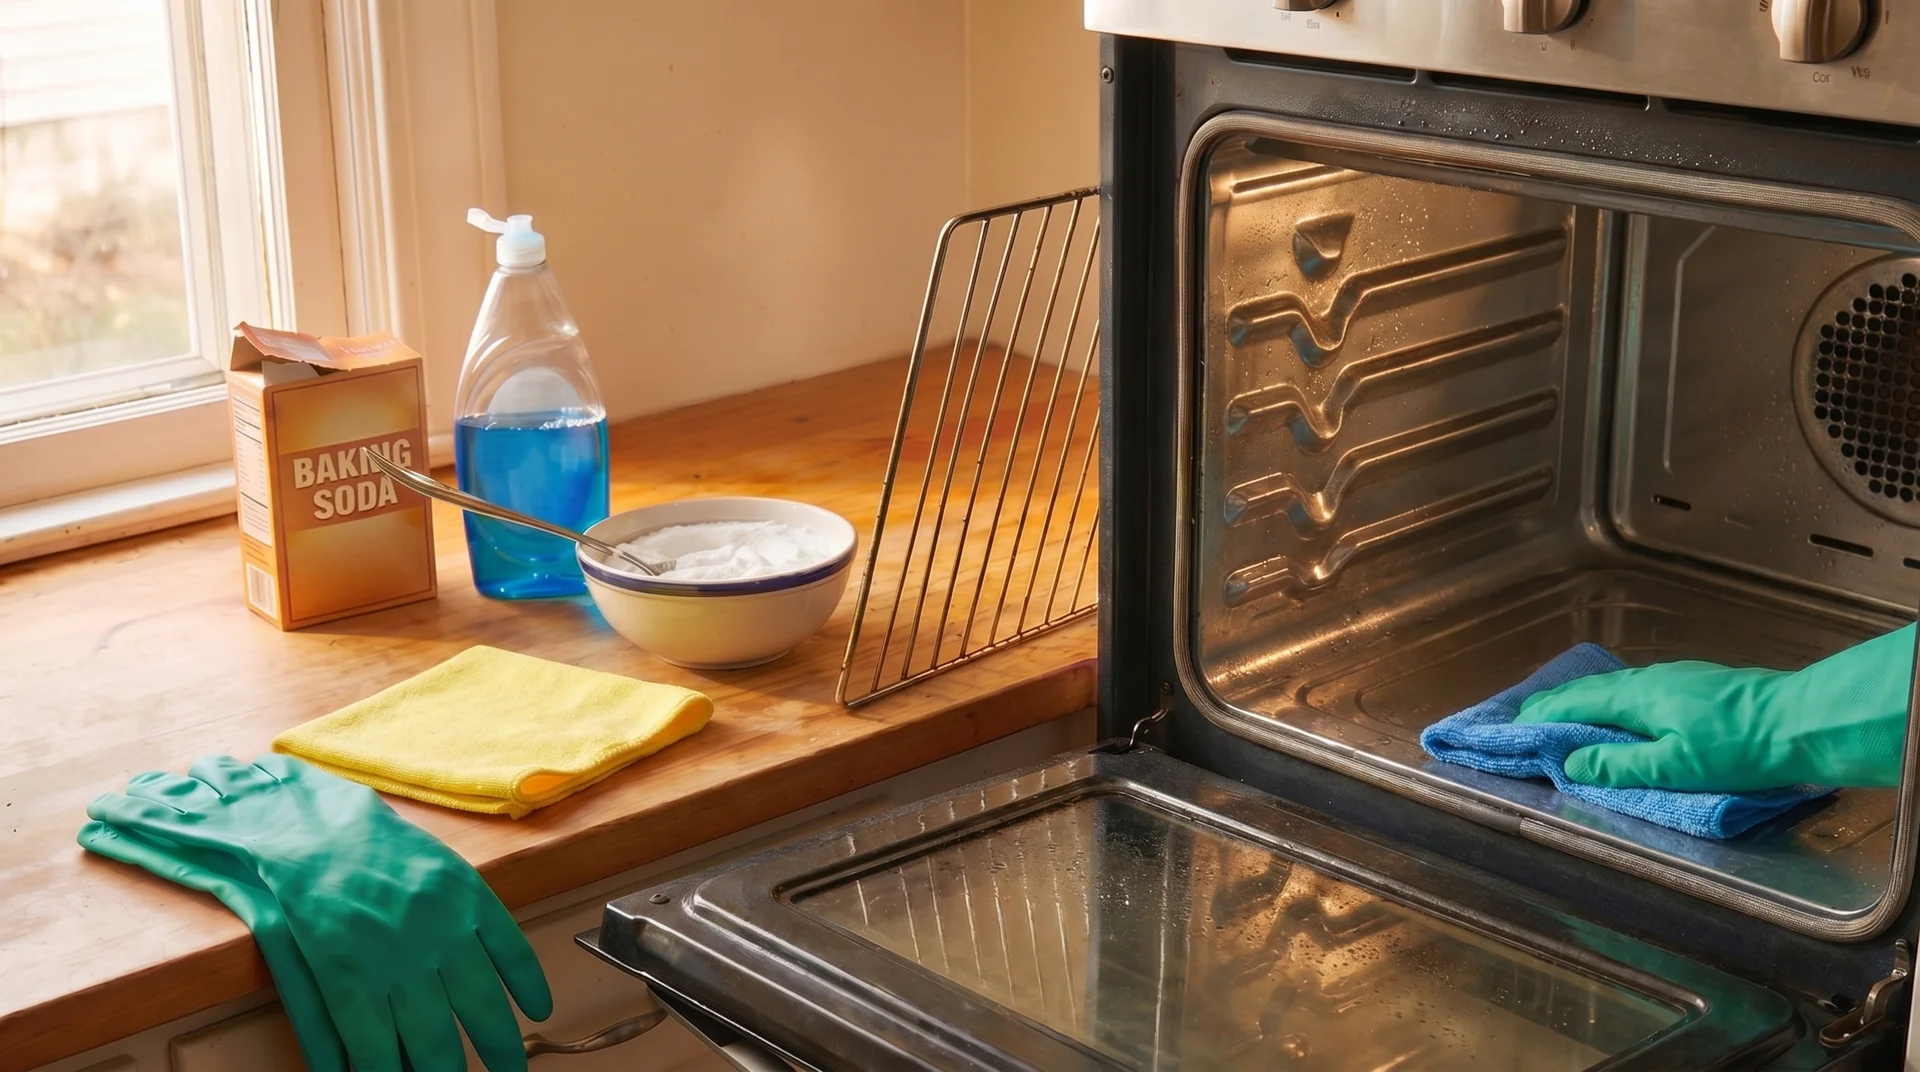
What You Need
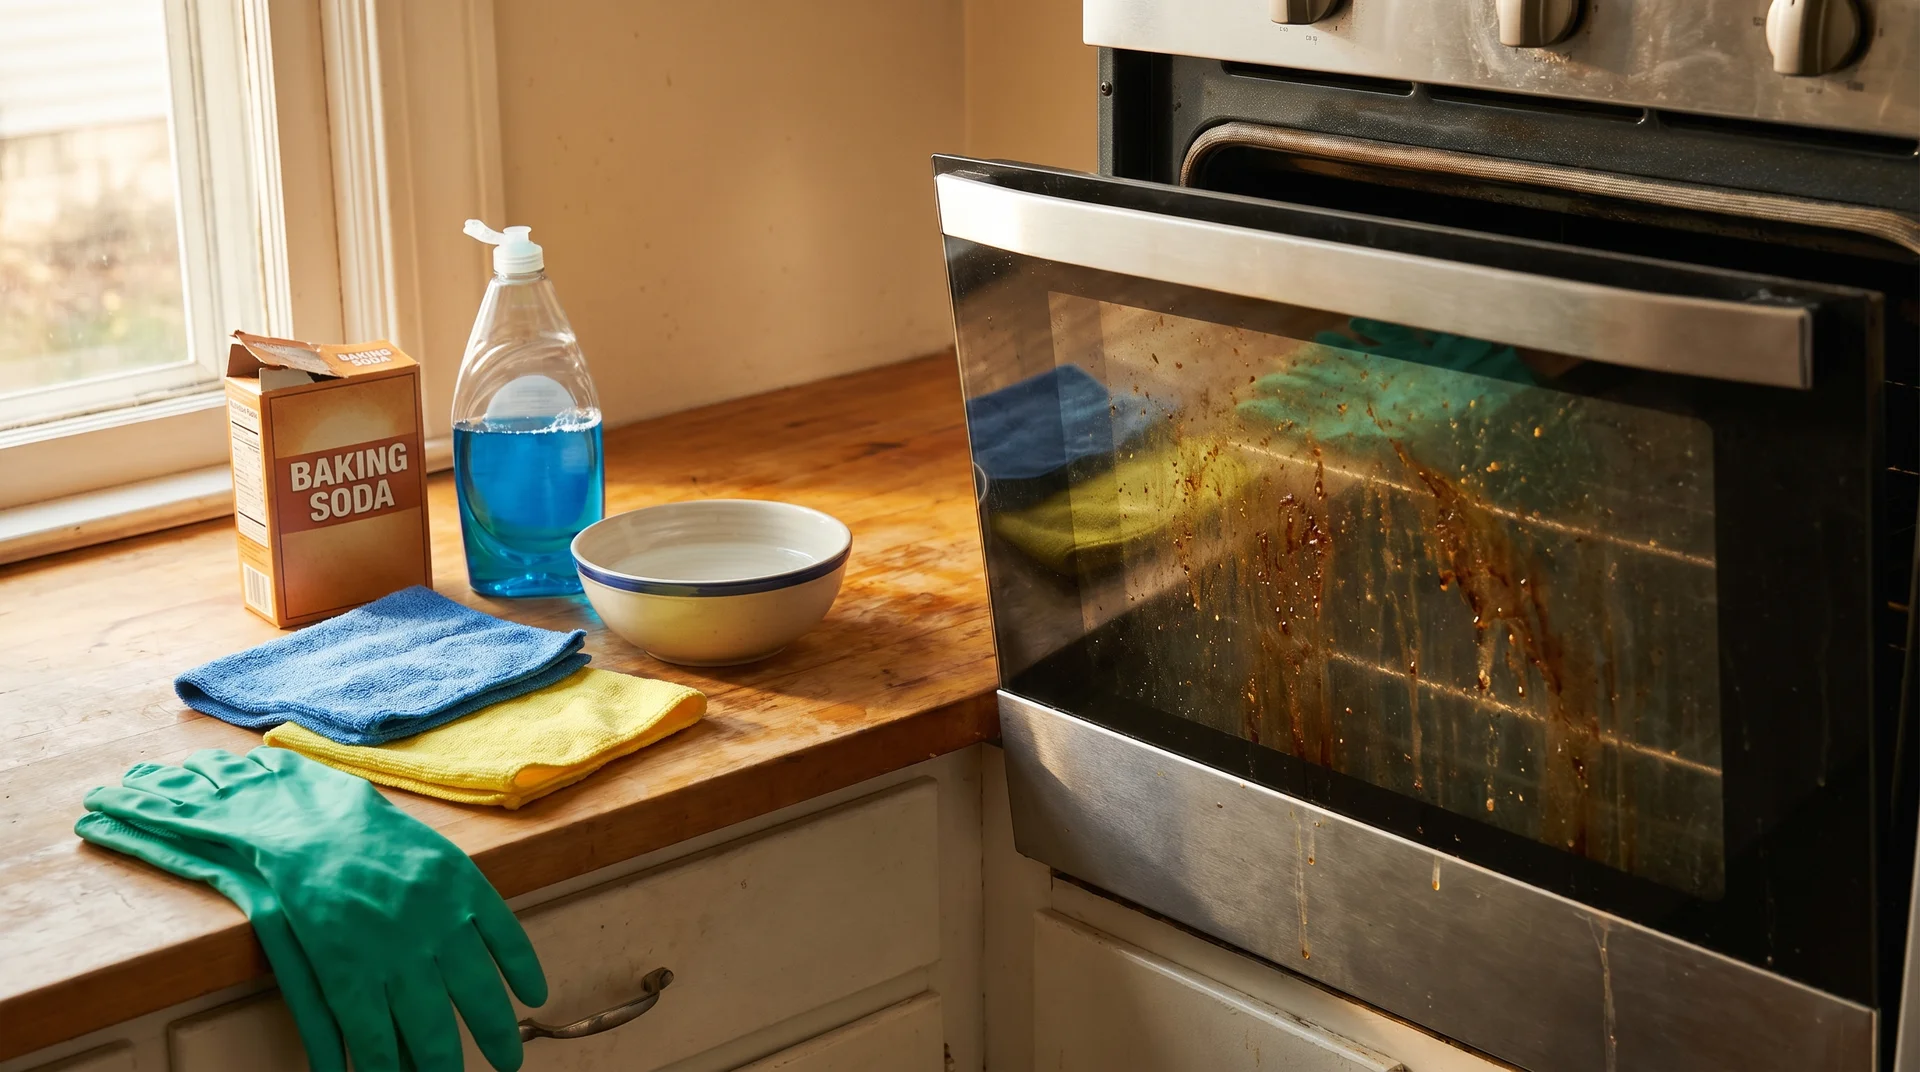
You need five things.
- Baking soda (not baking powder)
- Standard liquid dish soap
- Water
- Two microfiber cloths, kept separate: one for paste removal, one reserved for the rinse pass only
- Rubber or nitrile gloves
Two cloths matter. Using the same cloth for both passes drags baking soda residue back across the surfaces you have already cleaned.
Mixing the Paste
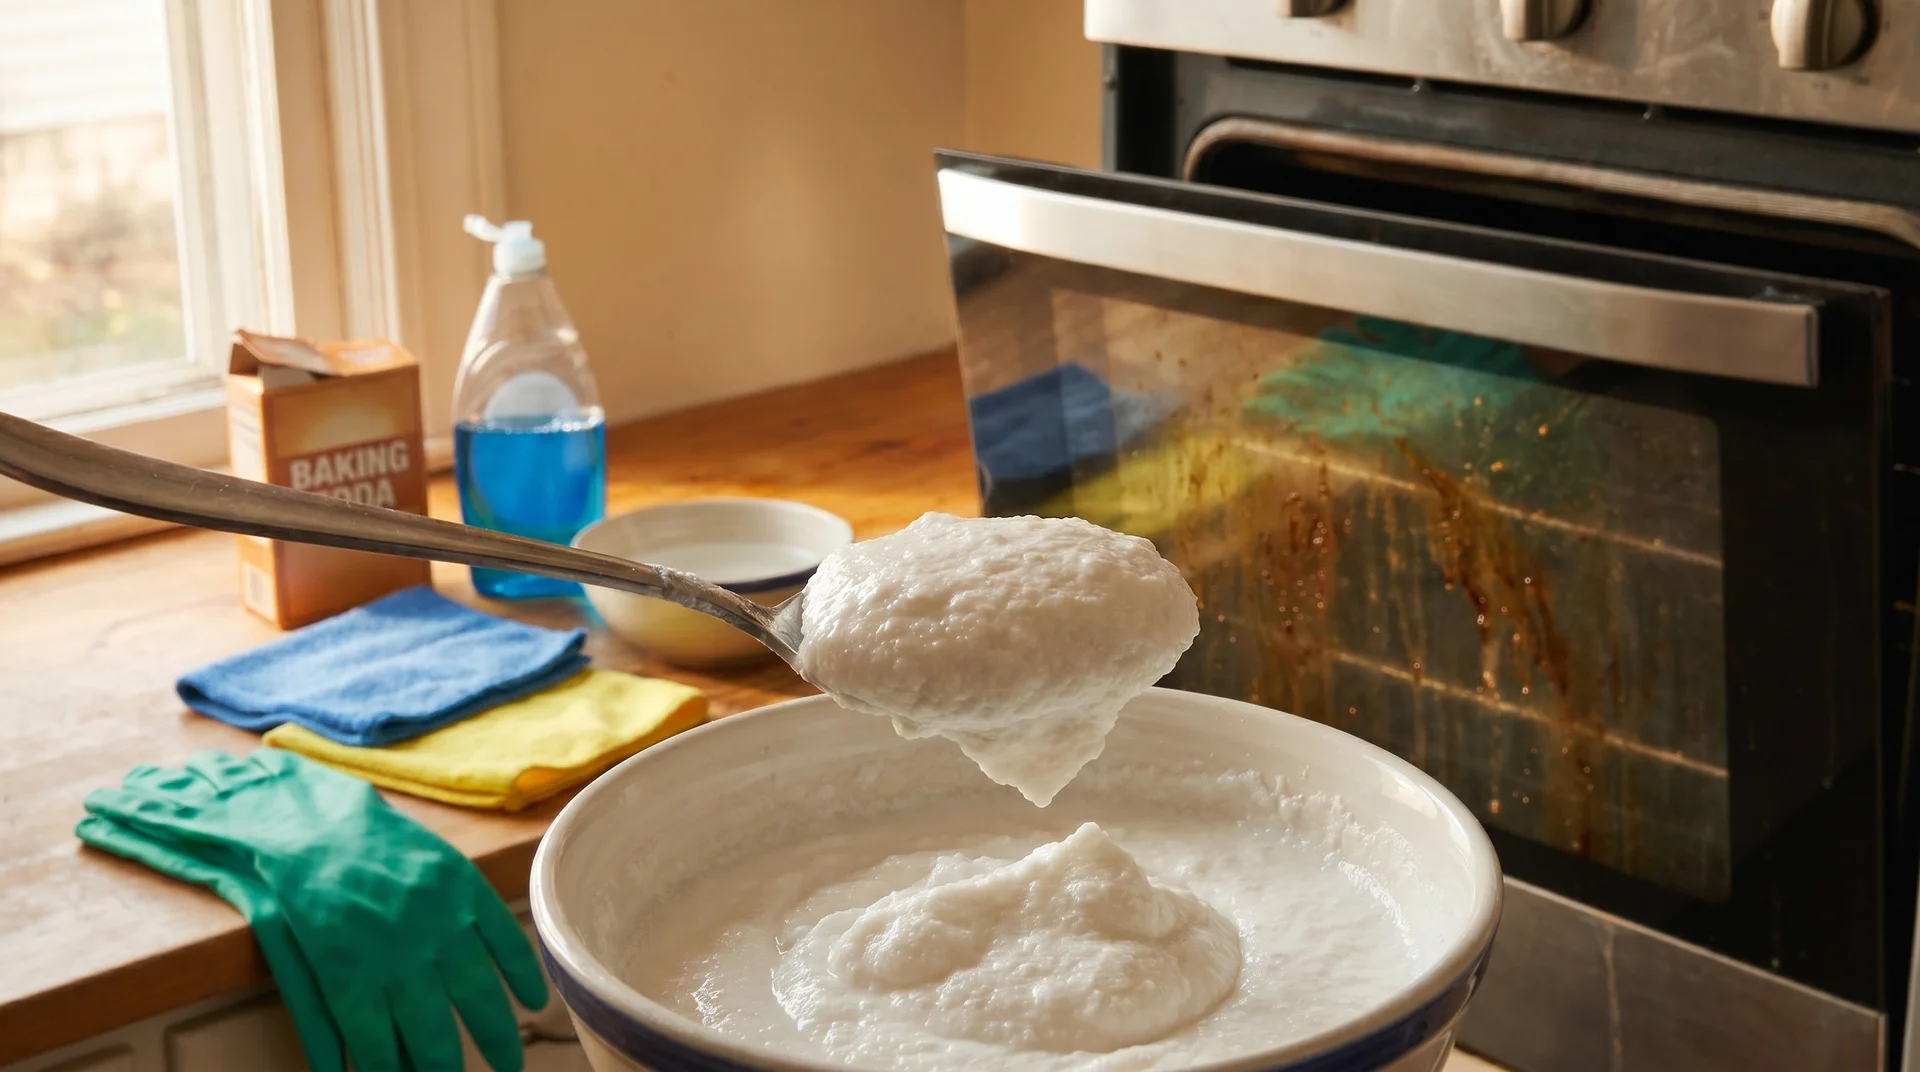
Target the consistency of toothpaste. Anything runnier will slide off vertical oven walls before the dwell period ends.
Start with 1/2 cup of baking soda and one tablespoon of dish soap. Add water a few teaspoons at a time. Stop when the paste holds its shape on a spoon without spreading.
If it runs when you tilt the bowl, add more baking soda. If it crumbles when you try to spread it, add a few more drops of water.
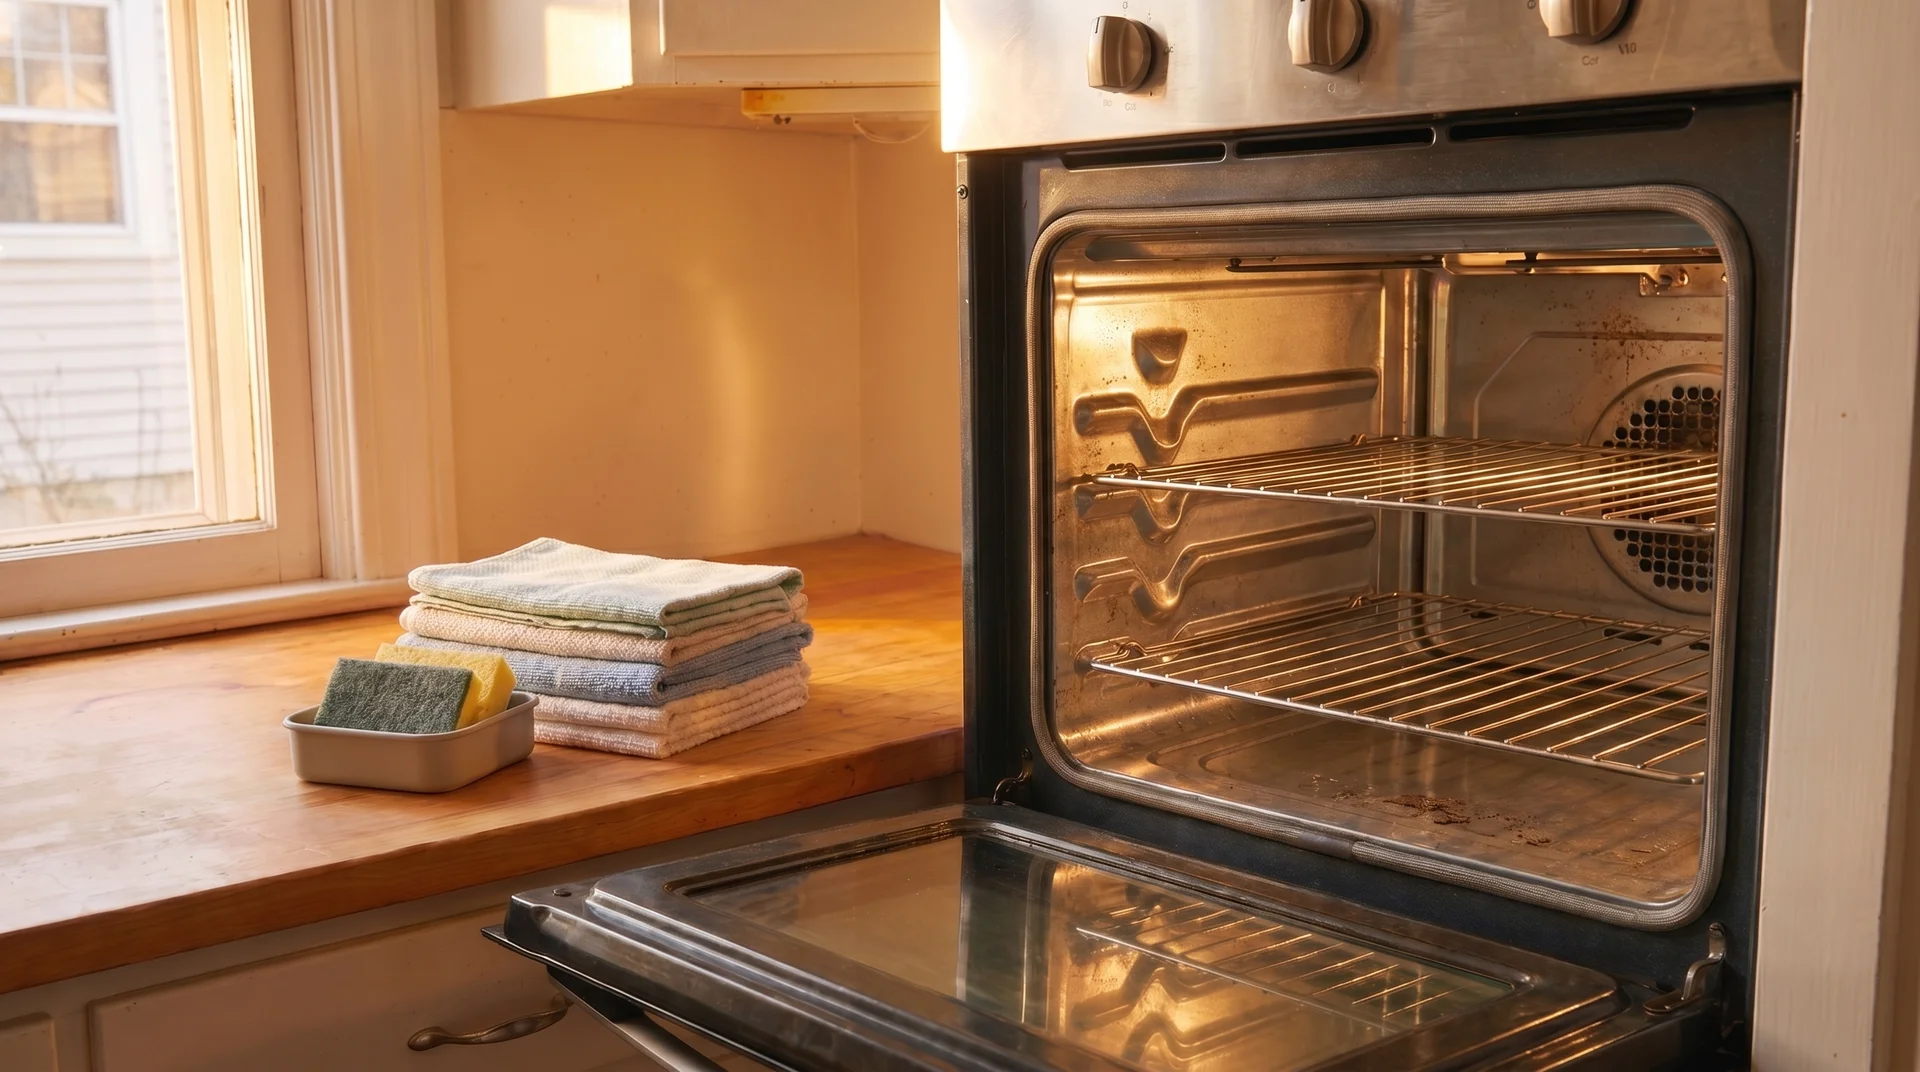
Preparing the Oven Before You Apply
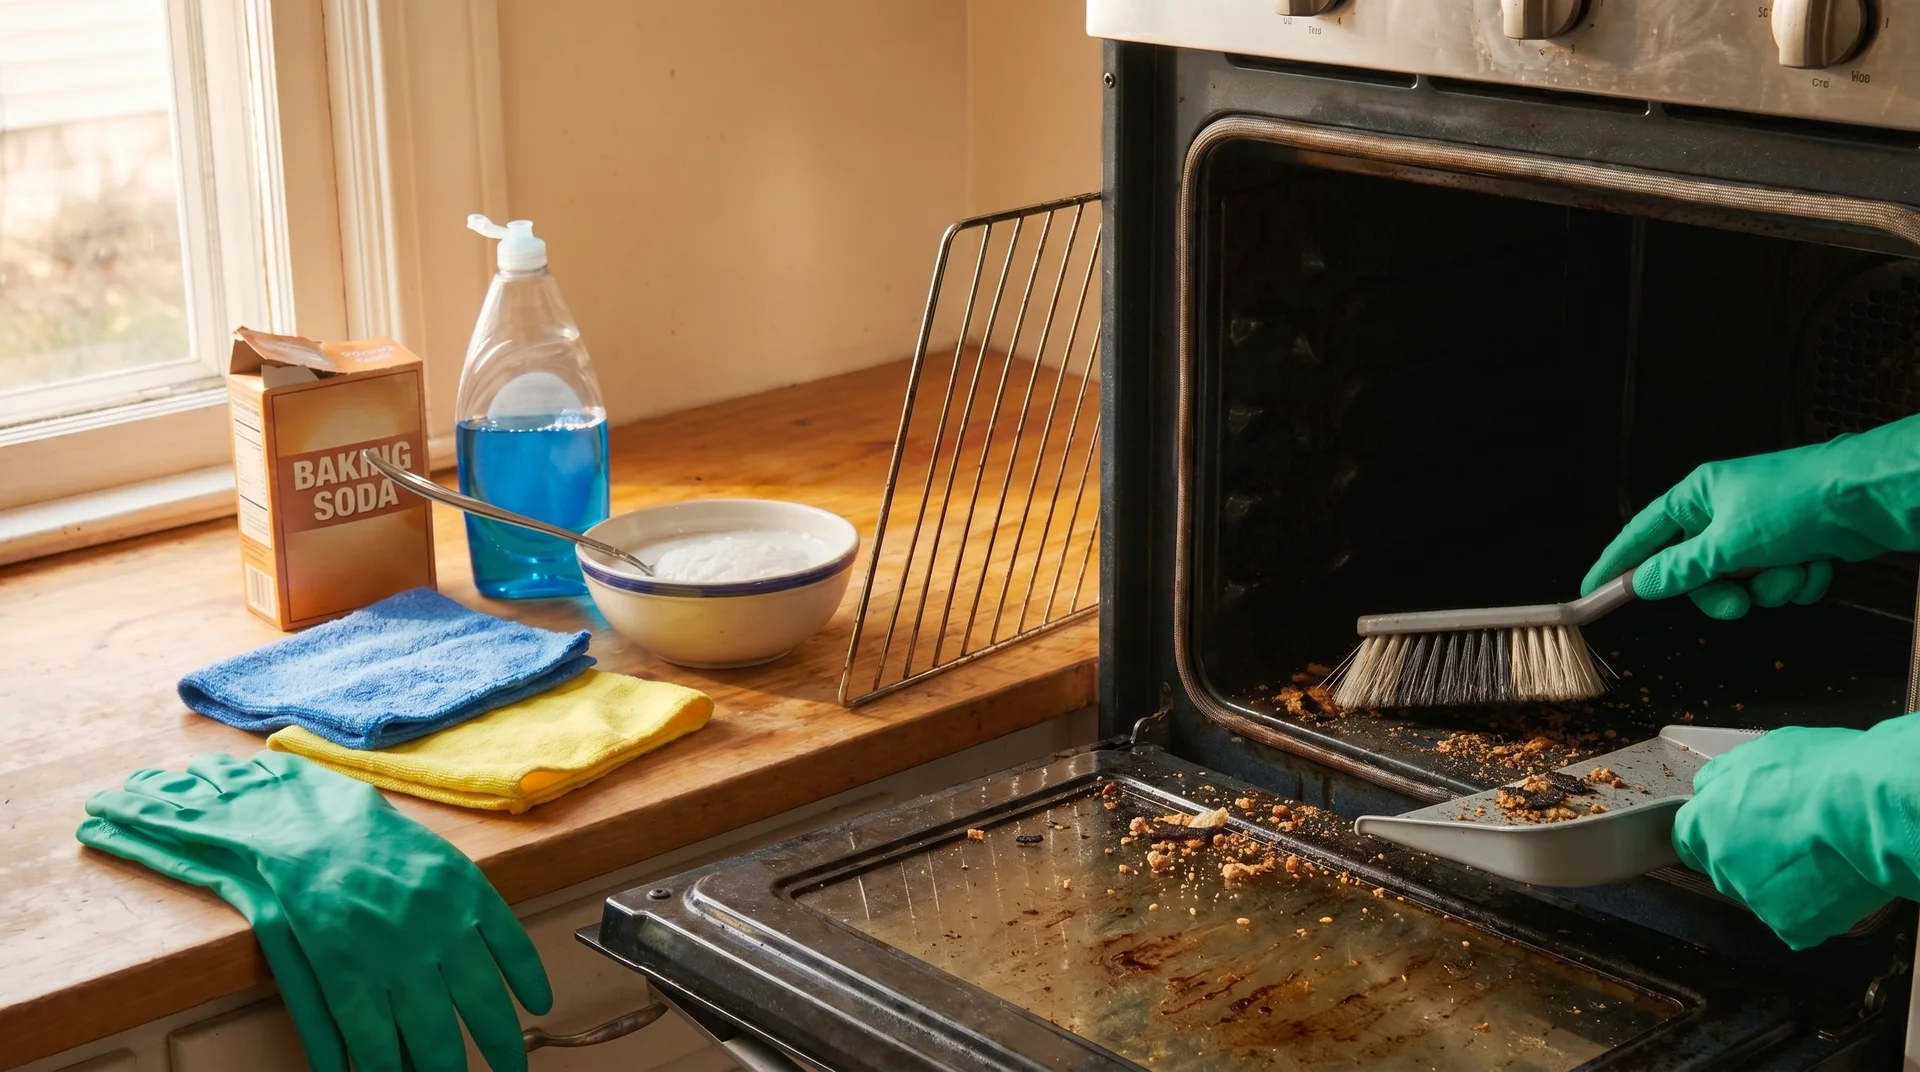
Clear the oven interior completely before any paste goes on the surfaces.
Remove the oven racks and set them aside. Take out any oven thermometer you keep inside. Knock loose debris off the oven floor before you start coating the walls.
Paste applied over loose debris pulls away from the oven surface during the dwell period. That cuts contact time precisely where you need it most.
Application: Surface Type and Sequence
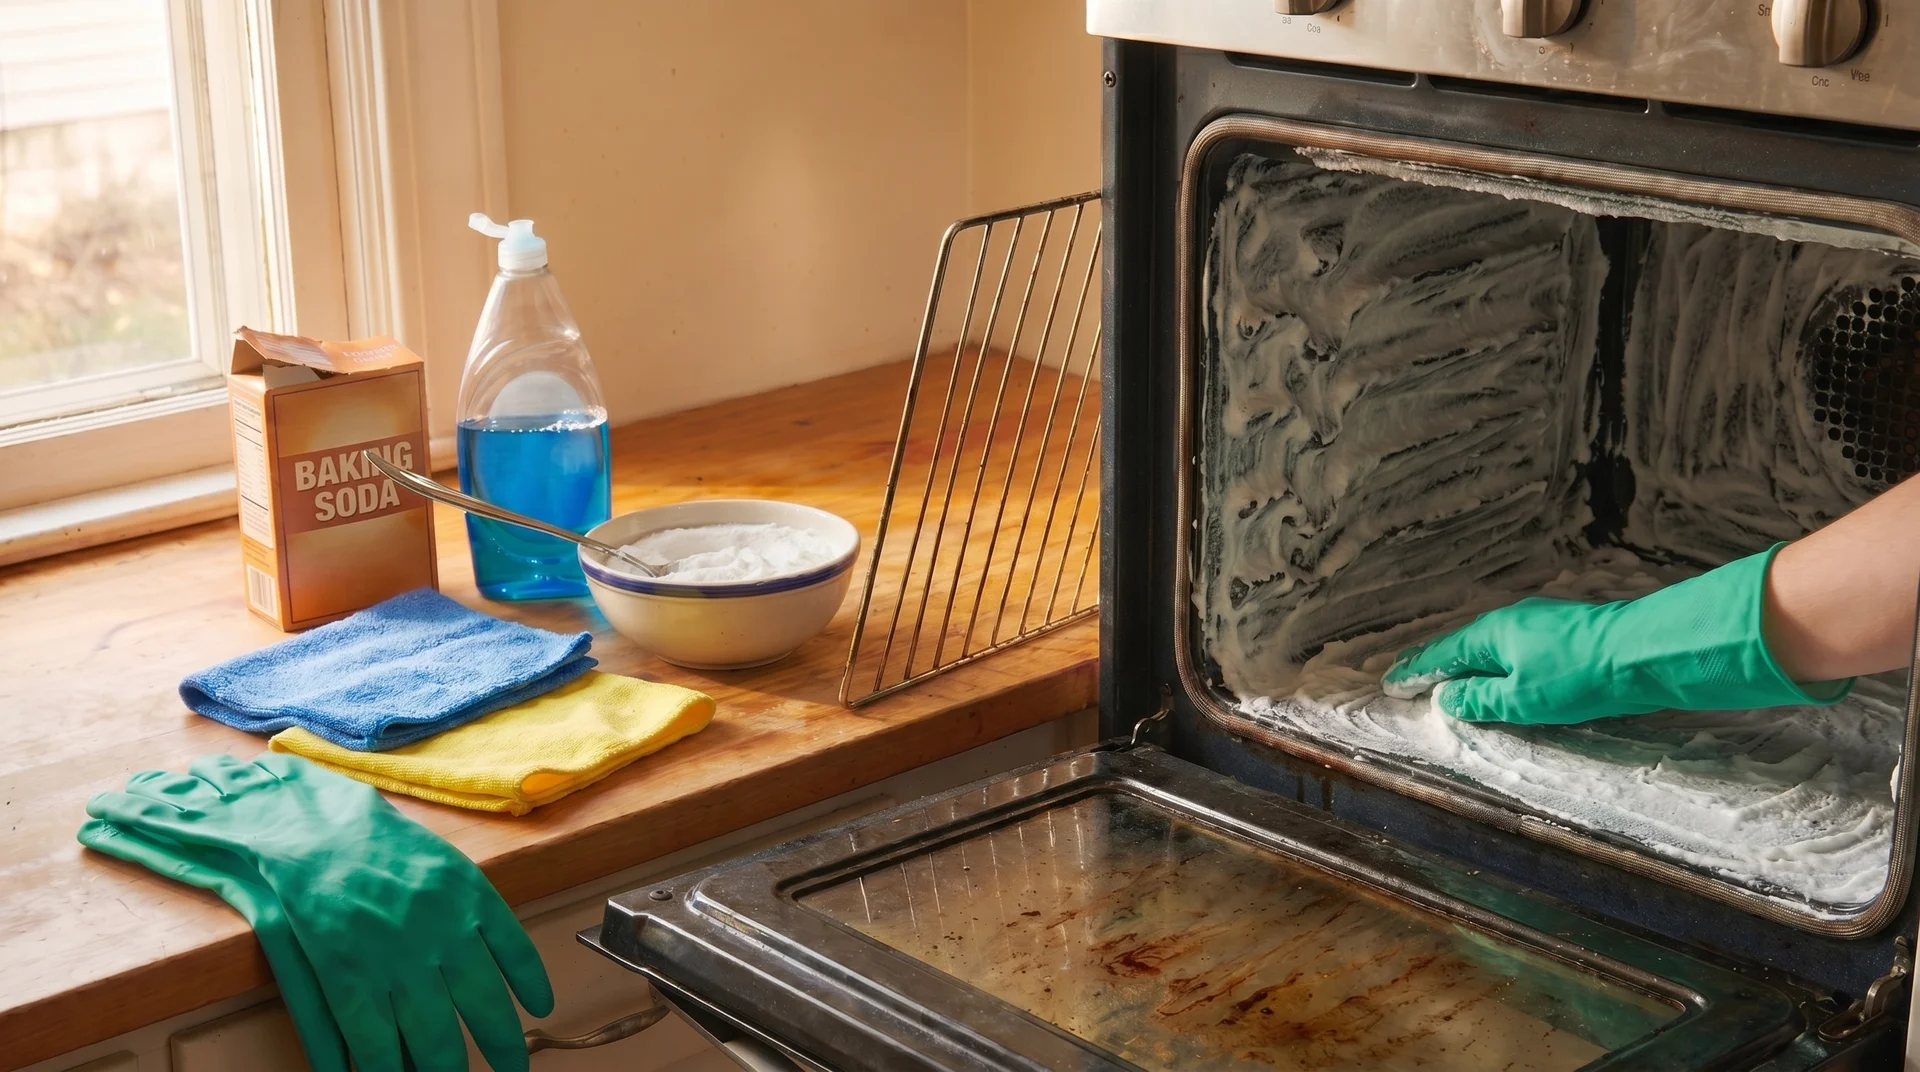
Work through the oven interior in a fixed sequence. Contact time, surface type, and sequence are not interchangeable variables — they each affect the result.
Apply in this order:
- Back wall
- Side walls (left, then right)
- Ceiling of the oven cavity
- Floor
Paste falls from upper surfaces as you work above them. Coating the floor last means you capture that fall rather than re-coating over it.
Spread the paste by gloved hand until the enamel surface is not visible through it. Thin patches dry faster and lose contact time before the surrounding areas do.
Skip the heating elements, the oven vents, and any exposed wiring. Then close the oven and leave it for the dwell period that matches your soil level.
The Wipe-Out and the Rinse: Two Separate Passes
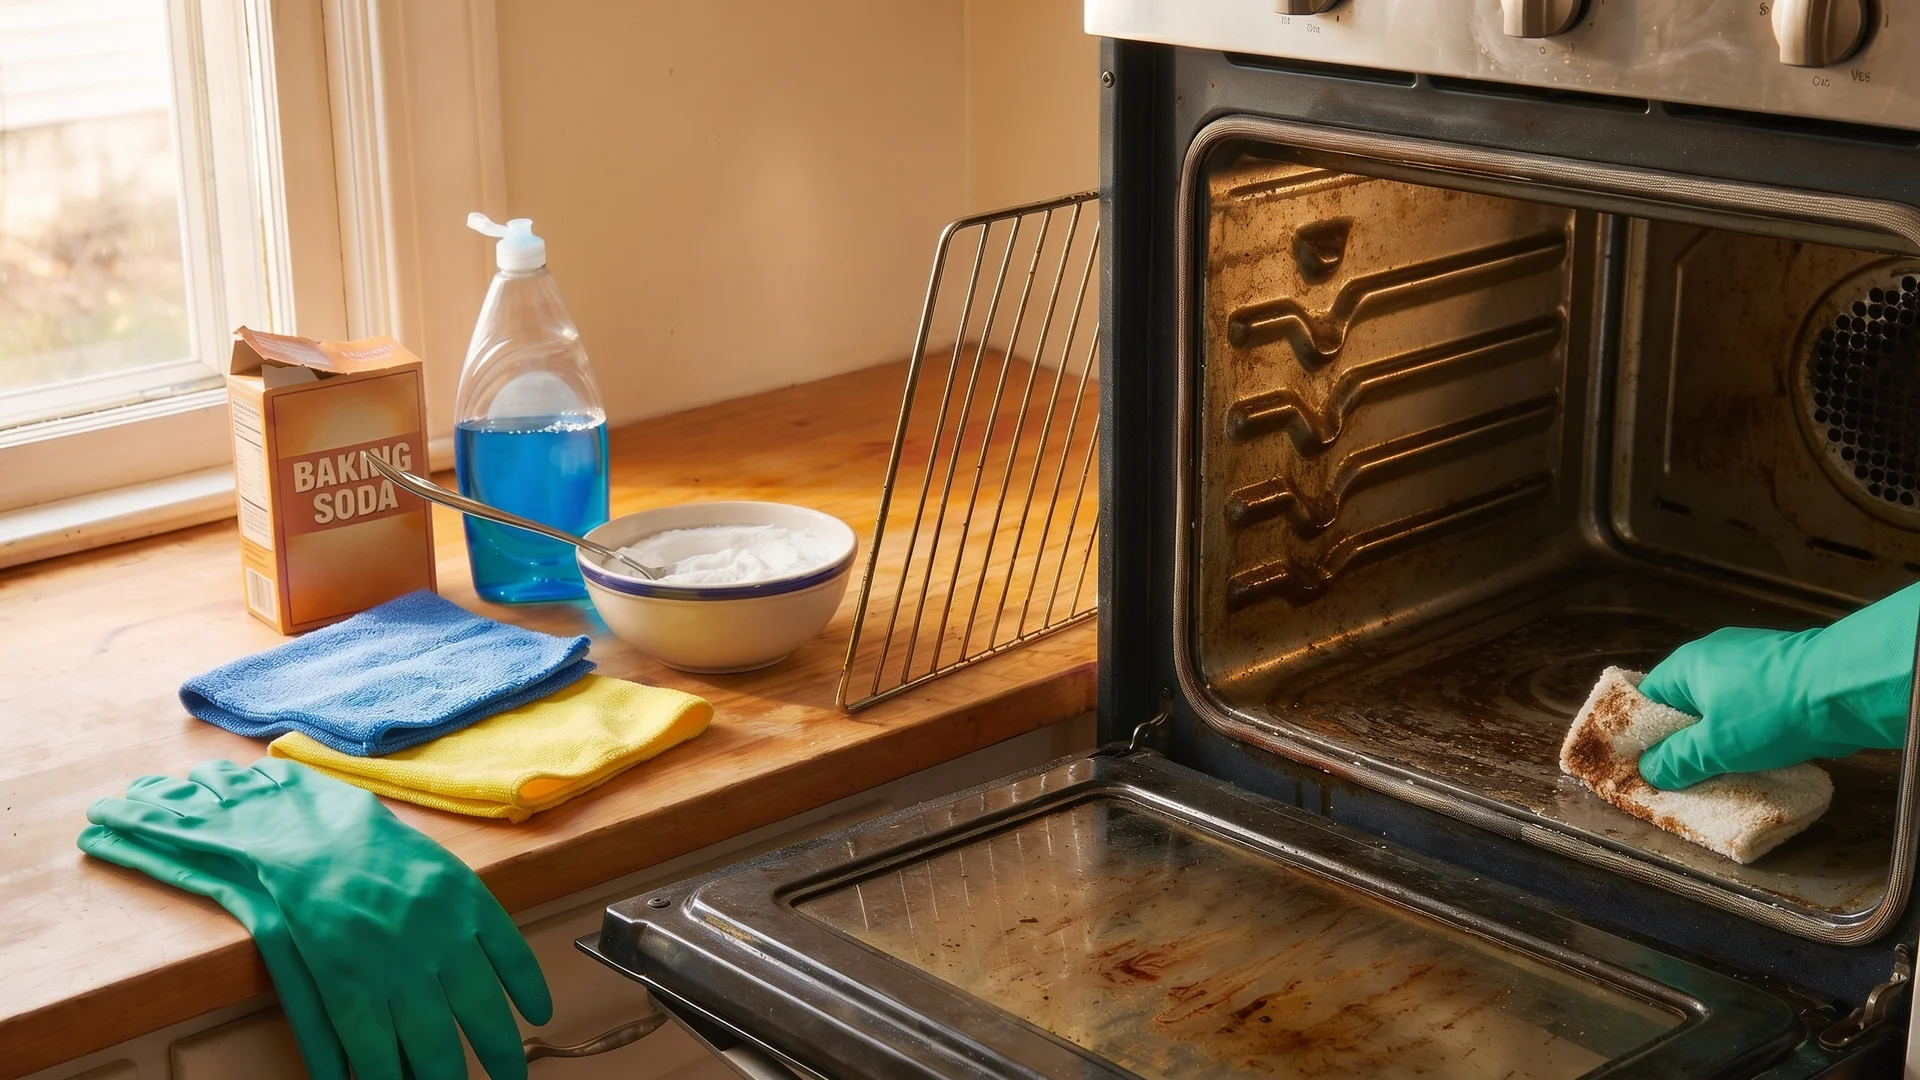
The rinse is not part of removing the paste. It is a separate action with a clean cloth and clean water, and skipping it is the most common reason the method appears to fail.
Run both passes in order:
- First pass is paste removal: Dampen the first microfiber cloth and wipe the paste out in sections. Rinse the cloth frequently. It will turn brown. That is the grease lifting off the surface.
- Second pass is rinse only: Take the second cloth, wet it with plain water only, and wipe every interior surface again. You are removing baking soda residue, not paste. The oven looks clean before this step. It is not finished.
Skip the second pass, and the baking soda residue stays on the oven surfaces. The next time the oven heats up, that residue activates with cooking steam and produces a sharp alkaline smell.
Most people blame the cleaner at that point. The cleaner is gone.
Cleaning Oven Racks
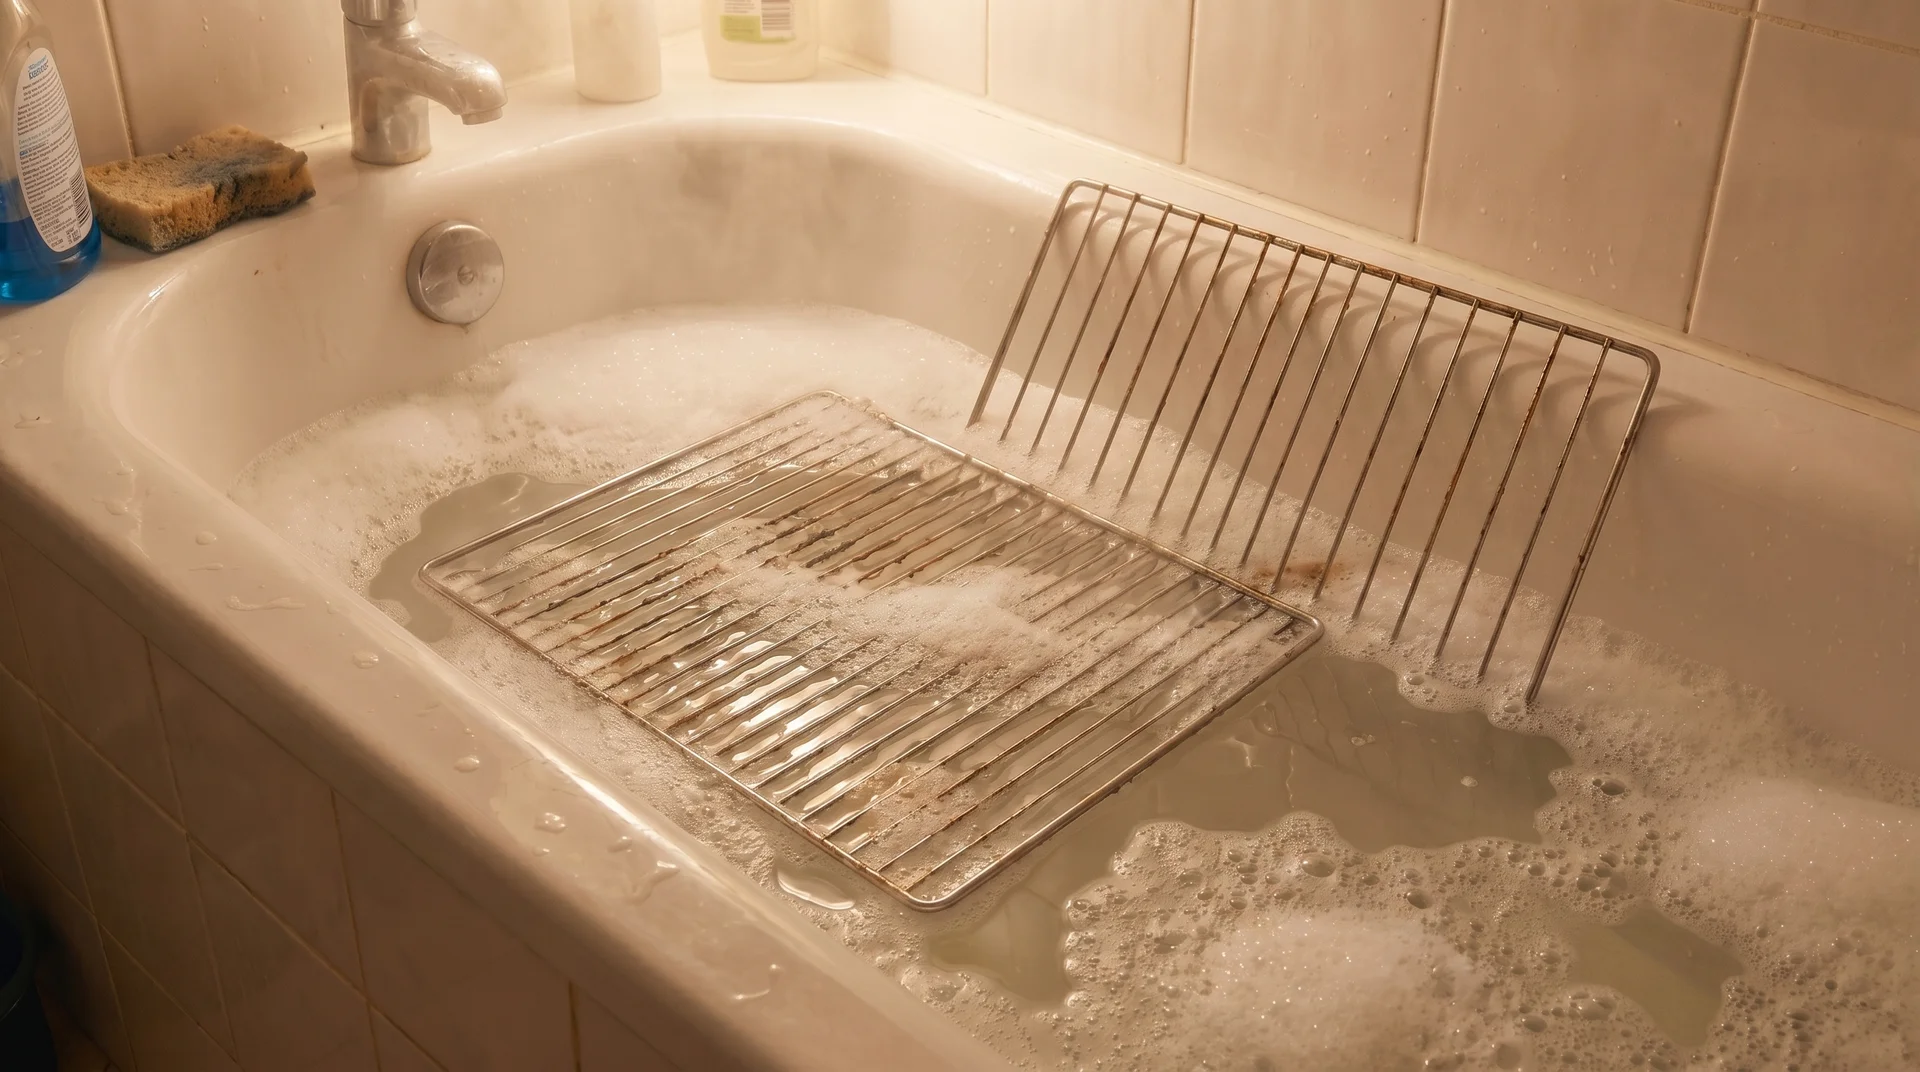
Paste does not work well on oven racks. Wire surfaces need submersion, not coating.
Place the racks in a bathtub or large utility sink. Fill with hot water and add 1/4 cup of dish soap. Soak for at least two hours.
Scrub the wire surfaces with a stiff brush after soaking. Rinse them thoroughly before putting them back. Soap residue left on the wires smokes on the next heat cycle.
Cleaning Oven Door Glass: Why This Surface Is Different
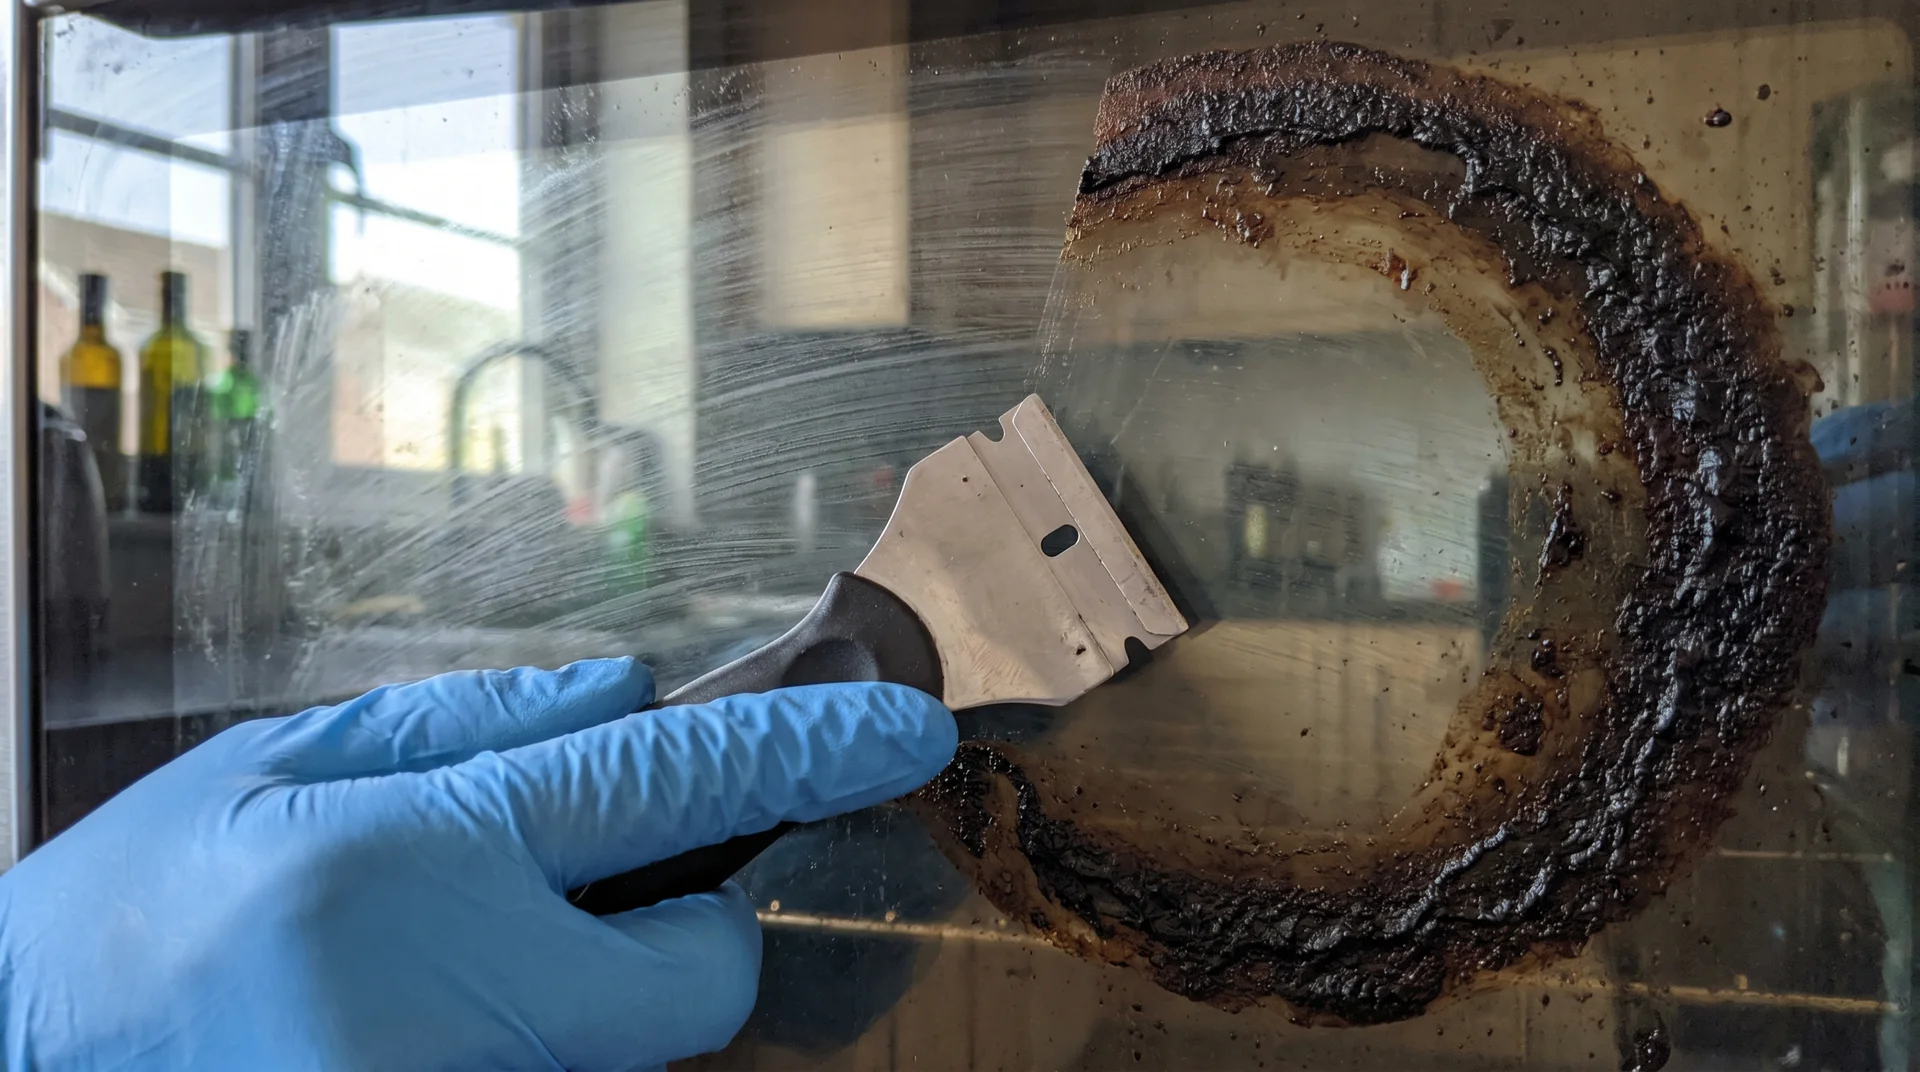
Baking soda paste cleans the oven door glass. Apply it to the inside glass surface and give it two to three hours.
Standard grime from regular cooking lifts well within that window. Carbonized black spots are a different problem, and they need a different tool.
- For carbonized black spots: Use a razor blade scraper held nearly parallel to the glass, at roughly 45 degrees. Never hold the blade perpendicular to the surface. That angle causes permanent scratches.
- What to keep away from the oven glass entirely: Abrasive scrubbing pads. They leave micro-scratches across the surface. Those scratches trap grease and make every future clean progressively harder.
The blade angle is not optional. Once the glass is scratched, no amount of cleaning reverses that.
This is also where people most often rush the dwell time. Heavy grease baked onto glass over months needs the same overnight patience as the oven floor.
When the DIY Method Isn’t Enough
The paste method has a ceiling. Carbonized residue is where most home ovens hit it.
Light grime lifts in two hours. Moderate buildup needs four to six hours, as the contact time breakdown earlier in this piece sets out. For carbonized residue, the kind that has been through many heat cycles, overnight is the floor.
If two overnight applications don’t lift a heavily carbonized surface, a commercial option is the practical next step. That does not mean reaching for sodium hydroxide, the chemical in standard lye-based conventional cleaners.
Commercial Non-Toxic Options for Oven Cleaning
Look for EPA Safer Choice certification, full ingredient disclosure, and no sodium hydroxide listed as an active ingredient.
Three products appear consistently in this space:
- Everneat (plant-based with pumice for mechanical scrubbing action on carbonized surfaces),
- Restore Naturals
- Wicked Strong (upcycled glycerin base).
Carbonized surfaces need mechanical action that paste cannot provide.
What “Fume-Free” Means, and Why Ventilation Still Matters
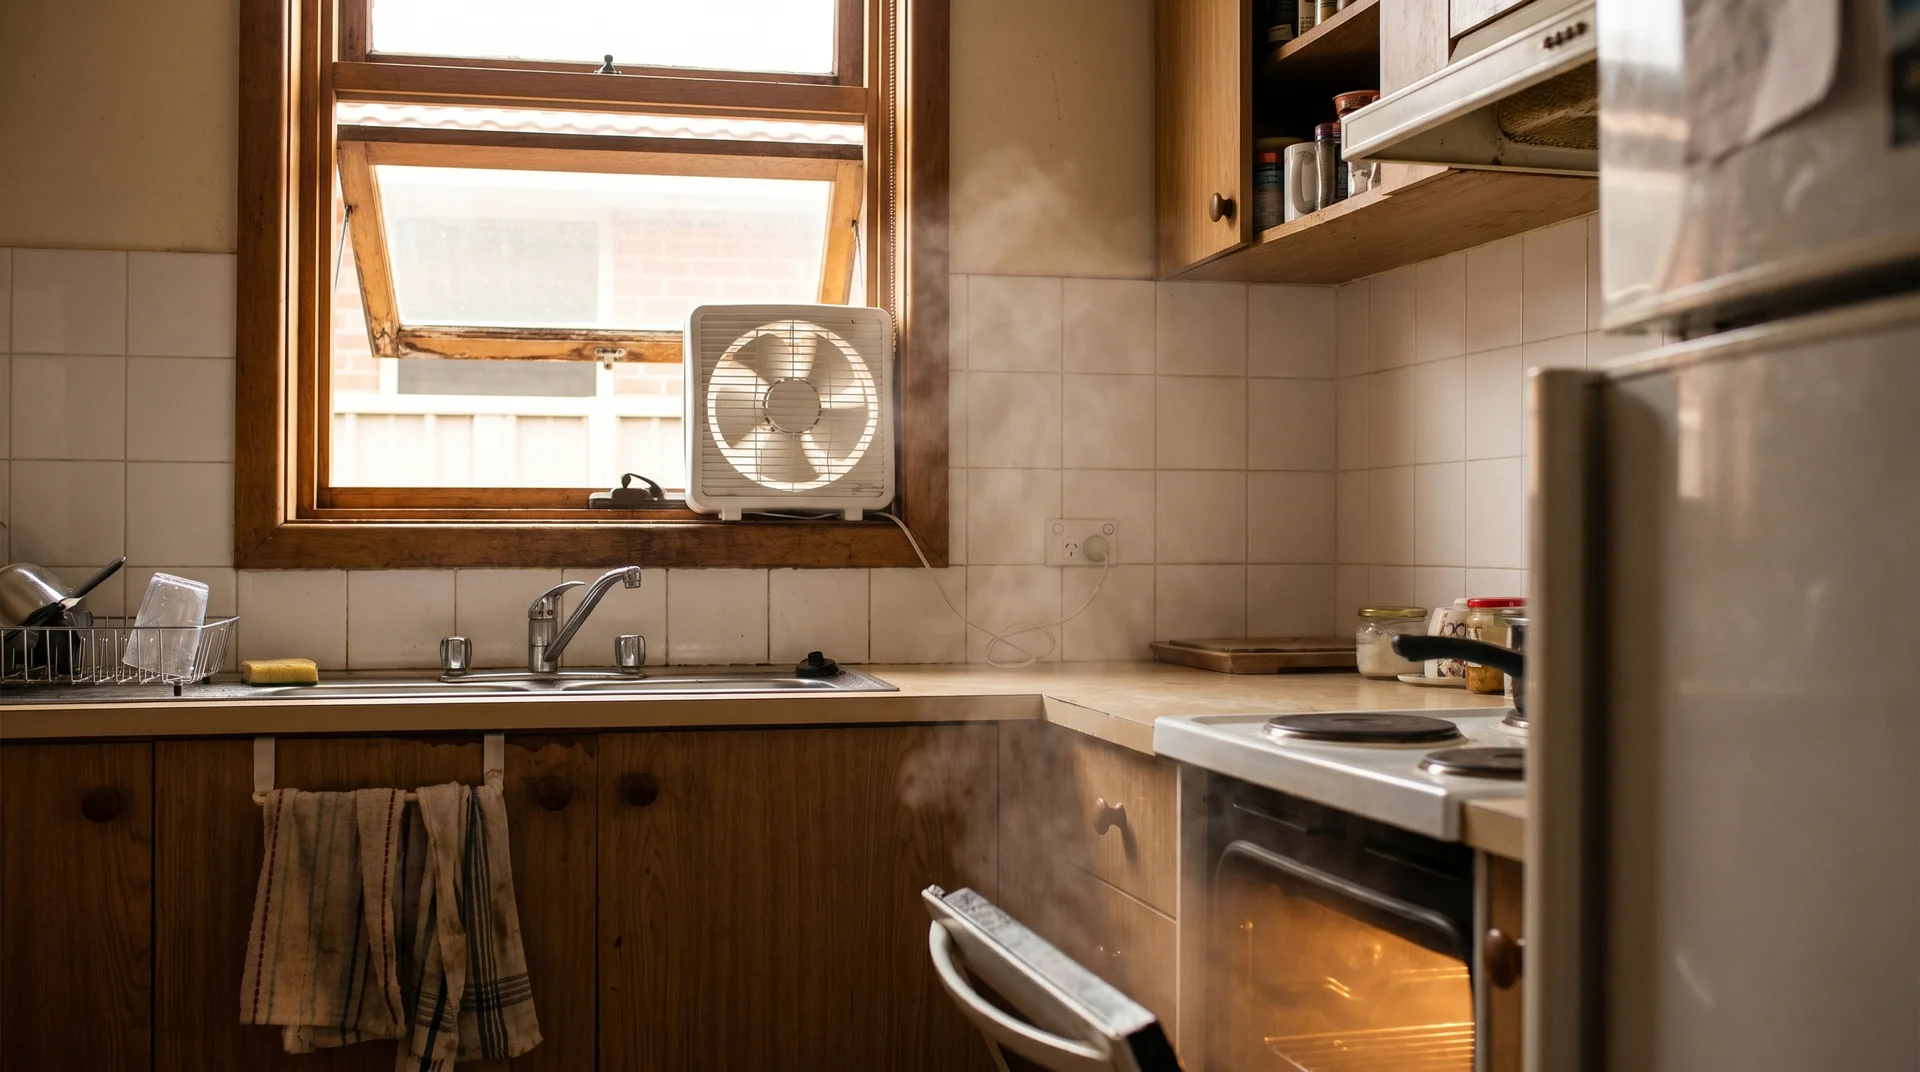
Fume-free and zero chemical exposure are not the same thing.
My father spent thirty years as a commercial kitchen inspector. His position on fume-free products is straightforward: if there are no fumes, ventilation is optional. He is not entirely wrong. He is also not entirely right, and the variable he is not accounting for is kitchen size.
Whether you are using DIY paste or a commercial fume-free product, the ventilation steps are the same:
- Open a kitchen window before you start
- Run the exhaust fan during application and for at least 15 minutes after wiping
- Leave the window open until the oven interior is fully dry
For the baking soda and dish soap paste, this is a genuinely low-volatility concern. Both ingredients have minimal vapor pressure. The risk in a well-ventilated room is low.
In a small closed kitchen, even low-volatility products add up. Ventilation takes 30 seconds to set up. Do it every time.
The product costs almost nothing. The overnight dwell is what most people don’t plan for.