The Dutch oven makes better food. That is the short answer.
The slow cooker wins in one situation: when you cannot be there during the cooking. For everything else, understanding what each tool does to your food is what makes this comparison useful.
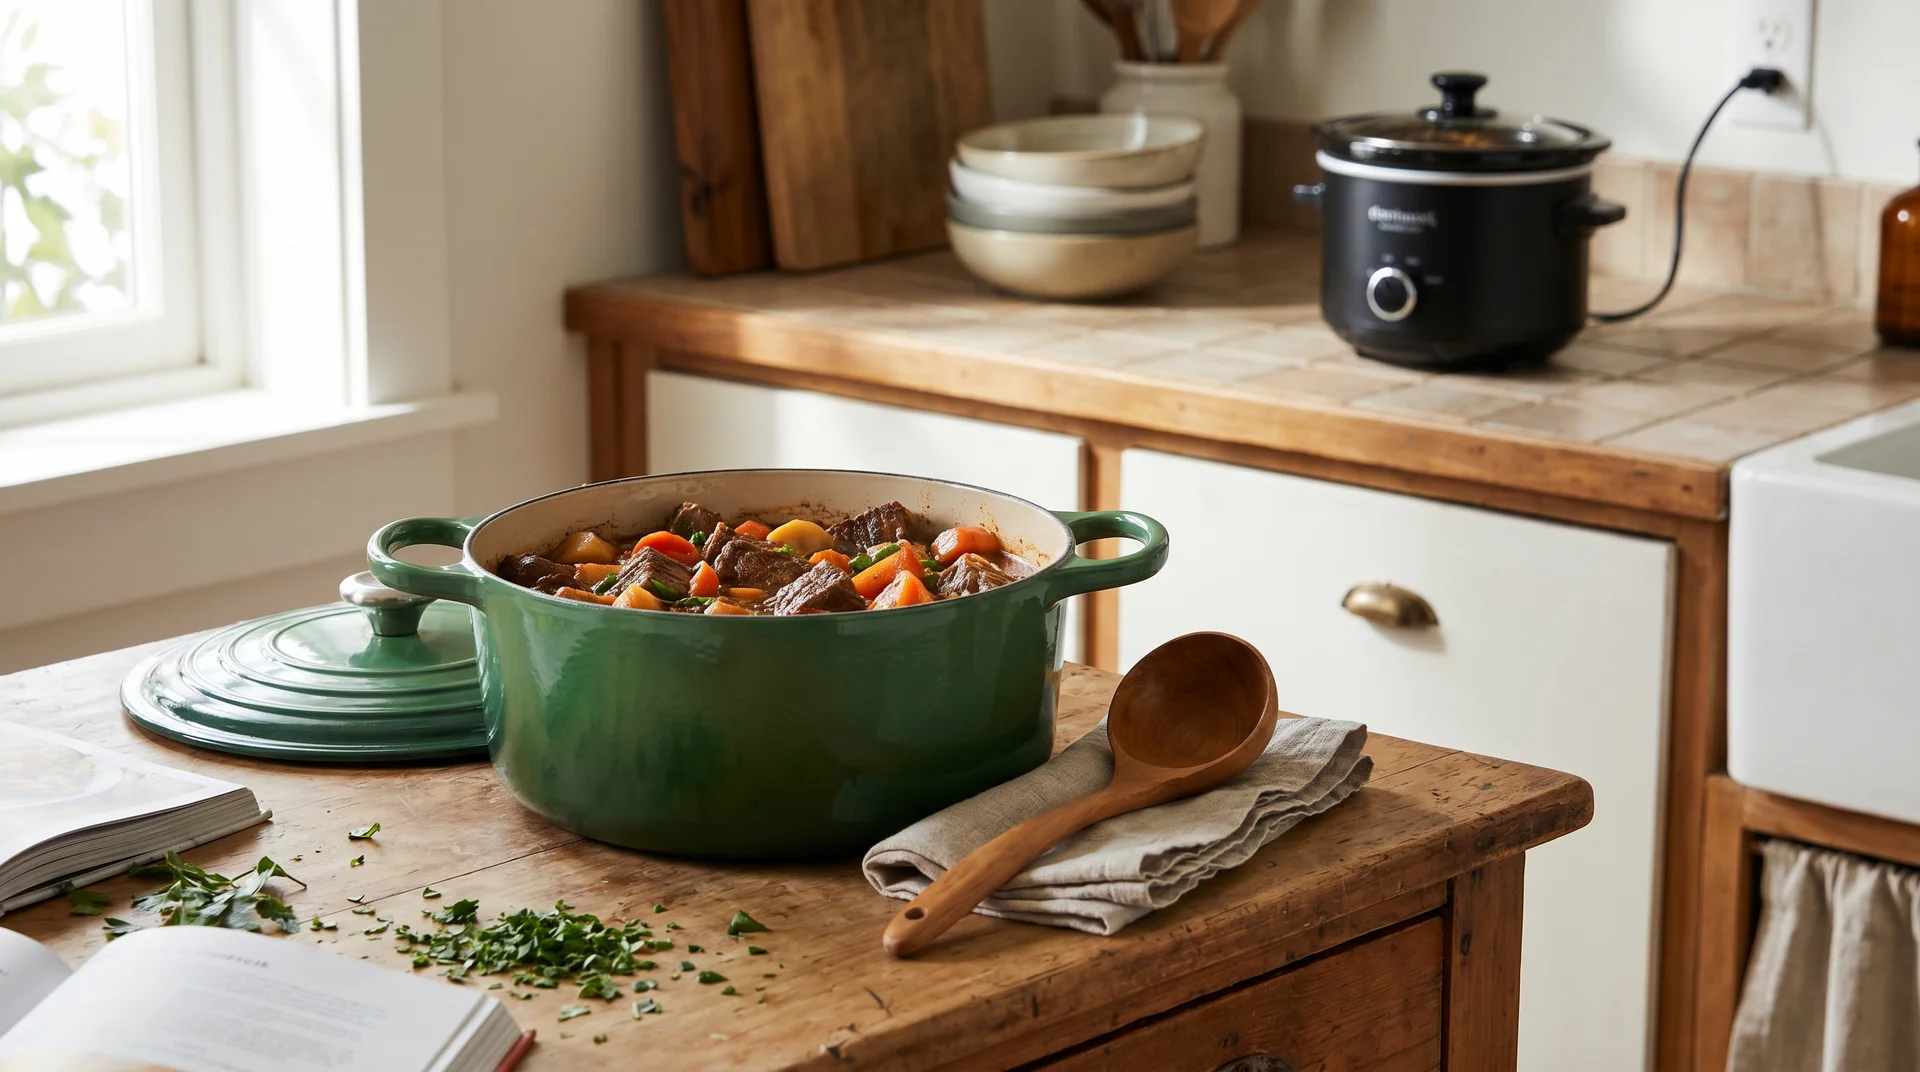
What a Slow Cooker and Dutch Oven Actually Do
These two tools handle heat and moisture in opposite ways.
That difference explains why the same braise tastes different in each pot. It also explains why swapping one for the other takes more than a timing adjustment.
What a Slow Cooker Actually Does to Your Food
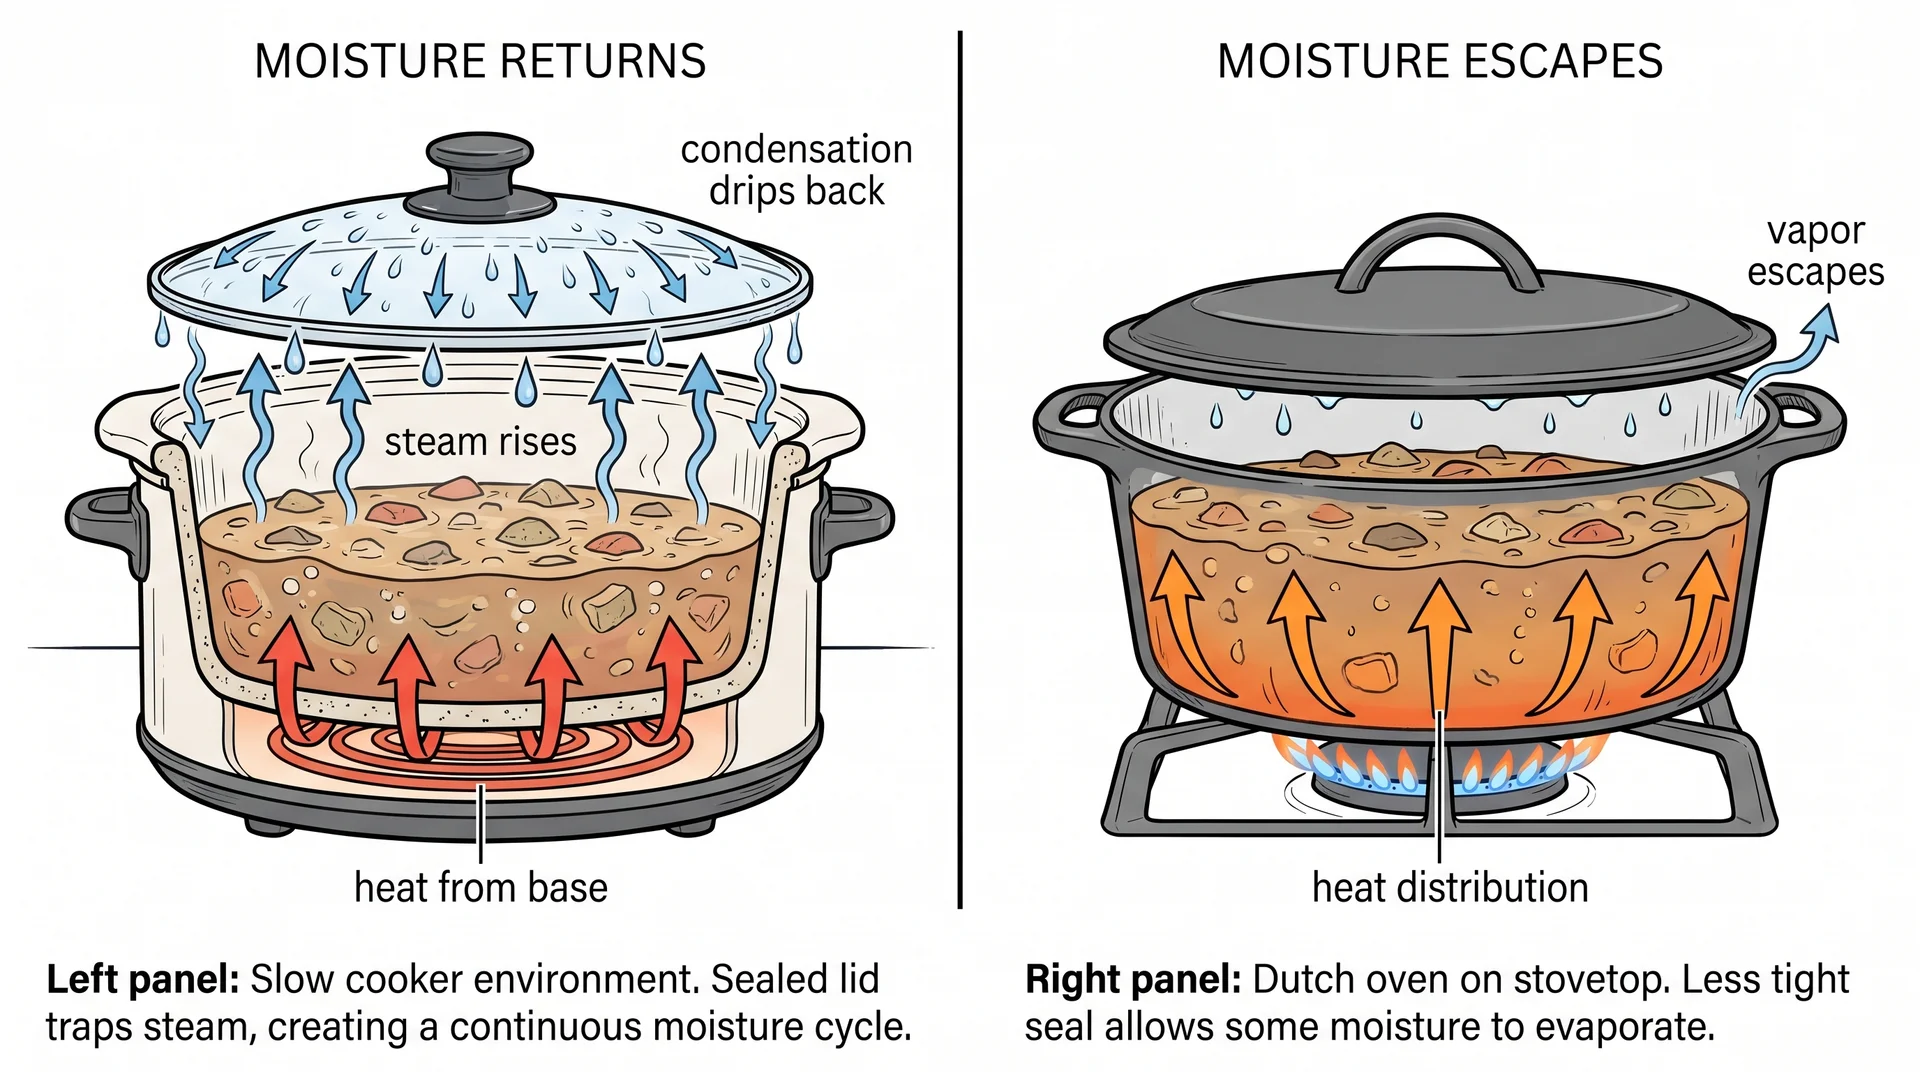
A slow cooker doesn’t reduce. It recirculates.
The heating element sits at the base of the unit. It warms the ceramic crock from below. The lid seals tightly on top.
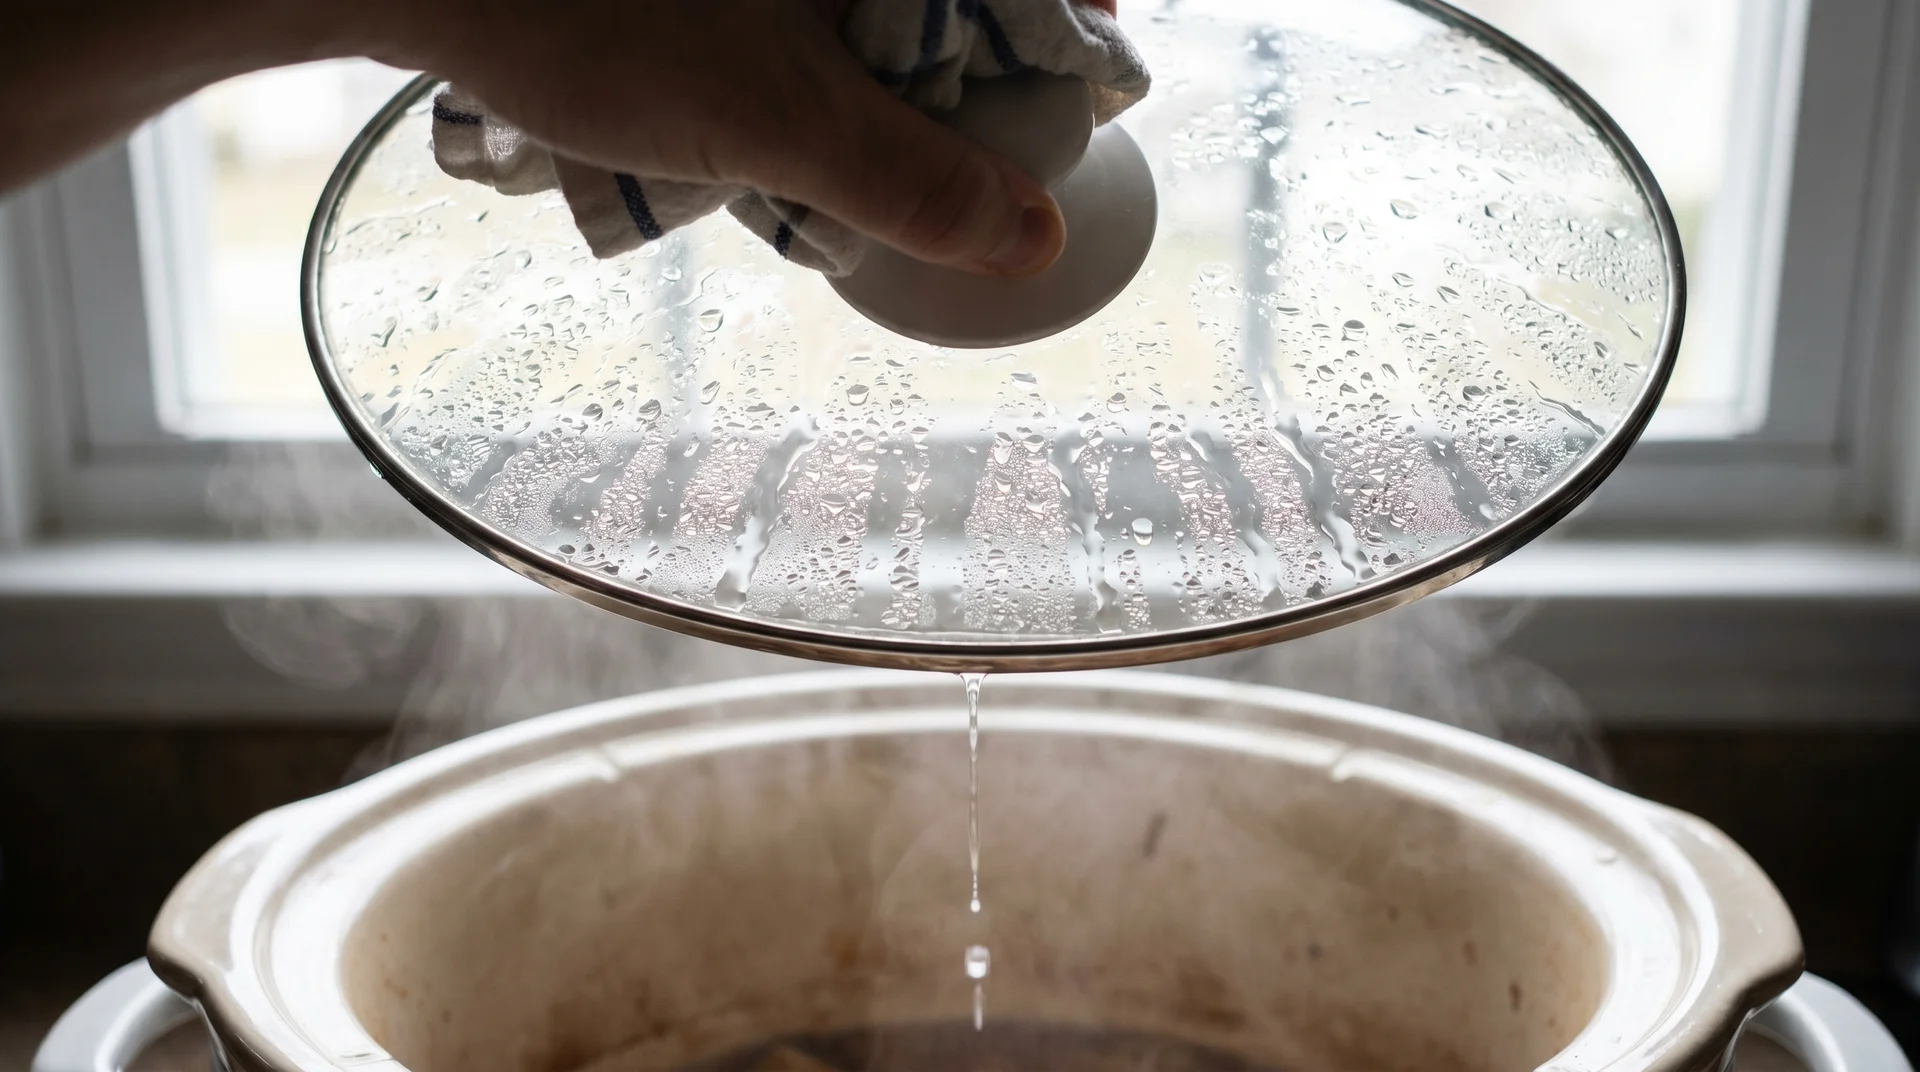
As the food heats, it releases moisture as steam. That steam rises, condenses on the lid, and drips back into the pot. The liquid volume at hour eight is nearly the same as at hour one.
Operating temperature is the slow cooker’s other hard constraint. On the low setting, it runs around 190°F. On high, it reaches about 270–300°F.
The Maillard reaction browns proteins and creates the flavor compounds that make a braise taste like a braise. It requires temperatures above roughly 280°F. A slow cooker on high barely touches that threshold.
Searing cannot happen inside a slow cooker. Flavors meld and soften over a long cook. They don’t develop through browning.
If you’ve ever had a slow cooker braise taste milder than you expected, those three facts explain why.
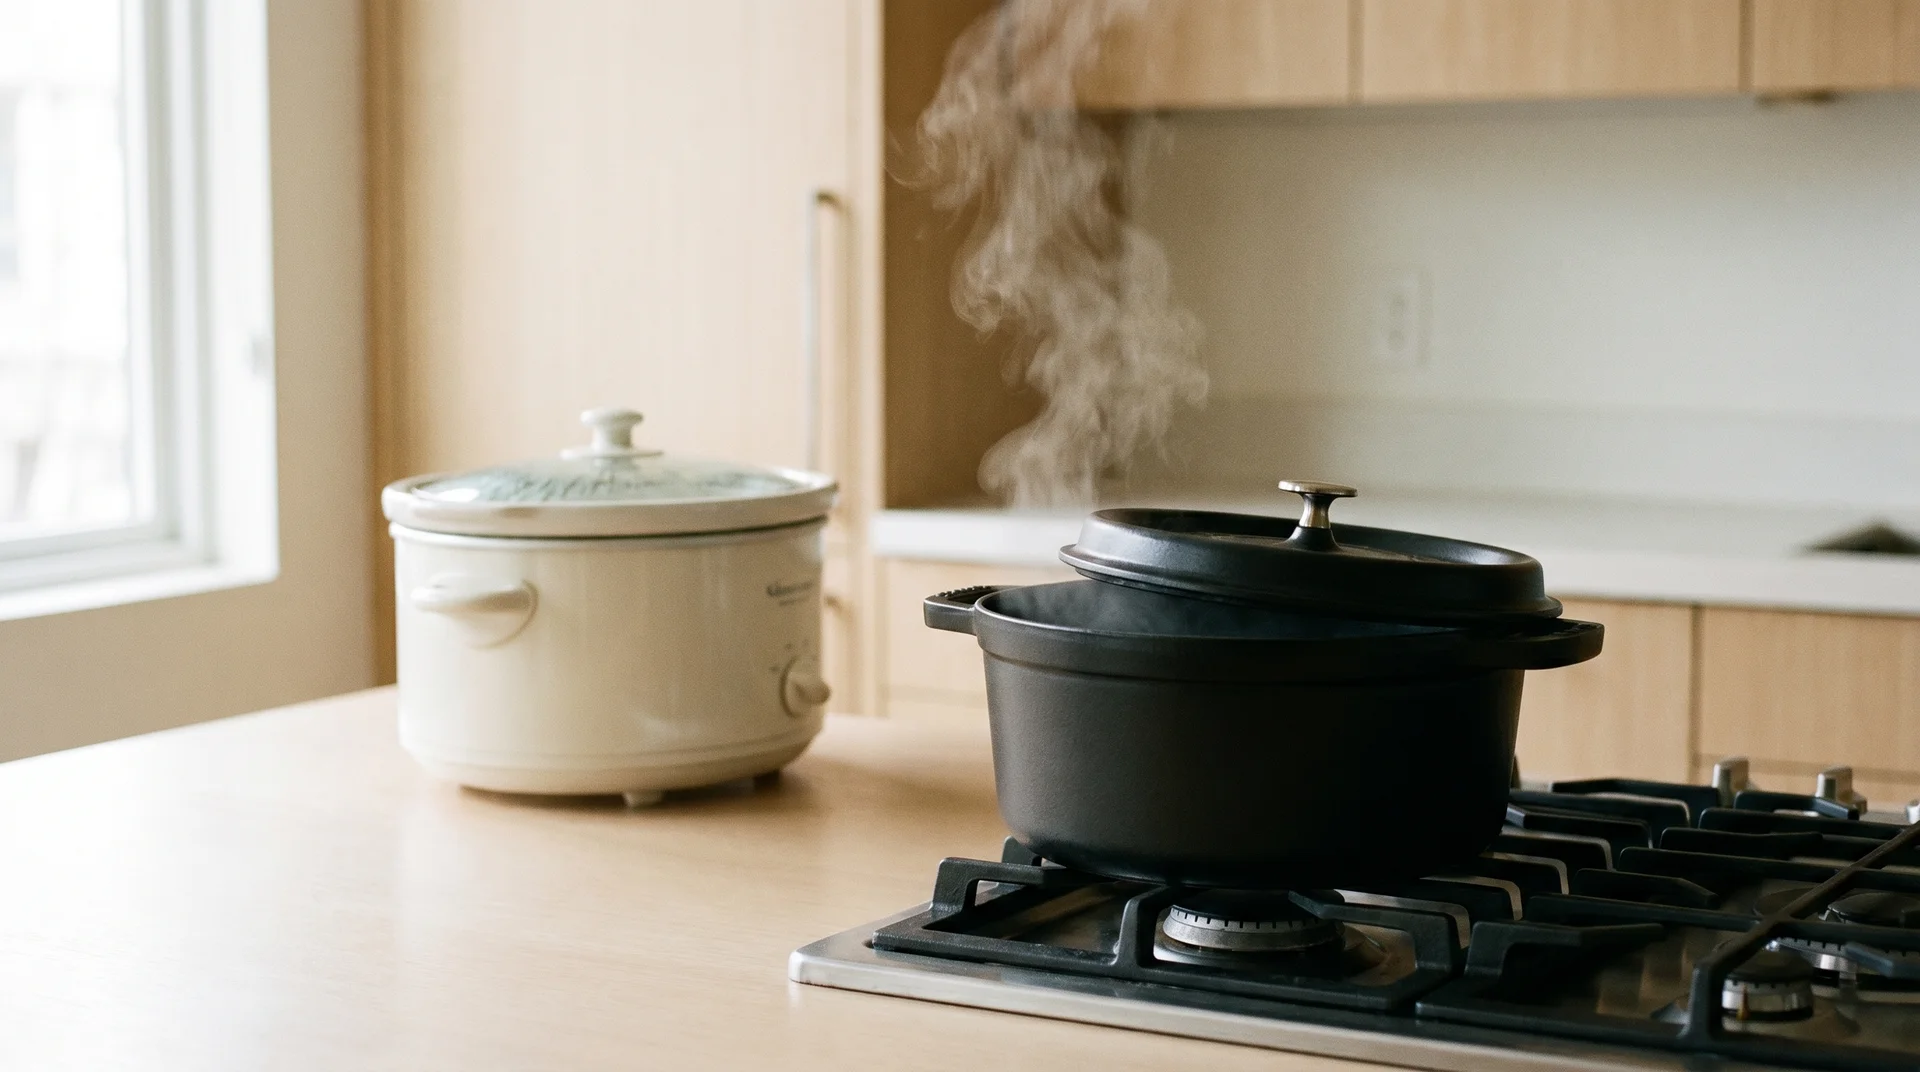
What a Dutch Oven Actually Does to Your Food
A Dutch oven is a passive vessel. It amplifies whatever heat source surrounds it.
Enameled cast iron holds and distributes heat evenly. On a stovetop, it reaches searing temperatures in minutes. In an oven at 275–325°F, it produces a steady, gentle braise.
The heavy lid traps most of the moisture. A small amount of steam escapes at the lid seal. That gradual loss concentrates the sauce as the cook progresses.
If you’ve used a Dutch oven for years and kept it to the same two or three dishes, you’re probably getting about half of what it can do.
Understanding why the slow cooker keeps falling short is the next part of the same picture.
Why Your Slow Cooker Keeps Making Watery Food
Watery slow cooker food is a physics problem.
The explanation isn’t complicated once you see it. Both of the following sections trace back to the same design feature of the appliance.
How the Condensation Loop Works
Every molecule of steam your slow cooker produces goes back into the pot.
The lid seals tightly by design. Steam rises, hits the lid, and condenses into liquid. It drips back down onto the food.
A dish starts with a set amount of stock and finishes with roughly the same amount. It also picks up whatever moisture the ingredients release during cooking. Vegetables and unseared meat add significant liquid to that total.
The result is a thin, diluted sauce. This doesn’t change, no matter how long the dish cooks.
Three Adjustments That Fix It
The watery result is fixable. Most slow cooker recipes just don’t explain the physics behind it.
All three adjustments below address different parts of the same problem: the slow cooker returns steam to the pot instead of letting it evaporate. Together, they change the result more than any single change would on its own.
- Reduce starting liquid by 25–35%. Most recipes assume open-pot evaporation, which never happens in a slow cooker.
- Sear the protein in a separate pan before adding it. Unseared meat releases more moisture during cooking and contributes no flavor base.
- Account for high-water vegetables. Zucchini, canned tomatoes, and frozen vegetables each add meaningful liquid over a long cook.
Apply all three to the next cook and compare the result to your current method. The difference is noticeable.
I tested this in my own kitchen, not under controlled conditions.
Cutting the starting liquid by 30% and searing the protein first changed what came out of the slow cooker in a way I didn’t fully predict before trying it.
What the Dutch oven does differently with those same ingredients is the reason the two pots produce such different results.
Where the Dutch Oven Wins?
Every flavor advantage the Dutch oven has traces back to one reaction.
The physics, the sauce behavior, and one low-oven technique most Dutch oven owners have never tried each deserve their own space.
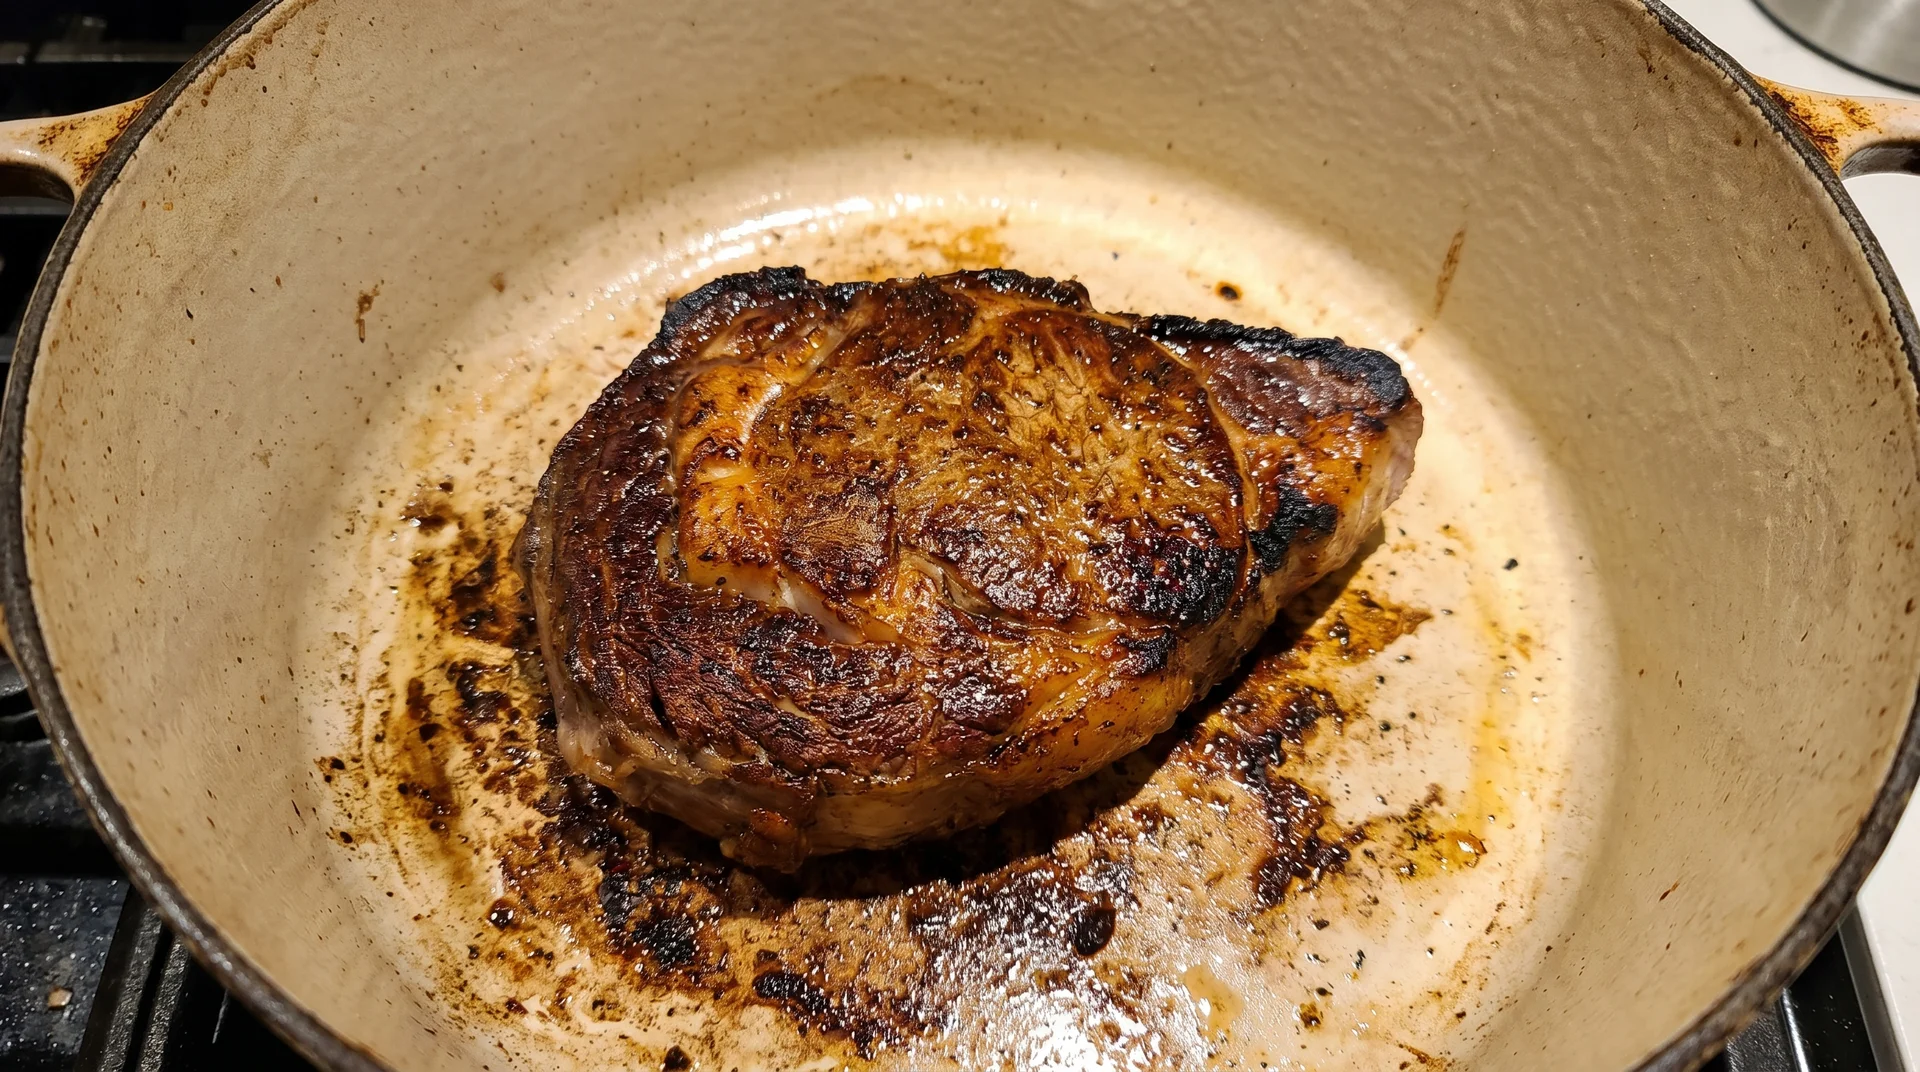
The Maillard Reaction and Why Searing Isn’t Optional
Skip the sear, and you are simmering raw meat in liquid. That is not a braise.
The Maillard reaction browns proteins and creates the flavor compounds that make a braise taste like a braise. It requires temperatures above roughly 280°F. Harold McGee documents this reaction in detail in On Food and Cooking.
A slow cooker on high barely reaches that threshold. A Dutch oven stovetop exceeds it easily. When you sear meat in a Dutch oven, the browned proteins leave a residue on the pan base. That residue is called fond.
Deglaze with wine or stock after searing. The fond dissolves into the liquid. It becomes the primary flavor base of everything that follows.
Every article on this subject calls searing a tip that “adds richness.” That framing underestimates the step. Searing builds the structural flavor base that the braising liquid draws from for the entire cook.
Fond is the flavor architecture of any braise. A slow cooker never reaches the temperature required to create it. That is the whole argument.
Sauce Reduction and Flavor Concentration
A Dutch oven sauce thickens and concentrates as the cook progresses.
As the braise runs, liquid slowly escapes through the lid seal as vapor. Volume drops. Flavor concentrates at the same rate.
By the final hour of a three-hour braise, the sauce has reduced noticeably. The result is glossy and coats the meat cleanly.
If you’ve lifted the lid near the end of a Dutch oven braise and found the sauce denser than you expected, that’s the reduction at work. A splash of stock at the halfway mark keeps the sauce where you want it.
Managing the reduction takes one midpoint check. That is the full extent of the active attention this cook requires.
The Oven Method Most Dutch Oven Owners Don’t Try
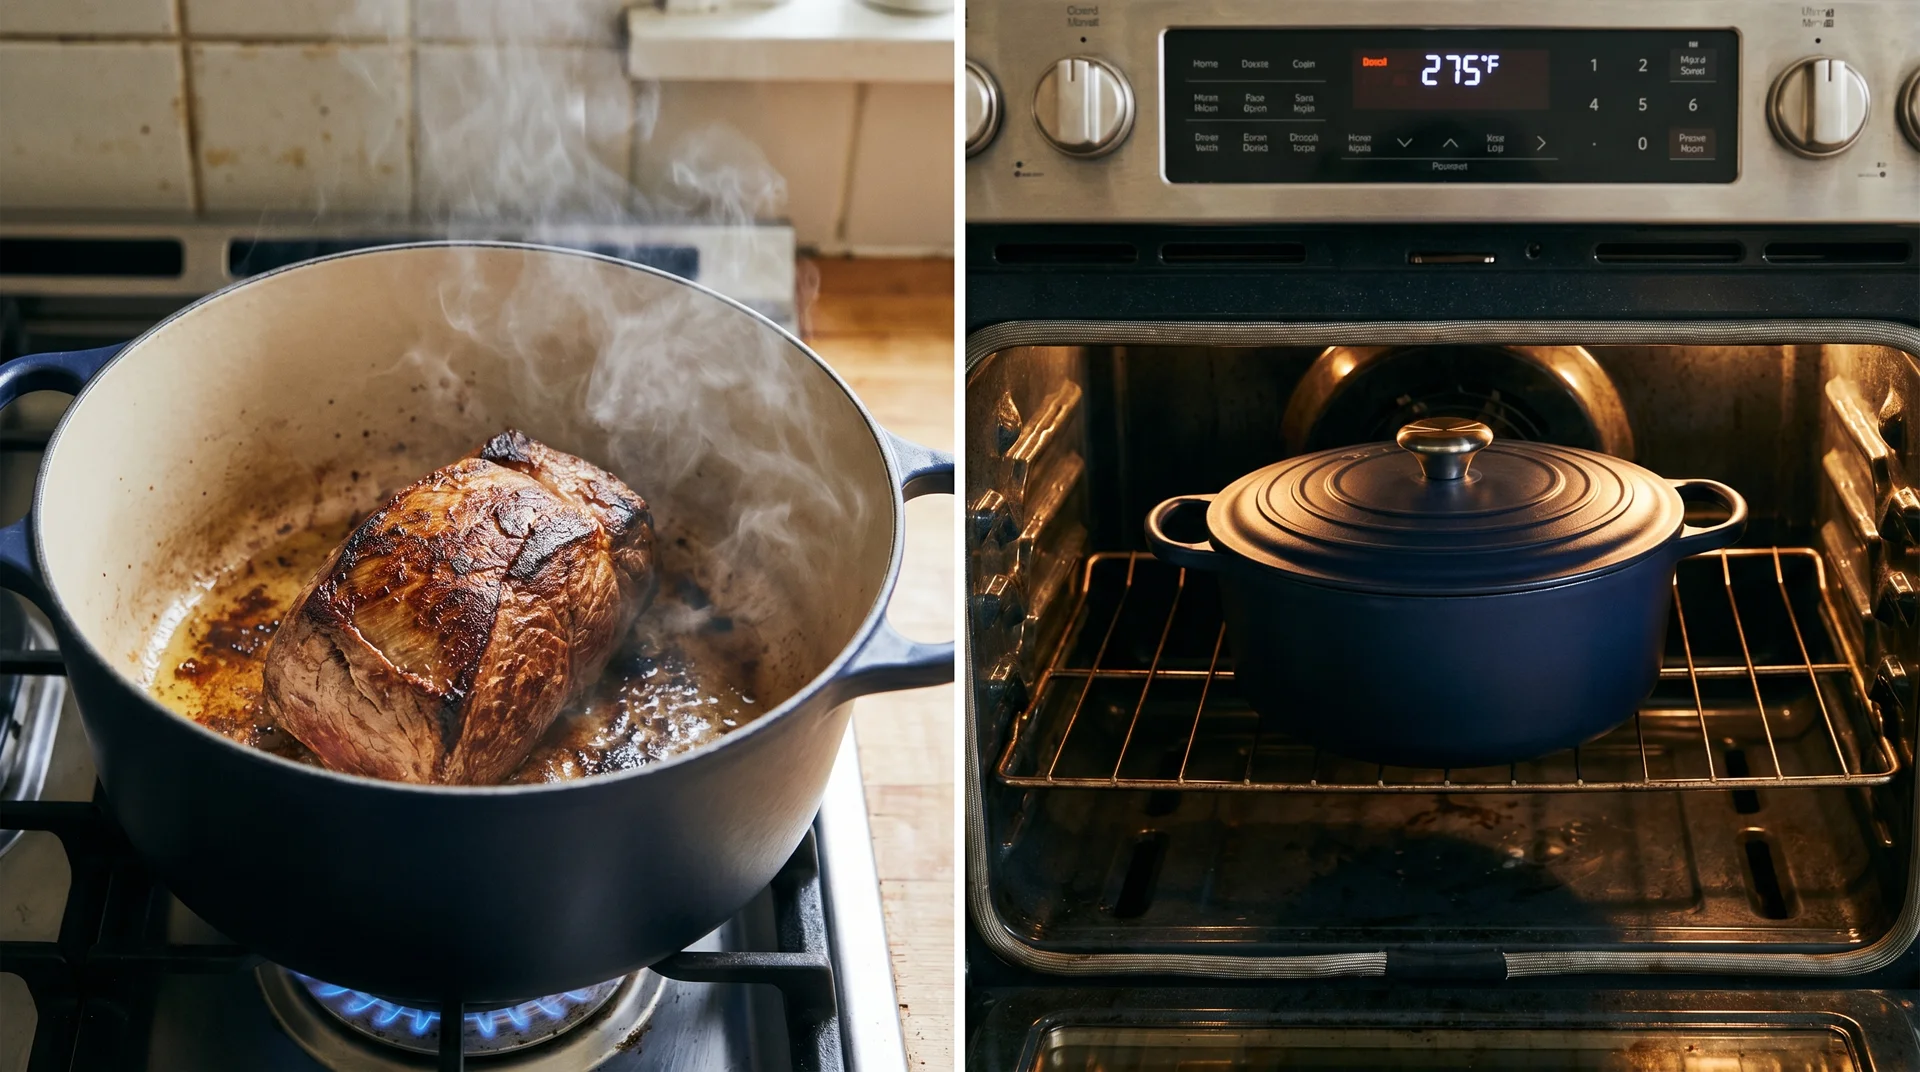
A Dutch oven at 275°F in the oven gives you hands-off cooking with real flavor behind it.
This is the technique that closes most of the convenience gap between the two tools. Sear on the stovetop first, then the oven does the rest.
Here is the method in order. Each step follows directly from the one before it, and none takes more than a few minutes of active time.
- Sear the protein in the Dutch oven on the stovetop until well browned on all sides
- Build your aromatics in the same pot and deglaze with wine or stock
- Add the remaining braising liquid and seat the lid firmly
- Set the oven to 275°F and slide the Dutch oven inside
- Check the liquid level once at the halfway point and add stock if needed
The low oven temperature sustains the same gentle heat as a slow cooker. The cook loses moisture gradually rather than returning all of it to the pot.
Use heavy oven mitts when removing the Dutch oven from the oven. Cast iron handles retain heat long after the pot comes out.
I’ve used this method on weeknight cooks for over two years. The midpoint check takes under a minute.
An eight-hour unattended cook is not what this method is for. Two to four hours with one midpoint check is the practical range.
There are situations the Dutch oven doesn’t cover. Those are where the slow cooker earns its place.
Where the Slow Cooker Genuinely Wins
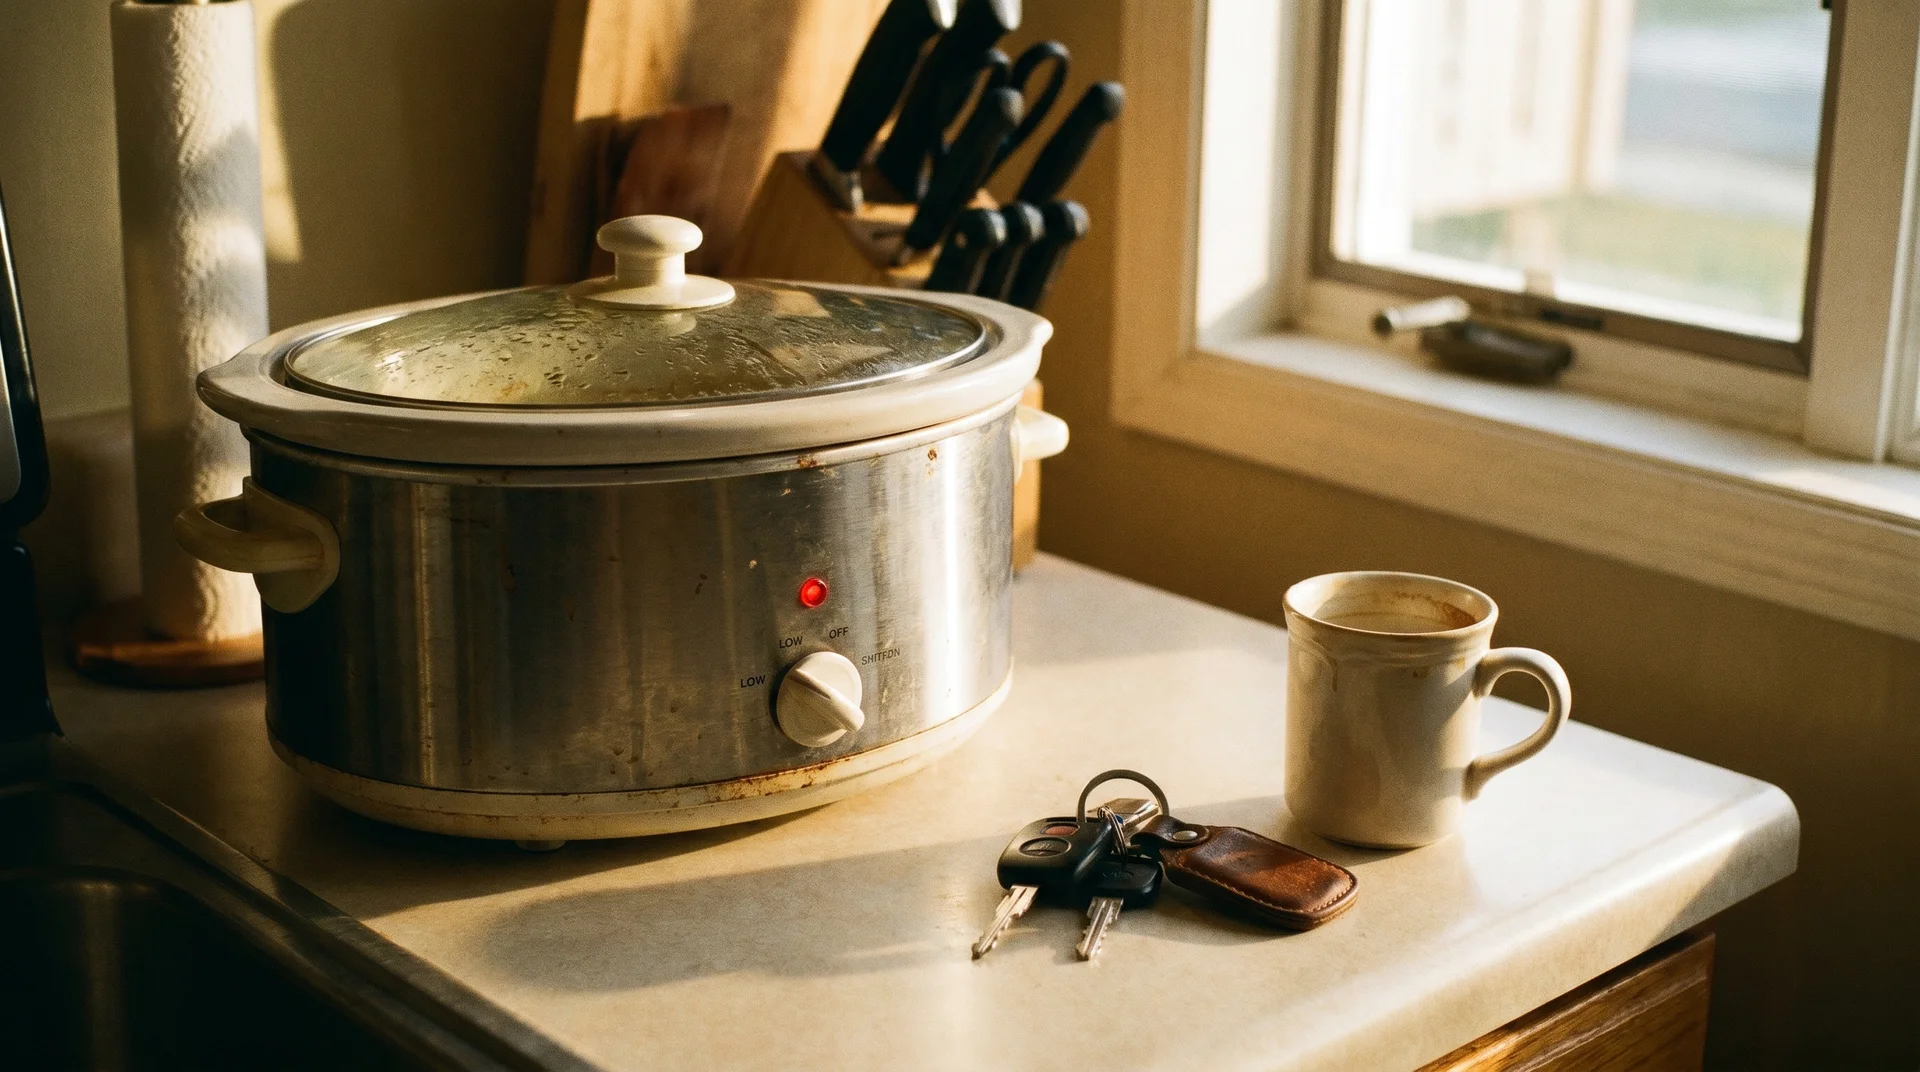
The slow cooker has one unbeatable advantage: it can run for ten hours while you’re somewhere else.
If you’re leaving for work and need dinner ready at 6 pm, the Dutch oven in the oven is not the answer. The slow cooker is.
One practical note before leaving a slow cooker running all day: check that the unit has no damaged cord or cracked ceramic insert. A slow cooker in good repair from a reputable brand is built for this use.
Budget is the other genuine edge. A basic 6-quart slow cooker runs $30–$60. An enameled Dutch oven from a brand worth using starts at $80–$150.
For a new cook on a tight budget right now, the slow cooker is a real piece of equipment that does its job well.
A slow cooker also draws far less electricity than running a conventional oven at 275°F for the same period. For apartment kitchens or anyone watching energy costs, that difference is real.
Summer heat is the third situation. Running an oven at 275°F for three hours adds real warmth to the kitchen. In those months, I reach for the slow cooker more often than I otherwise would.
I keep one specifically for overnight dried beans: in the pot Sunday night, ready Monday morning. I’ve never found a Dutch oven method for that use I like as much.
How to Convert Slow Cooker Recipes to a Dutch Oven
Two adjustments make the conversion work.
One changes the time. The other changes the liquid. Both follow directly from what each tool does to moisture.
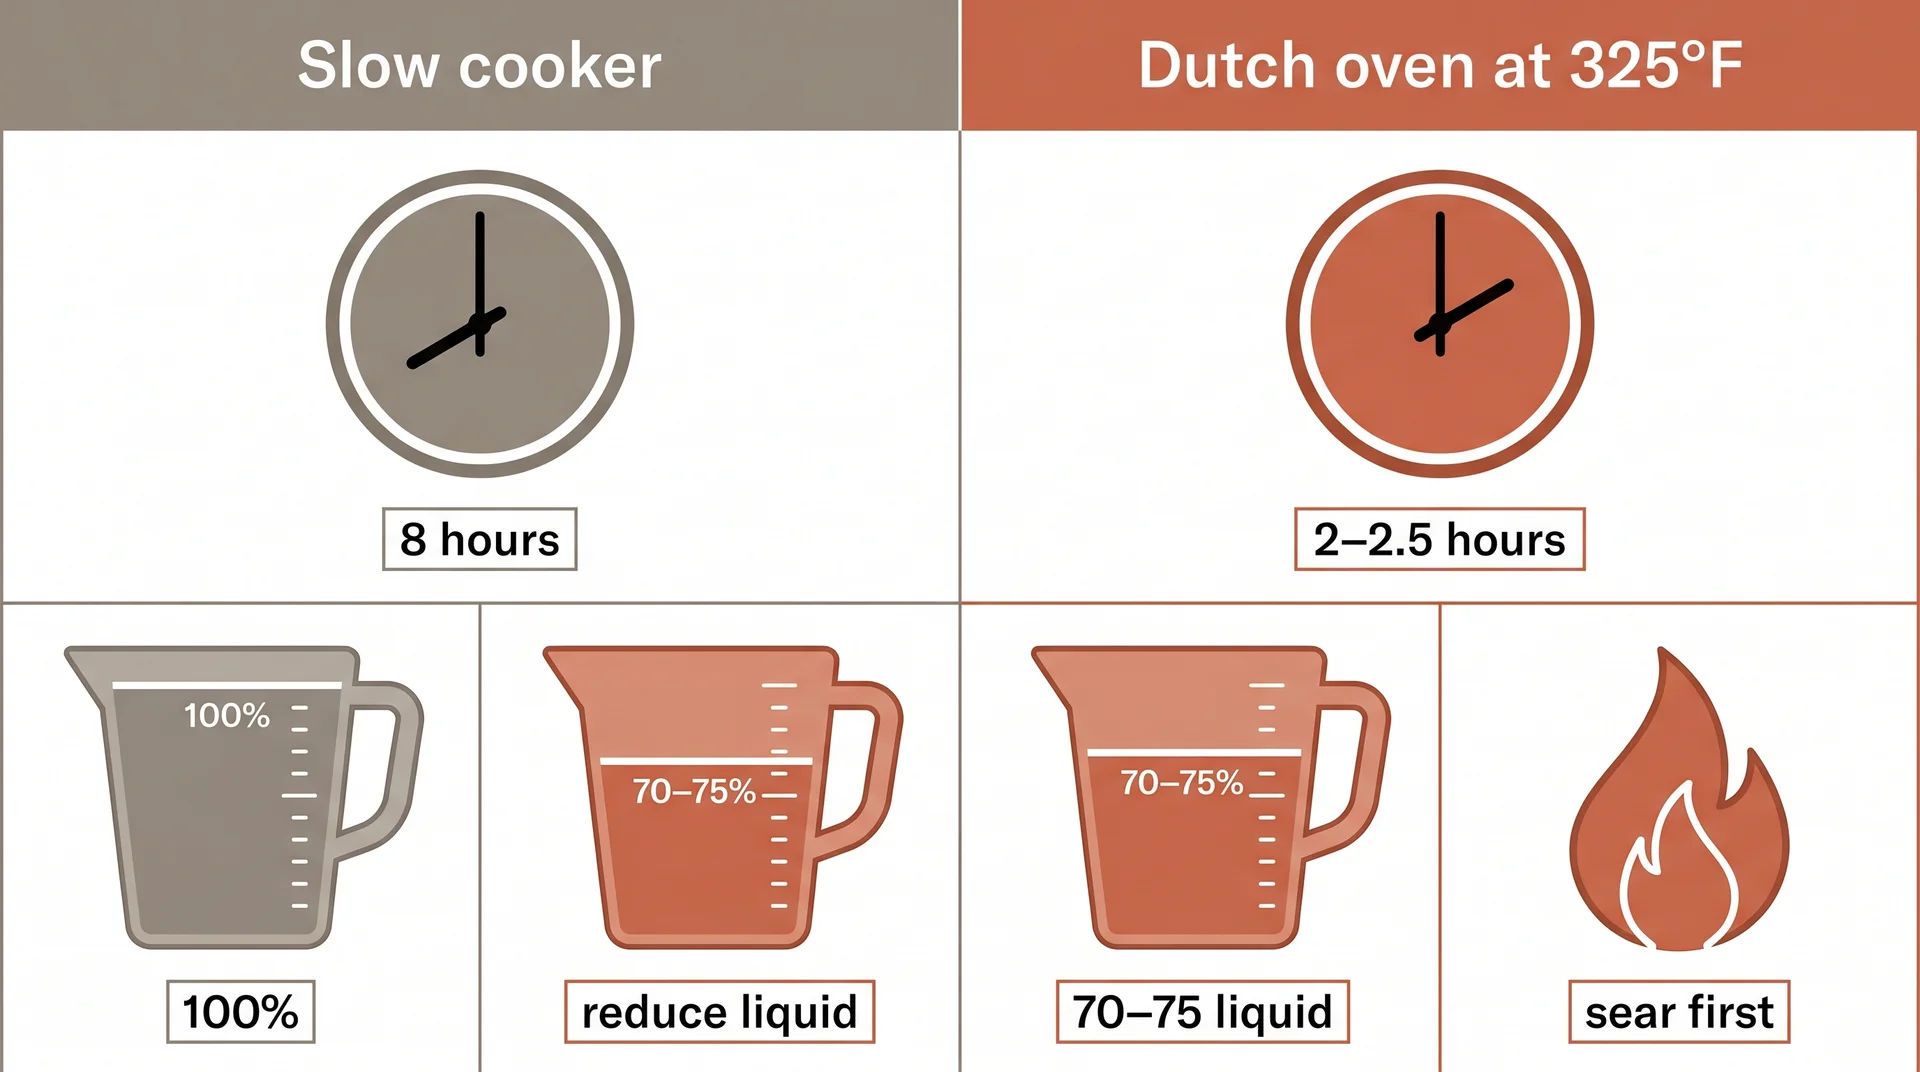
The Time Formula
A Dutch oven at 325°F takes roughly one quarter of a slow cooker’s low-setting time.
These estimates reflect the Dutch oven’s higher operating temperature and gradual evaporation. They give you a reliable starting point for the first cook.
- Slow cooker low for 8 hours → Dutch oven at 325°F for 2 to 2.5 hours
- Slow cooker low for 6 hours → Dutch oven at 325°F for 1.5 to 2 hours
- Slow cooker high for 4–5 hours → Dutch oven at 325°F for 1 to 1.5 hours
- Using the 275°F oven method: add 30–45 minutes to any of the above
Check the dish 20–30 minutes before the estimated endpoint on any first conversion. Each subsequent cook needs less guesswork.
I tested these times across several recipes in my own kitchen, not under controlled conditions. Results vary, and the first cook is where you calibrate.
Dutch ovens also vary between brands. A Lodge cast-iron Dutch oven runs hotter than a Le Creuset of the same size. The difference comes from wall thickness and how tightly the lid seats. A Staub behaves differently still.
Know this before you blame the formula when a first conversion runs long or short.
The Liquid Adjustment
Reduce the liquid from any slow cooker recipe by 25–30% when moving to a Dutch oven.
A slow cooker returns all the steam to the pot. A Dutch oven loses some through the lid seal. Start with less liquid when using a Dutch oven.
Check the liquid level at the halfway mark. Add a splash of stock if the sauce has reduced faster than expected.
One change matters more than the liquid ratio. If the original recipe skips the sear, add one. Brown the protein well in the Dutch oven before adding anything else.
That single step changes the flavor of the finished dish more than any other modification to the recipe.
Should You Buy Both, or Just One?
If you have to choose one right now, choose the Dutch oven.
“It depends on your lifestyle” is a way to avoid answering the question. The Dutch oven produces better food in most cooking situations. A slow cooker can’t replicate the flavor-building steps a Dutch oven uses.
A Dutch oven covers most of the slow cooker’s core function through the oven method. The versatility runs in one direction.
The decision comes down to how you actually cook. This table reflects real-world situations, not ideal ones.
| Your cooking situation | The better tool |
|---|---|
| Cooking weekends when you’re home | Dutch oven |
| Food needs to be ready after 8+ hours unattended | Slow cooker |
| Budget under $60 | Basic slow cooker |
| Budget $80–$150, want one workhorse pot | Enameled Dutch oven |
| Own a slow cooker, want better results | Add a Dutch oven. Keep the slow cooker. |
| Limited counter space, no outlet near the stove | Dutch oven |
| Hot summer kitchen, want to keep the oven off | Slow cooker |
Owning both doesn’t make one redundant. They solve different problems at different times.
I keep a slow cooker for overnight beans. I’ve never found a Dutch oven substitute I like as much for that use.
One thing this article doesn’t cover: how these two compare against a pressure cooker or Instant Pot. That is a different article, and it needs different criteria.
Start with the 275°F oven method if you already own a Dutch oven and want to see what it can actually do. Sear first, set the oven to 275°F, and check once at the halfway mark.
One cook with this method tends to make the rest of this comparison academic.