Most people assume a clicking igniter means something broke. It usually hasn’t.
The stove is almost always clicking because it’s wet, dirty, or has a part that went back on wrong. What changed in the last 24 hours is almost always where the answer is.
Can You Still Use the Stove While It’s Clicking?
A clicking gas stove is not a gas leak. So, if the burner lights and holds a flame while the igniter keeps clicking, you can use it. Keep the session short.
After cooking, unplug the stove or switch off the circuit breaker. Troubleshoot before your next meal.
If the burner clicks but no flame appears, stop there.
Turn the knob to off immediately. Check whether you smell gas near the stove.
If you smell gas, don’t use any electrical switches or devices in the room. Follow these steps in order:
- Find the supply valve on the gas line behind or beneath the stove. The supply valve is the shutoff that controls gas flow to the appliance. When it’s open, the handle runs parallel to the pipe. Turn it perpendicular to close it.
- Open a window and leave the room.
- Call your gas provider from outside the home.
The clicking isn’t the danger. Unlit gas is. If the stove smells fine and the burner lights normally, address the clicking before your next session.
Start Here: What Was Happening Right Before the Clicking Started?
Before you clean anything or call anyone, think backward 24 hours.
What triggered the clicking almost always tells you which of three different problems you’re dealing with. The fixes are completely different from each other.
Starting with the wrong one wastes time. It can also make the actual problem harder to find. Start with what triggered it.
After a Boil-Over or Spill
Moisture is blocking a clean electrical connection between the igniter and the burner head.
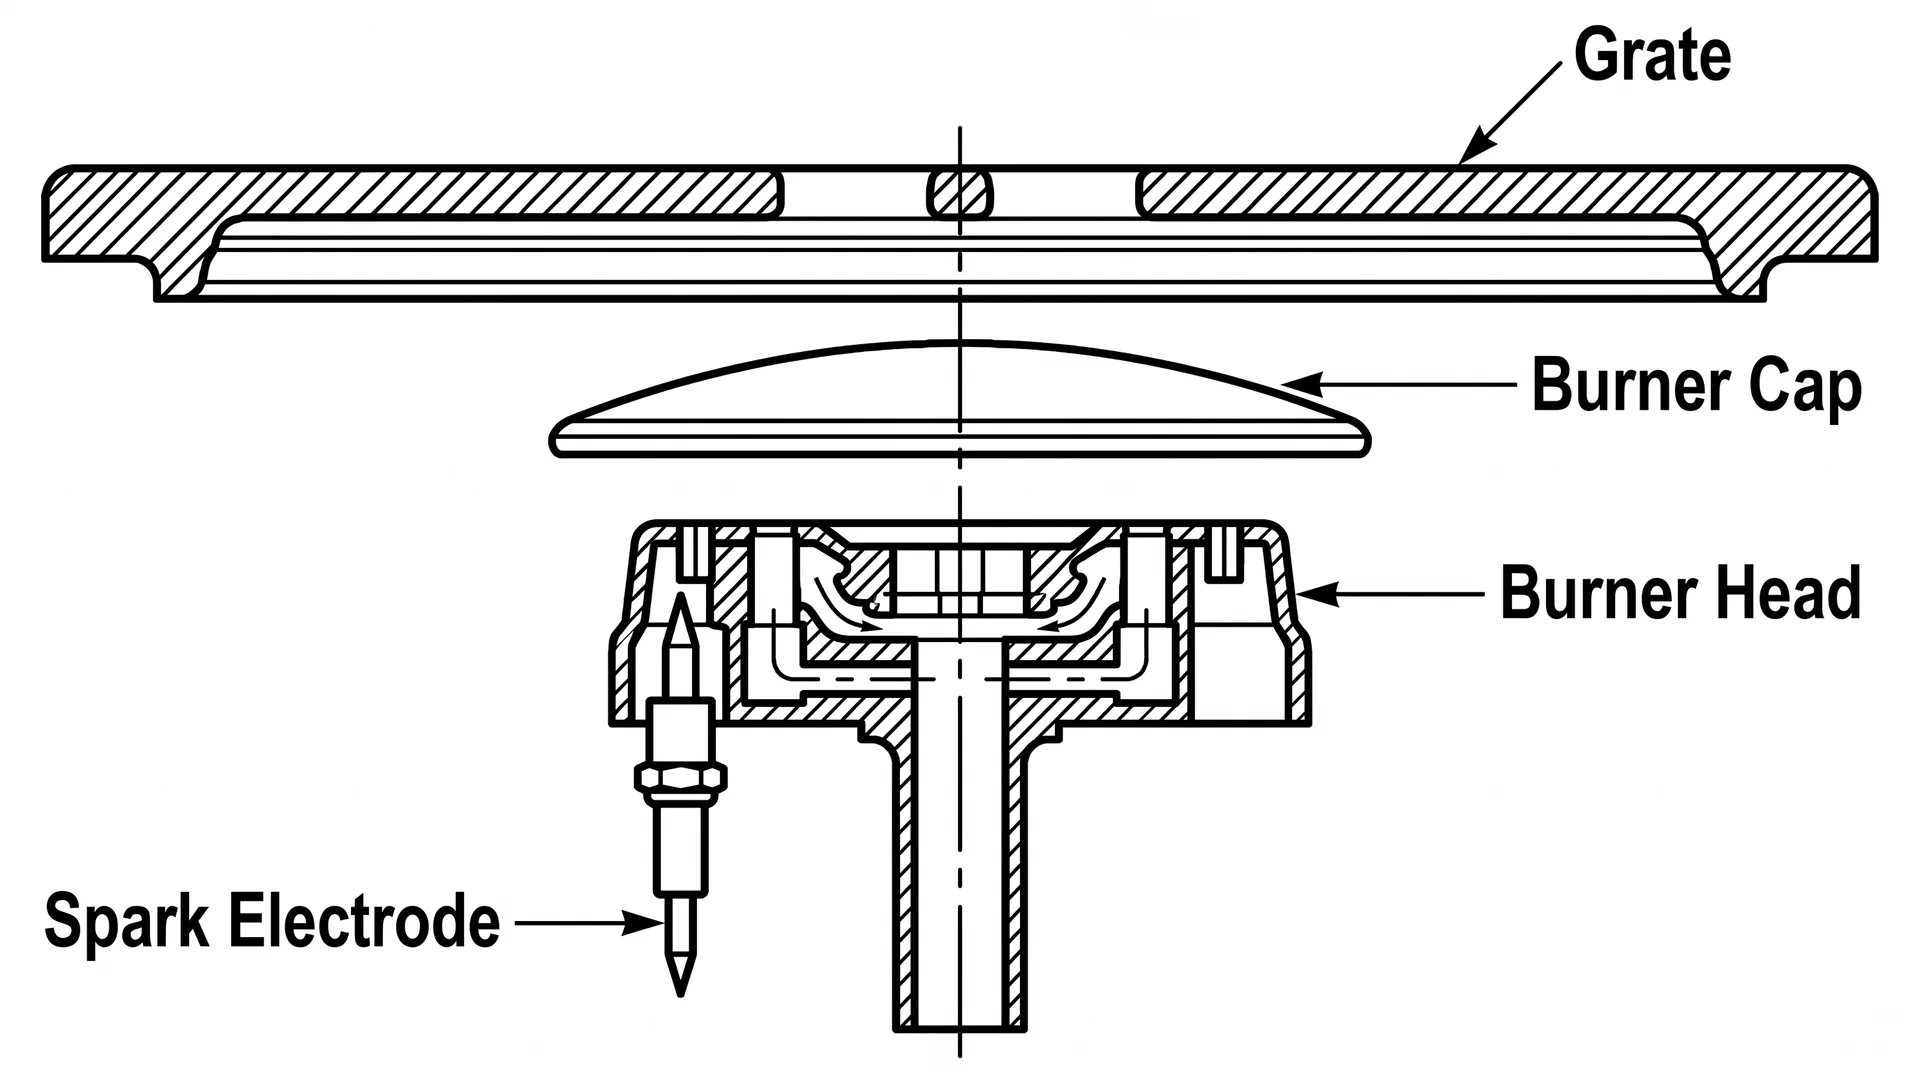
When a pot boils over, liquid travels under the burner cap and reaches the spark electrode. The spark electrode is the small white ceramic tip beside the burner head. It generates the spark that lights the gas.
Moisture on the ceramic disrupts the electrical path between the tip and the burner head. The igniter keeps firing because the ignition system hasn’t detected a successful flame. It’ll keep trying until either the gas ignites or the moisture clears.
The stove isn’t broken. It’s wet.
Most of the time, this resolves with drying and nothing else. But “a few hours” isn’t specific enough to be useful. The right drying time depends on where the moisture went.
After Cleaning the Stovetop
Spray cleaner reached the igniter switch behind the burner knob, not just the igniter tip on the burner surface.
The igniter switch is the electrical component on the valve stem behind each burner knob. When it closes, it tells the spark module to fire the igniter for that burner. The spark module is the central control board for the whole ignition system.
Spray cleaners applied to the cooktop surface run under the knobs. They reach the switch body, which sits inside the stove.
The surface dries within an hour. The switch body may still hold moisture 24 hours later.
People replug the stove after two hours, and the clicking resumes. They assume something broke. Usually, it hasn’t finished drying.
It Started on Its Own, with No Spill and No Recent Cleaning
A misaligned burner cap is the most likely cause when nothing has happened recently.
The burner cap is the flat disc that sits on top of the burner head. It distributes gas into an even ring of flame. A cap even slightly off-center can press against the igniter ceramic and trigger repeated sparking.
No moisture or debris needed. A bad cap position is enough.
Before anything else, lift the cap and reseat it centered and flat. Test the burner. It costs nothing and resolves the problem more often than people expect.
If the cap looks correctly seated and nothing has happened recently, you’re likely looking at a failing igniter switch or spark module. A stuck igniter switch keeps one burner clicking without stopping, even with the knob fully off.
A failing spark module makes all burners click at the same time when no knob is in use. Both require a technician.
One Burner Clicking or All of Them? That Answer Changes Everything.
This is the fastest diagnostic shortcut in the process.
With all knobs fully off, observe which burners are still clicking. The pattern tells you whether you’re dealing with a surface problem or an electrical one.
In a service kitchen, this is the first thing you check. It takes five seconds and narrows the problem significantly.
| What you’re seeing | Most likely cause | First step |
|---|---|---|
| All burners are clicking after a spill or cleaning session | Surface moisture on multiple igniters | Full cooktop drying, 24 to 48 hours if the spray cleaner went near the knobs |
| All burners are clicking with no recent spill or cleaning | Failing spark module | Try the reset step below before calling a technician |
| One burner clicking, others silent | Misaligned burner cap, port debris, or a faulty igniter switch for that burner | Reseat the burner cap first, then clean, then evaluate the switch |
When you turn any burner knob to the start position, all igniters fire at the same time. That’s standard, not a fault. GE Appliances’ official support documentation confirms this behavior across their gas ranges.
All four clicking when you turn one knob is normal. All four clicking when no knob is in use is not.
Oven igniters are a different article, and they need different criteria. The oven uses a glow-bar igniter inside the oven cavity. This type heats up and glows orange to light the gas rather than sparking. It fails differently, and misdiagnosing it leads to replacing the wrong part.
Step-by-Step Guide to Fix the Stove Igniter Clicking
Work through these steps in sequence.
Each step rules out a cause before you move to the next. Skipping ahead means cleaning a component that isn’t the problem. It also means possibly missing the one that is.
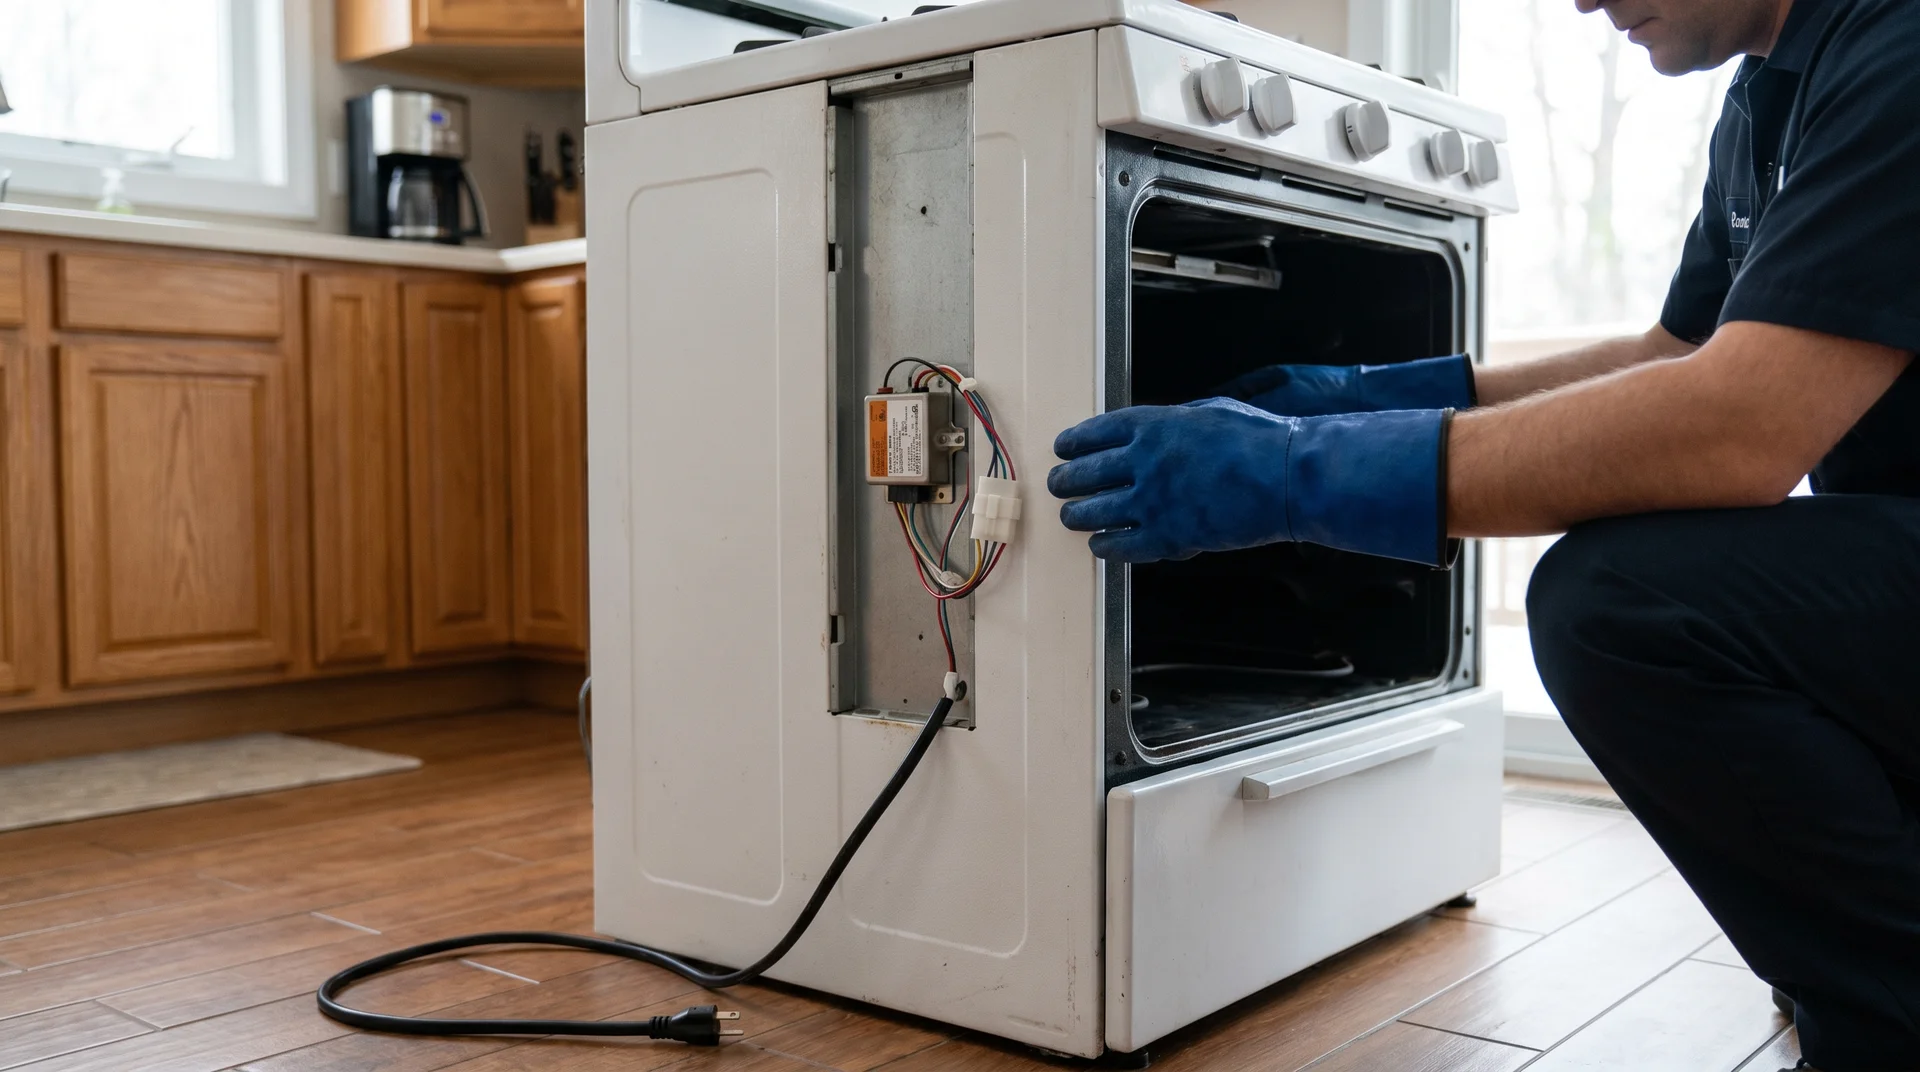
Step 1: Unplug the Stove Before Touching Anything
The igniter system carries voltage when the stove is plugged in, regardless of knob position.
Unplug it from the wall or switch off the circuit breaker before removing any burner components.
A stove that’s clicking is actively sparking. Don’t work around a live igniter.
Step 2: Reseat the Burner Cap
The burner cap is the most frequently overlooked cause of this problem.
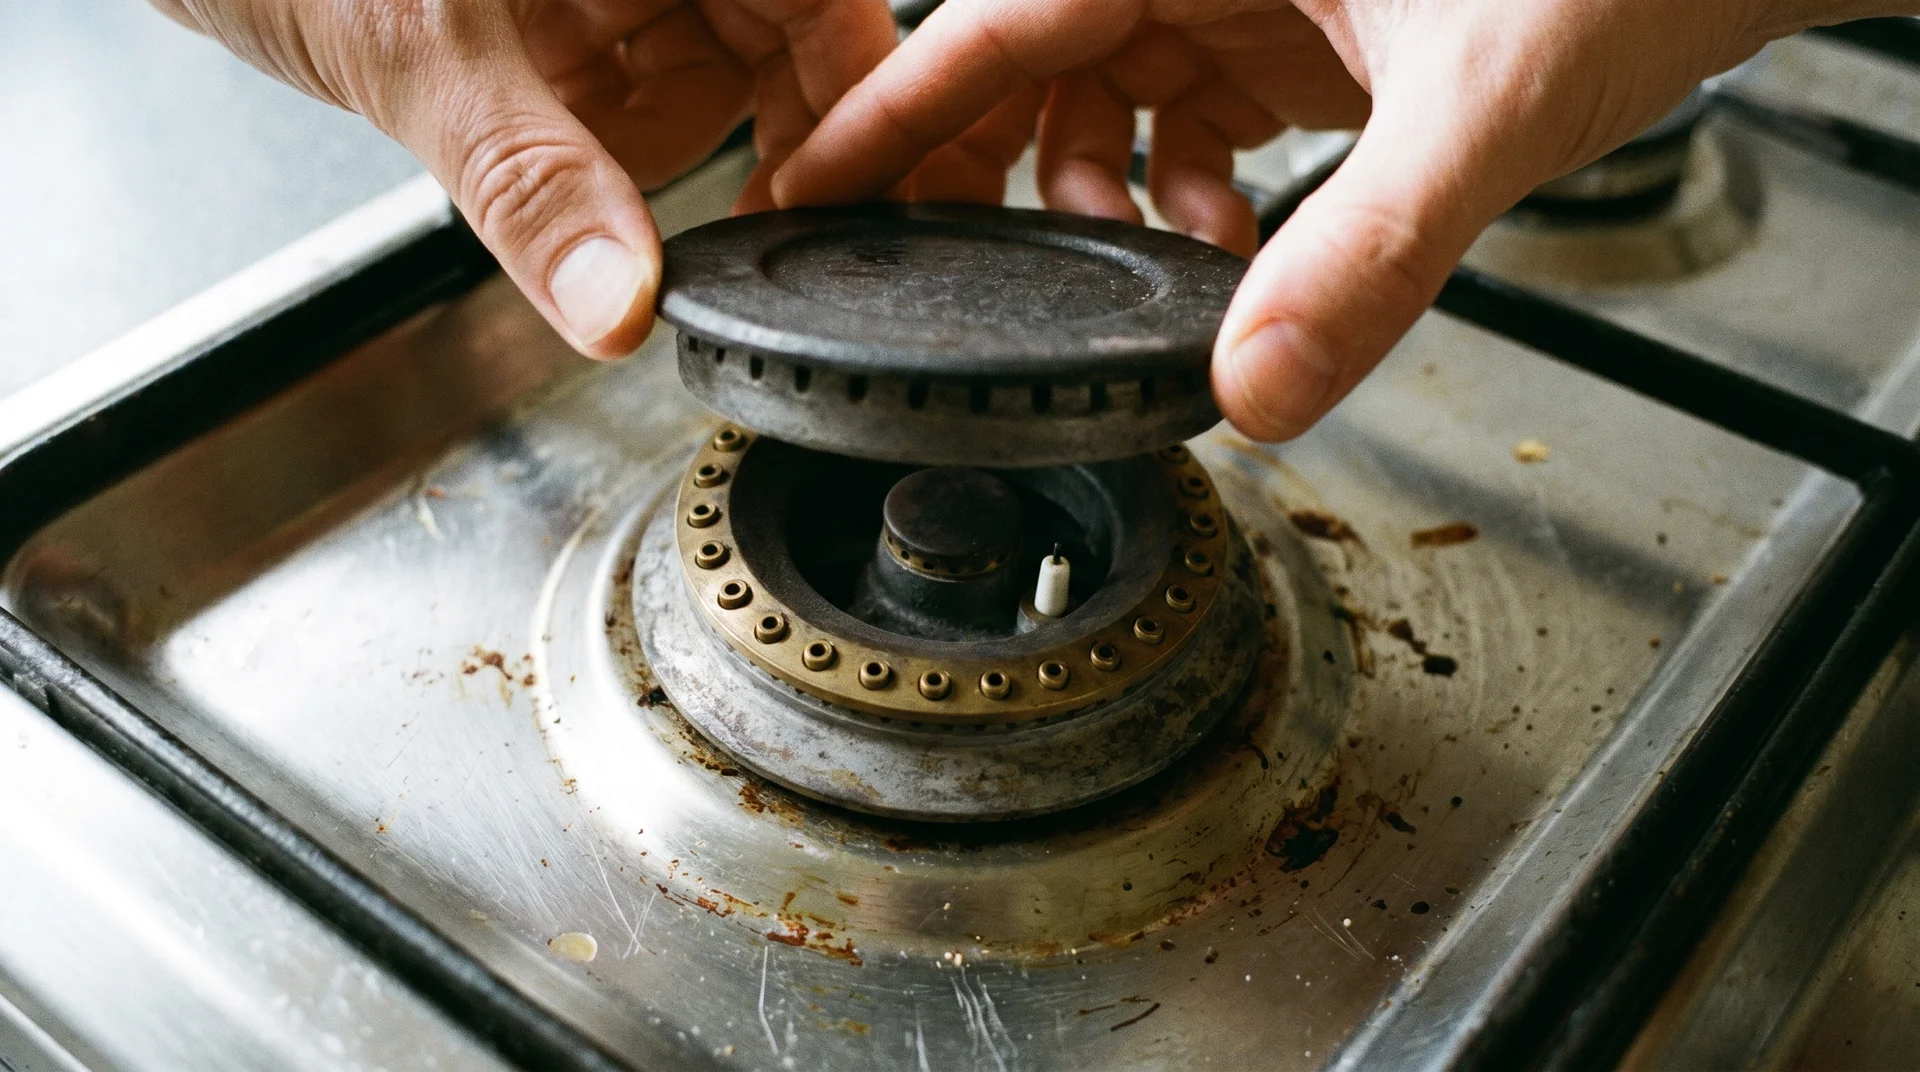
With the stove completely cool, pull the grate off the problem burner. Lift the burner cap straight up.
The cap should sit flat and centered on the burner head, with no tilt in any direction.
Some burner caps are keyed to fit only one orientation. If yours has a notch or flat edge, align it with the corresponding mark on the burner head. A cap in the wrong orientation clicks as persistently as one that’s simply off-center.
Restore power and test the burner. I’ve tested this on residential ranges, not in controlled conditions. This step resolves the problem more often than any of the ones that follow it.
Step 3: Clean the Igniter and Burner Ports
Food debris and grease block the burner ports and prevent the gas from reaching the spark cleanly.
With the stove unplugged, remove the burner cap, then the burner head. Look at the small holes around the ring of the burner head. These are the burner ports, where gas exits to form the flame.
When they’re blocked, gas flow is uneven. The igniter keeps trying.
Work through the cleaning in this order:
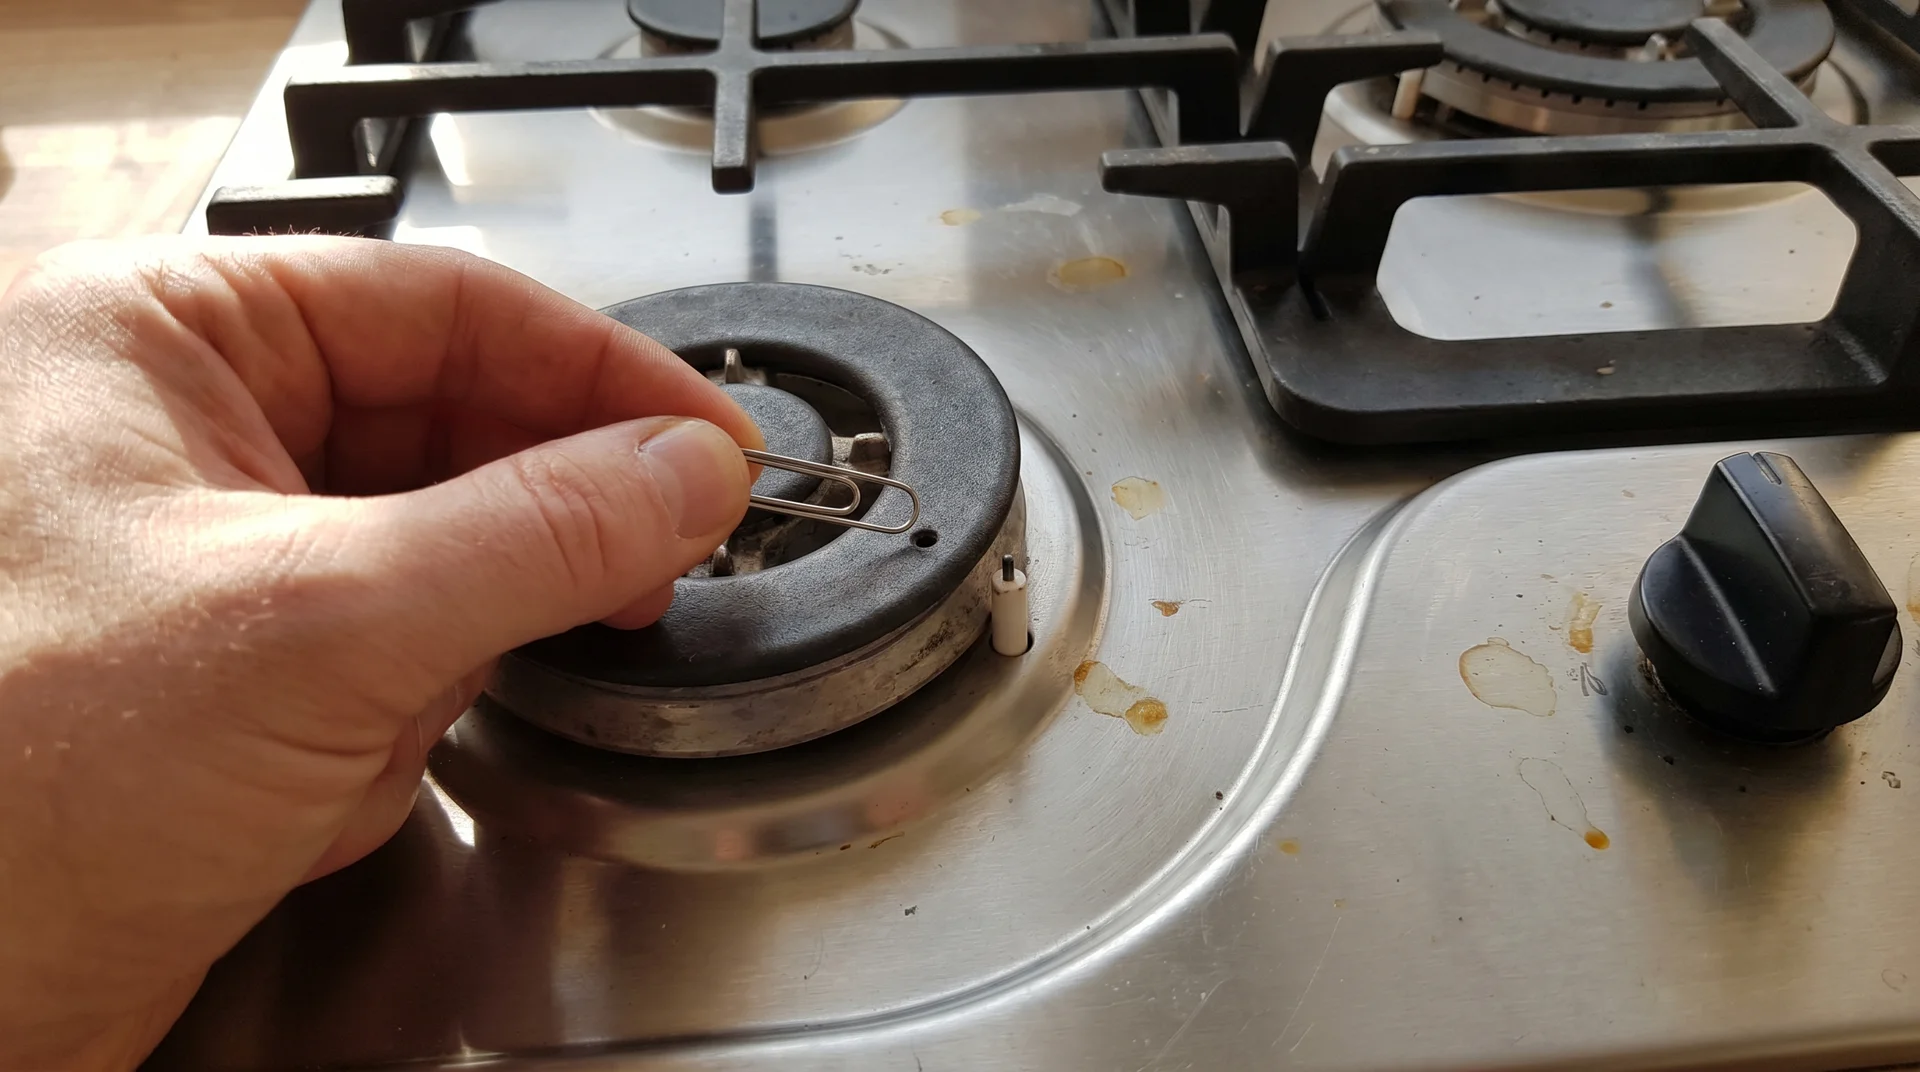
- Clear each burner port with a metal pin or a straightened paperclip. Push gently and straight through each hole. I keep a small collection of tools I’ve tested and set aside as not worth recommending.
A toothpick is in it. It breaks off inside the port and creates a secondary blockage that’s harder to clear than the original debris was.
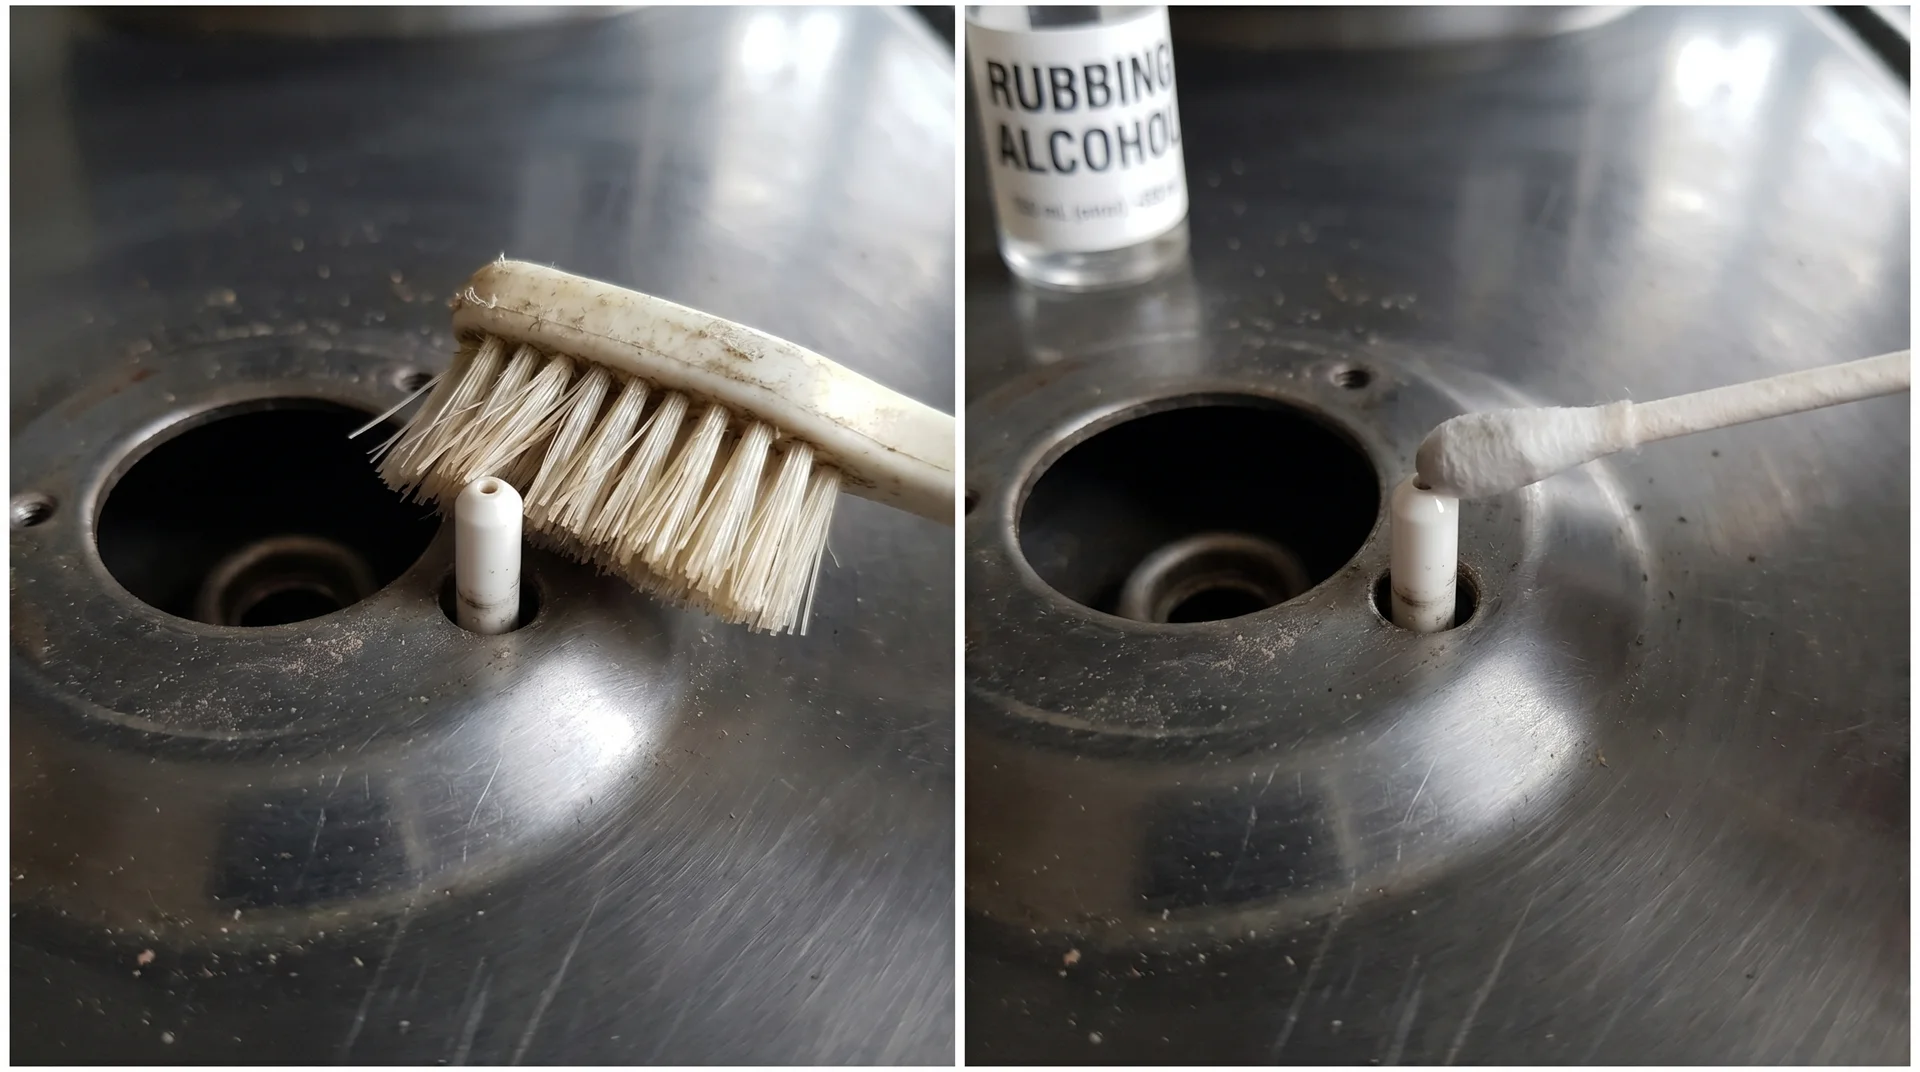
- Clean the spark electrode tip with a dry toothbrush first, then a cotton swab lightly dampened with rubbing alcohol. The tip is white ceramic, roughly the size of a pencil eraser.
It’s fragile, so handle it without pressing down on the ceramic itself. - Wash the burner head and cap in warm, soapy water. Dry them completely before reassembling. Moisture left on a clean burner cap will restart the clicking cycle when you restore power.
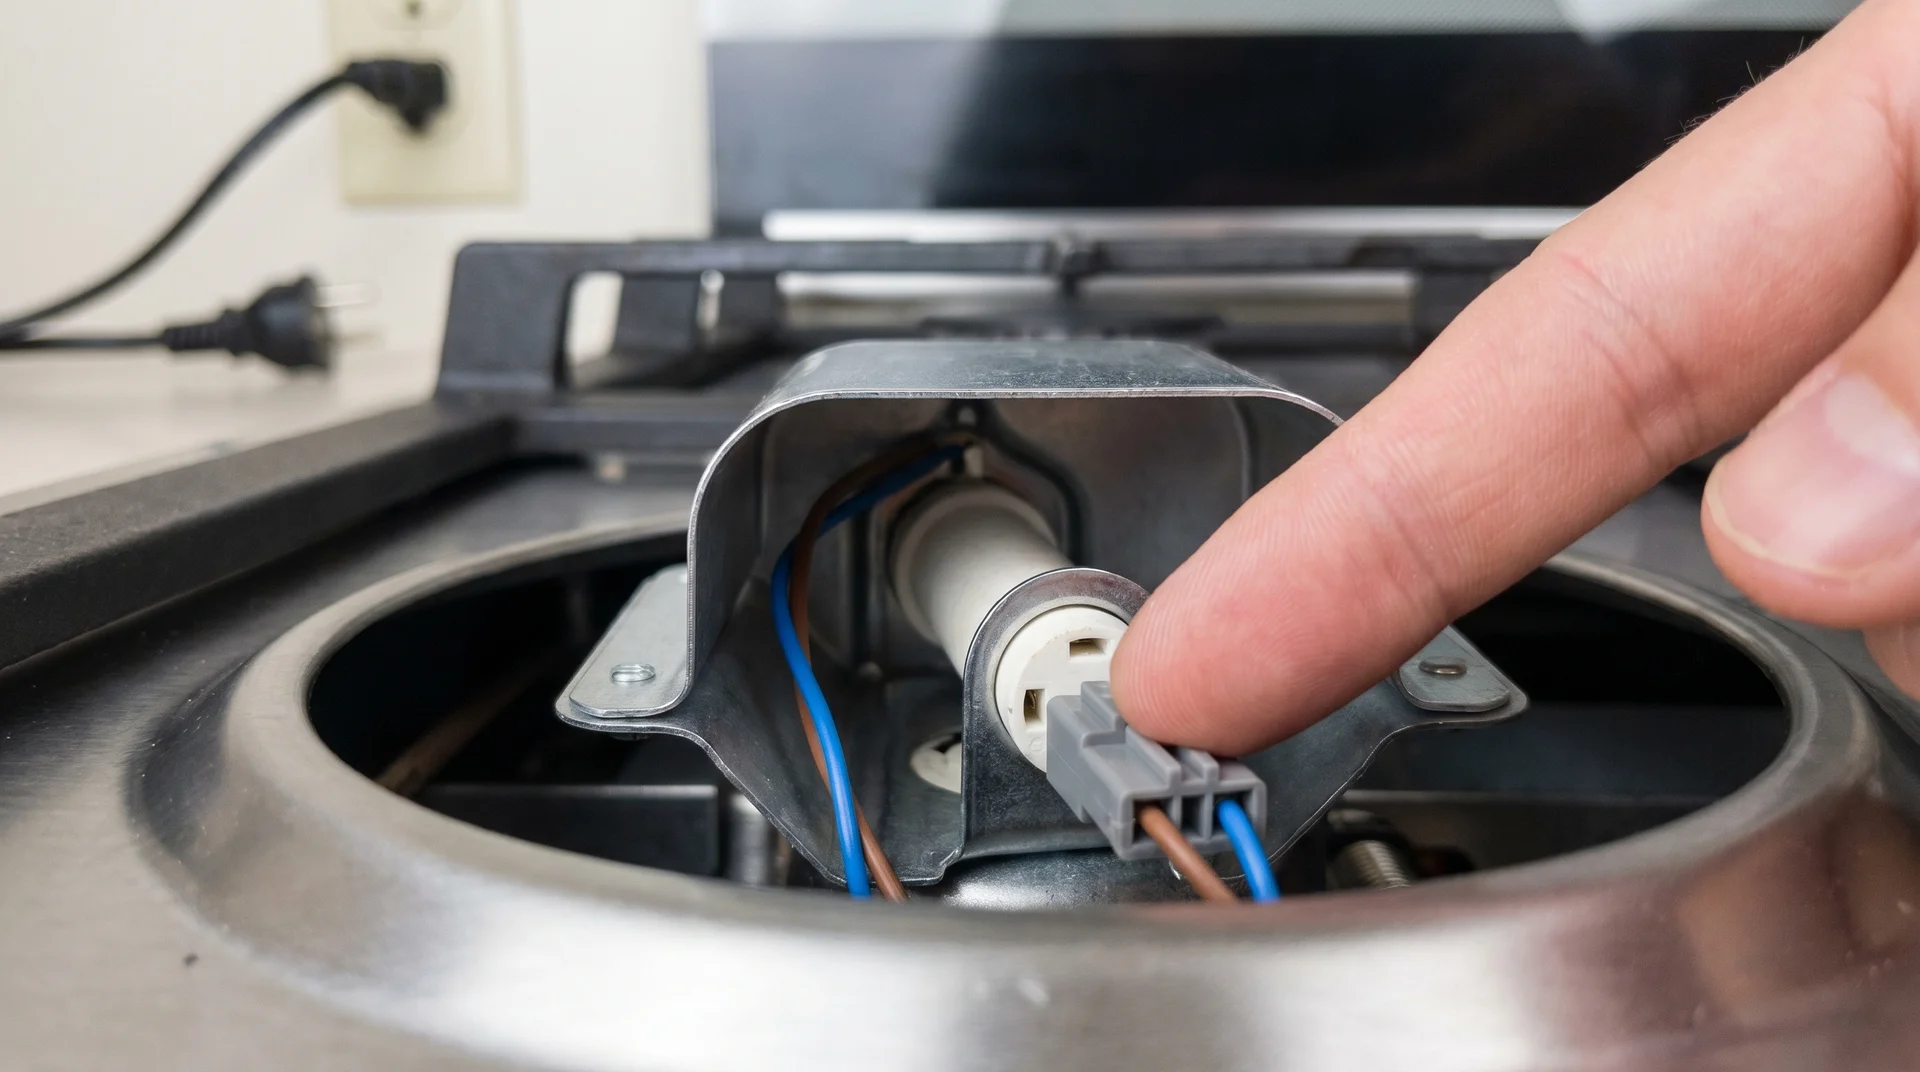
- If the stove was recently moved or had kitchen work done, check the wire connector to the igniter electrode.
The connector typically plugs in rather than being hardwired. With the stove unplugged, locate the igniter at the base of the stove and press it firmly back into place.


Don’t spray cleaner or water directly onto the ceramic tip. Don’t use bleach or ammonia-based cleaners anywhere near the igniter area.
Both can damage the ceramic and leave residue that causes repeated problems.
Step 4: Dry It Out Properly

The drying time depends on where the moisture went, not just how much there was.
“A few hours” covers one specific scenario. The others take longer. Mixing them up is why people replug the stove too soon and assume the clicking means something broke.
The three scenarios and their realistic timeframes:
- Small spill, moisture on the igniter tip and surrounding area only: 2 to 4 hours of air drying with the stove unplugged and components removed
- Larger boil-over reaching under the burner cap: 6 to 12 hours; remove the cap and burner head so air reaches the area beneath
- Spray cleaner or a significant spill that traveled under the knobs: 24 to 48 hours; direct a hair dryer on the lowest heat setting at the base of the knob stems, not at the burner surface
That last scenario means the moisture reached the igniter switch, not just the burner surface. The switch and the surface don’t dry at the same rate.
The igniter switch sits behind the burner knob, inside the stove body. Moisture that gets under the knob reaches the switch. It doesn’t evaporate from the surface outward.
A fan aimed at the open burner area handles surface moisture. A hair dryer on the lowest setting, held several inches from the knob stems, reaches deeper into the moisture.
If surface moisture is the issue, you can also turn the oven on to 350°F for 30 minutes. The heat warms the cooktop from the underside. It helps moisture trapped under the burner heads evaporate. Make sure no oil or grease has pooled in the affected area before doing this.
I’ve tracked this in my own kitchen, not in controlled conditions. The 48-hour mark is where my confidence in further drying drops. Past that point, I’d call a technician rather than keep waiting.
Stove Igniter is Clicking but No Flame
A stove that clicks without lighting needs a different diagnosis.
The most likely causes are blocked burner ports, a gas supply issue, or a failing spark electrode.
Start by confirming the gas supply valve is open. The valve sits on the gas line behind or beneath the stove. When it’s open, the handle runs parallel to the pipe.
If you’ve recently had kitchen work done, check the valve before anything else. Gas valves get switched off during jobs more often than contractors mention.
If the valve is open, clear the burner ports with a metal pin through each hole, gently. Blocked ports are the most common cause of a stove that clicks without lighting.
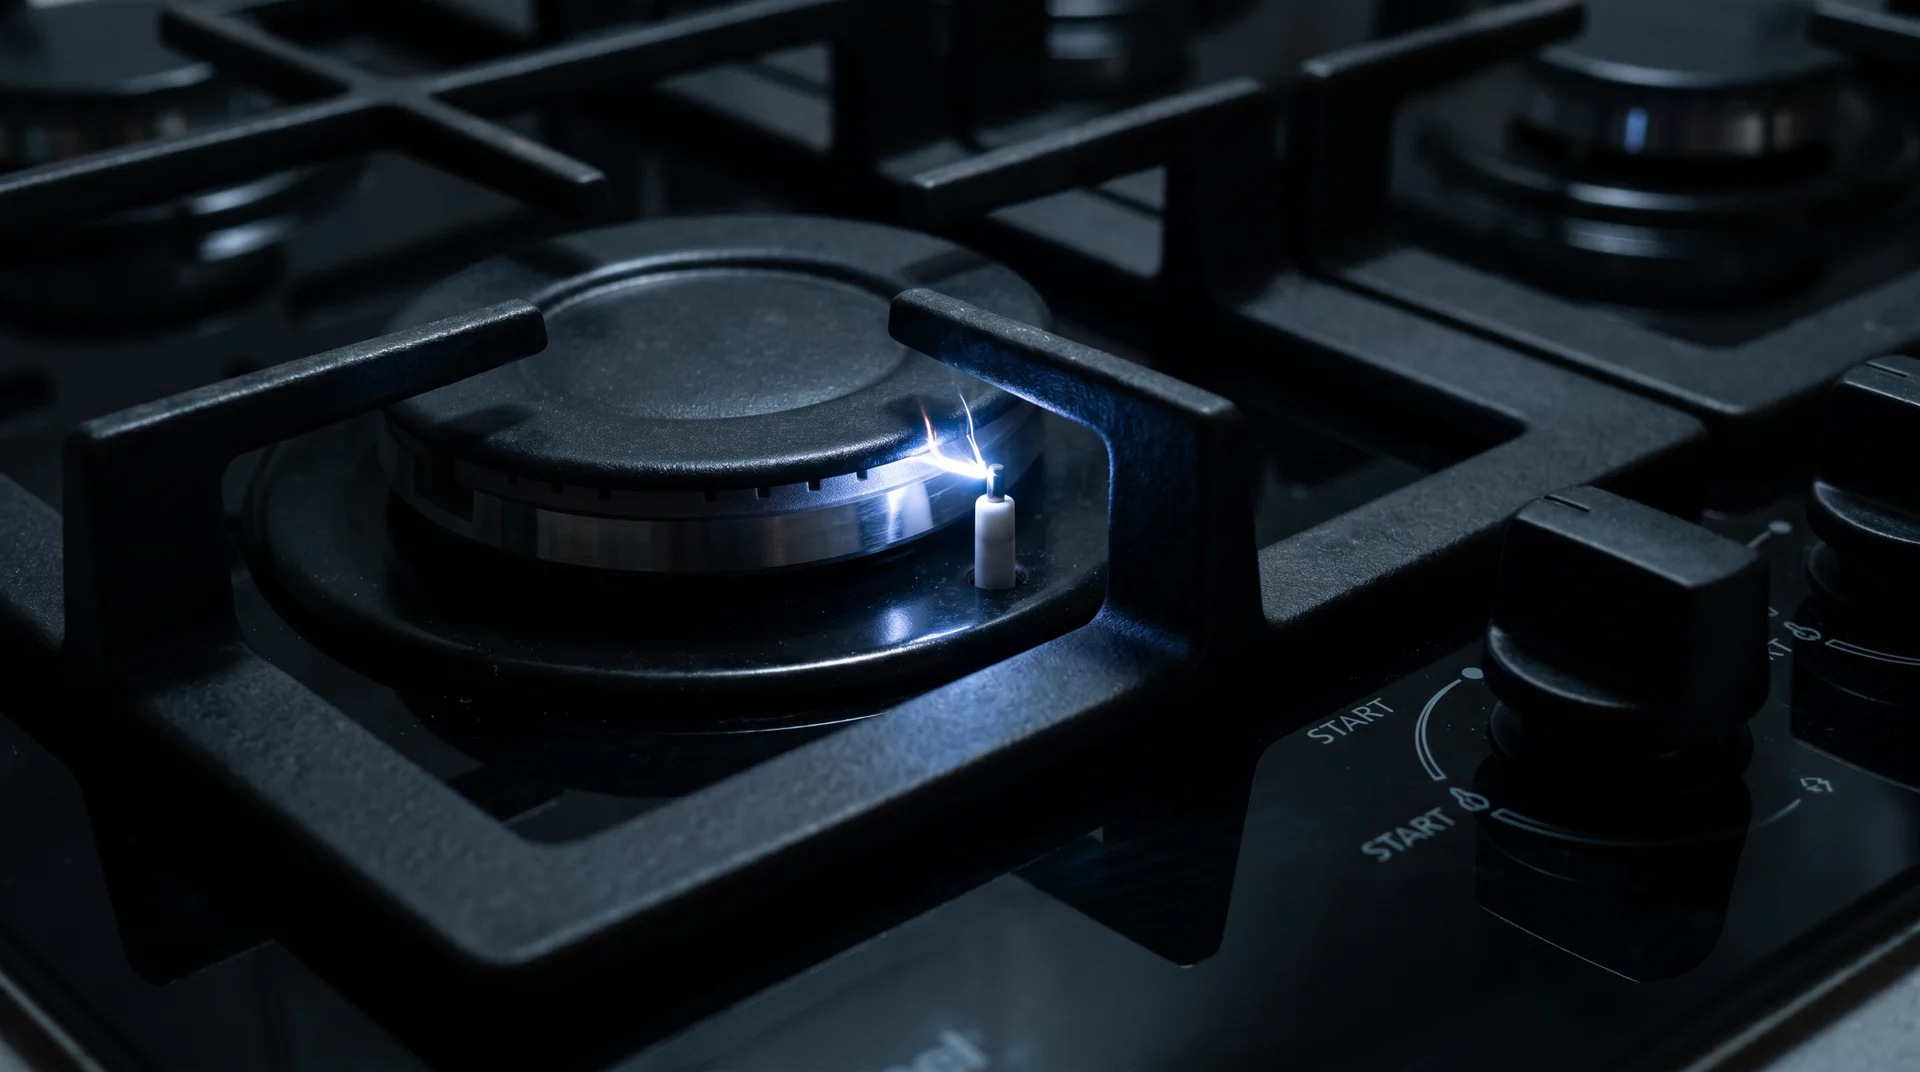
If clearing the ports doesn’t resolve it, watch the spark.
Darken the kitchen and turn the knob while watching the igniter. A healthy spark electrode produces a sharp, consistent blue-white spark between the ceramic tip and the burner head.
A weak orange spark points to a worn electrode. No visible spark at all points to a cracked ceramic.
Look for a visible crack or chip on the ceramic tip. A cracked ceramic doesn’t produce a reliable spark. Replacement parts for most standard gas ranges cost $15 to $40.
Order by model number from the manufacturer or an appliance parts supplier.
When to Stop the DIY and Call Someone
The cleaning and drying steps in this guide are safe to do yourself. The next level is not.
If the clicking is accompanied by a burning plastic smell rather than a gas smell, stop using the stove immediately. That smell points to wire damage inside the stove body and needs a technician before anything else.
Two components can cause persistent clicking when the surface fixes don’t resolve it. Each fails in a way you can identify before picking up the phone.
Signs the Igniter Switch Has Failed
A stuck igniter switch fires the igniter without stopping, even with the knob fully off.
Each burner has its own igniter switch on the valve stem behind the knob. When the knob turns to the start position, the switch closes. It tells the spark module to fire that burner’s igniter.
A switch stuck closed, from moisture damage, corrosion, or worn contacts, sends that signal without stopping.
The signs that point specifically to a switch problem:
- Clicking isolated to one burner, continuing after complete drying and cleaning
- Clicking that started immediately after a large spill went into the knob area
- Clicking that stops when you pull the knob off the valve stem, but resumes when you replace it
Replacing an igniter switch means disassembling the control panel. The switch also sits next to gas connections inside the stove body. Sears Parts Direct’s igniter switch documentation describes the procedure accurately. It’s not a safe DIY repair for anyone without appliance repair experience. Call a technician.
On some stove models, individual igniter switches aren’t sold separately. You may need to replace the full switch assembly with its wire harness. A technician will confirm which option applies to your specific model.
Signs the Spark Module Has Failed
A failing spark module fires all igniters at the same time, even when no knob is in use.
The spark module receives signals from each igniter switch and routes power to each spark electrode. When it fails, it can bypass the switch signals entirely. It fires all igniters without stopping.
Failure is typically caused by moisture intrusion, component age, or a power surge.
The signs that point to a module problem rather than a switch problem:
- All burners are clicking at the same time when no knob is in use, after complete drying
- Clicking that started immediately after a lightning strike or a significant power surge
- Clicking that stops when you unplug the stove, but resumes the moment power is restored, even after extended drying
Before calling anyone, try unplugging the stove for at least 60 seconds. That allows the spark module’s control board to fully reset. Plug it back in and test. If the clicking stops, the module has a temporary fault signal rather than a hardware failure. If it resumes, you’re looking at a component replacement.
That is a component replacement. A technician is the right call.
What Repair Costs
These are the three repairs that come up when the DIY steps don’t resolve the clicking.
| Repair | Typical cost range |
|---|---|
| Igniter switch replacement, one burner (parts and labor) | $80 to $160 |
| Spark module replacement (parts and labor) | $150 to $280 |
| Igniter ceramic replacement, DIY parts only | $15 to $40 |
The repair cost isn’t the only question. It’s what the repair costs relative to the age and condition of the appliance. A spark module replacement on a two-year-old range is a clear decision.
The same repair on a fifteen-year-old range with other components already failing is a different calculation. That’s a different article, and it needs different criteria.
What Actually Prevents Igniter Clicking
Most igniter clicking is preventable.
I tracked this in my own kitchen over several months, not in controlled conditions. All three of the causes below showed up as direct triggers within six weeks of changing one cleaning habit.
- Use a damp cloth on the cooktop instead of spray cleaner. A cloth wrung out in warm water cleans the surface just as well. It can’t push moisture behind the knobs the way an aerosol can.
- Dry the burner cap area completely before reassembling after any spill or cleaning. Remove the cap, wipe beneath it, and let the area breathe for at least an hour. Reassembling a damp cooktop restarts the clicking cycle from scratch.
- Seat the burner cap correctly every single time. Centered, flat, keyed orientation matched if your model requires it. This takes thirty seconds and prevents the most common non-moisture cause of persistent clicking.
These aren’t complicated. They just have to be done every time, or the clicking comes back.
A clicking igniter almost always has a specific trigger. Think backward before you assume something failed. What was happening in the 24 hours before the clicking started is almost always where the fix is.